What is updatechecker.exe & How to Fix its Errors?
Eliminate any error with our verified fixes
4 min. read
Updated on
Read our disclosure page to find out how can you help Windows Report sustain the editorial team Read more
Key notes
- The updatechecker.exe process is a part of the Asus software and is found on devices from the manufacturer.
- The process often leads to high CPU usage or even crashes out of the blue.
- To fix things, disable updatechecker.exe from startup apps or uninstall the program running it, amongst other solutions.
Any functional Windows PC has many background processes running, which usually isn’t an issue. The problem arises when one of these starts to affect the performance or cause apps to crash. A process that many reported trouble with is updatechecker.exe.
In some cases, users reported that updatechecker crashed randomly or even triggered 100% CPU usage for many. Remember, this is not a problem encountered by all but only on specific devices. So what is the process, and how do you fix these errors? Keep reading to find out!
What is updatechecker.exe?
The process, updatechecker.exe, is a part of the Asus software installed on the computer, and its primary role is to check for newer versions of the programs. It’s certainly not a critical Windows process and is only found on Asus devices.
So, you can disable updatechecker.exe if required, and it shouldn’t affect the core functioning of the PC. However, for those that rely on Asus programs that came pre-installed, it’s best to leave things as it is and have the process running.
Also, the updatechecker process was found to be a part of the MiniTool Partition Wizard tool. So if you have it installed on the PC, simply uninstall the software. Here are the primary paths the .exe file can be found in depending on the program that added it: C:\Program Files (x86)\ASUS\ASUS Live Update C:\Program Files\MiniTool Partition Wizard
How do I fix updatechecker.exe errors?
Before we move to the slightly complex solutions, here are a few quick tricks to try:
- Your primary approach should be to restart the computer. Even if this doesn’t fix things, it will bring the high CPU usage to normal levels and allow users to at least work on the problem.
- Verify whether the process is in the correct directory, i.e., under the program’s folder. If that’s not the case, it’s probably malware and needs to be eliminated.
If none of the fixes work, head to the ones listed next.
1. Scan for malware
- Press Windows + S to open Search, type Windows Security in the text field, and click on the relevant search result.
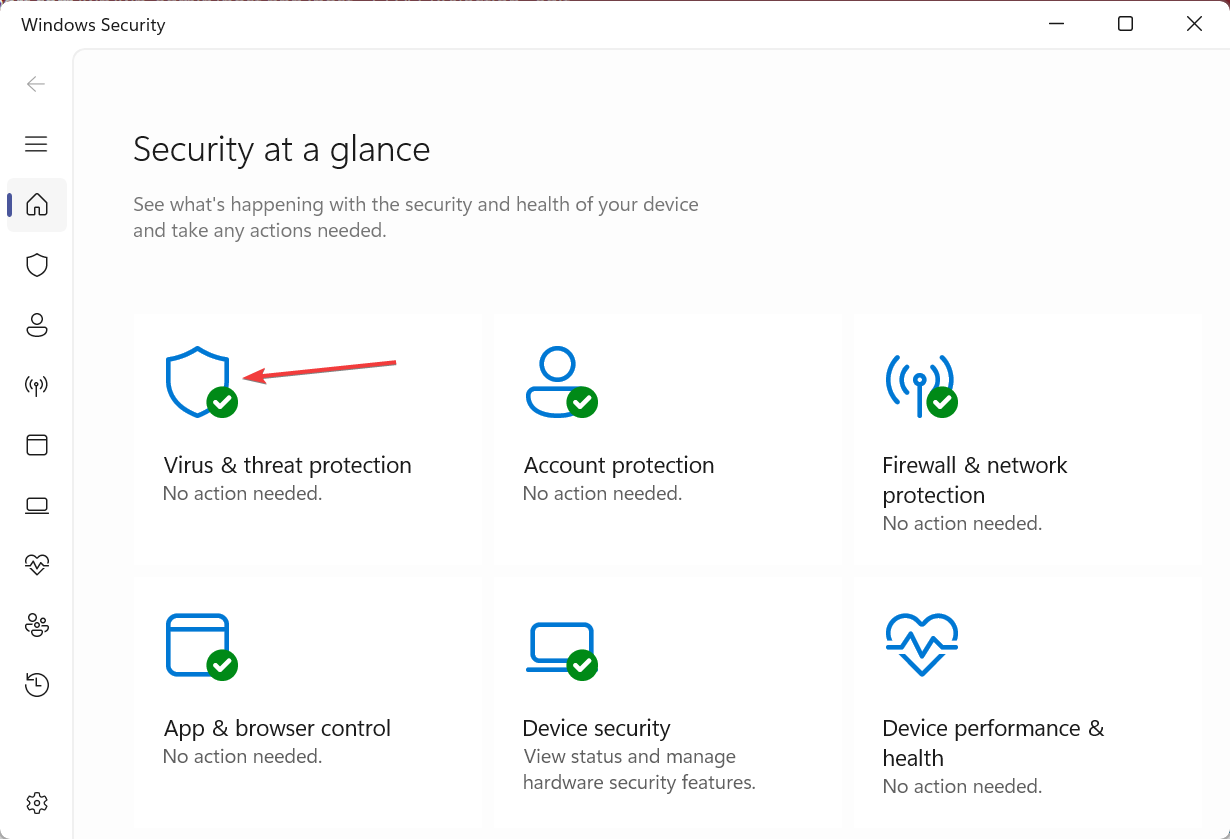
- Click on Virus & threat protection.
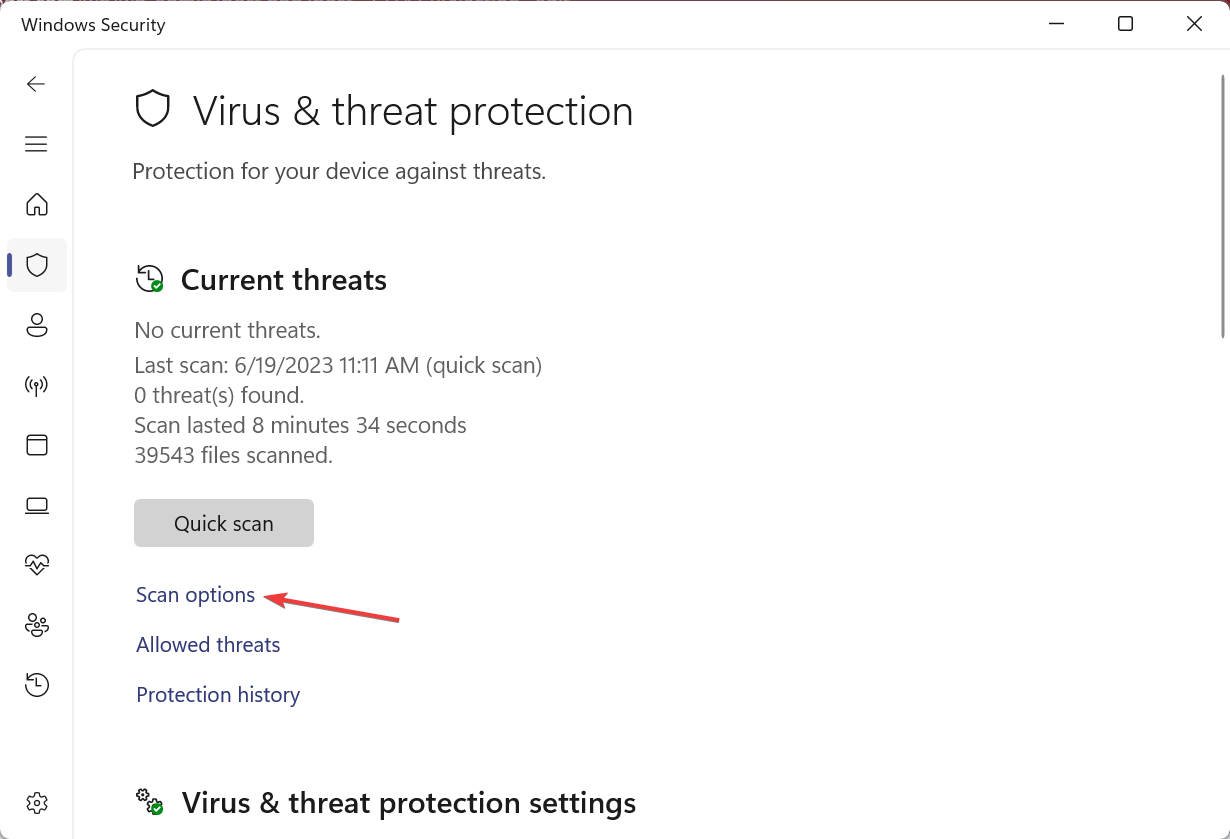
- Click on Scan options.
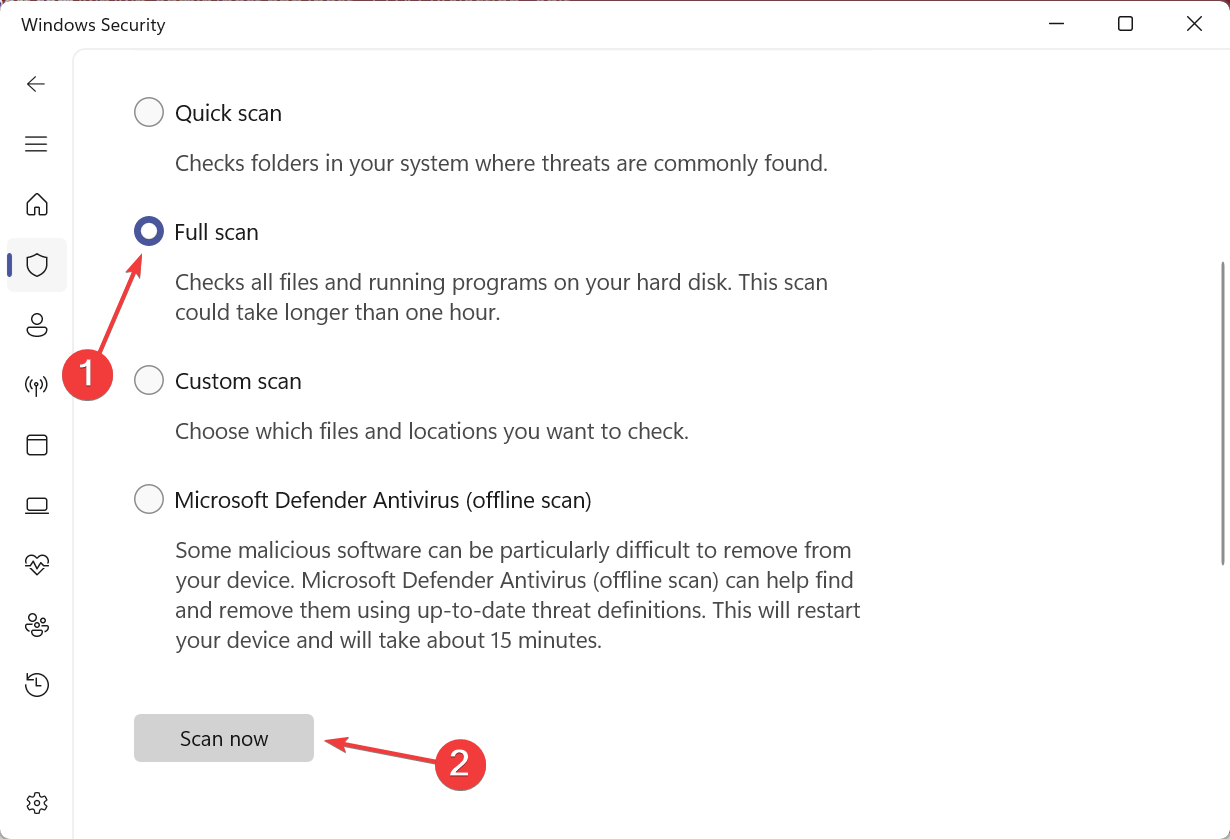
- Select Full scan, then click on Scan now, and wait for the scan to complete.
If updatechecker.exe is indeed malware, running a scan with the built-in Windows Security should make it evidently clear. Besides, you could use a reliable antivirus solution for more accurate results.
More exactly, we suggest you utilize a professional antivirus tool for advanced scanning and removal tools for the latest malware threats.
⇒ Get ESET HOME Security Essential
2. Disable the process from startup
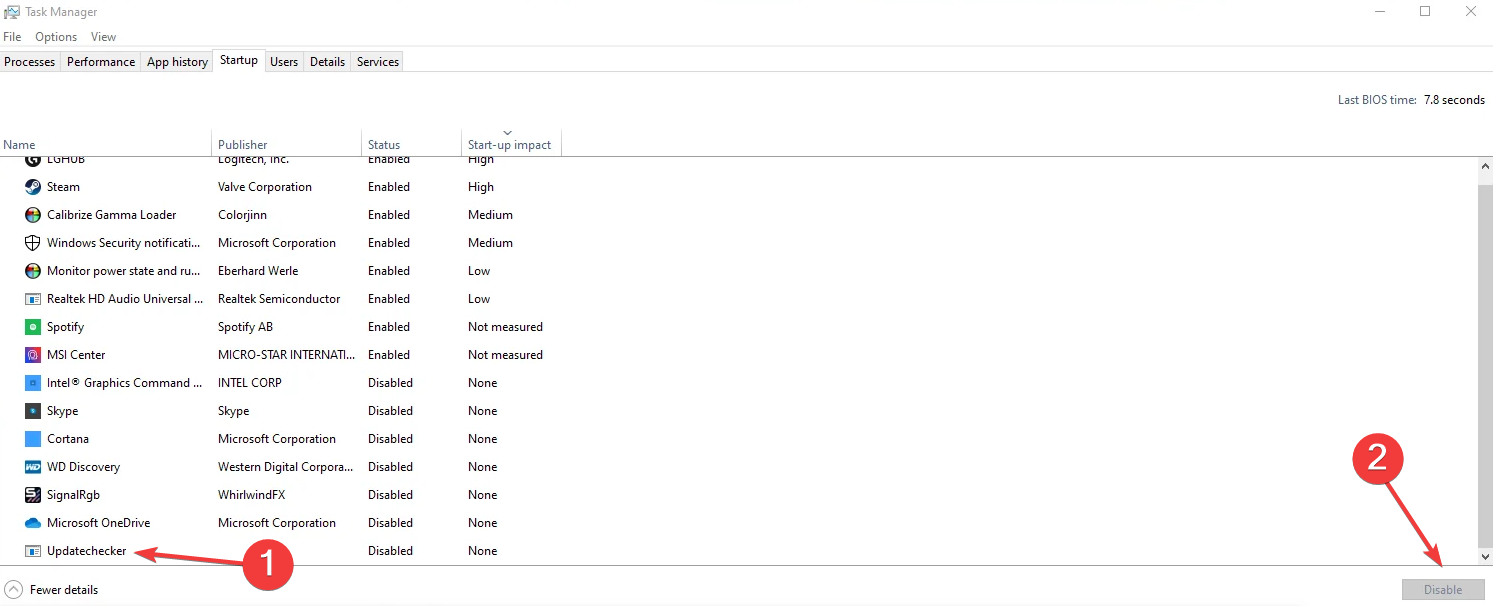
- Press Ctrl + Shift + Esc to open Task Manager, and head to the Startup tab.
- Now, select UpdateChecker from the list and click Disable.
- Once done, restart the computer.
Though not for all, the UpdateChecker may appear in the list of startup apps for many. And disabling it should do the trick! While you are at it, make sure to remove it from the startup folder in Windows as well.
3. Uninstall the program behind the process
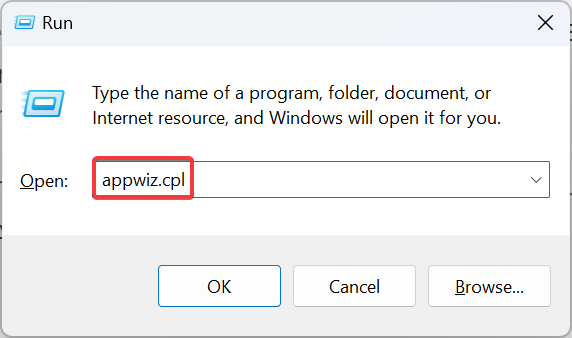
- Press Windows + R to open Run, type appwiz.cpl in the text field, and hit Enter.
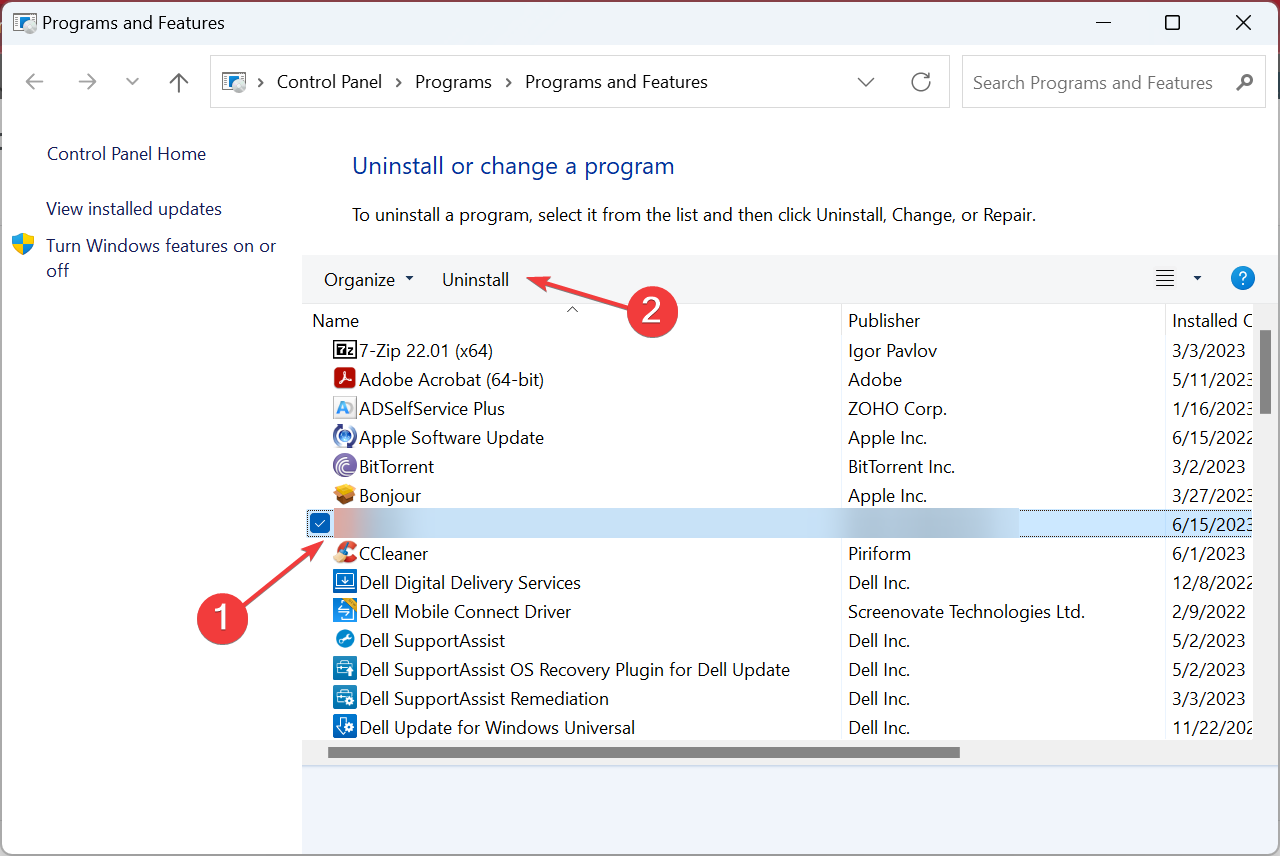
- Select the program responsible for the process, and click Uninstall.
- Follow the on-screen instructions to complete the process.
When disabling updatechecker.exe from the startup apps doesn’t help, you could remove the program behind it altogether, be it the Asus software, MiniTool Partition Wizard, or even a few codecs, as reported in this forum.
4. Use a dedicated uninstaller software
If Task Manager has the Disable option greyed out for UpdateChecker and there are no programs on the PC responsible for the process, it’s likely that a previously installed app used updatechecker.exe.
There are often leftover files from programs that trigger such issues, and in this case, it’s best that you use a dedicated uninstaller software to get rid of all such files and registry entries.
5. Perform a system restore
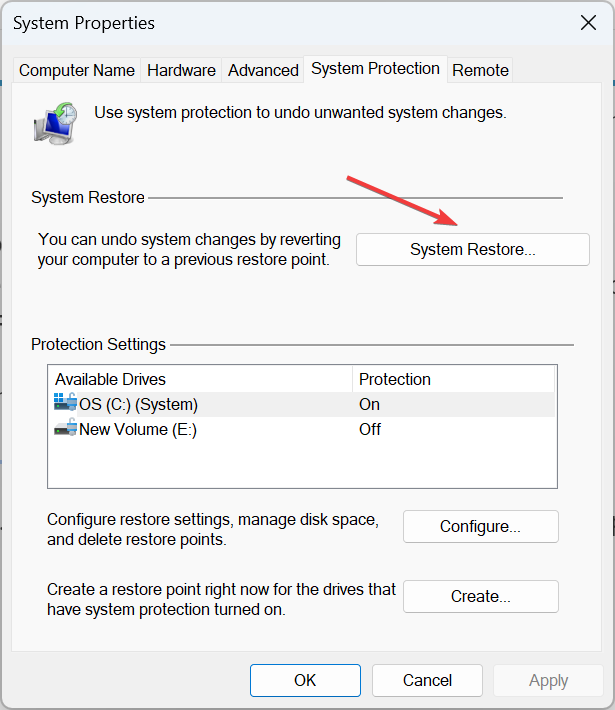
- Press Windows + S to open Search, type Create a restore point, and click on the relevant search result.
- Click the System Restore button.
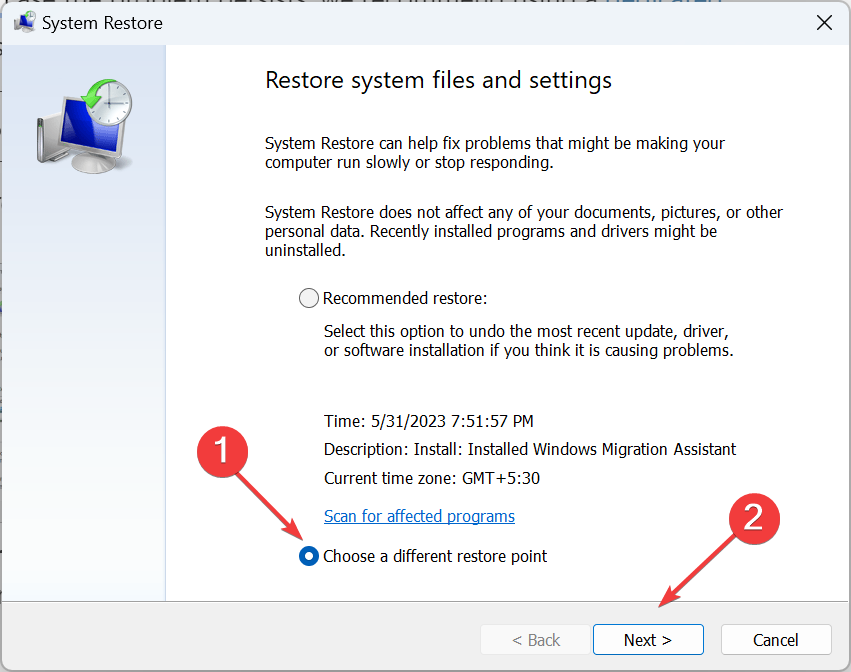
- Select Choose a different restore point, and then click Next.
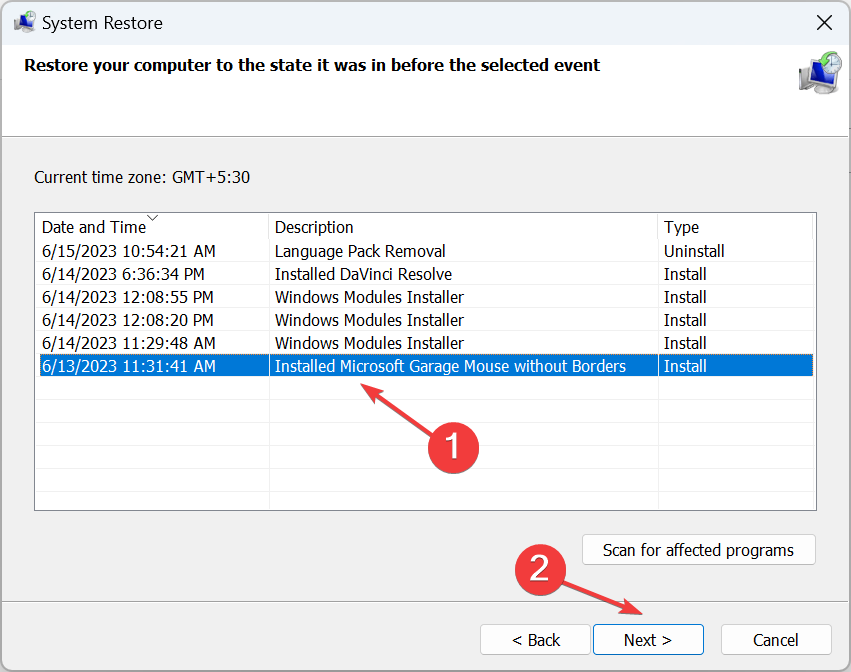
- Pick another restore point from the list, one created before the error first appeared, and click Next.
- Finally, verify the details, and click Finish to start the restore process.
When nothing else works, the last option is to restore the PC to a state before the error first appeared. You may lose some apps and settings in the process, but it won’t affect the personal files.
And once you have fixed updatechecker.exe errors, find some quick ways to speed up the Windows PC.
For any queries or to share what worked for you, drop a comment below.

