FIX: USB Wi-Fi adapter not detected in Windows 10/11
Key notes
- Networking is an important part of every PC, and not being able to access the Internet can be a big problem.
- Many Windows 10 users have reported that the USB Wi-Fi adapter not being recognized.
- Check out our website’s Network Hub for more information on how to handle networking issues.
- Take a look at our Fix section for complete guides on troubleshooting tech issues.

The benefits of the Wi-Fi network over the LAN are obvious.
If you need Wi-Fi connectivity but don’t want cables, the USB Wi-Fi adapter seems to be the best solution for you.
However, a lot of users have had a hard time with those, especially the unbranded ones. Namely, it seems that Windows 10 can’t recognize some of them.
For that purpose, we prepared a list of possible solutions in order to fix this and make your Wi-Fi adapter recognizable for Windows 10.
Make sure to move through the enlisted steps one by one, so we can resolve it together.
What can I do if the USB Wi-Fi adapter is not recognized?
1. Update driver through the system
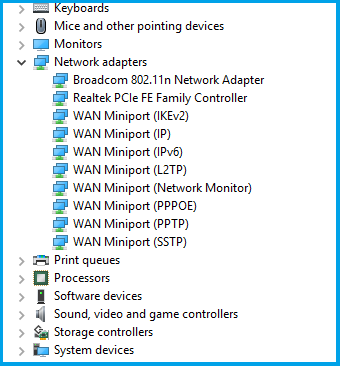
- Right-click the Start button, and open Device Manager.
- Navigate to Network adapters.
- Right-click on your external USB WI-Fi adapter and Update driver.
2. Try an alternative USB port
After thousands of plug-in and unplug cycles, your USB ports must suffer. Over time of extensive use, there’s a good chance that one of the available ports is malfunctioning.
So, make sure to try out multiple ports before you discard hardware as the possible issue instigator. USB ports are prone to malfunctions, so this is a common problem.
Luckily, every PC comes with multiple USB ports so you’ll at least have a choice. If you have appropriate tools, you can check for the power outage.
3. Install proper drivers
- Right-click on Start and open Device Manager.
- Navigate to Network adapters.
- Right-click on USB Wi-Fi adapter and open Properties.
- Choose the Details tab.

- Select Hardware Ids.
- Copy the first line and paste it into your browser.
- Locate the official drivers in results. Download and install them.
- Make sure to download and install only official drivers from trusted sources.
- Restart your PC and look for changes.
Most of the contemporary USB Wi-Fi adapters come with the support disk with drivers compatible with Windows 10.
It’s uncertain whether the automatically installed drivers will suffice, so it’s of the utmost importance to install the drivers provided by the OEM.
If you’re missing the installation disk, you can find the drivers online. The only thing you’ll need to do is to locate them manually.
Keep in mind that updating your drivers is an advanced procedure. If you’re not careful, you can cause permanent damage to your system by manually downloading the wrong driver versions.
Since updating drivers manually can be a long process, we recommend a professional driver updating tool that will automatically update all your drivers for you.
Once installed, this software will check your installed driver versions against its cloud database of the latest versions and will download the updates automatically.
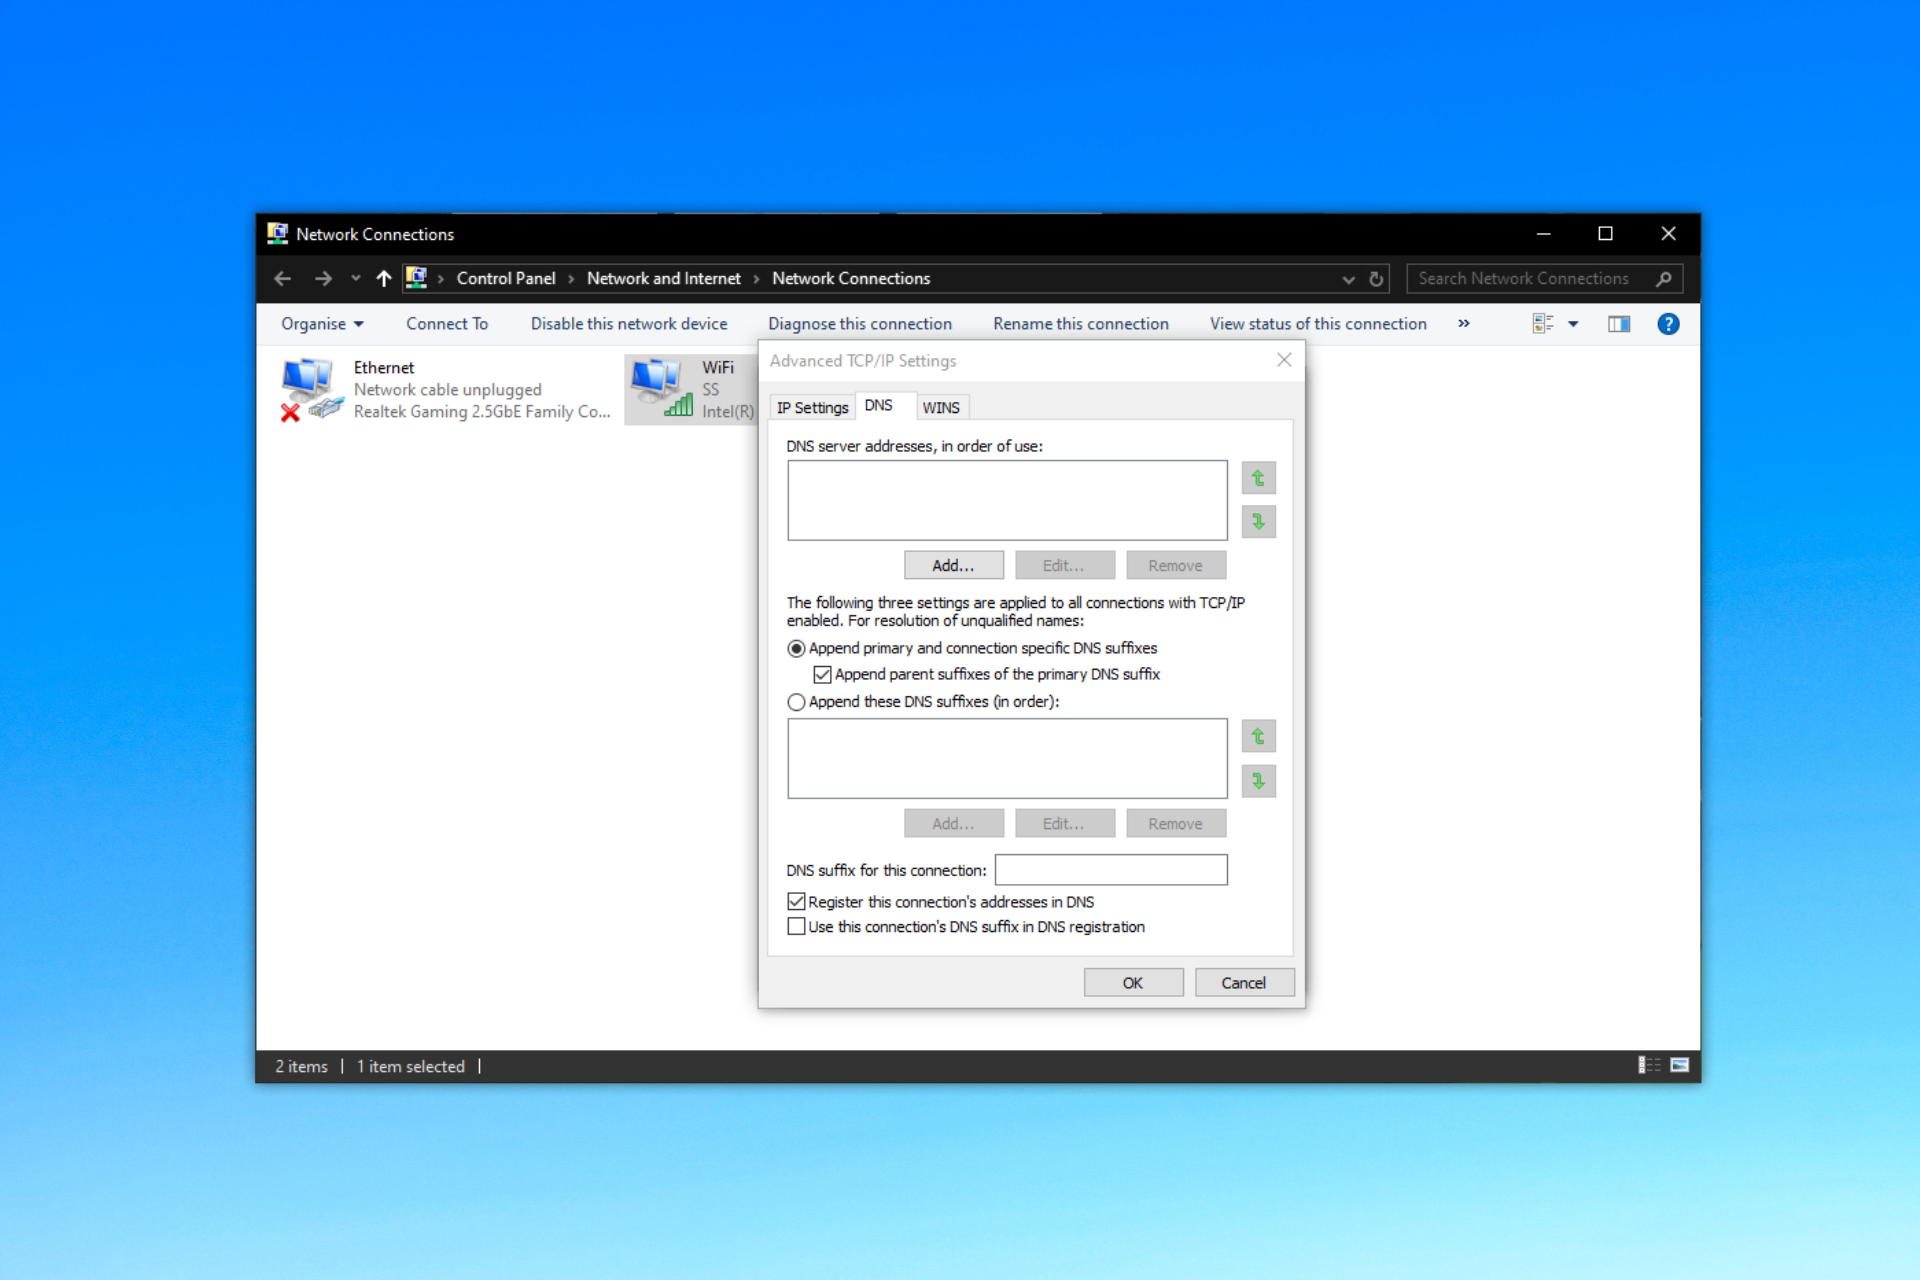
4. Check Power settings
- Right-click on the Battery icon, and open Power Options.
- Select your preferred plan and click on Change plan settings.

- Choose the Change advanced power settings option.

- ExpandUSB settings, and go to USB selective suspend settings.
- Disable this option for both On battery and Plugged In alternatives.
- Save changes and restart your PC.
A large chunk of power consumption on your PC goes to USB ports and dedicated devices you’ve plugged in.
In order to reduce the power consumption, Windows has some hidden power-related options that tend to suspend USB in order to preserve battery life.
5. Disable the turn off this device to save power option

- Right-click the Start button, and open Device Manager.
- Navigate toUniversal Serial Bus controllers, and expand the section.
- Right-click on each individual USB root hub, and open Properties.
- Click on the Power management tab.
- Uncheck the Allow the computer to turn off this device to save power box and confirm changes.
- You’ll need to do this for each USB hub, respectively.
- Restart your PC.
This is a crossover of Power settings and drivers. Namely, every USB hub has it’s dedicated power settings. The idea is to disable certain USBs in order to preserve power.
However, this can affect the devices connected via USB negatively , which can affect the Wi-Fi adapter performance or even trigger the error code 10. Because of that, make sure to disable this option for all USB root hubs.
In case you found an alternative solution for USB Wi-Fi adapter issues in Windows 10, make sure to tell us in the comments below. We’ll be grateful for your valuable insights on the subject.
Read our disclosure page to find out how can you help Windows Report sustain the editorial team. Read more


Improve this guide
User forum
5 messages