Windows 11 Power Plan Keeps Changing: How to Stop It
Revert to your default power settings then try again
Key notes
- The power plan on Windows 11 is a set of system settings that manage computer performance, battery life, and system noise.
- However, there are times when your PC’s power plan keeps changing on its own, and this can be quite annoying.
- It could be a virus or a conflicting app, so ensure to scan for viruses and examine your apps carefully to disable or uninstall them.

A power plan is a set of hardware and software settings that determine how your system uses power. When you change the power plan, you are tweaking settings to achieve either high performance or efficiency.
Depending on how you use your PC, you should select the best power settings to balance performance and efficiency. However, users can’t get these settings to stick as their power plans keep changing. Let’s have a look at how we can resolve this below.
Why does my power plan keep changing on Windows 11?
It is important to note that the power plan affects all activities on your computer. For example, if you are playing games and using the internet simultaneously, your CPU will use more energy than it would if you were only using it for one task at a time.
You’ll therefore notice that your PC suddenly becomes slow or lags since your power plan settings need to reflect your activities. To get to the root of these issues, we explore some of the possible reasons why your Windows 11 keeps changing the power plan:
- Power-saving software conflicts – You may use a third-party program to monitor or manage your computer’s power usage. If so, it may be overriding the default power settings.
- Low battery – If you’re not charging your laptop, Windows will automatically change the power plan when your battery is running low. Battery management software can help you increase its longevity.
- New application – You may have installed a new program that requires different power settings than those initially set and hence keeps changing them.
- Battery issues – It’s worth checking the battery health of your machine. If it has a dead battery or a faulty battery sensor, it may not respond to any power plan settings.
- Corrupted system files or registry entries – A corrupted system file or bad entry in your registry can cause Windows 11 to revert back to its default power options every time you restart your computer.
- Faulty driver – A faulty driver can cause your computer’s power plan to change without your knowledge.
- Antivirus software – Many antivirus programs include an option to automatically change your system’s power plan whenever they detect malware on your PC.
How do I fix my power plan keeps changing?
A few preliminary checks that could help before the advanced solutions include:
- Ensure your battery is fully charged if using a laptop, and take steps to improve battery life.
- Check if there is any third-party software that is causing this issue. If yes, then uninstall it or disable it temporarily.
- Make sure that Windows is fully up-to-date even without an Internet connection.
- Restart your computer and see if the issue persists.
1. Run the power troubleshooter
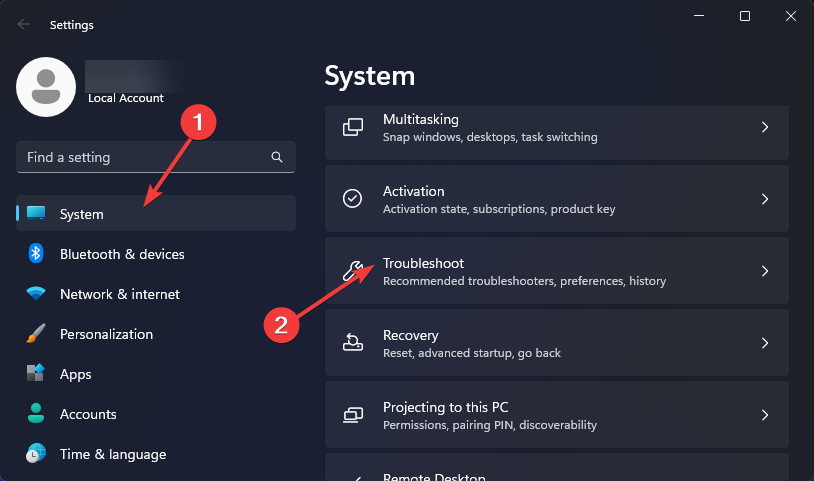
- Hit the Windows key and click on Settings.

- Click on System on the left pane, then Troubleshoot on the right pane.
- Select Other troubleshooters.
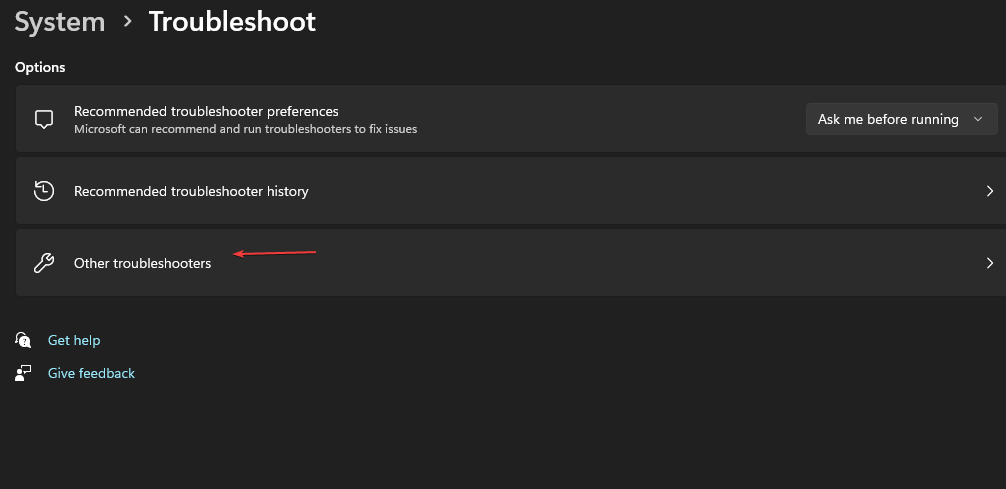
- Scroll down, locate Power and click the Run button.

2. Run the DISM and SFC commands
- Hit the Start Menu icon, type cmd in the search bar, and click Run as administrator.

- Type the following commands and press Enter after each one:
DISM.exe /Online /Cleanup-Image /Restorehealthsfc /scannow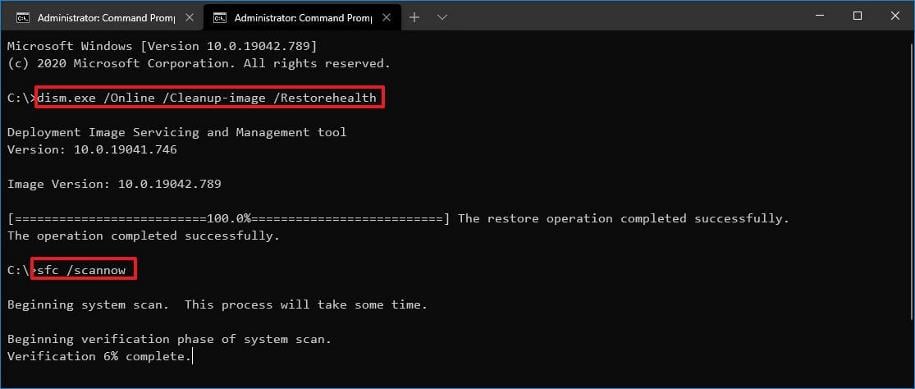
- Restart your PC.
3. Run a virus scan
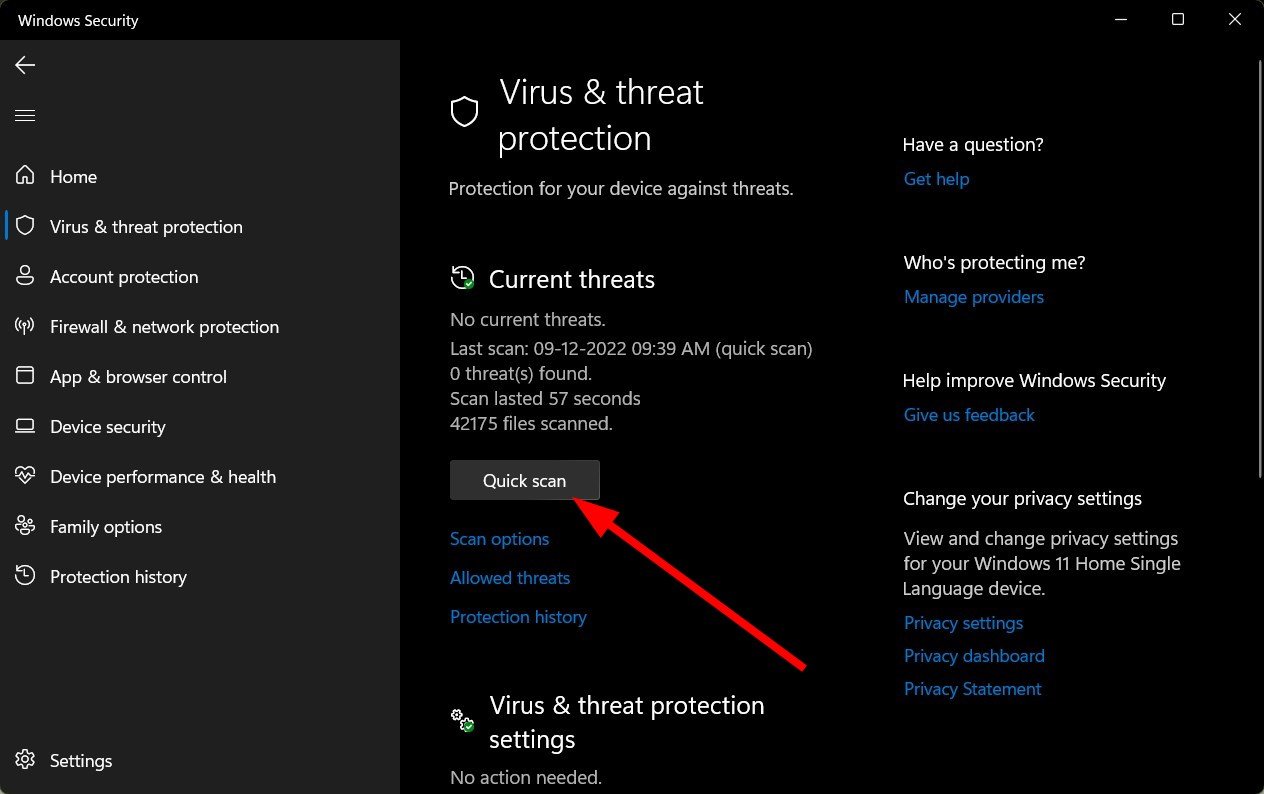
- Press the Windows key, search Windows Security and click Open.

- Select Virus & threat protection.
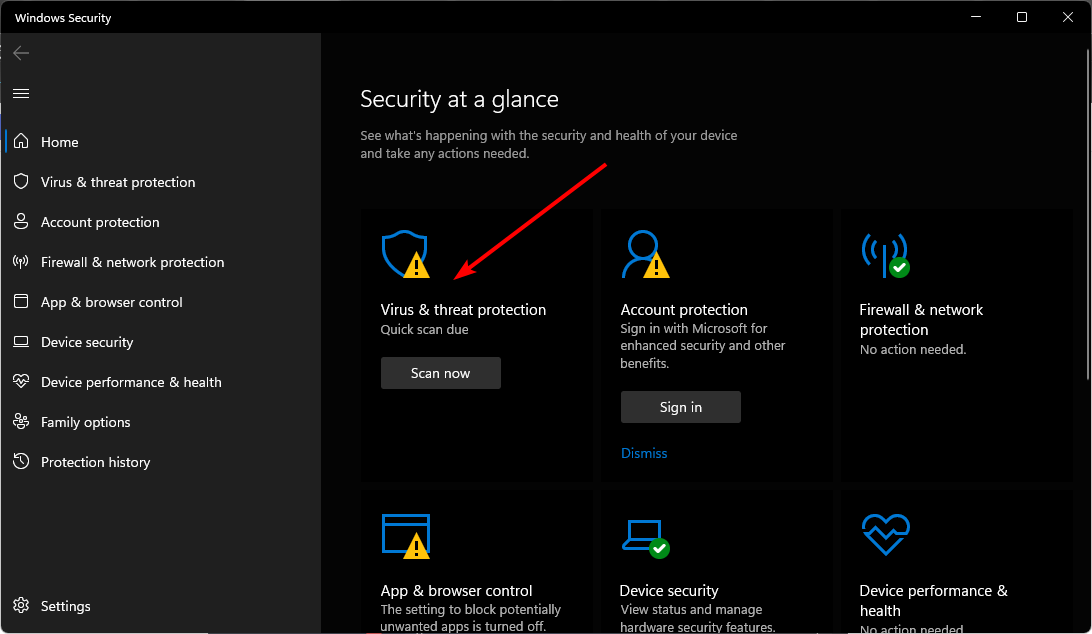
- Next, press Quick scan under Current threats.
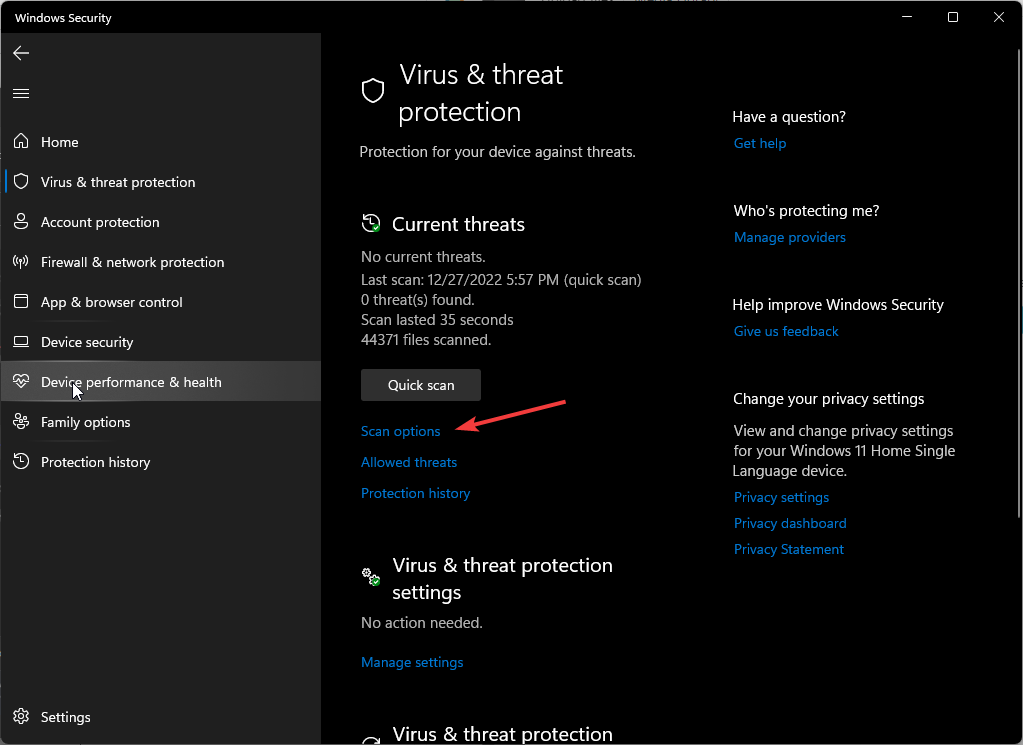
- If you don’t find any threats, proceed to perform a full scan by clicking on Scan options just below Quick scan.
- Click on Full scan then Scan now to perform a deep scan of your PC.
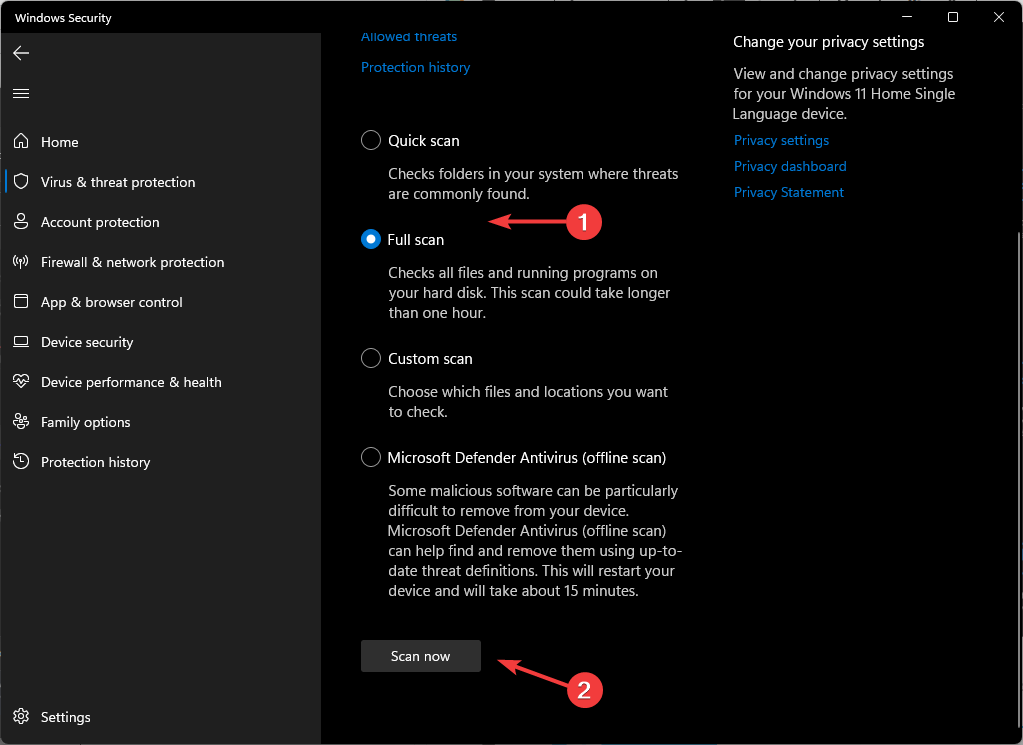
- Wait for the process to finish and restart your system.
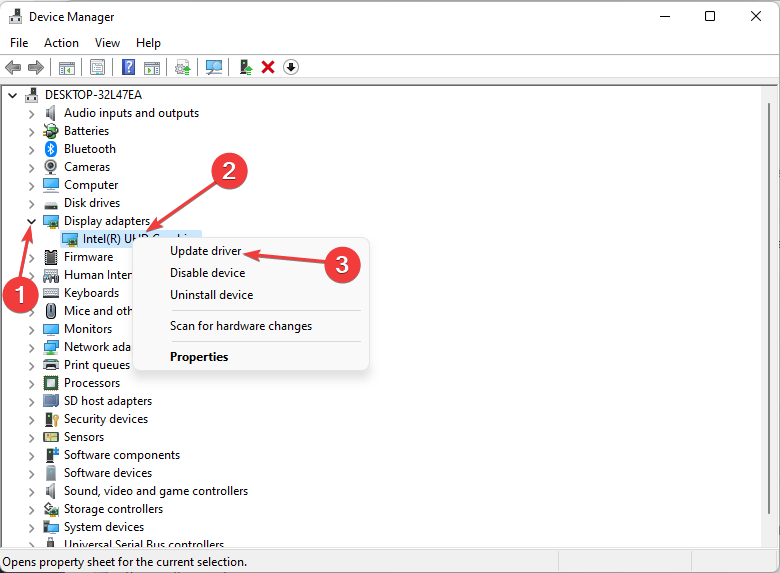
4. Update your graphic driver
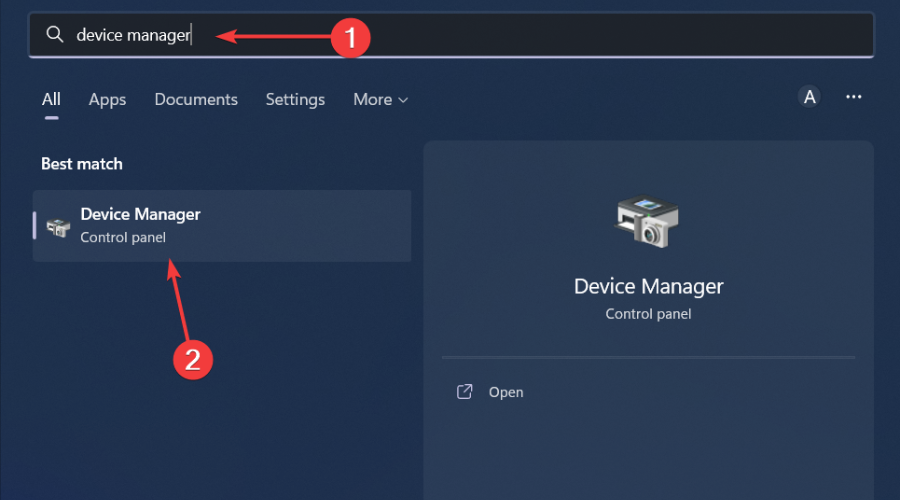
- Hit the Windows key, type Device Manager in the search bar, and click Open.
- Navigate to Display adapters and find your graphics card.
- Right-click on your graphics card and select Update driver.
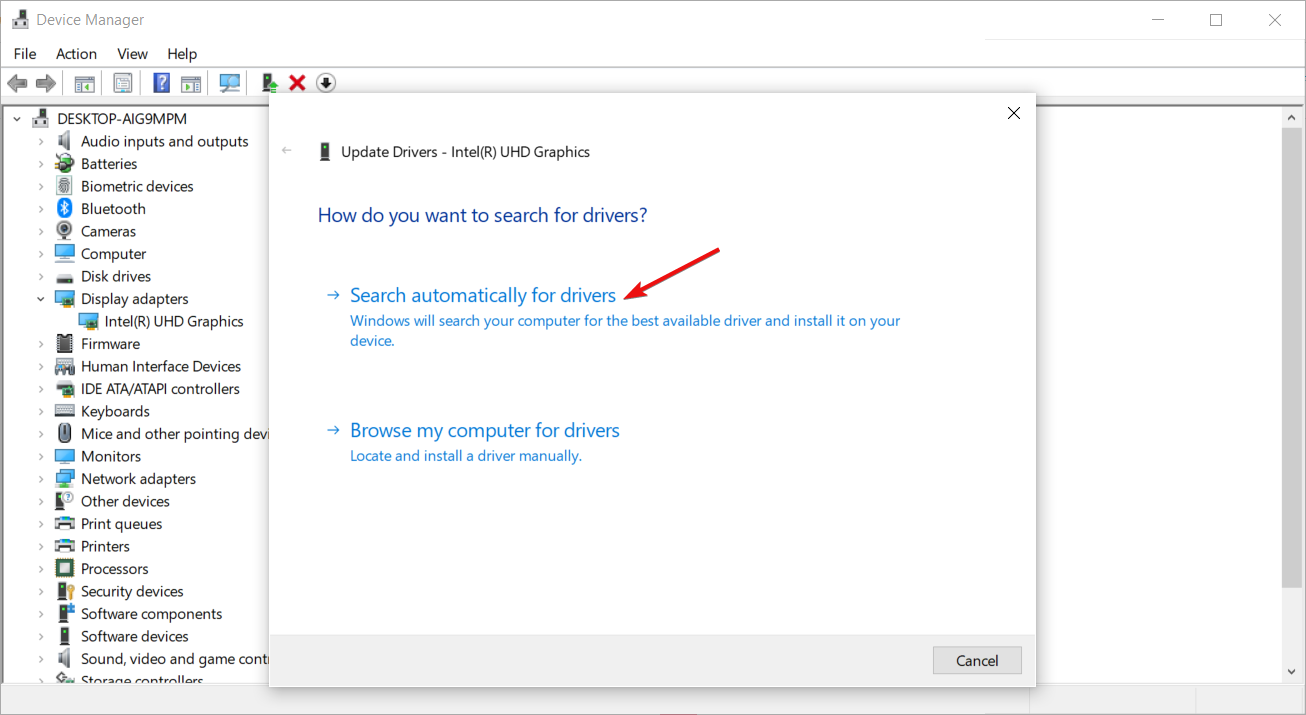
- Select Search automatically for drivers.
If you’re not tech-savvy, you could end up downloading the wrong driver and causing more problems than you solve. Thankfully, some tools can make this process much easier. One such tool is Outbyte Driver Updater, which automatically finds and updates all your drivers in one click.
Outbyte Driver Updater scans your computer for outdated or missing drivers and automatically installs them. This saves time and ensures that everything runs smoothly on your PC.

Outbyte Driver Updater
Prevent various errors from choosing the wrong drivers, and let Outbyte Driver Updater find the best updates.5. Restore default power plans
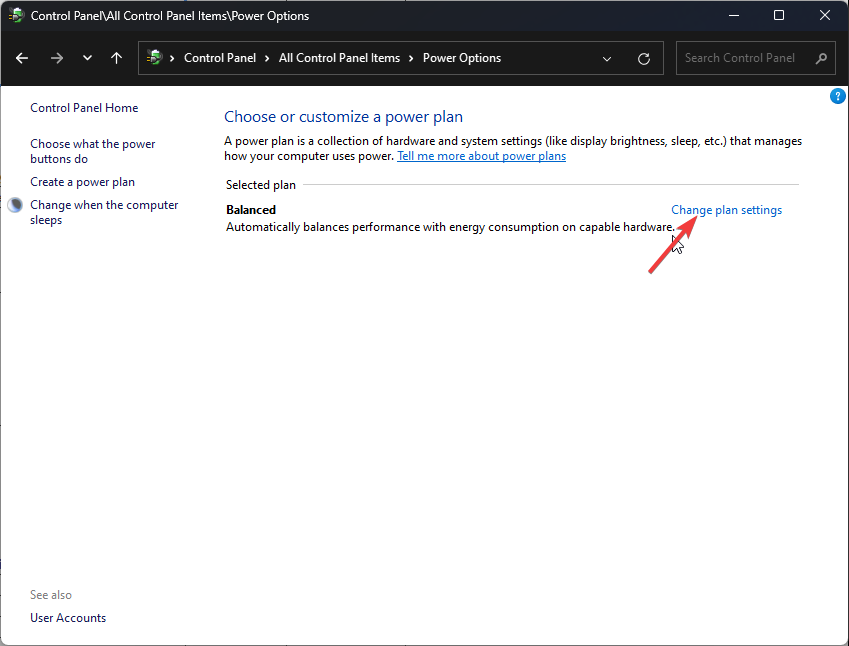
- Hit the Start Menu icon, type Control Panel in the search bar and click Open.

- Navigate to Power Options and click to Open.

- Select Change plan settings.
- Click on Change advanced power settings.
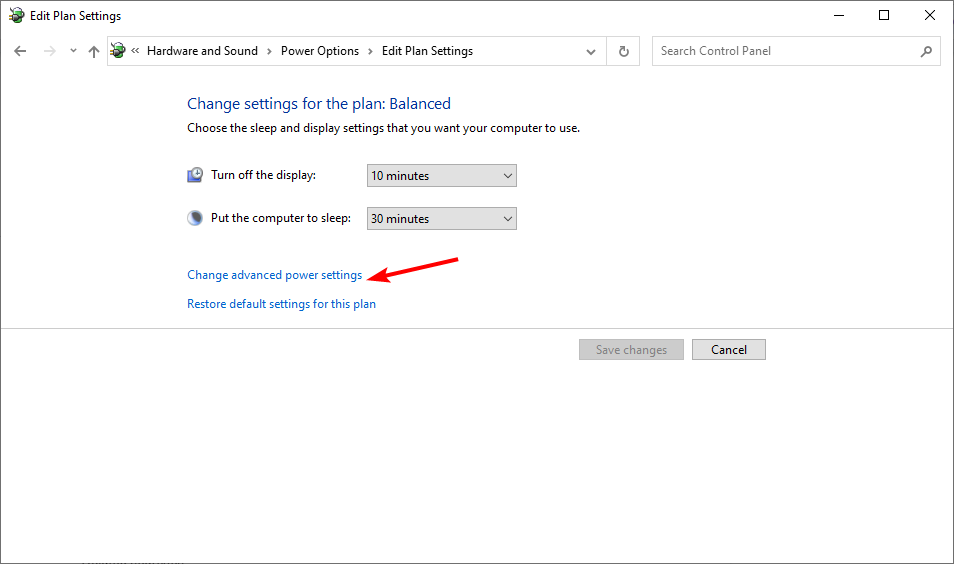
- In the Power Options dialog box that appears, select Restore defaults, then click Apply and OK to save changes.

6. Perform a clean boot
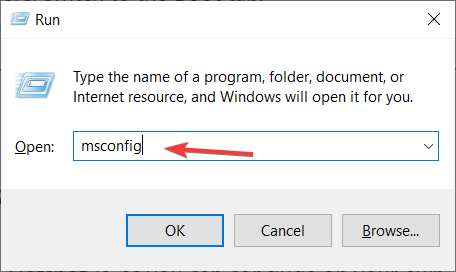
- Hit the Windows + R keys to open the Run command.
- Type in msconfig and hit Enter.
- In the System Configuration window that opens, navigate to the Services tab, check Hide all Microsoft services option, and click on Disable all.

- Restart your PC.
We also have a similar article for when Windows 10 power plan keeps changing, so check out our recommended fixes.
In another odd situation, the power plans might be missing altogether but do not fret as we show you how to get them back in our detailed guide.
Also, learn more about the difference between balanced and high-performance settings and decide which is the best for your system.
Do let us know if the issue has been resolved in the comment section below.
Read our disclosure page to find out how can you help Windows Report sustain the editorial team. Read more


Improve this guide


User forum
0 messages