Windows Backup Failed to Get an Exclusive Lock [Fix]
Check for any hard drive errors that may prevent Windows backup
6 min. read
Updated on
Read our disclosure page to find out how can you help Windows Report sustain the editorial team. Read more
Key notes
- Backup is an important feature for every PC user, which helps you to keep your data safe and secure.
- But, there is a chance that Windows Backup fails to get an exclusive lock on a drive especially if you have not partitioned your drive correctly.
- You may have to reformat the drive or use an alternative backup solution.
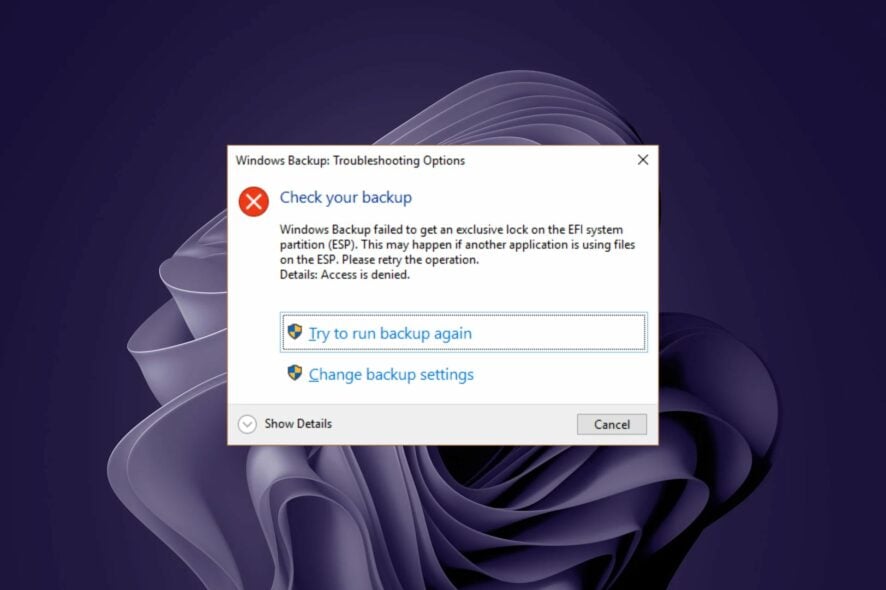
Windows backup is a great tool to safeguard your data against failures and disasters. However, sometimes you may find yourself stuck with an error message indicating that Windows backup failed to get an exclusive lock on the EFI system partition.
Windows 11 backup errors are not new, so let’s have a closer look at what this one means and how you can get back to smooth backups again.
What does the Windows backup failed to get an exclusive lock error mean?
If you get the Windows backup failed to get an exclusive lock on the EFI system partition message when backing up your PC, another application is using the drive, and the backup process cannot be completed.
This can happen because of one or more of the following reasons:
- The disk was not partitioned correctly – If you have two partitions on a hard disk, Windows Backup cannot create a backup image of the entire disk if one is formatted with the wrong partition style.
- Another program or user account locks the file – This can happen if another program or user account is writing to or reading from this file while Windows Backup backs it up. It, therefore, cannot access the file to avoid data corruption.
- Incorrect settings – Some incorrect backup settings on your computer may be causing this issue.
- Antivirus settings – Antivirus software can interfere with the backup process, especially if it’s set to scan files before they’re backed up.
- Network connection issue – In some cases, Windows backup failed to get an exclusive lock error message can also be caused by a network connection issue between your computer and the storage device where backups are stored.
- Windows backup service – The Windows backup service may be having a glitch and hence can’t perform its normal operations.
How can I fix the Windows backup failed to get an exclusive lock error?
Here are some preliminary steps that may help you resolve this issue:
- Close out any unnecessary programs that may be blocking the backup process.
- Check the network connection and switch to an Ethernet cable if possible.
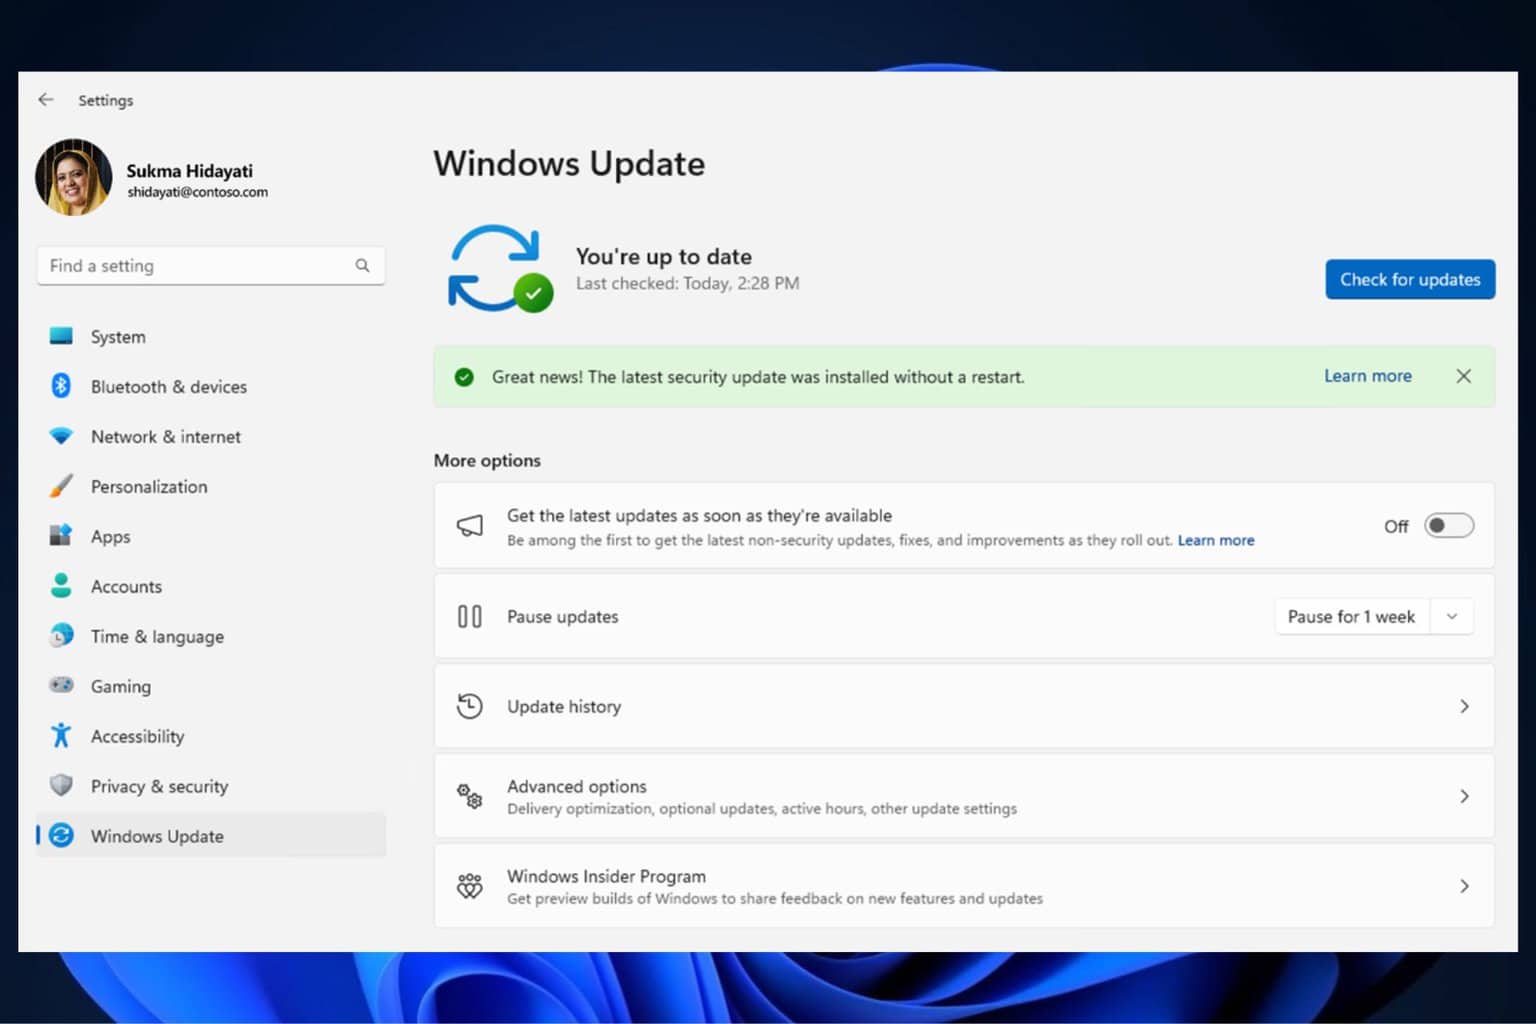
- Make sure that your computer is fully updated.
- Verify that you’re using an administrator account.
- Ensure you have enough free space on your hard drive for the backup process.
- Check your hard drive for errors.
- Restart your PC and try backing up again.
1. Disable antivirus temporarily
- Hit the Start menu icon, type Windows Security in the search bar and click Open.
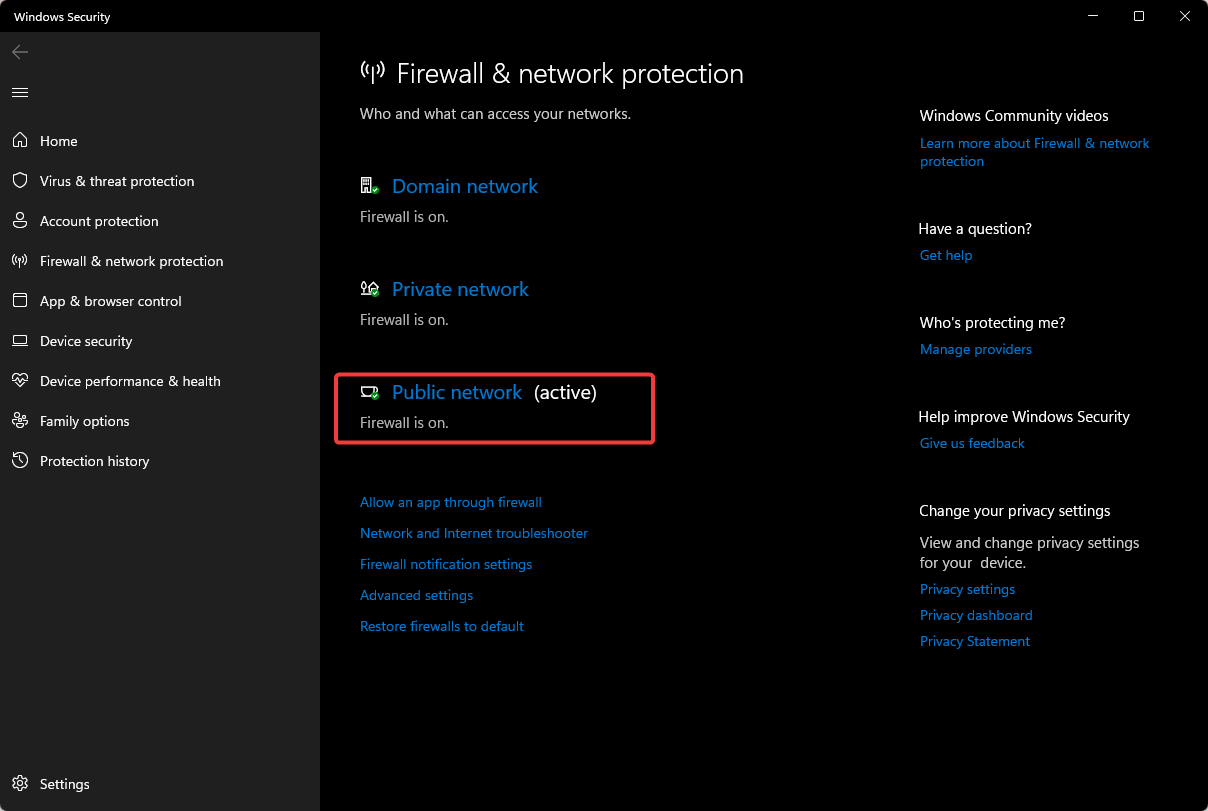
- Click on Firewall & network protection, then select Public network.
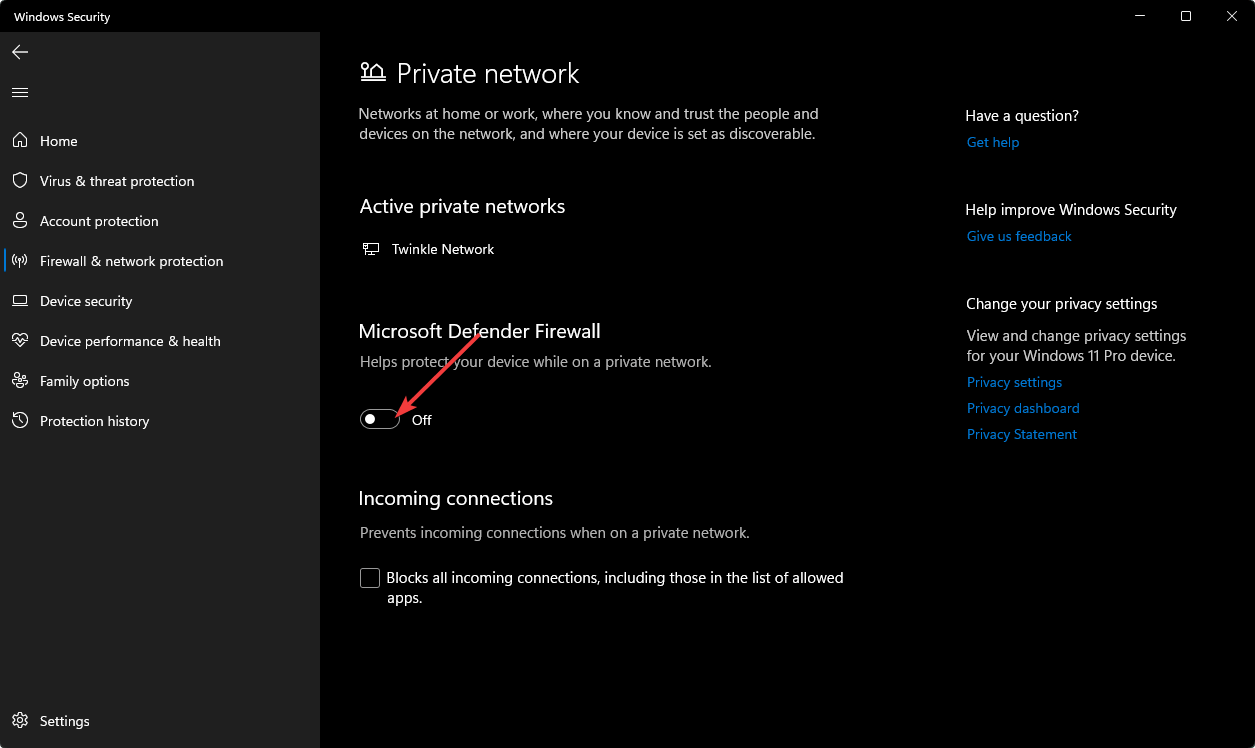
- Locate Microsoft Defender Firewall and toggle the off button.
2. Perform a System File Checker scan
- Hit the Start Menu icon, type cmd in the search bar, and click Run as administrator.
- Type the following command and press Enter:
sfc /scannow
Alternatively, you can save time and effort and perform this action more in-depth by using a dedicated repair program.
3. Run a virus scan
- Press the Windows key, search Windows Security, and click Open.
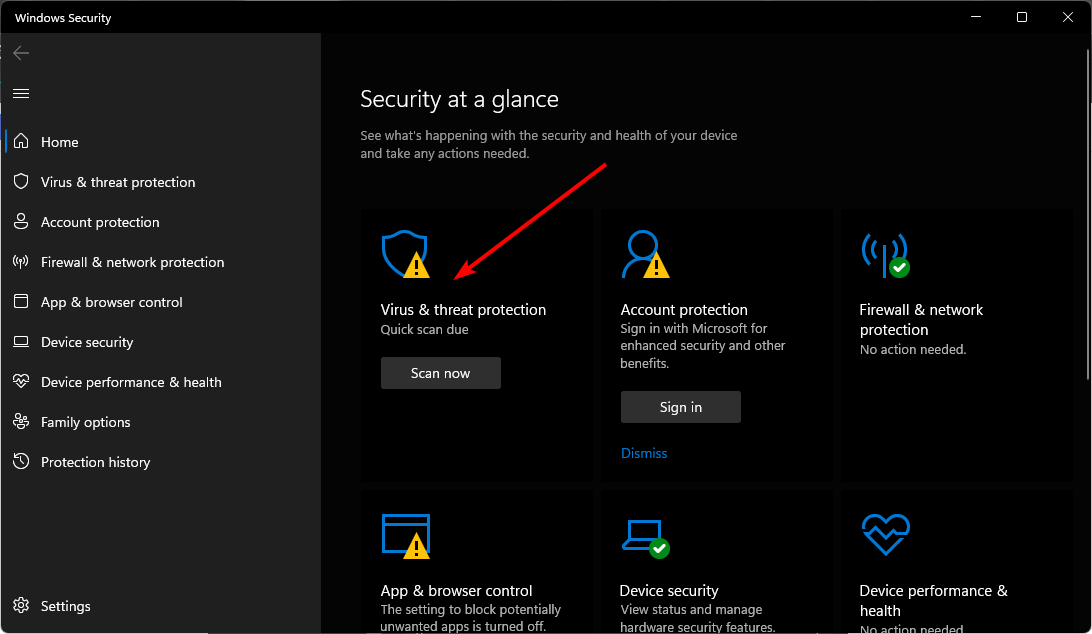
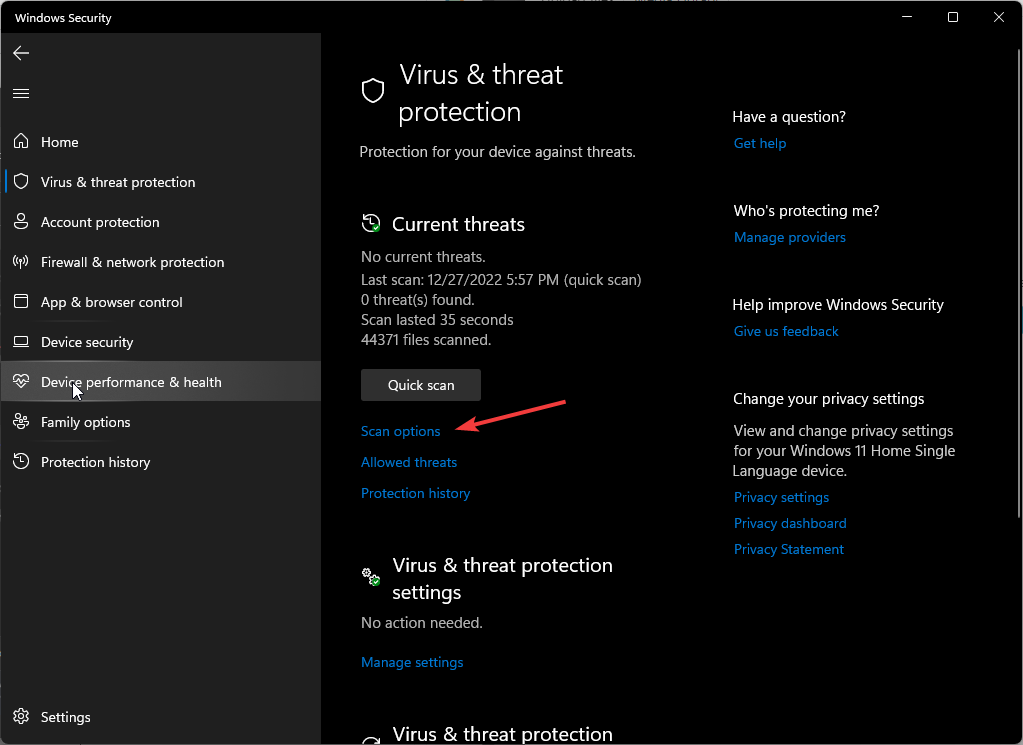
- Select Virus & threat protection.
- Next, press Quick scan under Current threats.
- If you don’t find any threats, proceed to perform a full scan by clicking on Scan options just below Quick scan.
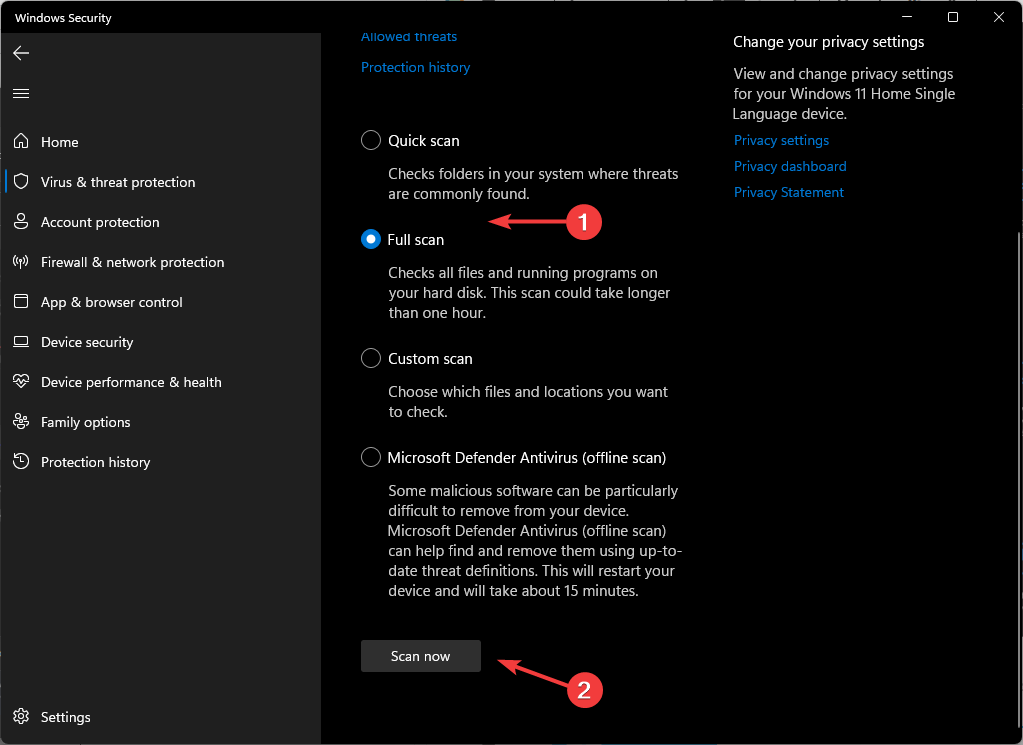
- Click on Full scan, then Scan now to perform a deep scan of your PC.
- Wait for the process to finish and restart your system.
4. Uninstall recently installed programs
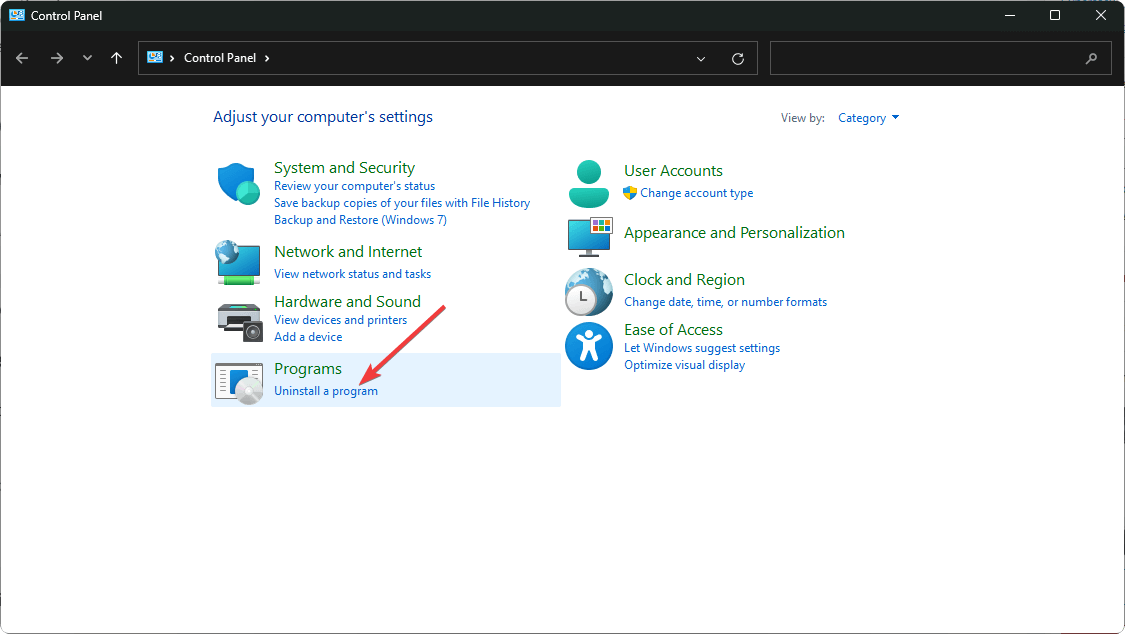
- Hit the Windows key, type Control Panel in the search bar, and click Open.
- Navigate to Uninstall a program under programs.
- Find the most recently installed program, click on it, and select Uninstall.
5. Reformat your backup drive
- Hit the Start Menu icon, type cmd in the search bar, and click Run as administrator.
- Type the following command and press Enter:
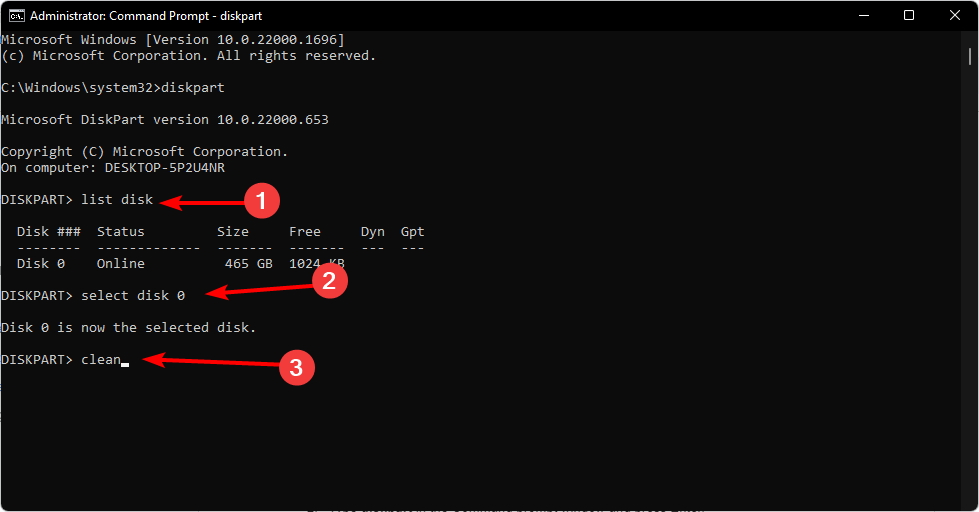
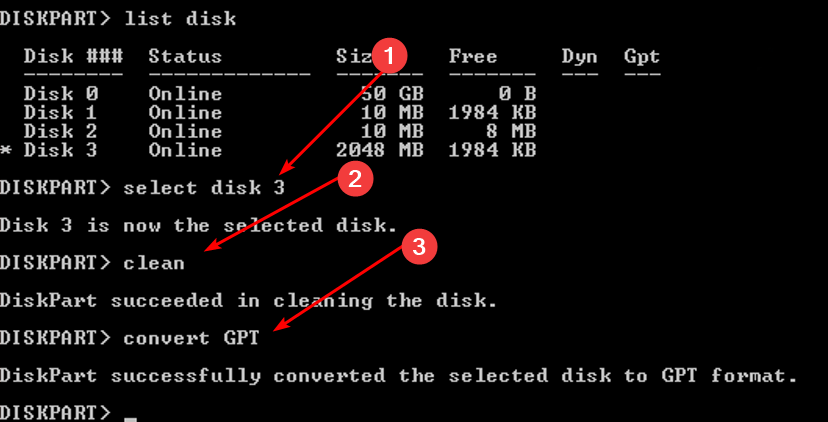
diskpart - Next, type listdisk to display the number of available drives in your system.
- Check the number listed against the drive you want to format and Enter the following command. Remember to replace X with the corresponding number of the drive:
selectdisk X - Next, type in clean to clear everything from the drive.
- Type in convert gpt and press Enter.
- Wait for the process to finish, and type in the following command:
create partition primary - Next, Enter the following commands to format and assign the drive a letter:
select partition xformat quick fs=NTFS assign letter C - Restart your PC.
6. Perform a clean boot
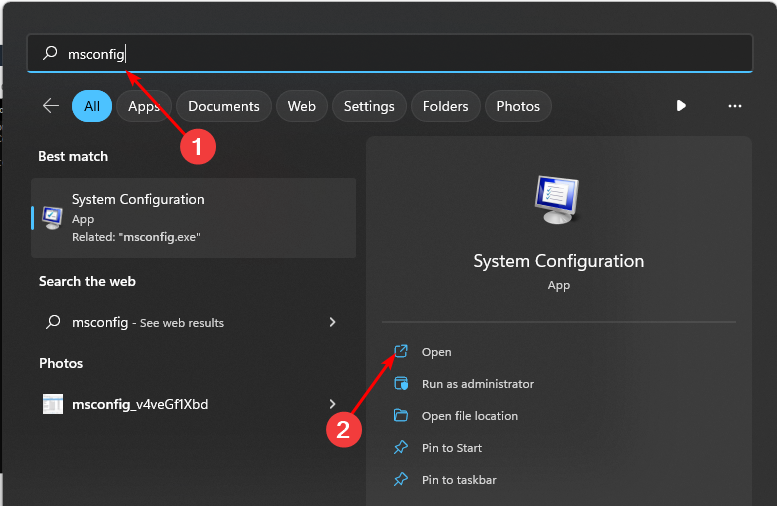
- Hit the Windows key, type msconfig, and open System Configuration.
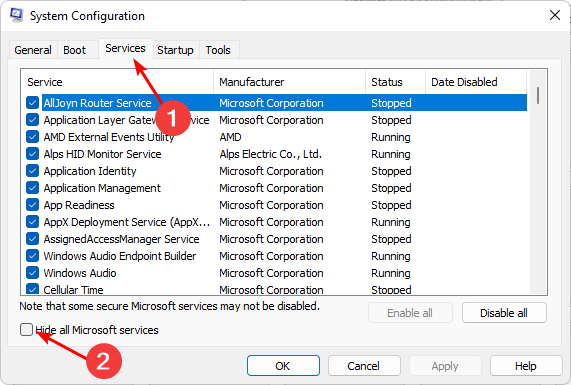
- Switch to the Services tab and select Hide all Microsoft services.
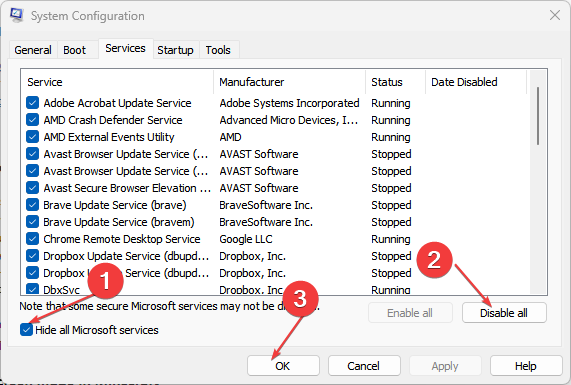
- Click on the Disable all button, then hit the Apply button to save the changes.
- Go back and click on the Startup tab, select Open Task Manager then click OK.
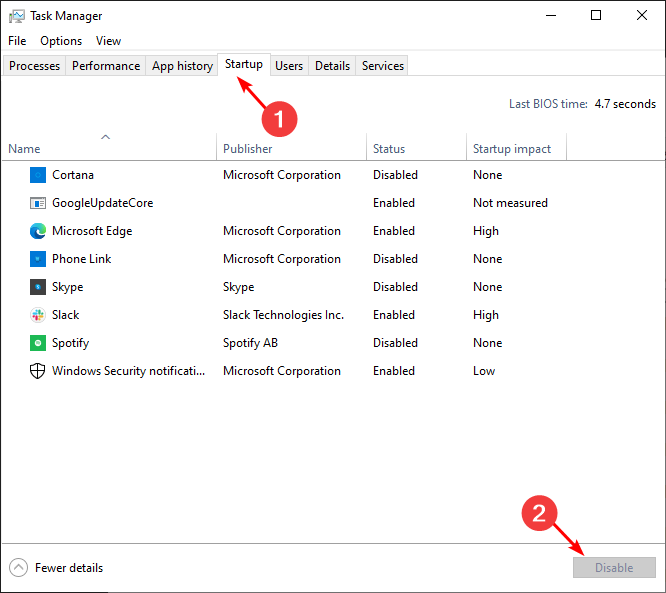
- In the Startup tab of the Task Manager, Disable all the Enabled startup items.
- Close Task Manager and restart your PC.
7. Change the logon user
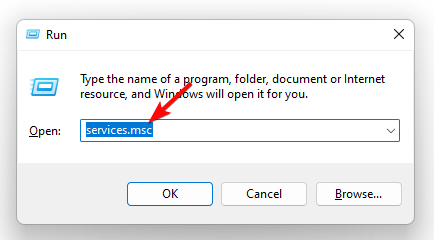
- Hit the Windows + R keys to open the Run command.
- Type services.msc in the dialog box and hit Enter.
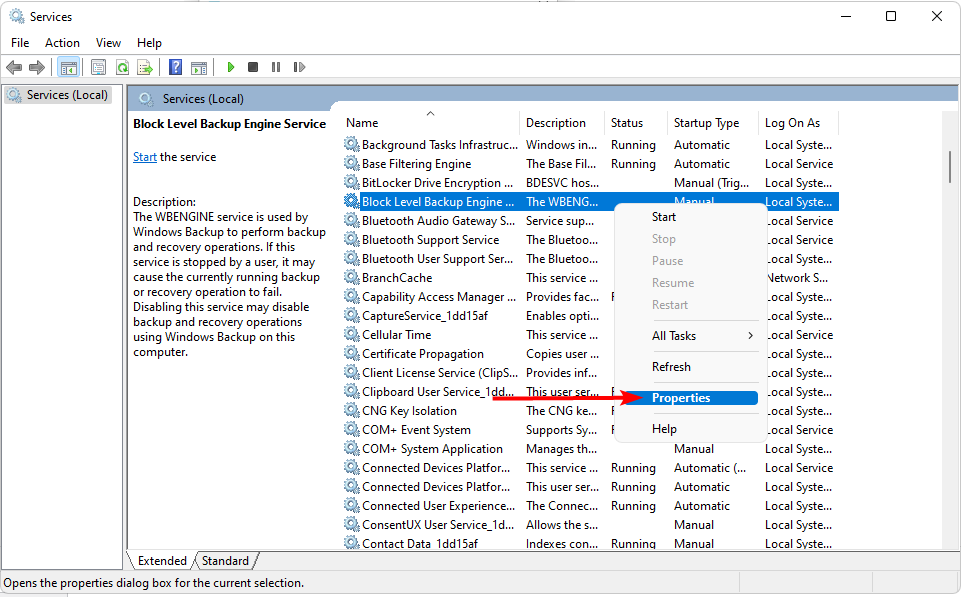
- Locate the Block Level Backup Engine Service, right-click on it, and select Properties.
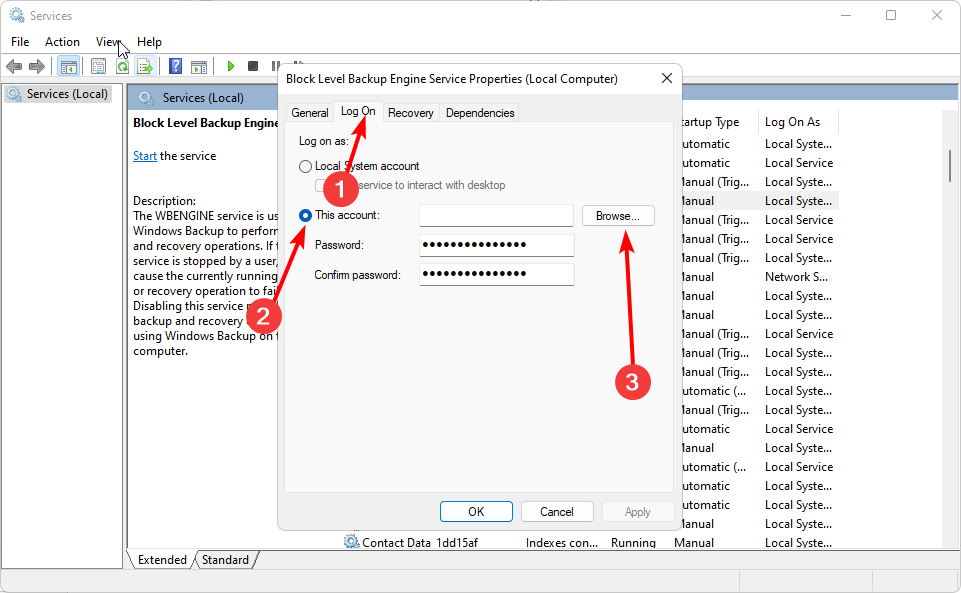
- Navigate to the Log On tab, check the This Account box and click on Browse.
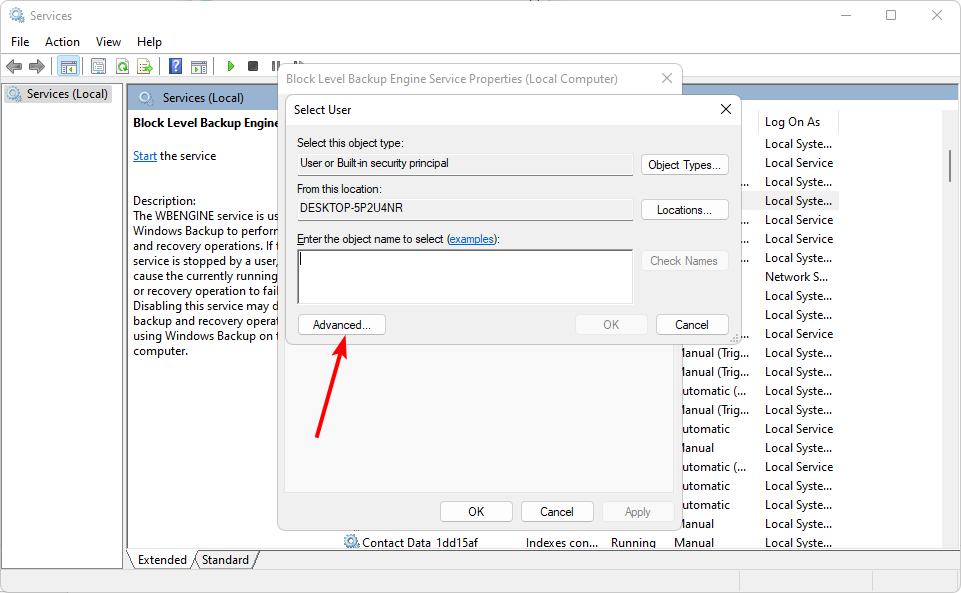
- In the new Window, click on Advanced.
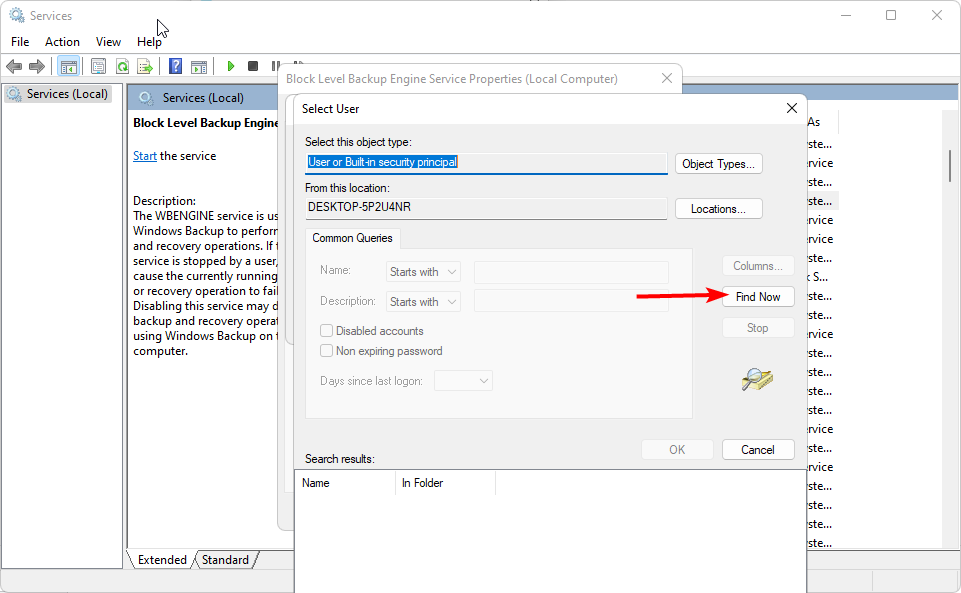
- Next, click on Find Now. A list of available users will be displayed.
- Select a user account and enter credentials where necessary, then click on Apply and OK to save the changes.
8. Use an alternative backup solution
If you’re still facing the Windows backup failed to get an exclusive lock on the EFI system partition error, it may be time to try other avenues.
There are a lot of Windows 11 backup options available that you can choose from as you wait for this issue to be resolved.
That’s it from our end, but leave us a comment below if you could address this issue using a solution not mentioned here.







User forum
0 messages