Fix: Windows Did Not Detect A Properly Installed Network Adapter
Reinstalling the network drivers will fix this problem quickly
4 min. read
Updated on
Read our disclosure page to find out how can you help Windows Report sustain the editorial team. Read more
Key notes
- The Windows did not detect a properly installed network adapter could mainly occur due to improperly installed drivers.
- To fix it, you can run hardware and devices troubleshooter, reinstall the network driver, or modify the Wi-Fi adapter properties.
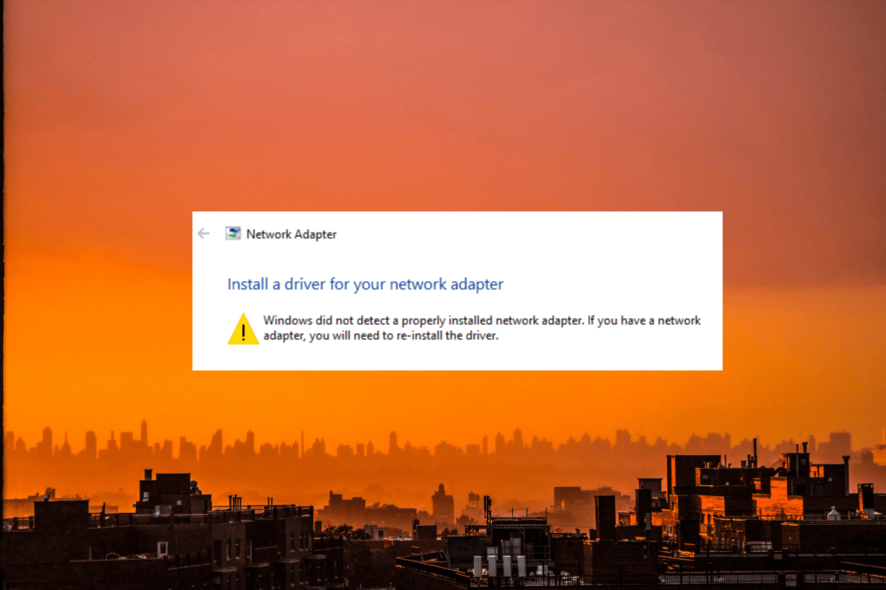
A properly functioning network adapter is crucial for establishing and maintaining a stable internet connection on a Windows computer. Encountering the Windows did not detect a properly installed network adapter error message can be frustrating and prevent you from accessing the local network resources.
This guide will explore several troubleshooting steps and solutions to address the issue right after understanding potential causes.
Why is my PC not detecting my network adapter?
There could be various reasons for this issue; some of the common ones are mentioned here:
- Missing network drivers – If the network adapter drivers are missing or outdated, Windows may not be able to detect or utilize the network adapter correctly. Try updating the drivers.
- Hardware connection issues – An improperly connected network adapter can trigger this issue. Ensure it is securely seated in expansion slot & check the cables connecting it to the motherboard.
- Faulty network adapter – In some cases, the network adapter itself may be defective or malfunctioning, causing this problem.
- BIOS or UEFI settings – Incorrect BIOS or UEFI settings can prevent Windows from recognizing and utilizing the network adapter.
Identifying the error’s underlying cause is crucial to implement the appropriate solution. Now that you have done that proceed with the troubleshooting steps to fix it.
How can I fix the Windows didn’t detect any network hardware?
Before engaging in advanced troubleshooting steps, you should consider performing the following checks:
- Try restarting your computer and router.
- Ensure your internet is working fine.
- Your Windows must not have any pending updates.
- Ensure the latest BIOS or UEFI firmware is installed.
- Replug the ethernet cable if using a wired connection.
- Remove and add the Wi-Fi networks added to your device.
Once you have checked all these, let us move to the solutions.
1. Run Hardware and Devices troubleshooter
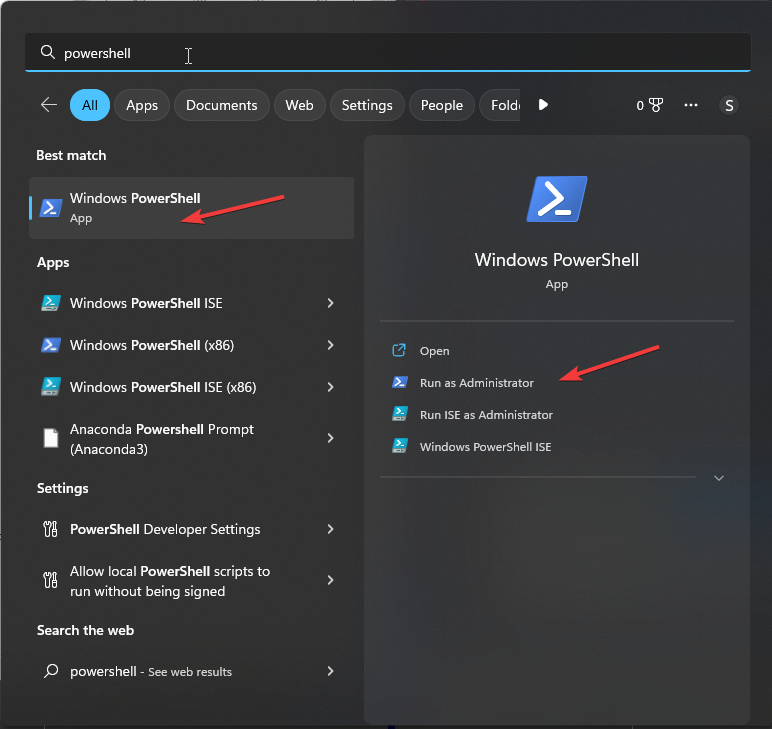
- Press the Windows key, type powershell and click Run as administrator.
- Type the following command to open the troubleshooter and hit Enter:
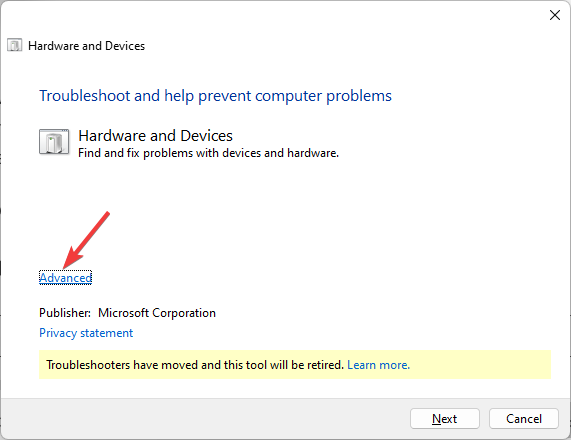
msdt.exe -id DeviceDiagnostic - On the Hardware and Devices window, click Advanced.
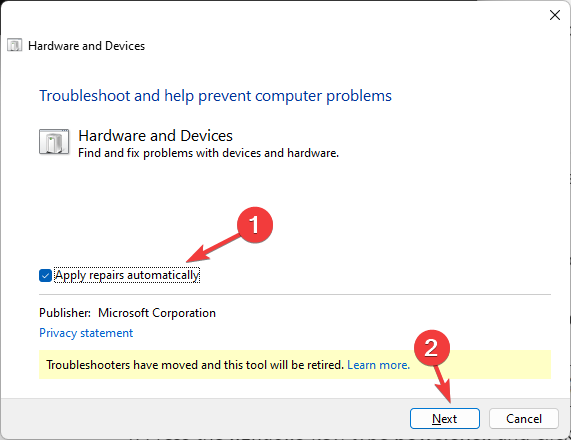
- Select Apply repairs automatically, then click Next.
- Follow the onscreen instructions to complete the process.
2. Reinstall the network driver
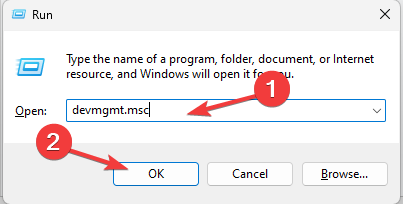
- Press Windows + R to open the Run console.
- Type devmgmt.msc and click OK to open the Device Manager.
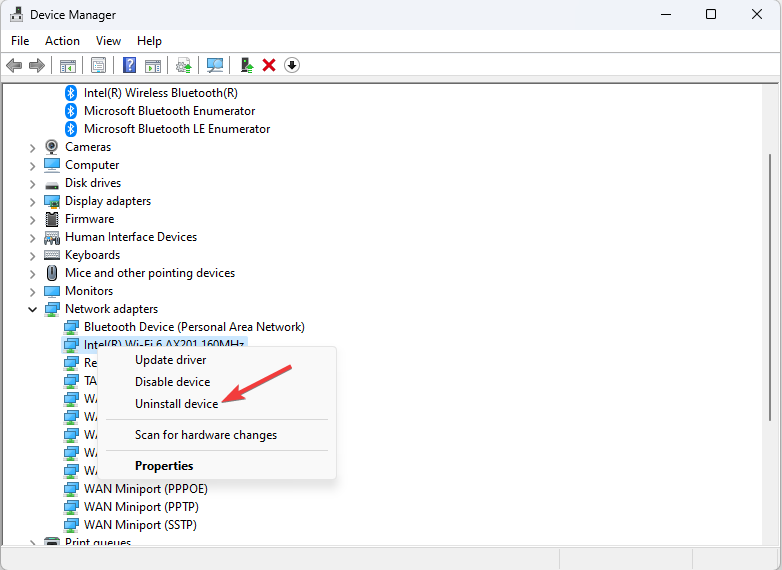
- Locate and click Network adapters to expand it.
- Right-click the Wi-Fi or other affected driver and select Uninstall driver.
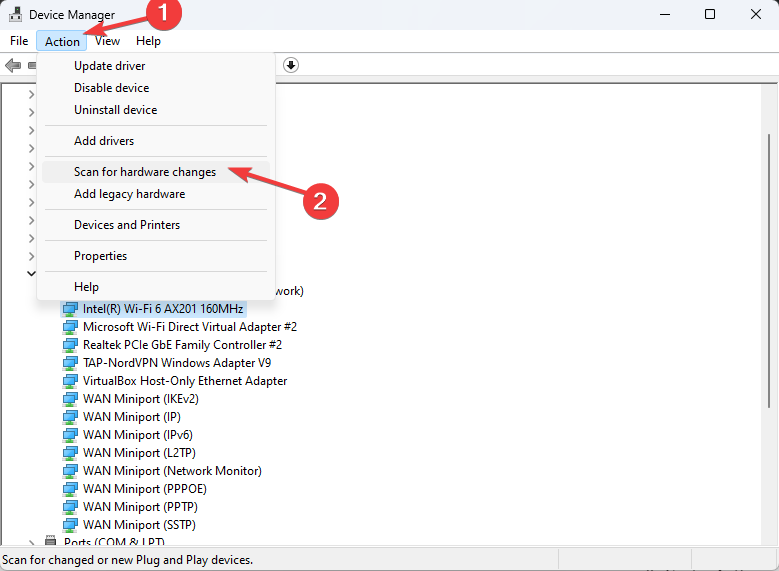
- Once uninstalled, go to Action and select Scan for hardware changes.
- Reboot your PC to save the changes.
3. Modify the Wi-Fi adapter properties
- Press Windows + R to open the Run console.
- Type devmgmt.msc and click OK to open the Device Manager.
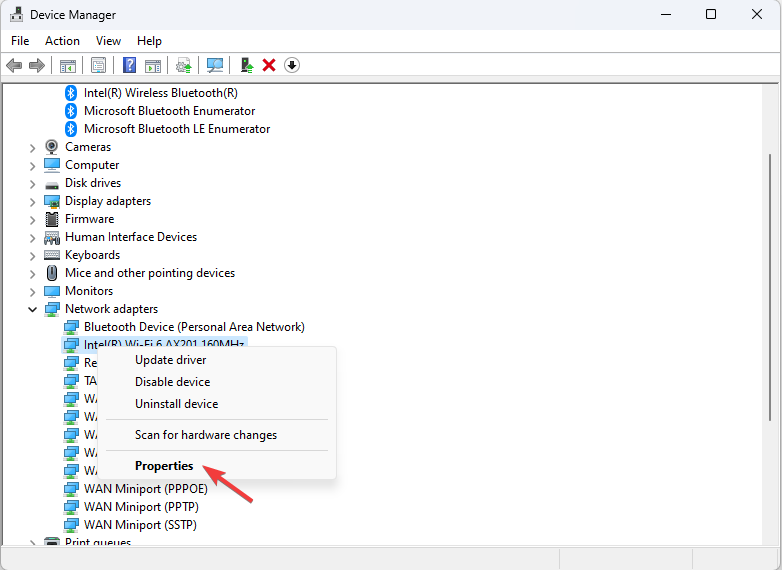
- Locate and click Network adapters.
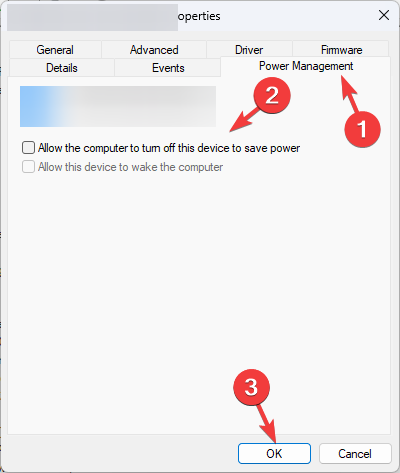
- Right-click the Wi-Fi driver and select Properties.
- Go to the Power Management tab, and remove the checkmark next to Allow the computer to turn off this device to save power.
- Click OK.
4. Uninstall the Windows update
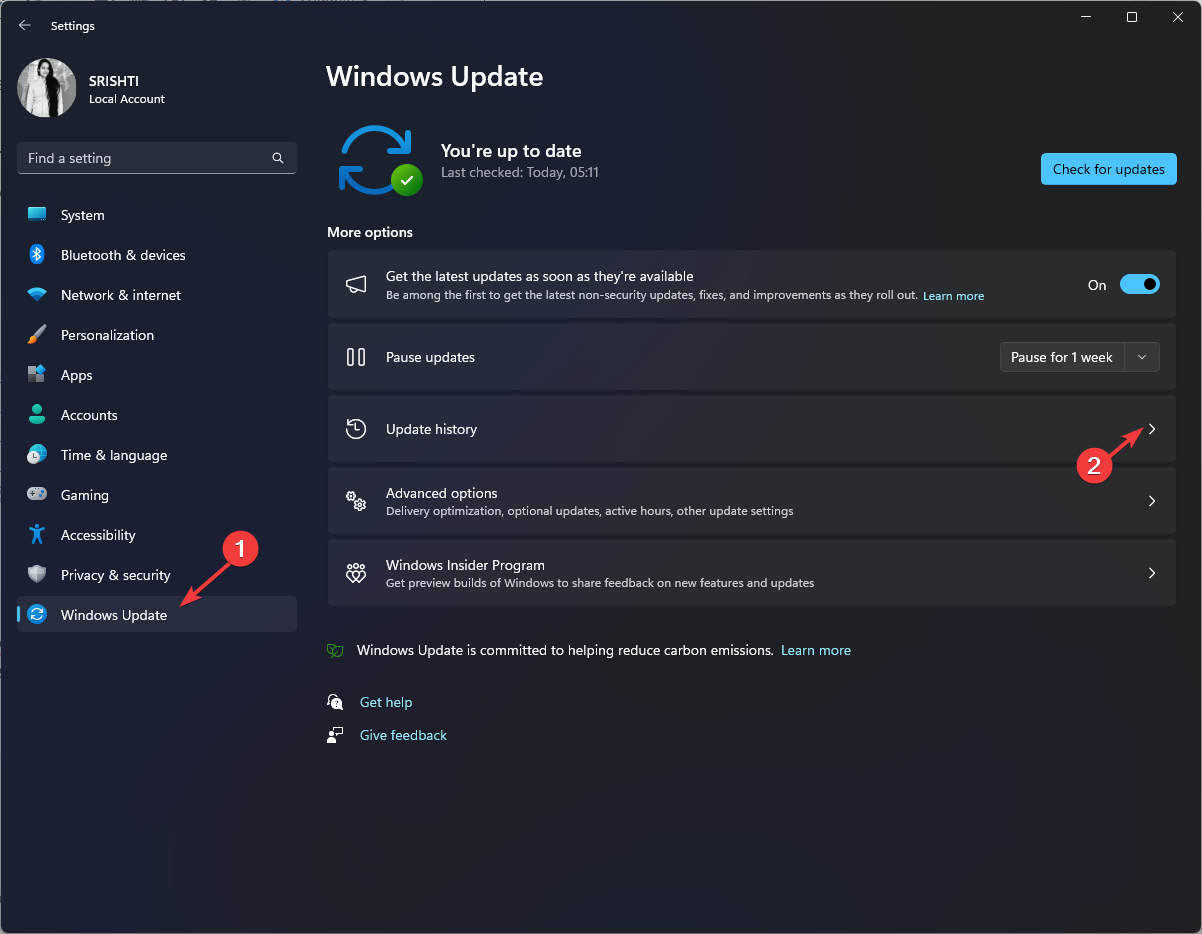
- Press Windows + I to open the Settings app.
- Go to Windows Update, and click Update history.
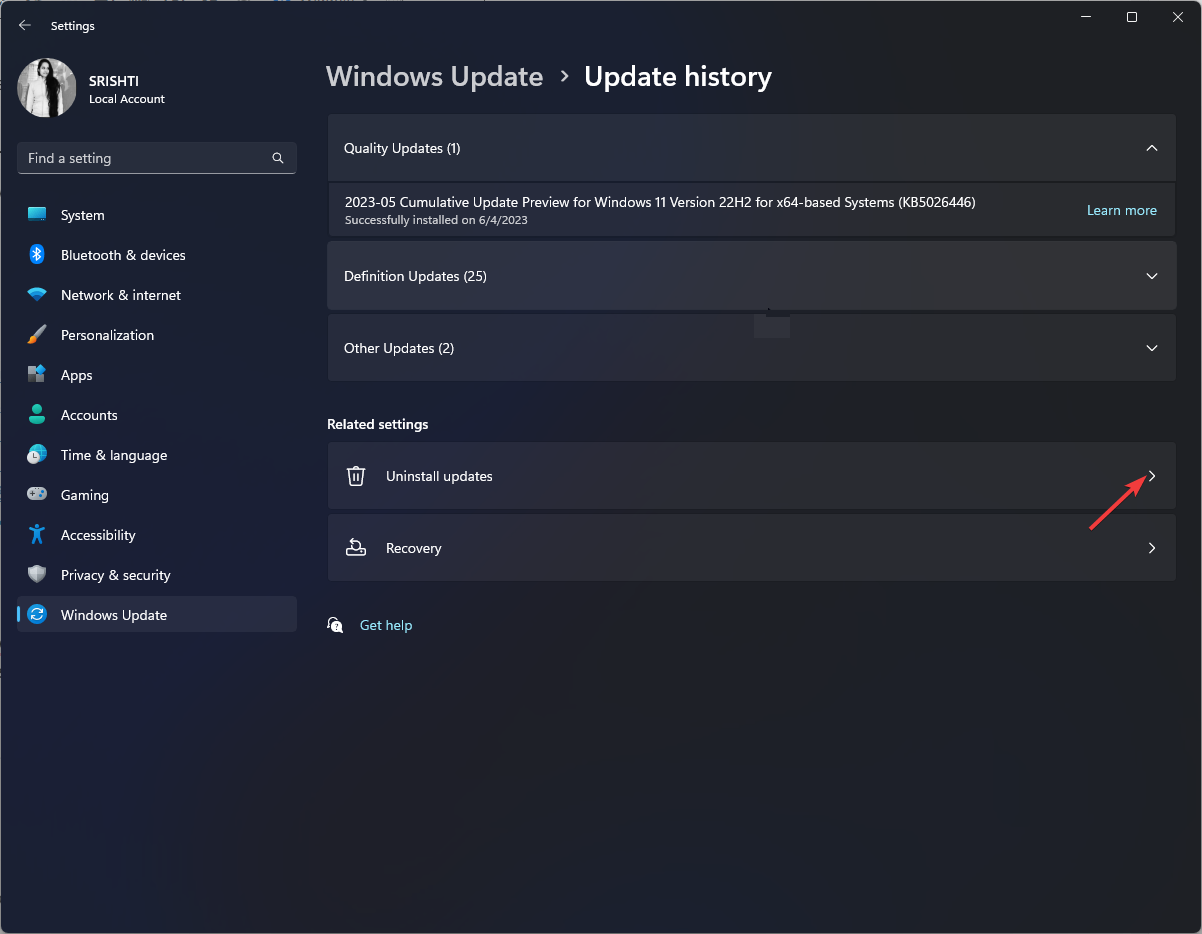
- Under Related settings, click Uninstall updates.
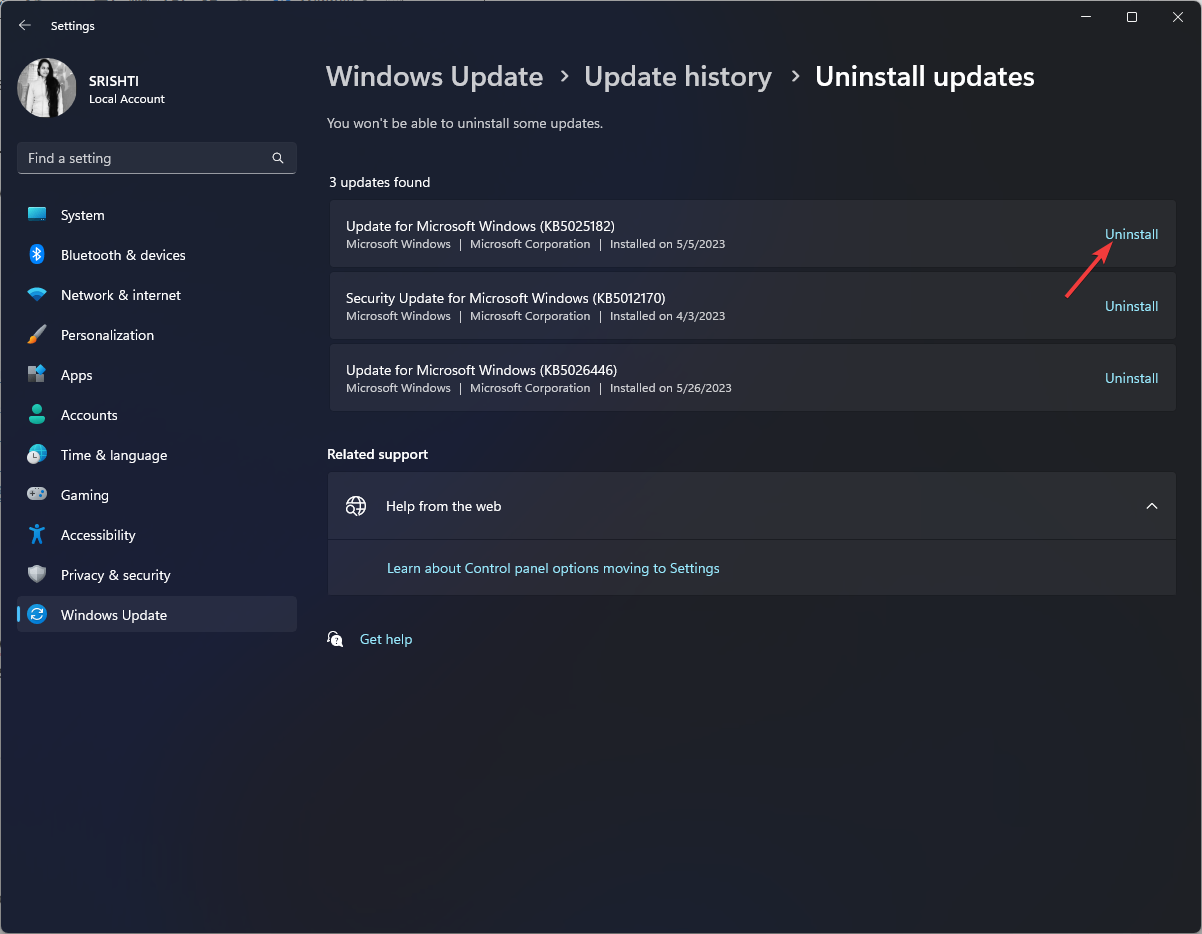
- Go to the latest update and click Uninstall.
Wait for a few minutes and once it is complete, restart your computer and check if the issue persists.
5. Enable IPv6
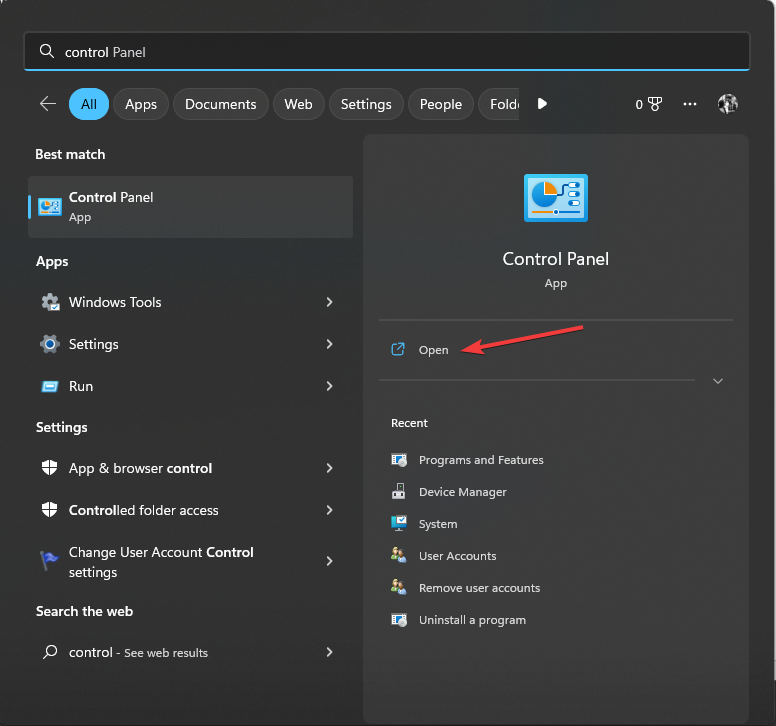
- Press Windows key, type control panel and click Open.
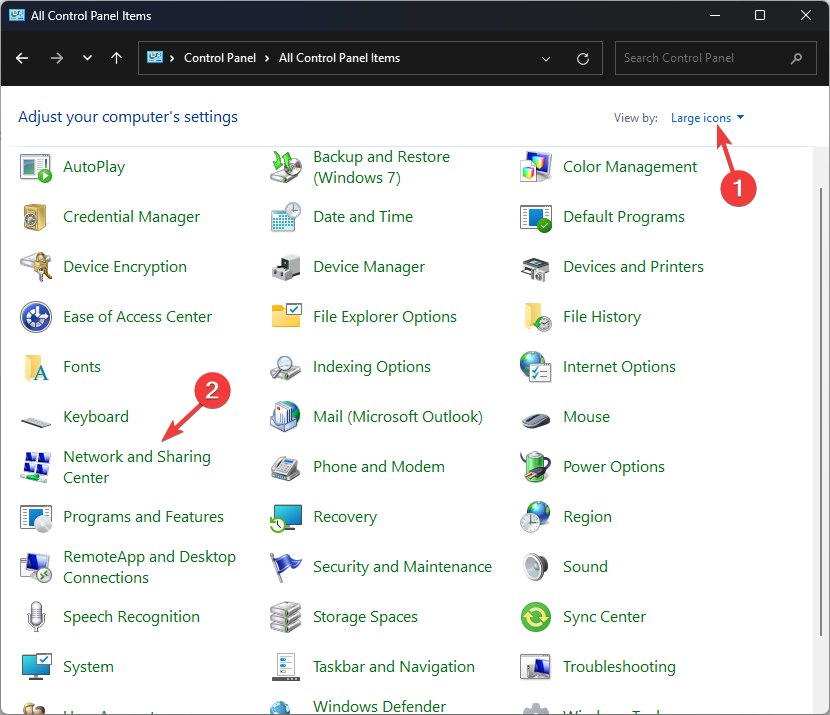
- Select View by as Large icons and click Network and Sharing Center.
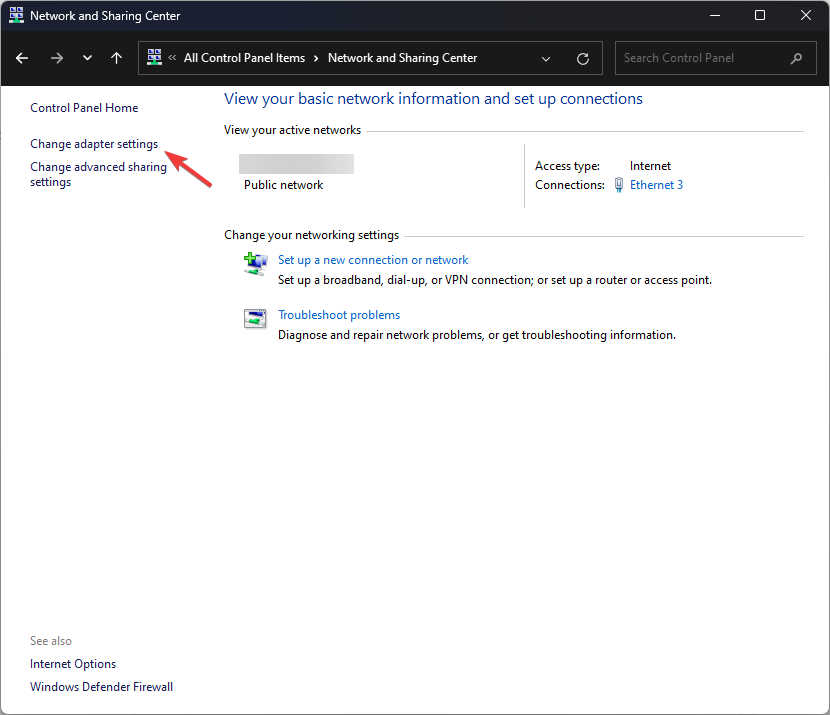
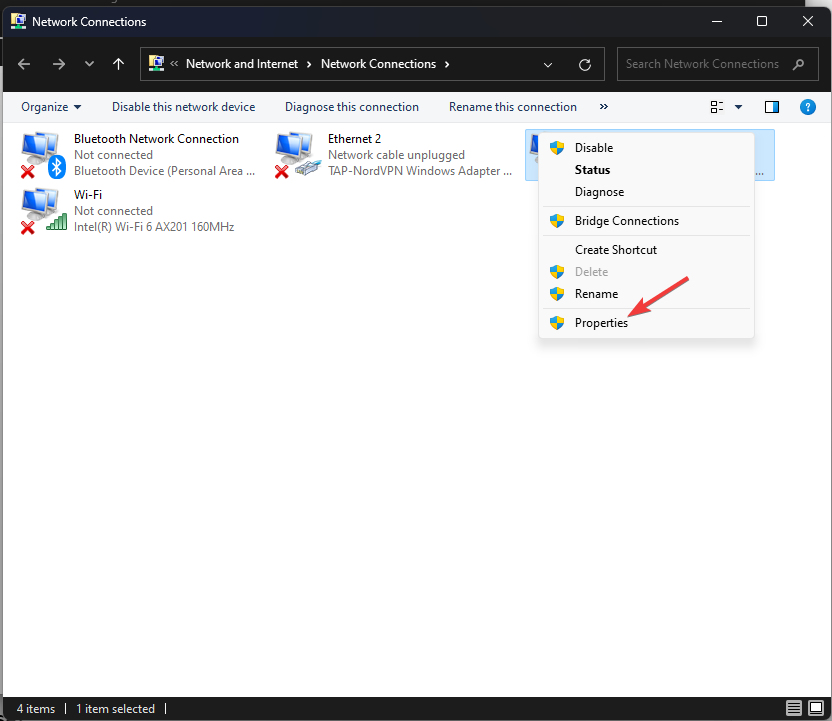
- Click Change adapter settings.
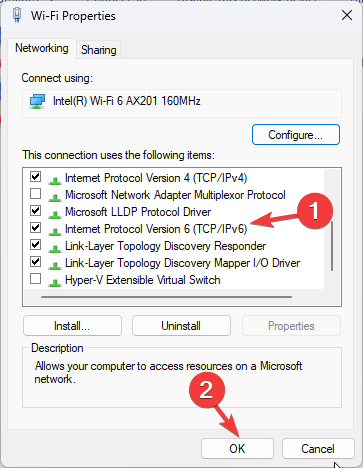
- Right-click the network adapter and select Properties.
- Locate Internet Protocol Version 6 (TCP/IPV6) and place a checkmark next to it to enable it.
- Click OK to confirm the choice.
6. Reset your network
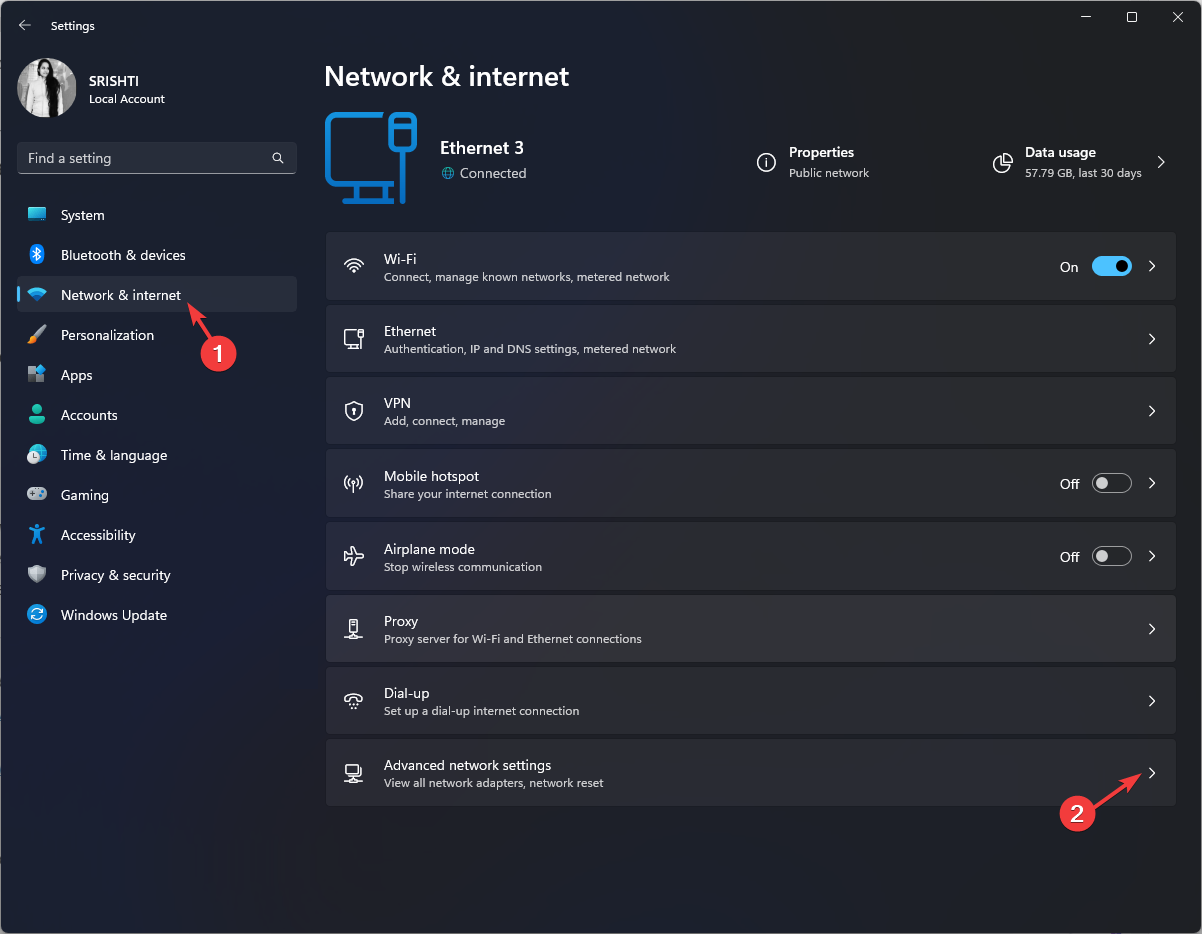
- Press Windows + I to open Settings.
- Go to Network & Internet, then click Advanced network settings.
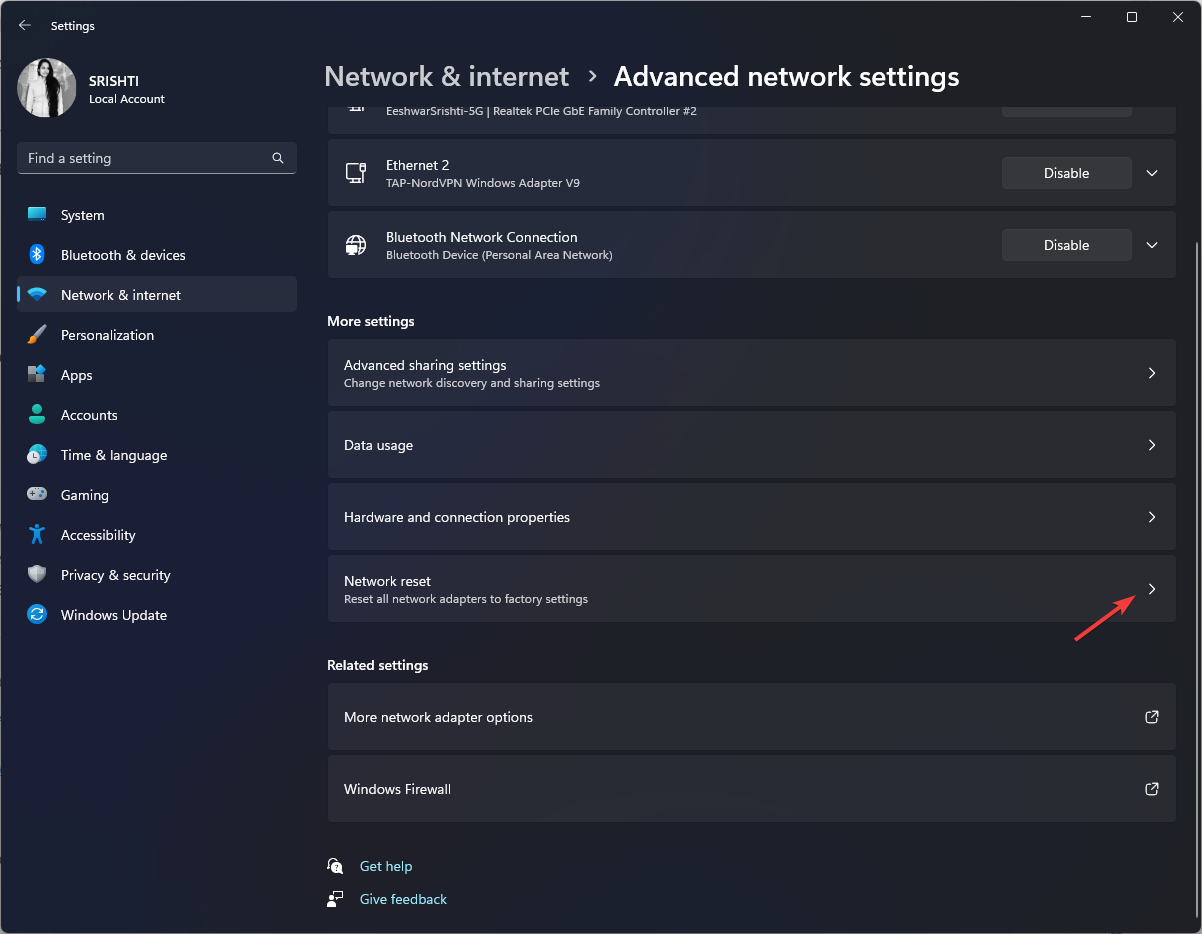
- Under More settings, click Network reset.
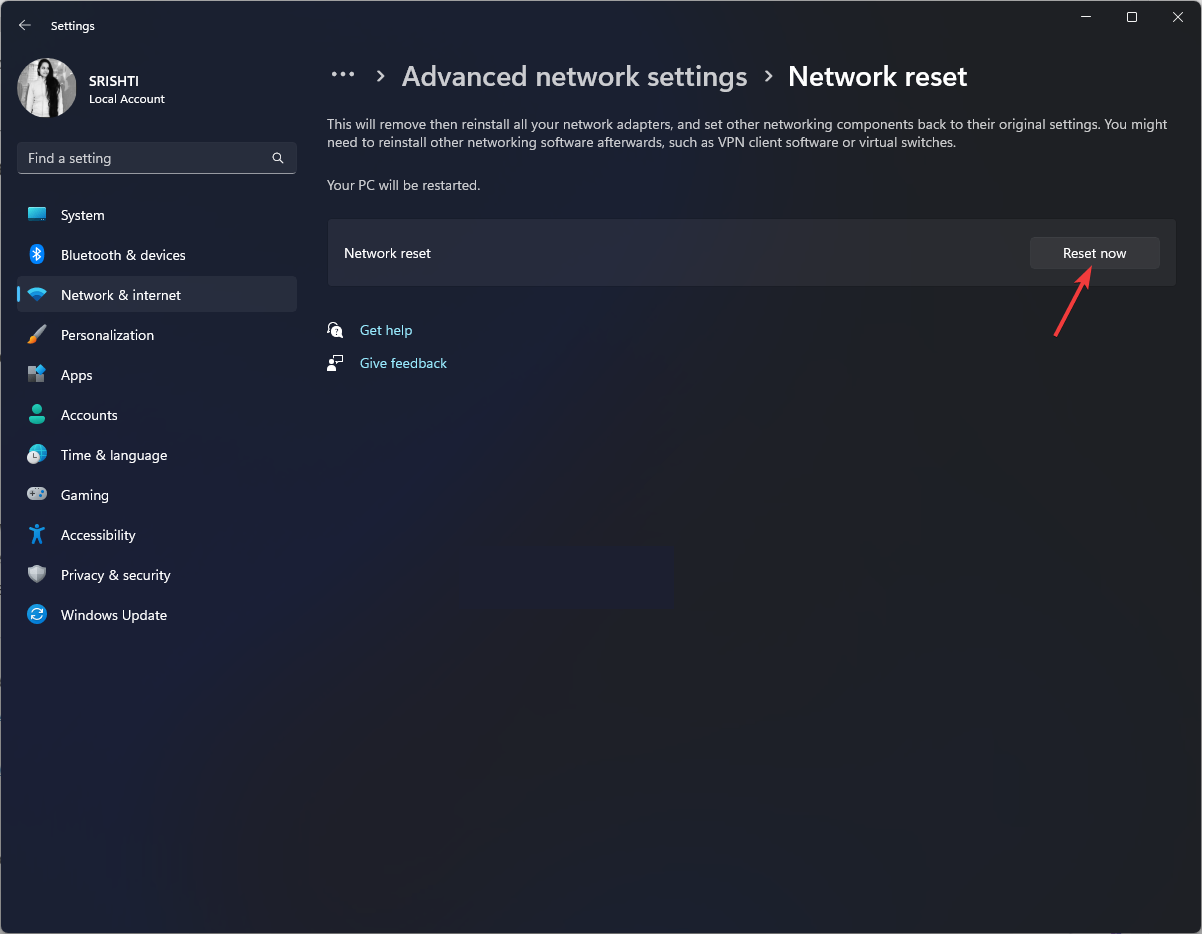
- On the next page, locate Network reset and click Reset now.
7. Reset Winsock
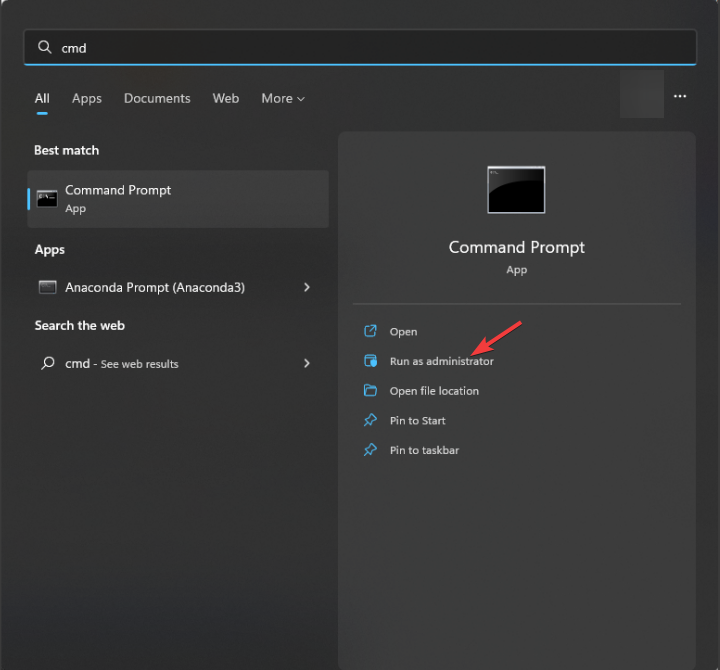
- Press the Windows key, type cmd, and click Run as administrator.
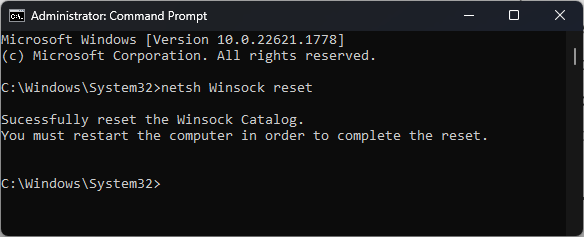
- Copy & paste the following command to reset Winsock and press Enter:
netsh Winsock reset - Restart your computer to check if the issue persists.
So, you can follow these methods to fix the Windows that did not detect a properly installed network adapter error and restore network connectivity to your Windows computer. If nothing worked for you, we suggest you perform a clean installation of Windows.
If you are facing issues like the Wi-Fi adapter not working on your PC, we recommend you check out this guide for quick fixes.
Please feel free to give us any information, tips, and your experience with the subject in the comments section below.




User forum
0 messages