Delete Defaultuser0 on Windows in 4 Different Ways
Remove the defaultuser0 account by using the command line
Key notes
- Sometimes you might get defaultuser0 after you upgrade your PC to a new version.
- If you want to remove defaultuser0, you need to use Command Prompt or other methods.

Sometimes when installing the new version, you might get a new user account. This is usually Defaultuser0, and many are wondering how to delete Defaultuser0.
This account can cause problems, and many reported that deleted user accounts keep appearing, so let’s see how we can fix this problem.
What is defaultuser0?
- This is a temporary account created by Windows.
- It’s created when installing Windows, and it’s necessary for the installation process.
- Windows out-of-the-box experience creates it if there are no other accounts on the PC.
- The account is password protected, so it can’t be accessed.
How can I delete defaultuser0 in Windows 10?
1. Enable hidden administrator account
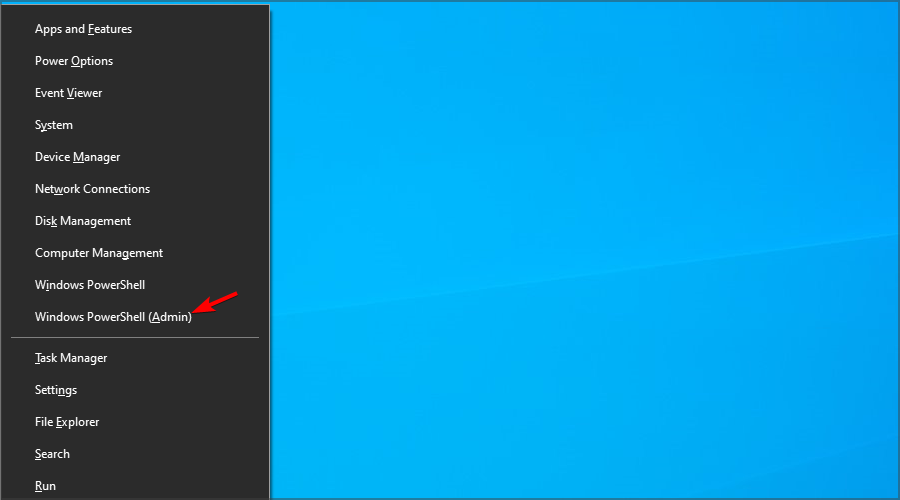
- Press Windows key + X and select Windows PowerShell (Admin).
- Now run the following command:
net user administrator /active:yes
- This will enable the hidden administrator account.
In case this doesn’t work, you need to run this command in Command Prompt in Recovery Mode. We have
After doing this you should have enabled the hidden administrator account. Now you can use administrator account to create new users accounts and delete Defaultuser0 account.
In addition, when you start Command Prompt you can create new account right from there by typing the following lines and hitting Enter after each line:
net user "Jack" xxyyzz /add
net localgroup administrators "Jack" /add
This will create a user Jack with xxzzyy password and add it as an administrator.
2. Delete the Defaultuser0 account
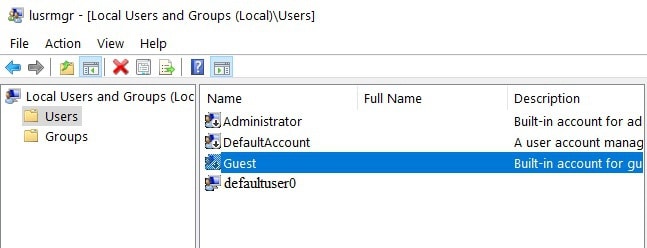
- Go to Start and type lusrmgr.msc. open the Local Users and Groups folder.

- Right-click on the defaultuser0 account and select Delete.
- Go to
C:\Users - Locate the defaultuser0 folder and delete it.
You can also delete it with Command Prompt:
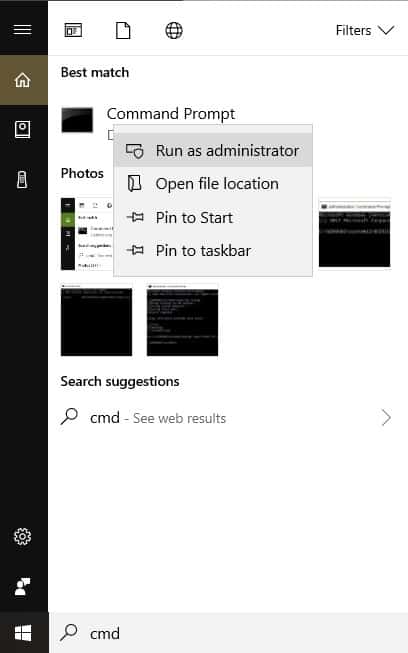
- Go to Start and type CMD. Right-click on the first result and select Run as Admin.
- Type the following command and hit Enter:
net user defaultuser0 /DELETE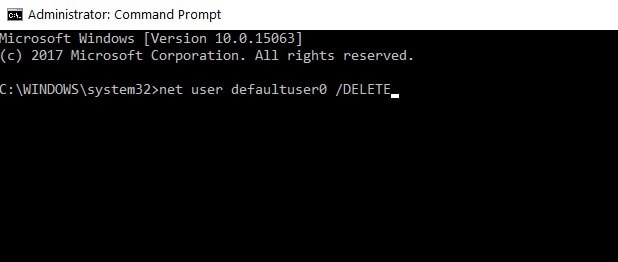
- Close the Command Prompt.
Many reported that they can’t add a new user account, and if you’re having this issue, we have a special guide that can help you.
3. Run Delprof2
- Download Delprof2.
- Run the software.
- It will scan your PC for any inactive accounts.
- Use it to delete defaultuser0.
4. Perform Windows 10 custom install
- To perform this, you’ll need Windows 10 DVD or USB with Windows 10 setup. Just start the setup and follow the instructions.
- When you get to the Which type of installation window, choose Custom install.

- Before using this option make sure that you backup your files.
- Make sure to choose the right partition to install Windows 10, usually the Primary partition. If you don’t format your hard drive, your documents and files will be saved. However, all of your installed applications will be removed.
- Follow the instructions and wait for the installation to finish.
If you don’t know how to make a bootable drive, read our guide on how to create a bootable Windows 10 UEFI USB drive.
Also, if you want to back up your data, read our guide on how to create a Windows 10 backup.
That would be all, I hope this article helped you delete defaultuser0 from your PC.
If you need help concerning a particular upgrade issue, tell us more about the problem you’re experiencing, and we’ll try to find a solution.
Read our disclosure page to find out how can you help Windows Report sustain the editorial team. Read more


Improve this guide


User forum
1 messages