0x80040c01 Installation Error: 5 Ways to Fix It
Use the dedicated program installer troubleshooter to figure things out
Key notes
- Every program has a setup file that's unique to its own system, and if there are any issues during the installation process, you may run into problems like 0x80040c01.
- A quick fix is to reinstall the problematic problem but the trick is to get rid of all its previous installation files.

Installing software on your PC comes easy for most users, but some are plagued by the egads installation failed error code 0x80040c01. The error can occur on any program, most notably the Microsoft Edge and Chrome browsers.
You cannot run the app, so let’s explore how to resolve this issue below.
Why am I getting the error 0x80040c01?
If you are receiving this error message, it means that your computer is missing a required system component and cannot run the program installer properly at this time.
Some of the common causes behind this issue include:
- Problem with the setup file – The setup file for the program you’re trying to install may be corrupt or damaged hence why you cannot install the program.
- Versions conflict – You may have downloaded the software and tried to install it before deleting the previous outdated or damaged copy.
- Corrupt registry – If you had a virus infection and it was able to penetrate into your registry, some entries may have been added or deleted that are causing the error 0x80040c01.
- Firewall interference – Your firewall or antivirus may be blocking the installation because it has flagged the setup file as a risk. This can happen if you downloaded the program from an unverifiable source.
- Insufficient permissions – Although you can install apps without administrative privileges, some require you to use an admin account.
- Software conflict – If you are trying to install software on a computer that doesn’t meet the minimum system requirements then this error will occur.
How do I fix the error 0x80040c01?
A few prerequisites to check off before attempting the complex solutions include:
- Switch to a user account with administrative privileges if you aren’t on one already.
- Check whether your firewall is blocking installations.
- Run Windows Update to get rid of any compatibility issues.
- Check for system file errors.
- Clean out your Registry.
- Try the installation in Safe Mode.
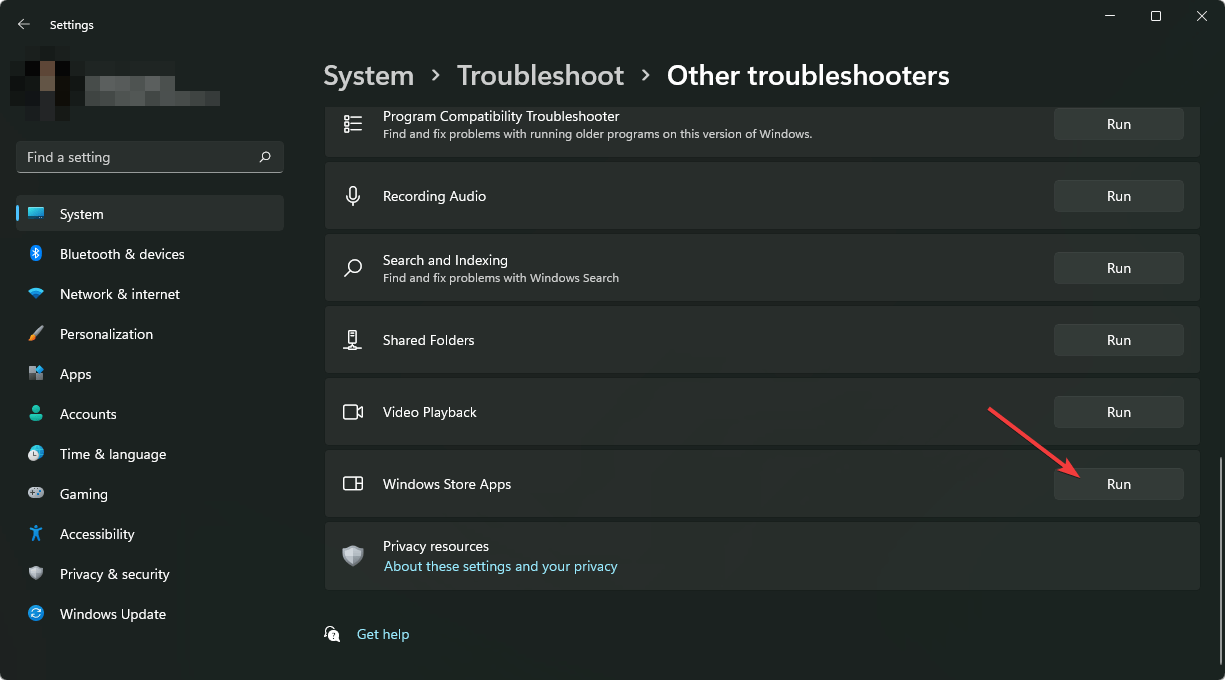
1. Run the Windows Store Apps troubleshooter
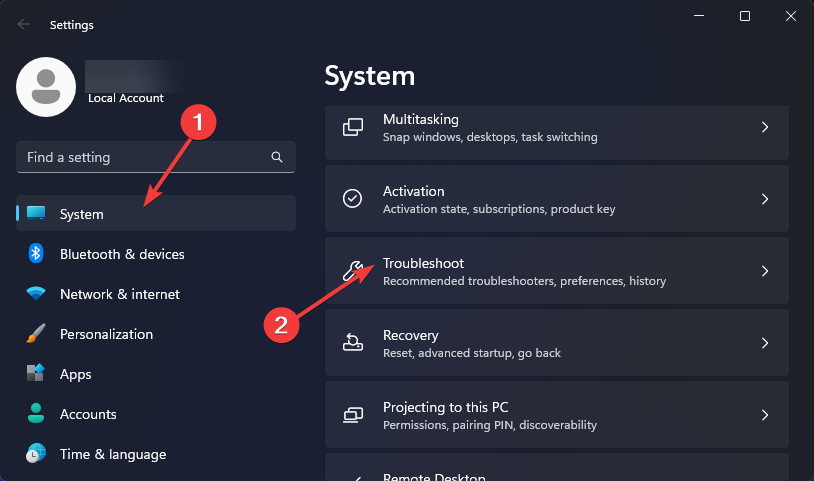
- Hit the Windows key and click on Settings.

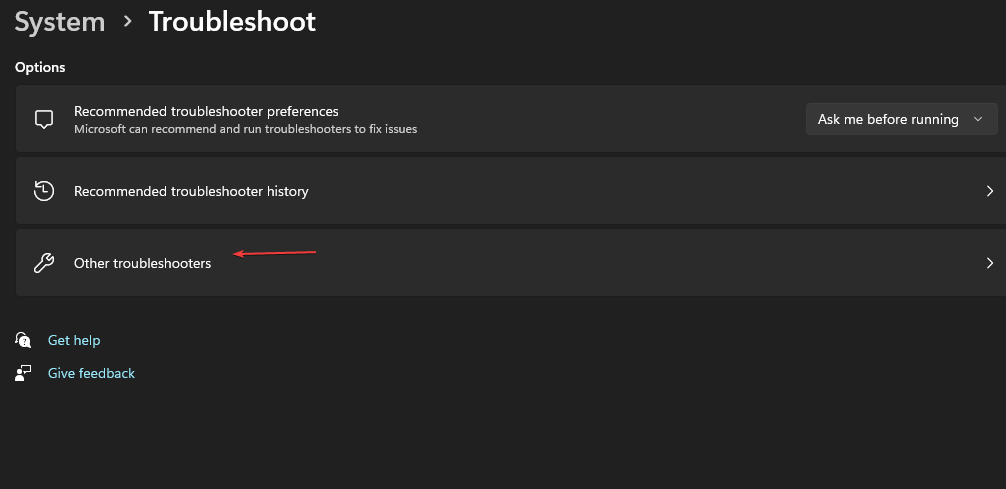
- Click on System and select Troubleshoot.
- Navigate to Other troubleshooters.
- Click the Run option for the Windows Store Apps troubleshooter.
2. Delete the Google folder
- Hit the Windows + R keys to open the Run command.
- Type %localappdata% and hit Enter.

- Locate the Google folder, right-click on it, and select the Delete icon.
You’ll need to have administrator privileges on your computer to delete the Google folder. Alternatively, remove any software remnants that may be causing the 0x80040c01 installation error.
The files in this folder may be corrupt, so they are blocking the installation.
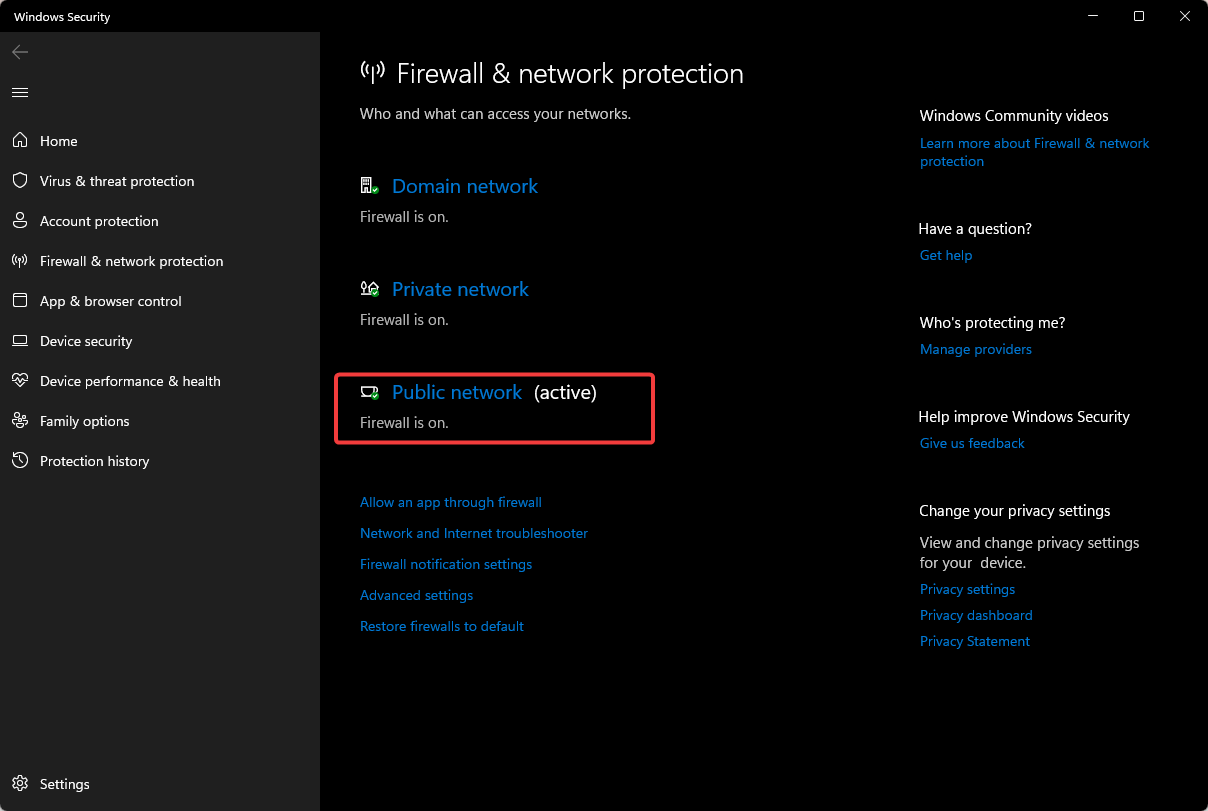
3. Disable your antivirus temporarily
- Hit the Start menu icon, type Windows Security in the search bar, and click Open.

- Click on Firewall & network protection, then select Public network.
- Locate Microsoft Defender Firewall and toggle the off button.
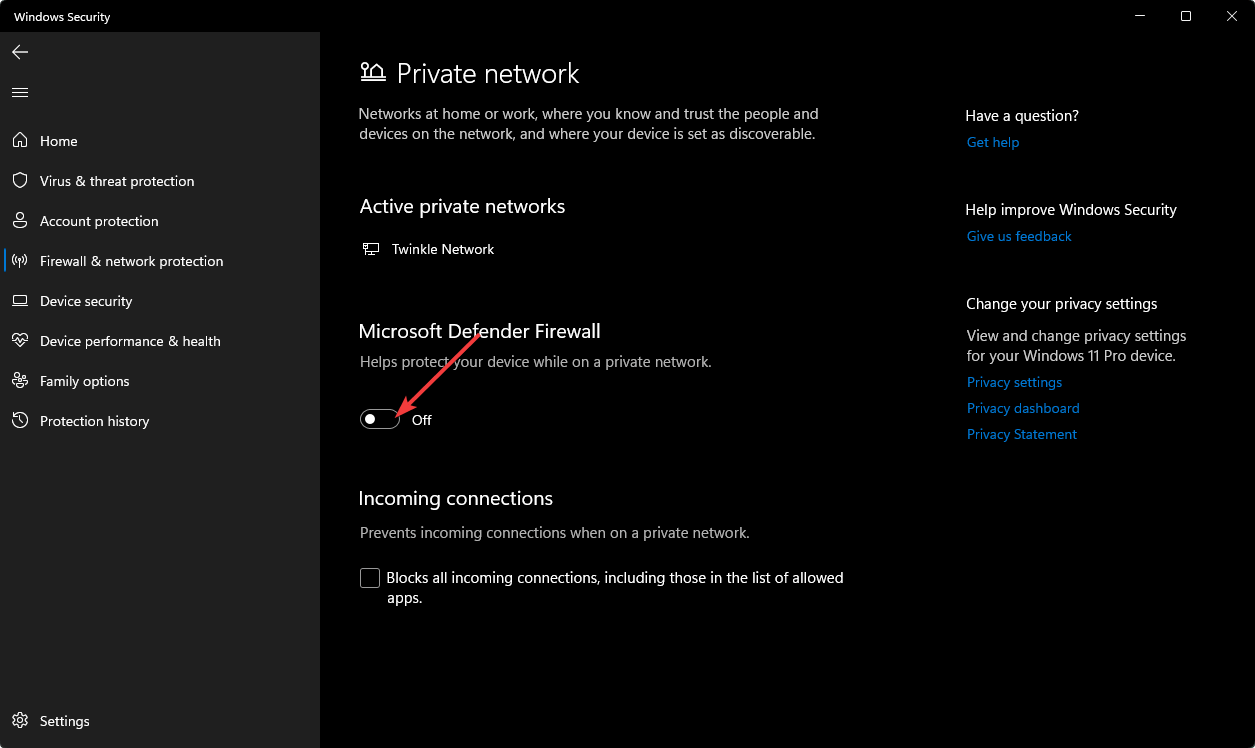
If you have a third-party antivirus present, ensure you disable it too, and try again.
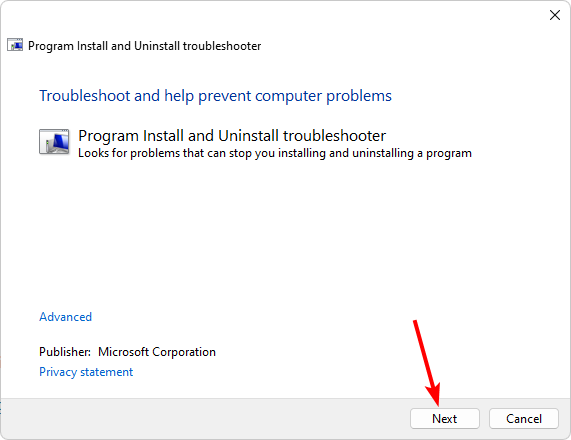
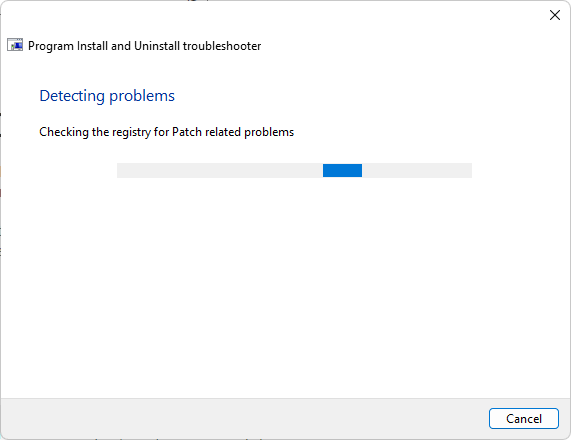
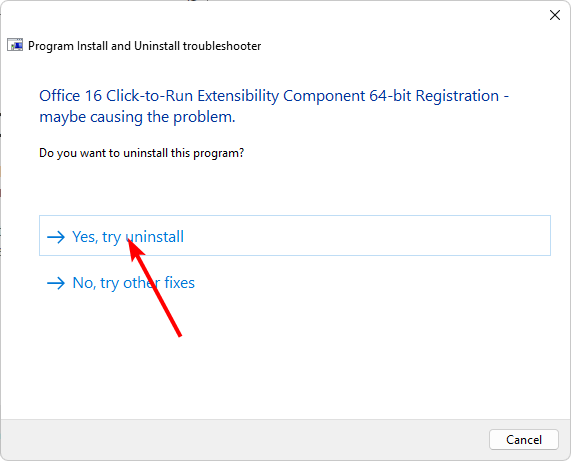
4. Run the Program Install and Uninstall troubleshooter
- Download the Program Install and Uninstall troubleshooter and install it.
- Open it and click on Next.
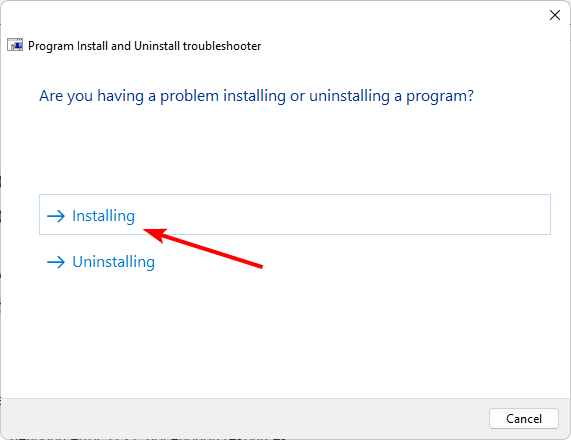
- You’ll be asked whether you have a problem installing or uninstalling a program. Select one option.
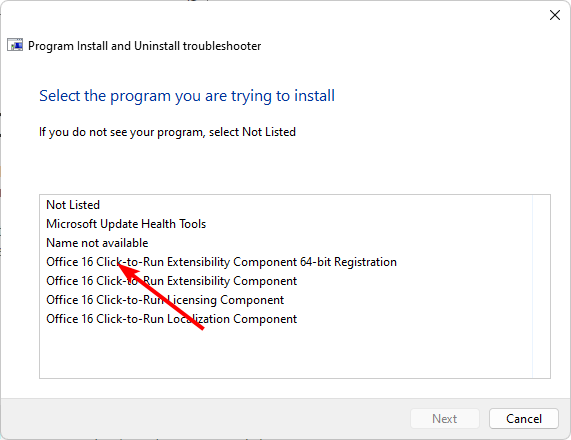
- Next, you’ll be asked to select the program that is not installing. Pick the problematic program from the list.
- The troubleshooter will start scanning for problems.
- Once it completes, you’ll be presented with two options. Pick either and wait for the troubleshooter to recommend fixes.
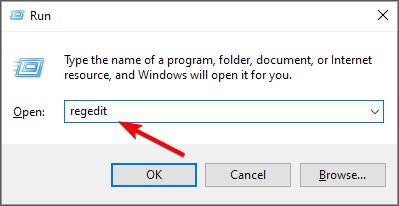
5. Edit the Registry
- Hit the Windows + R keys to open the Run command.
- Type regedit and hit Enter to open the Registry Editor.
- Navigate to the following location:
HKEY_CURRENT_USER\Software\Google\Update\ClientState - Find the following entry 4DC8B4CA-1BDA-483e-B5FA-D3C12E15B62D and Delete.
Remember to exercise extra caution when editing the registry. If you change the wrong thing in the registry, you could end up with a non-working computer or one that runs slower than usual.
There are some situations where editing the registry is necessary, but even in these cases, it’s always best to back up your registry before making any changes.
Hopefully, the steps above have provided you with a means of determining exactly what is causing the 0x80040c01 installation error and how to fix it.
In addition, to prevent such errors, performing some maintenance on your computer regularly can go a long way. If you haven’t performed some type of maintenance in a while like an antivirus scan or cleaning your hard drive, then it’s high time you did so.
That’s it from us but feel free to continue this conversation in the comment section below with any additional thoughts or suggestions.
Read our disclosure page to find out how can you help Windows Report sustain the editorial team. Read more


Improve this guide


User forum
0 messages