LSA Package is Not Signed as Expected: 5 Ways to Fix It
Issues with the Credential guard may affect LSA package
4 min. read
Updated on
Read our disclosure page to find out how can you help Windows Report sustain the editorial team. Read more
Key notes
- The LSA package error can occur due to a bug installed with a recent Windows update.
- Performing a Clean boot on your PC can fix the issue.
- Using the Restore point is easy to get around the problem.
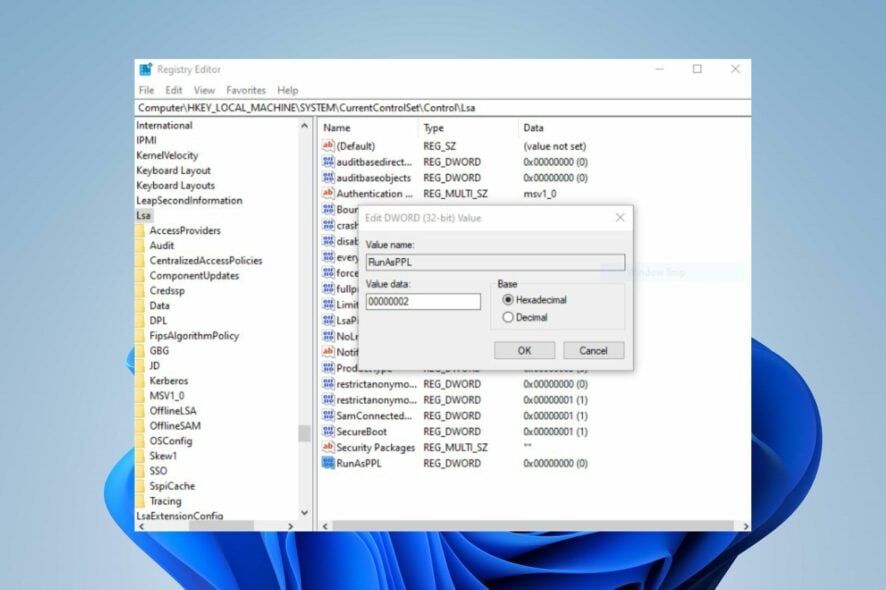
The LSA package is not signed as expected is an error from the Local Security Authority (LSA) security subsystem in the Microsoft Windows operating system. It verifies login attempts and tasks relating to Windows authentication.
However, the error can pop up when you try to remove your password from Windows 11 or during a system reboot.
Why is the LSA package not signed as expected?
The full error log message reads: Event ID 6155: LSA package is not signed as expected. This can cause unexpected behavior with Credential Guard.
The most common cause of the LSA package not signing as expected error is a Windows update error on your PC. Many of our readers reported that the error began when they rebooted their PCs after updating to Windows 22H2.
Furthermore, other factors that can cause this error are:
- Third-party app interference with the LSA security system – Third-party apps like antivirus software can impede the activities of the Local Security Authority. They can block access to the necessary credentials, likewise, they can try to access it without authorization. Also, credential manager software can cause the LSA package error.
- Issues with the Credential Guard – The LSA package is not signed as expected error may appear when there is an issue with the Credential Guard.
Various other factors can cause the issue and vary on different PCs. Nonetheless, you can resolve the problem by troubleshooting your PC.
What can I do if the LSA package is not signed?
Before proceeding with any advanced troubleshooting steps for the error, go through the following preliminary check:
- First, disable the antivirus software on your PC.
- Then, restart Windows in Safe Mode and check if the error appears.
If the above checks are not helpful, try the solutions below:
1. Perform a Clean boot
- Press Windows + R key to open the Run dialog box, type msconfig in the text bar, and click OK.
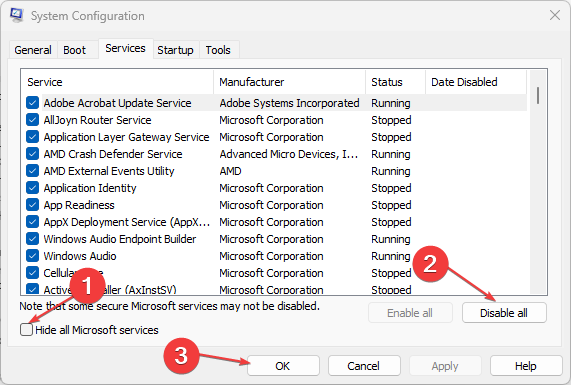
- Navigate to the Services tab and check the box for the Hide all Microsoft services option, then click Disable all.
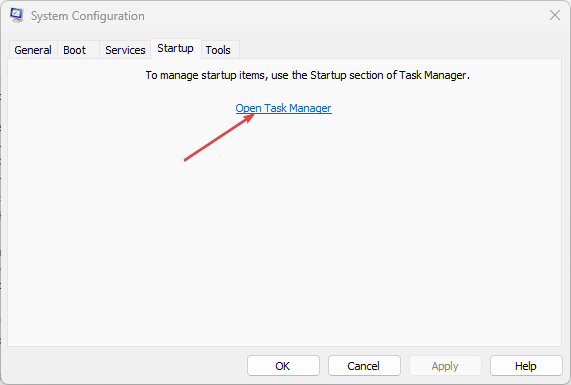
- Go to the Startup tab and click Open Task Manager.
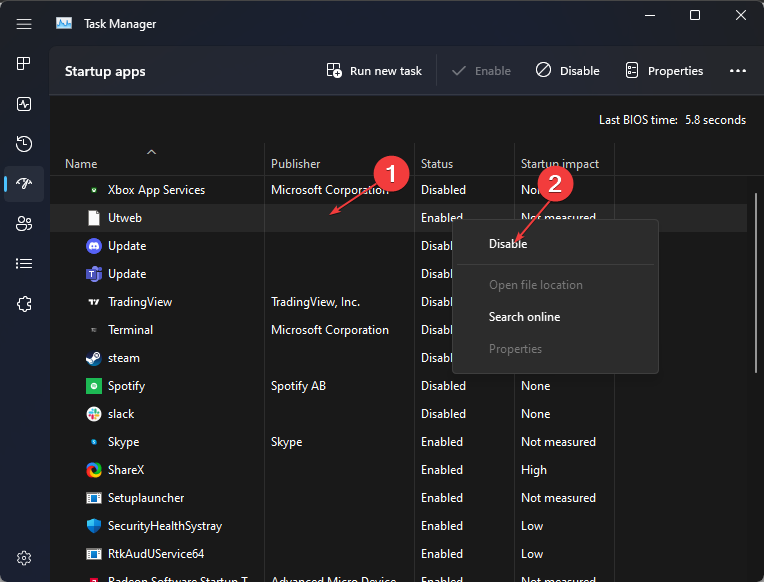
- Select the unnecessary startup programs and click the Disable button.
- Restart your PC and check if the error appears.
A clean boot will prevent any third-party app from launching from the start, blocking any interference from the apps. Also, it’ll disable startup apps that may prompt the error.
2. Uninstall recent Windows updates and update Windows
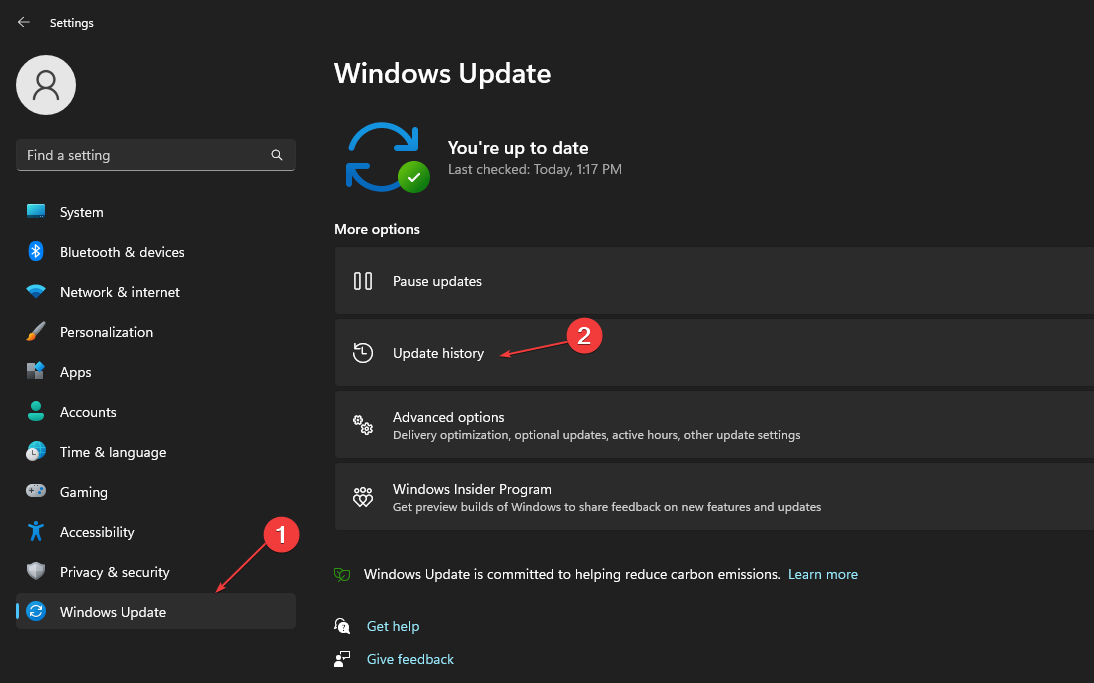
- Press Windows + I to open the Settings app.
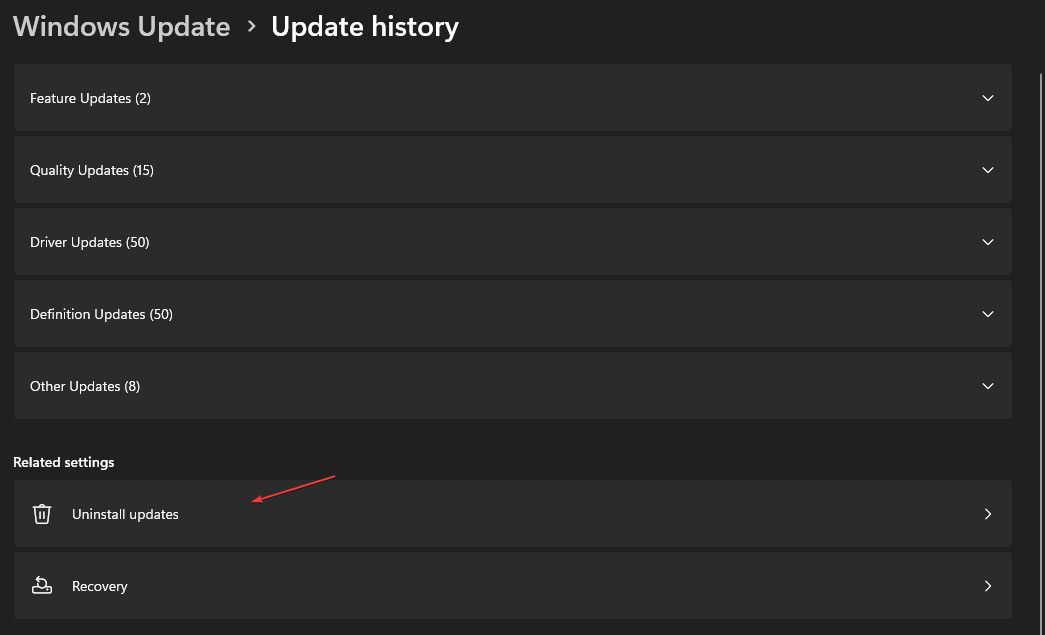
- Click on Windows Update and click the Update history option.
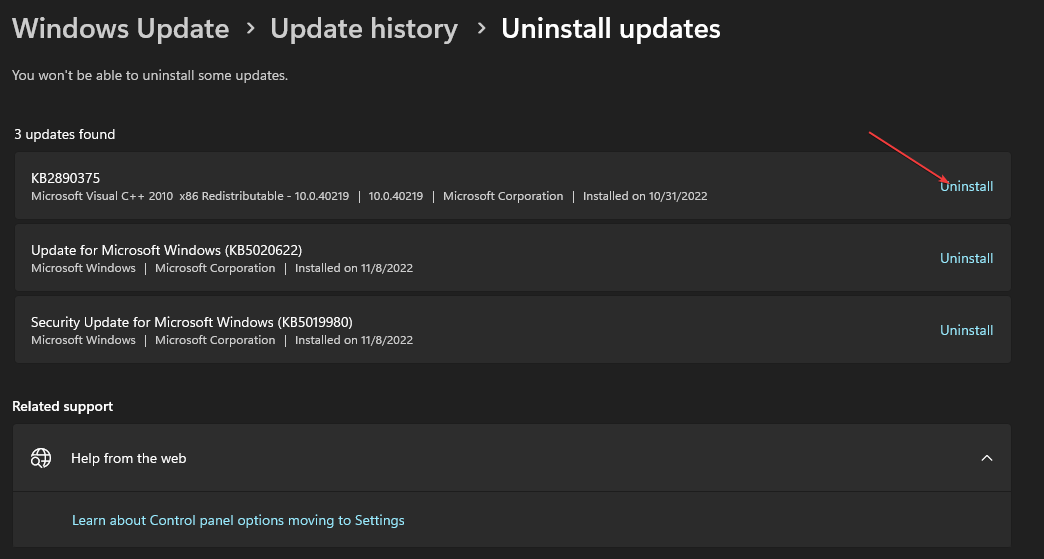
- Click the Uninstall updates button and select the most recent update.
- Select Uninstall.
Uninstalling the recent Windows update should help fix any bug installed with the last patch causing issues with the LSA package.
3. Perform a System Restore
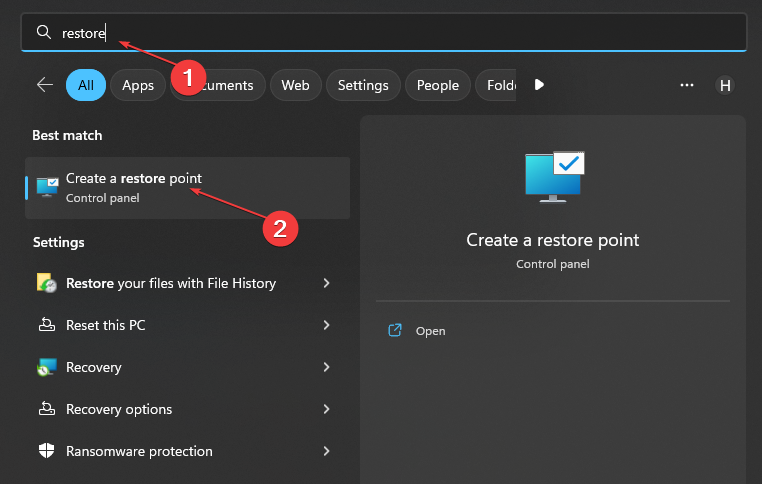
- Left-click the Start button and input restore, then click Create a Restore Point.
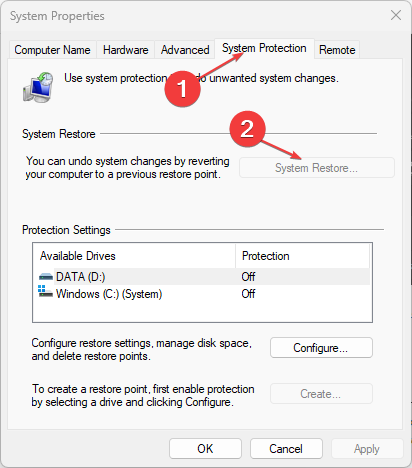
- Navigate to the System Protection tab and click on System Restore.
- Click Choose a different system restore option and click Next to choose a specific Restore Point.
- Select the last time your system worked correctly, then click Next.
- Click the Finish button.
A system restore will backdate your procedure and remove the recently added corrupt items or faulty components causing the issue.
If you have any issues running it, check how to fix Restore Point if it’s not working on your PC.
If you don’t want to perform this manually, then an alternative to this process would be an automated tool.
4. Enable LSA Protection using the Registry
- Right-click the Start button, select Run, type Regedit, and click OK to open the Registry Editor.
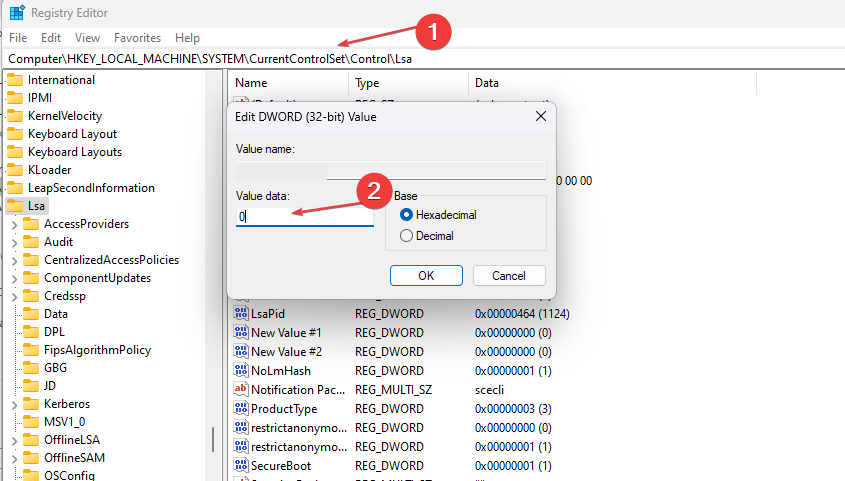
- Navigate to the following registry key:
HKEY_LOCAL_MACHINE\SYSTEM\CurrentControlSet\Control\Lsa - Set the new value to:
- Close the Registry Editor and restart your PC.
Enabling LSAvia the Registry editor will set it to isolate other services.
5. Turn off Credential Guard
- Left-click the Start button, type Regedit in the search box, and select the Registry Editor from the results.
- Navigate to the following keys and set their values to 0 to disable the virtualization-based security:
HKEY_LOCAL_MACHINE\SYSTEM\CurrentControlSet\Control\Lsa\LsaCfgFlags HKEY_LOCAL_MACHINE\SOFTWARE\Policies\Microsoft\Windows\DeviceGuard\LsaCfgFlags - Restart your computer.
Note that you must set the registry settings to 0 to disable virtualization-based security.
Read about disabling Credential Guard on Windows 10/11 if you can get around the above steps. This isn’t the only issue and we have a great guide on what to do if Local Security Authority Protection is off on Windows 11.
In conclusion, we have a detailed guide on turning off password-protected sharing in Windows 11.
If you have further questions or suggestions, you can drop them in the comments below.




User forum
0 messages