How to Share a Folder on a Private Network and Access it From Another PC
The PCs must be connected to the same private network to access the shared folders
4 min. read
Published on
Read our disclosure page to find out how can you help Windows Report sustain the editorial team. Read more
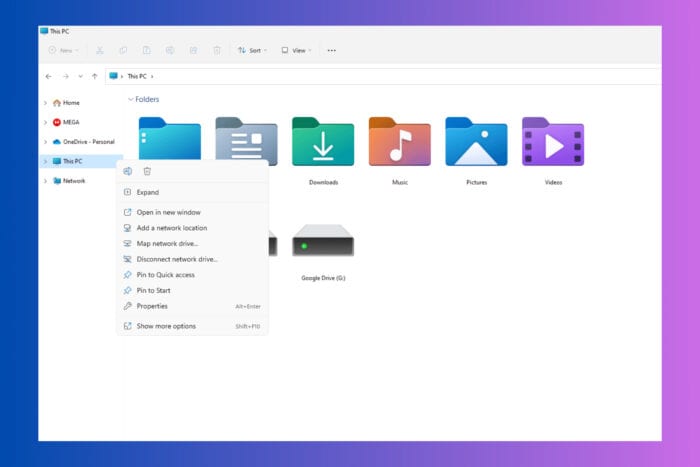
Sharing folders on your private network can make file management and collaboration much easier. Whether you’re working from home or managing a small office network, these steps will guide you through the process of sharing folders seamlessly.
How do I share folders on a private network?
1. Enable File and printer sharing
- Open Settings by clicking the Start menu and selecting the gear icon.
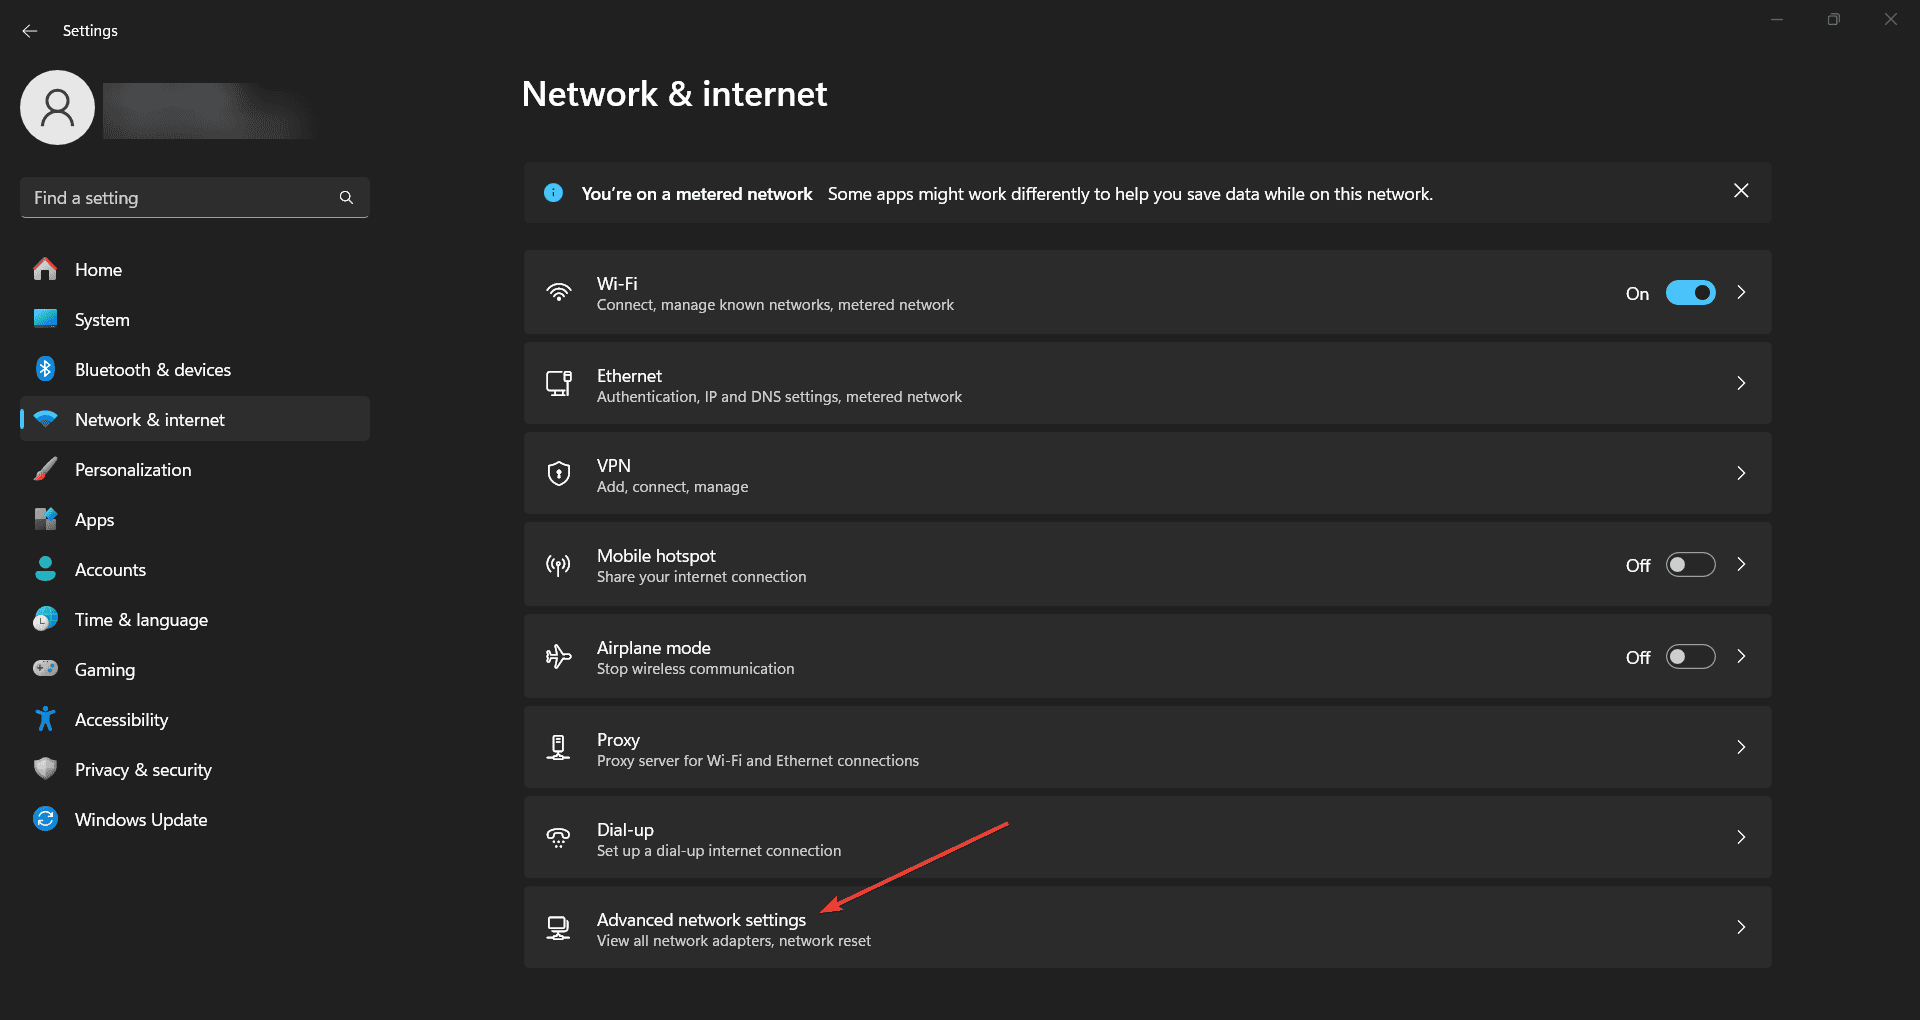
- Click on Network & Internet.
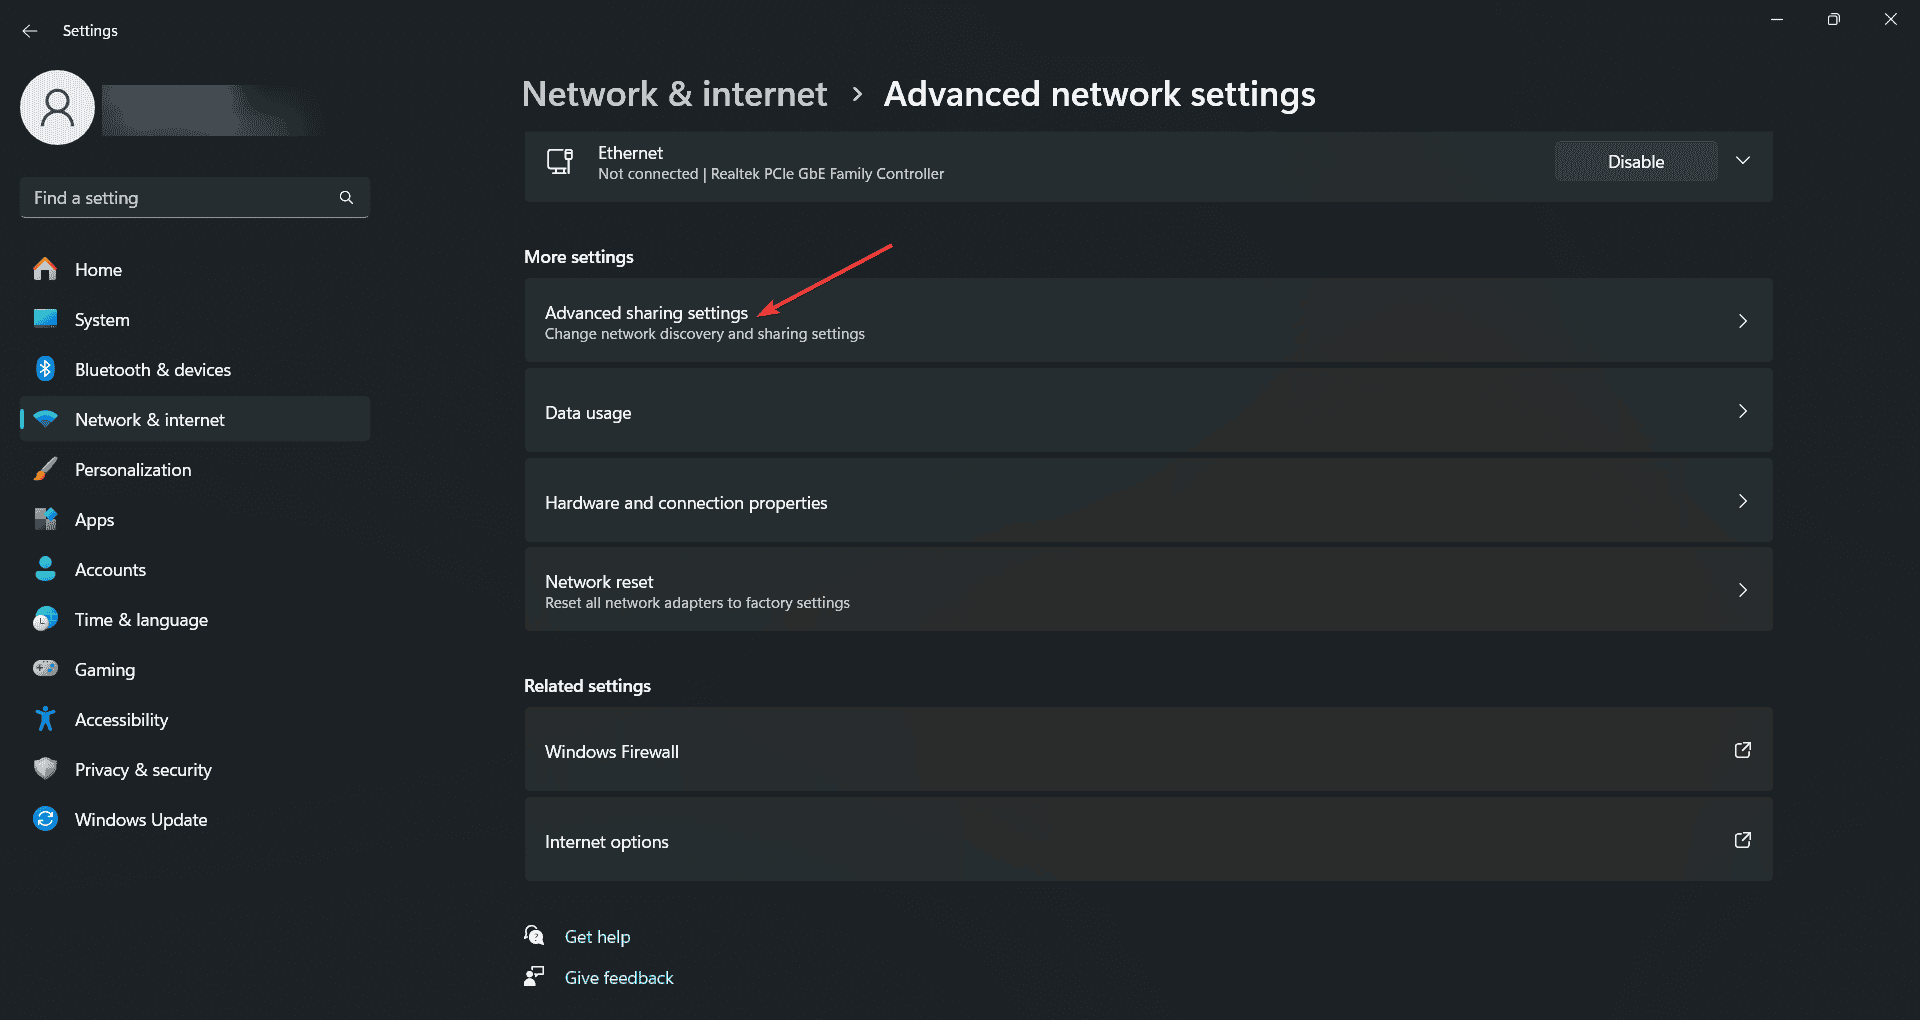
- Scroll down and click on Advanced network settings.
- Next, click on Advanced sharing settings.
- In the the Private networks section, toggle to on Network discovery and File and printer sharing.
- Also check the box for Set up network connected devices automatically.
- Click on Save changes.
This solution ensures that your computer is discoverable on the network and can share files and printers. Enabling network discovery and file sharing is crucial for communication between devices on the same network.
2. Share a folder
- Open File Explorer by clicking on the folder icon on the Taskbar or pressing Windows + E.
- Navigate to the folder you want to share.
- Right-click on the folder and select Properties.
- Click on the Sharing tab.
- Click the Share button.
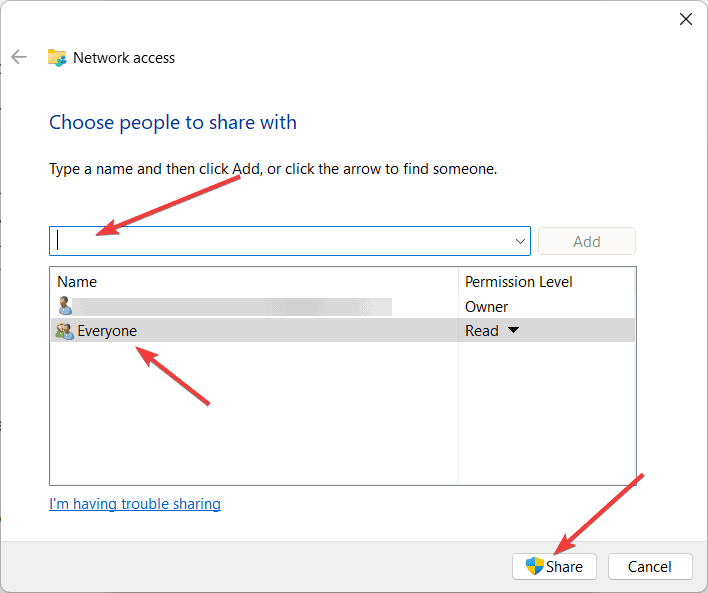
- In the Network access window, either type in the username you want to share with or select Everyone.
- Click on the Add button.
- Choose the permission level (Read or Read/Write) from the drop-down menu next to the username.
- Click on Share, and then Done.
Sharing a folder this way makes it accessible to other devices on the network, allowing them to read or modify files based on the permissions you set. We also have a helpful guide on how to add a new user on Windows 11 so you can share the folder locally.
4. Check network classification
- Open Settings by clicking the Start menu and selecting the gear icon.
- Click on Network & Internet.
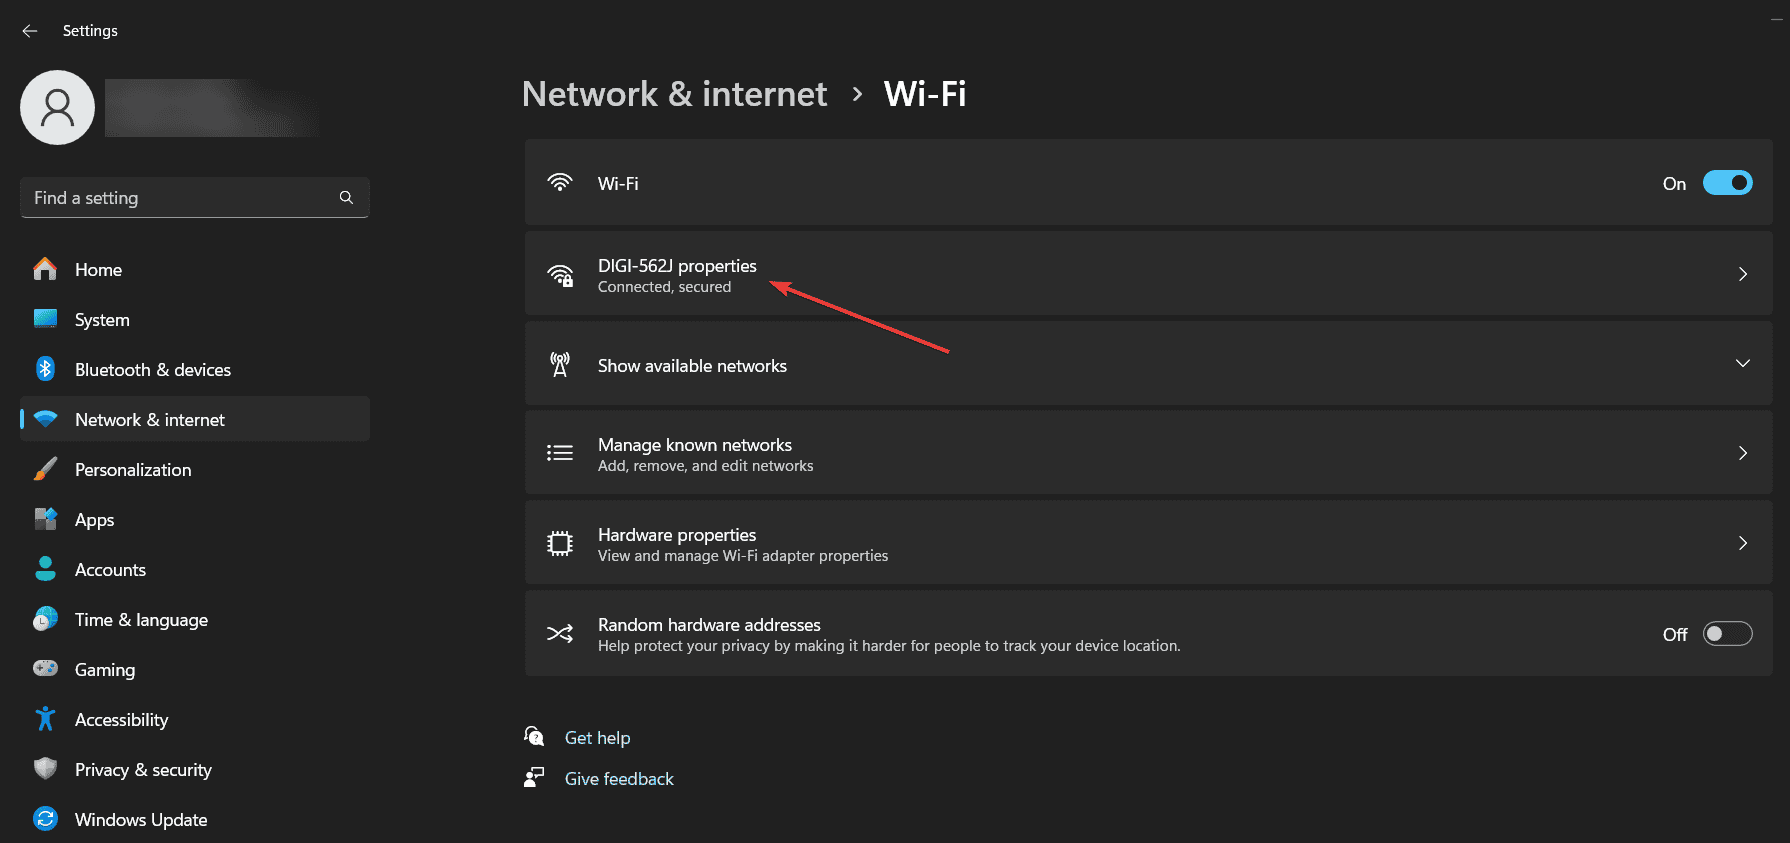
- Click on your network connection, e.g., Wi-Fi or Ethernet.
- Now, click on the network properties.
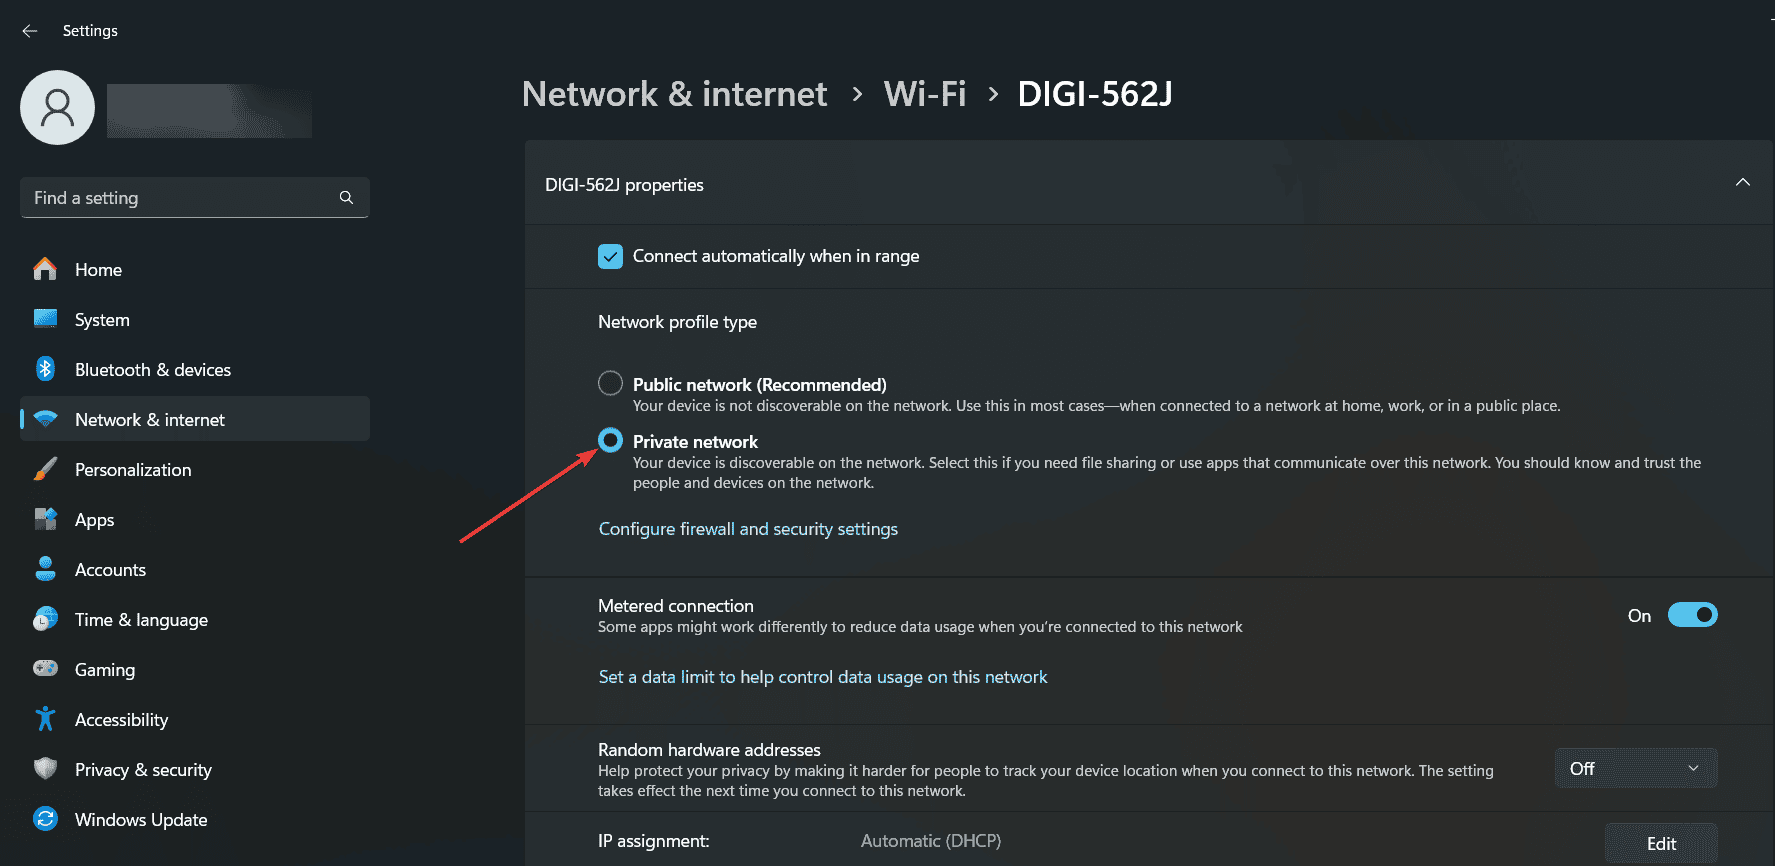
- In the Network window, ensure that the network is classified as Private.
Ensuring that the network is classified correctly (as Private network) allows Windows to treat it securely but also permissibly, providing necessary access to shared resources.
5. Mapping a network drive
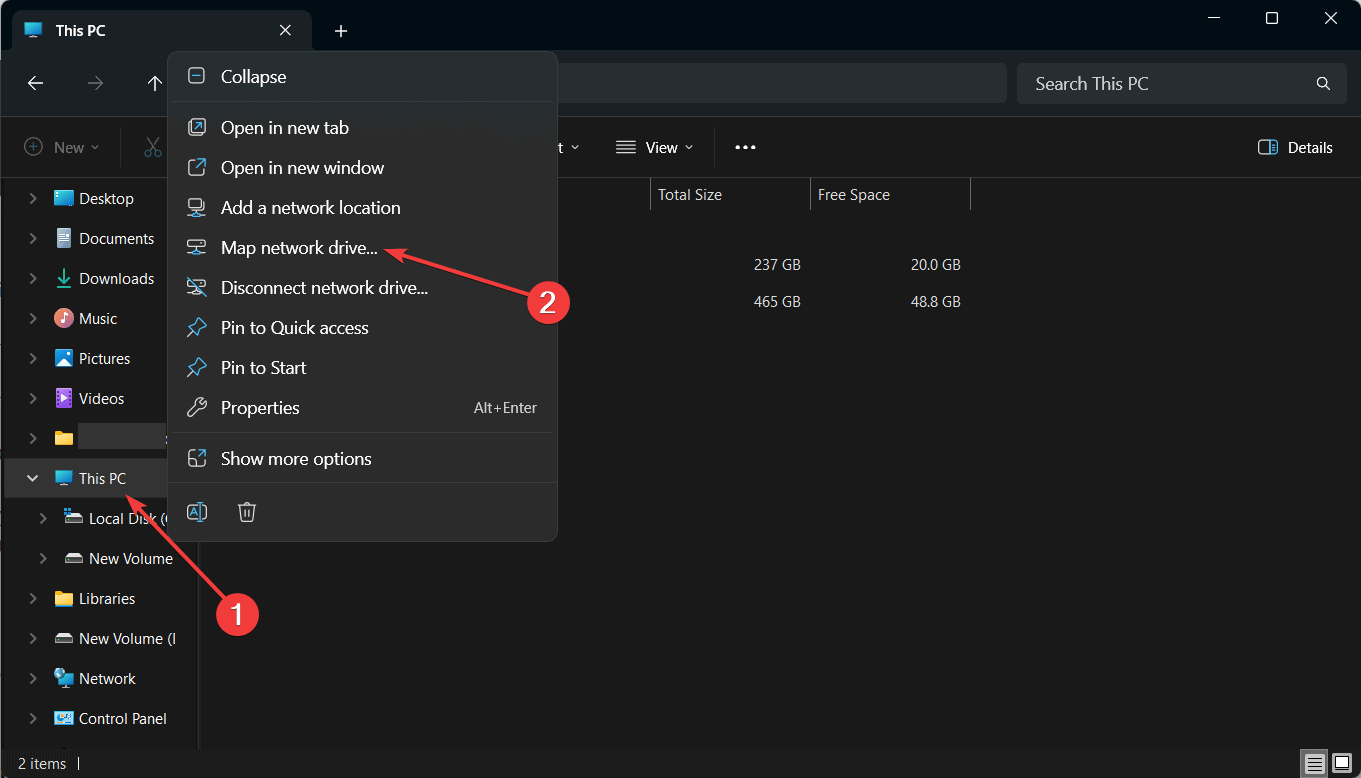
- Press Win + E to open File Explorer.
- Right-click on This PC and select Map network drive.
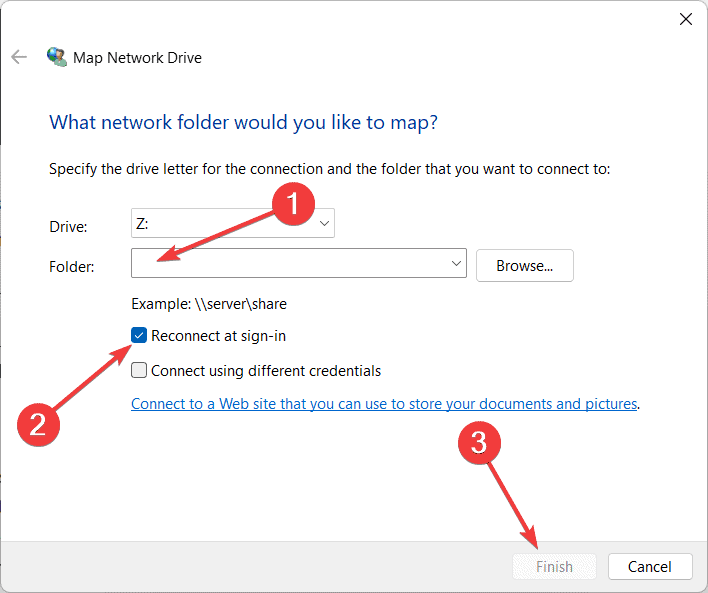
- Choose a drive letter from the drop-down menu.
- In the Folder field, type the shared folder path in the form \\ComputerName\SharedFolder.
- Check Reconnect at sign-in if you want the drive to be mapped automatically each time you log in.
- Click Finish.
Mapping a network drive creates a persistent link to the shared folder, making it convenient to access it as if it were a local drive.
6. Access a shared folder from another computer
- Open File Explorer by pressing Windows + E keys.
- In the left pane, click on Network.
- If prompted to turn on Network discovery, click to enable it.
- Locate the computer name of the shared folder you need to access.
- Double-click on the computer name and navigate to the shared folder.
Accessing a shared folder this way allows you to browse files and folders shared from another computer within the same private network. In other words, only computers that are connected to the same private network can access the shared folders.
When someone will attempt to access the shared folder, this will require the owner PC password. If you want to disable the Password protected sharing, follow the highlighted link for detailed instructions.
By following these steps, you can efficiently share folders on your private network. To prevent future issues, regularly check your network settings and ensure your sharing preferences are up to date.
You might also be interested in reading our guide on what you can do in the Network and sharing center. Also, if the firewall is blocking the network sharing, address this guide to learn how to allow it.
For any other questions, head down to the comments section below.


User forum
0 messages