How to Fix the Shutdown Button Not Working on Windows 10
Use the easy fixes to get the shutdown working effectively again!
7 min. read
Updated on
Read our disclosure page to find out how can you help Windows Report sustain the editorial team. Read more
Some users complaining that their Laptop is not shutting down. Now, it is the Windows 10 shutdown button not working issue that is troubling users.
That problem is usually due to the Start Menu not working. However, it can also be caused by power settings issues, or the button itself is not working. Luckily, we have all the situations covered below.
How do I fix the Shutdown button if it’s not working?
1. Replace the Intel Management Interface driver
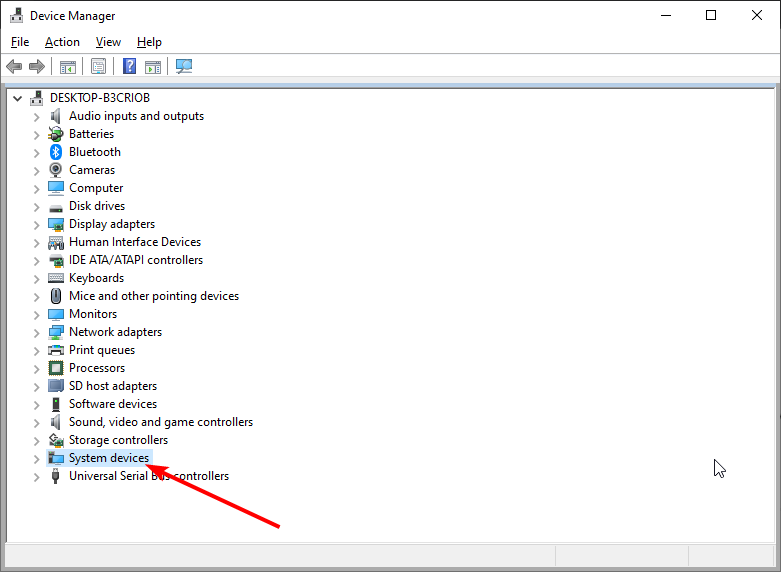
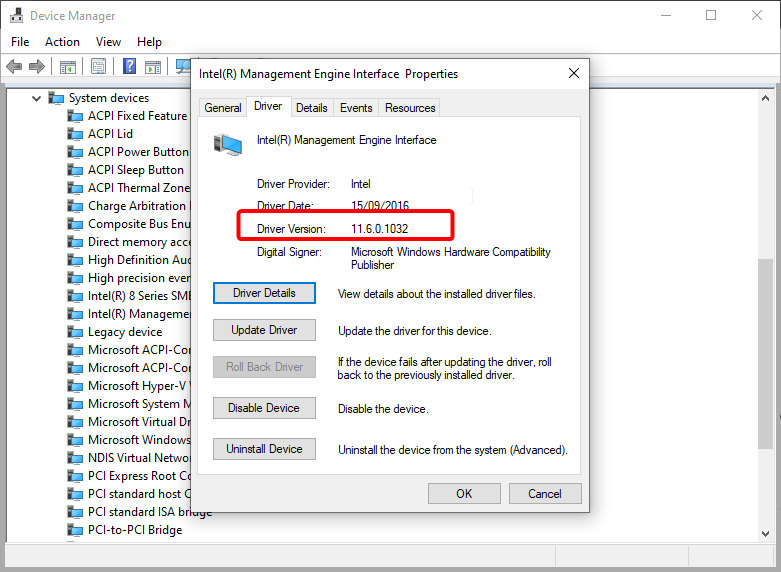
- Press Windows key + X and choose Device Manager from the list.
- Double-click the System Devices option to expand it.
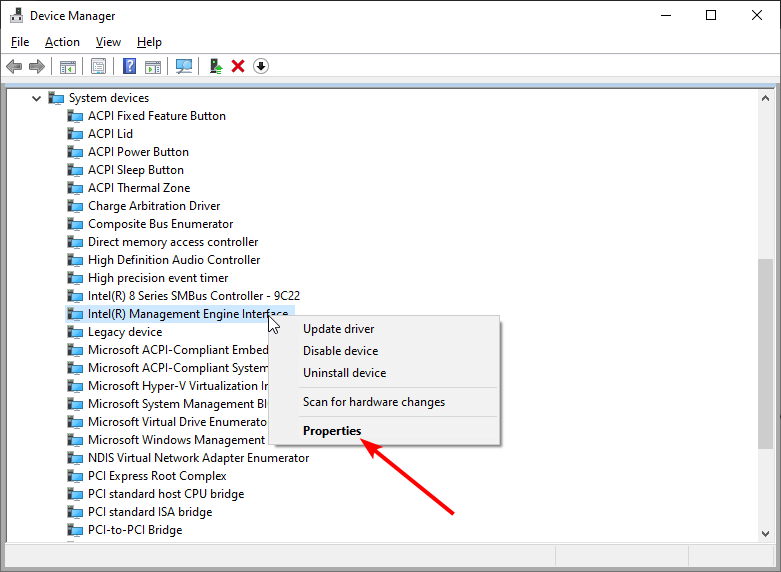
- Right-click Intel(R) Management Engine Interface.
- Choose the Properties options.
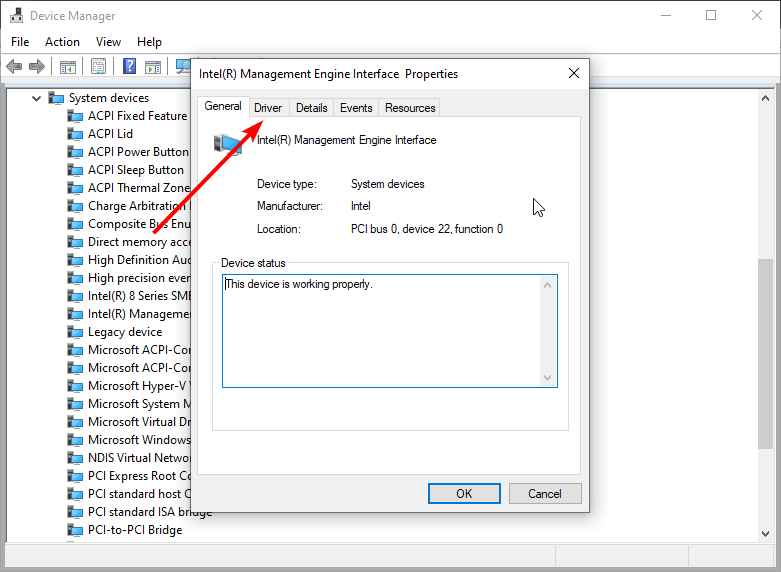
- Now, click the Driver tab in the top menu.
- Check the version of the driver to see if it is 11.
- If it is version 11, go to Intel’s website and download an older or later version.
- When you try to install an older version, you’ll be notified that you already have a newer version.
- Click Yes to overwrite it.
According to the reports, the Intel Management Interface driver can cause the shutdown button not working issue on Windows 10 and 11, so to fix it, you need to install the older version.
Currently, version 11 is the leading cause of some laptop shutdown issues, so let’s check first what version of the driver you’re using.
Otherwise, you can use specialized driver updating software and get the correct driver versions for your PC.
2. Put your computer into sleep mode and then shut it down
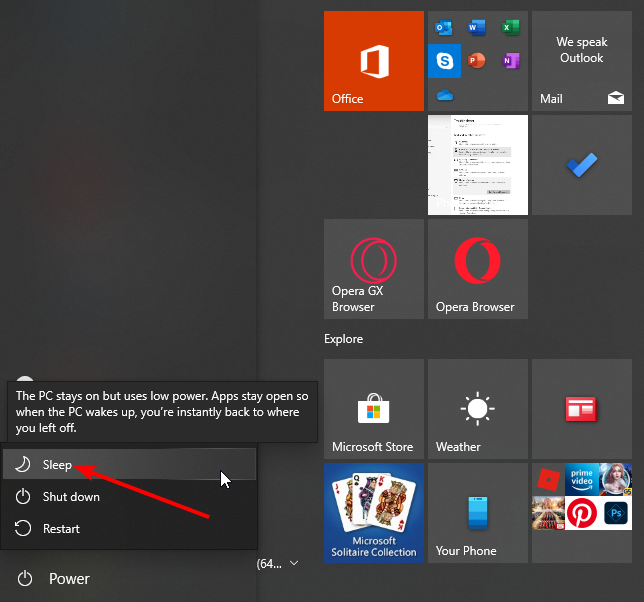
- Press the Windows key and click the Power icon.
- Click the Sleep option.
- Wake the computer from sleep and sign in.
- Now, shut down your PC.
This is more of a workaround that will temporarily fix the shutdown button not working problem. But it’s not a permanent solution, so keep that in mind.
3. Use a shutdown command to shut down your PC
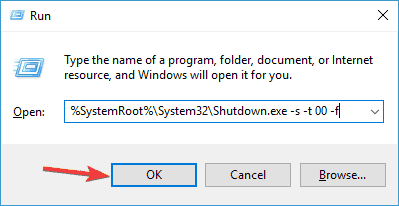
- Press the Windows key + R to open the Run dialog.
- When the Run dialog opens, enter the string below and click OK:
%SystemRoot%System32Shutdown.exe -s -t 00 -f
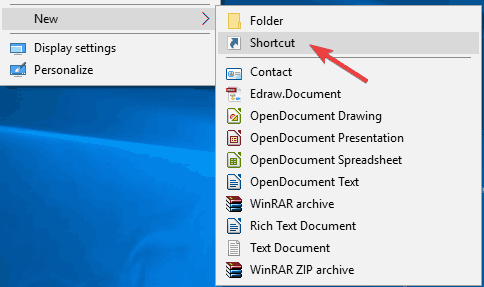
After running this command, your PC should shut down. This is easy to get past the shutdown button not working issue. If this command works, you might want to create a shortcut to run it faster.
This is relatively simple, and you can do it by following these steps:
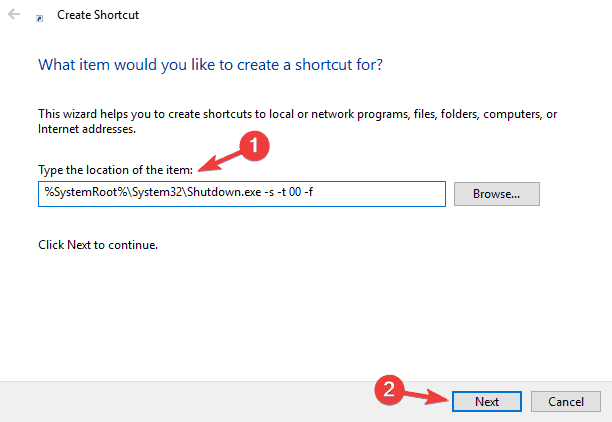
- First, right-click your Desktop and choose New > Shortcut from the menu.
- In the Type the location of the item field, enter the string below, and click Next to continue: %SystemRoot%System32Shutdown.exe -s -t 00 -f
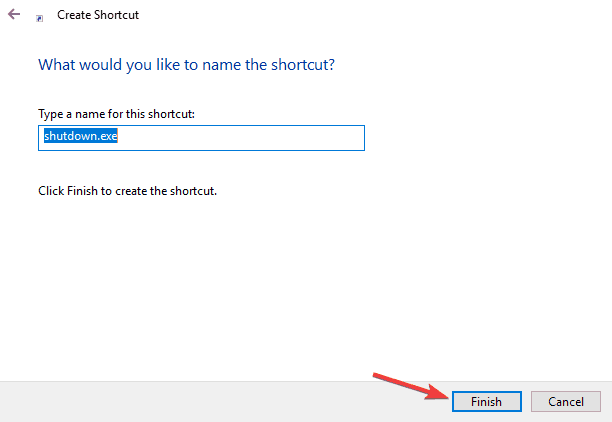
- Change the shortcut’s name if you want, and click on Finish.
You can permanently shut down your PC using the shutdown command. Remember that this is a workaround and won’t fix the core problem. But it will allow you to shut down your PC with just a few clicks.
4. Install the latest updates
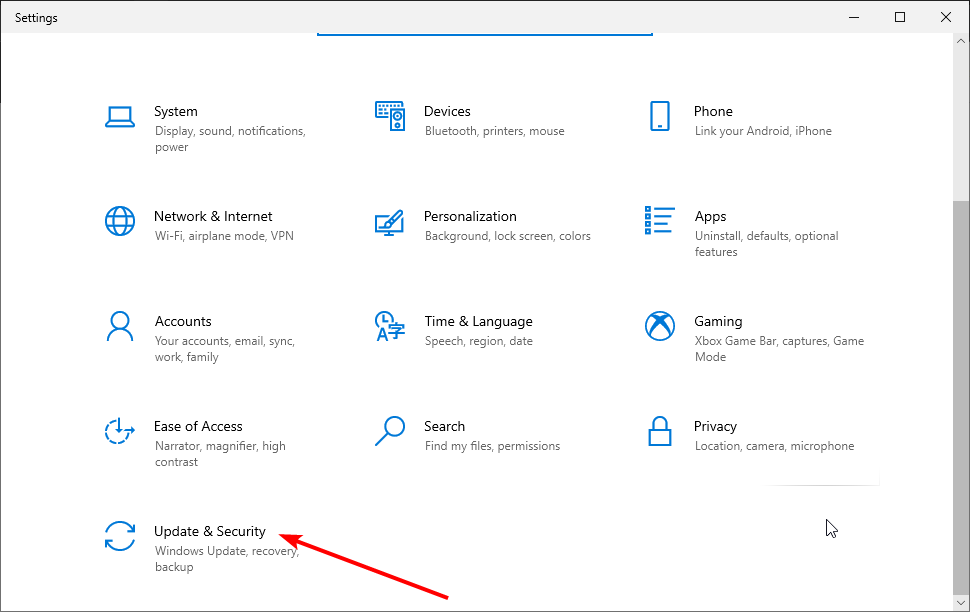
- Press the Windows key + I to open the Settings app.
- Choose the Update & Security option.
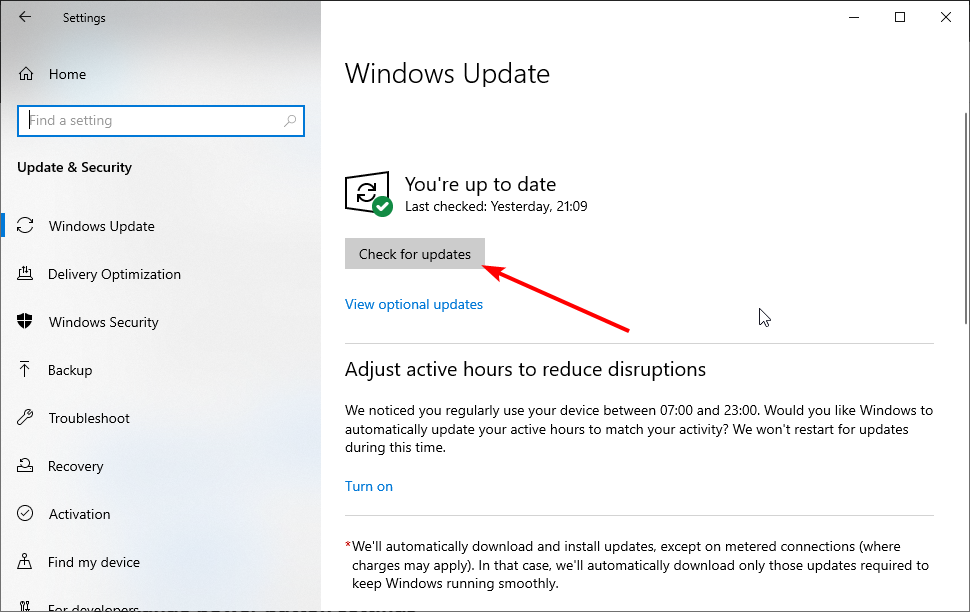
- Now in the right pane, click on Check for updates button.
Windows 10 is a solid operating system, but inevitable glitches and bugs can sometimes appear. For example, if the shutdown button is not working on your PC, the problem might be a bug in your system.
The best way to permanently fix this problem is to install the latest updates. If you can’t open the Setting app in Windows 10, look at this article to solve the issue.
5. Change power button settings
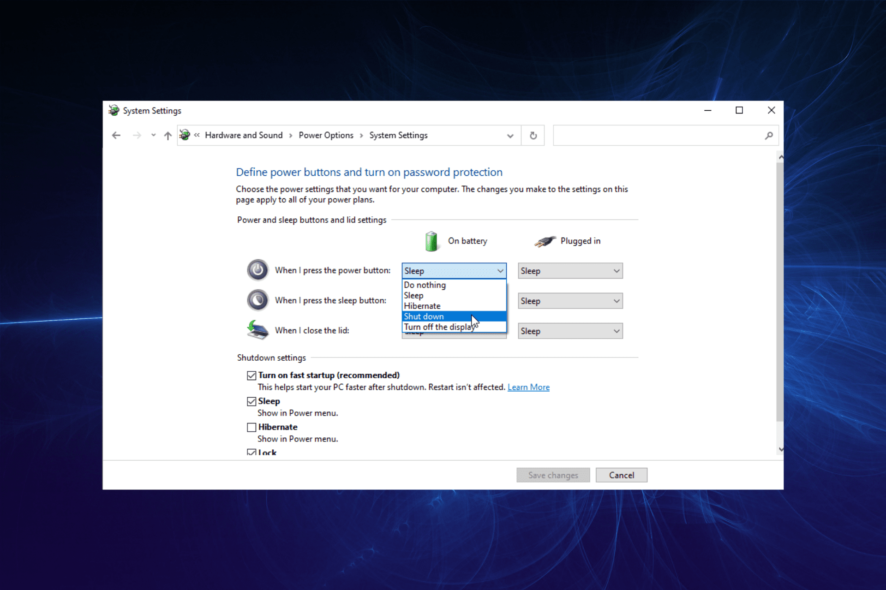
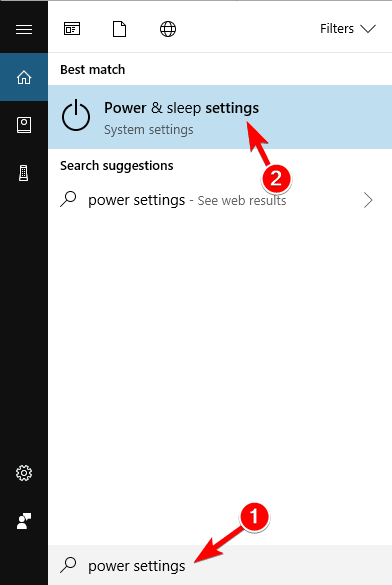
- Press the Windows key + S and enter power settings.
- Select Power & sleep settings from the menu.
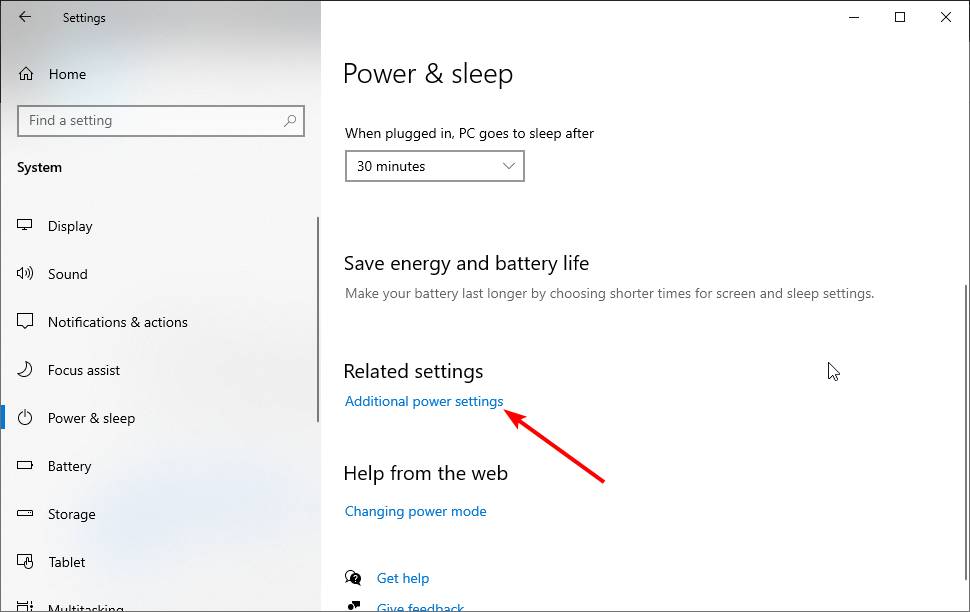
- Click Additional power settings in the right panel.
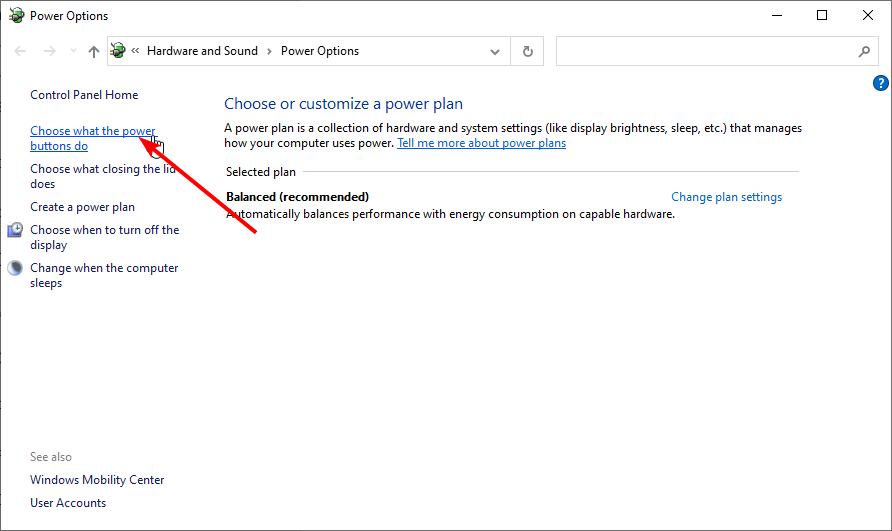
- Now click Choose what the power buttons do from the menu on the left.
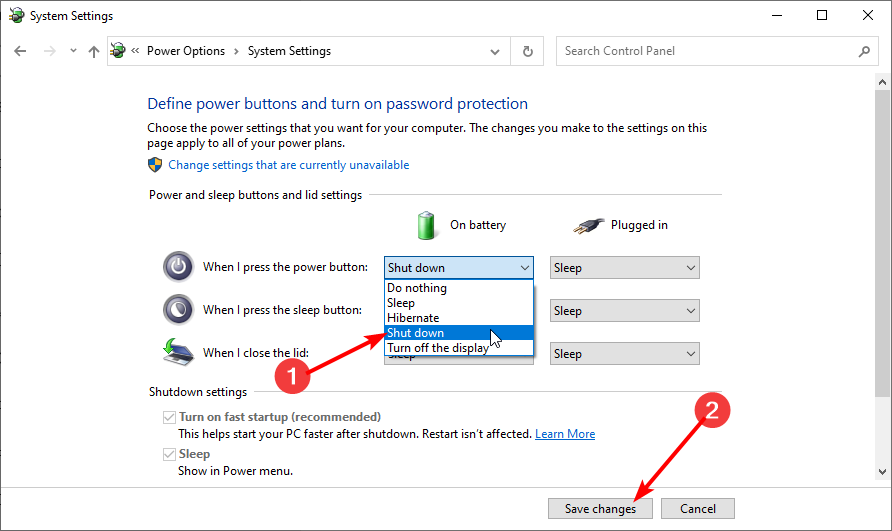
- Set When I press the power button to Shut down.
- Now, click on Save changes.
If the shutdown button is not working on your PC, the problem might be your settings. The power button can be configured to do several things, and sometimes it might not turn off your PC.
After that, your power button will be configured to shut down your PC whenever you press it.
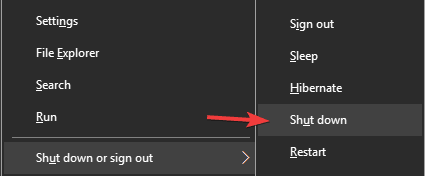
6. Use the Win + X shortcut
If the shutdown button is not working, you might be able to turn off your PC using this workaround. In addition, Windows 10 comes with a helpful menu called Win + X, which holds several valuable shortcuts.
You can easily access specific applications using this menu, but you can also turn off your PC.
After doing that, your PC should shut down without any problems. Remember that this is just a workaround, so you’ll have to use this method whenever you want to shut down your PC.
7. Turn off Fast Startup
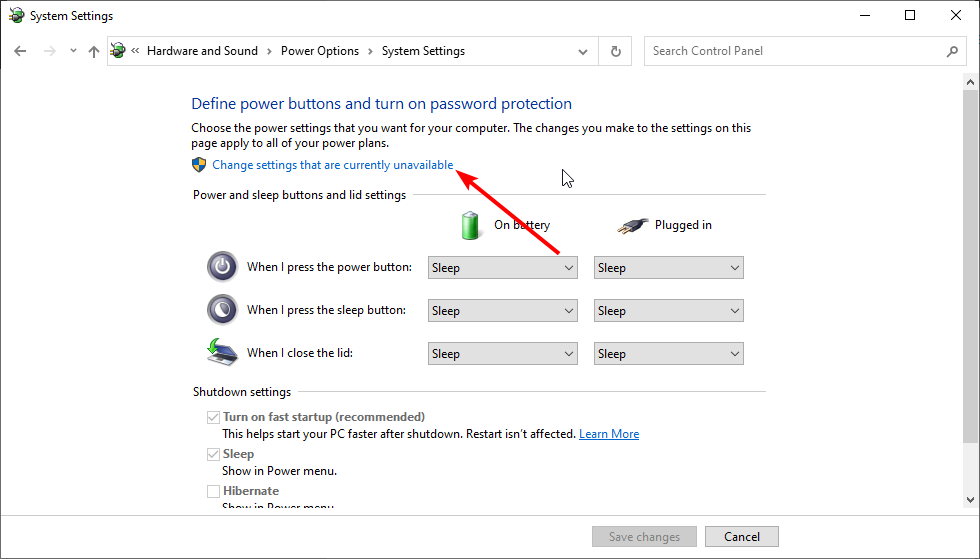
- Press the Windows key, type power settings, and select Power & sleep settings.
- Click the Additional power settings option.
- Select Choose what the power buttons do in the left pane.
- Now, click on Change settings that are currently unavailable.
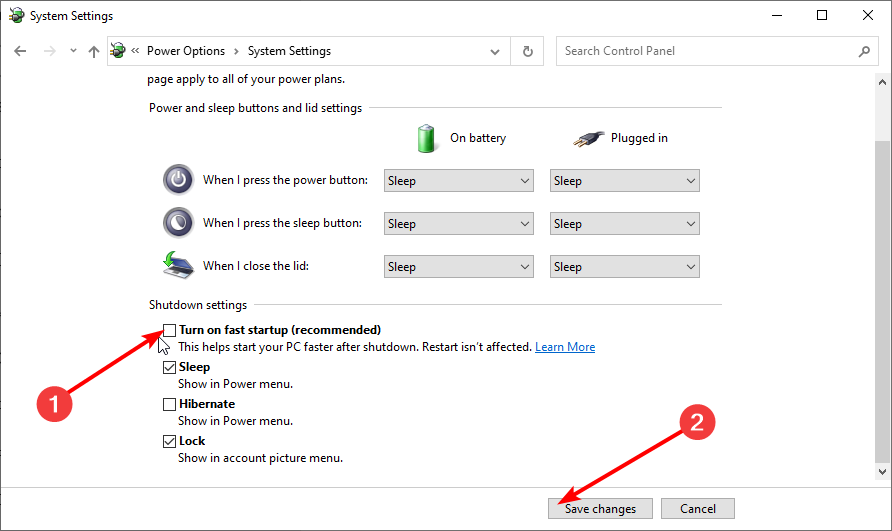
- Uncheck the box for Turn on fast startup (recommended).
- Click the Save changes button.
Windows 10 has an exciting Fast Startup feature that allows your PC to start faster. The feature combines shutdown and hibernation into one, allowing your PC to start faster.
However, specific issues like the shutdown button, not working problem can occur due to this feature. And many users are suggesting turning it off.
After doing that, this feature should be disabled completely. Remember that your PC might boot slower than before after turning off this feature, but the shutdown problem should be resolved entirely.
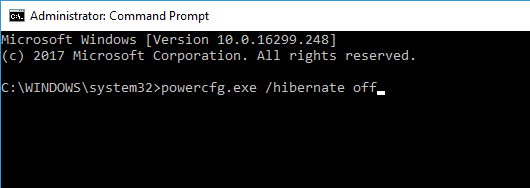
8. Turn off hibernation
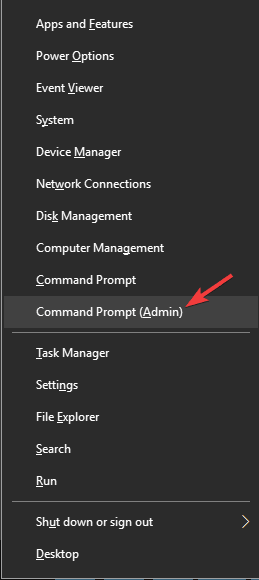
- Press Windows key + X and choose Command Prompt (Admin) or PowerShell (Admin) if Command Prompt is unavailable.
- When Command Prompt starts, enter the command below and press Enter: powercfg.exe /hibernate off
Hibernation is a helpful feature that will shut down your PC and save all your open files allowing you to continue where you left off.
However, sometimes this feature can cause the shutdown button not working issue. After that, the hibernation feature will be turned off, and the shutdown problem will be resolved.
9. Reset your BIOS
If the shutdown button is not working, the problem might be your BIOS configuration. BIOS works as a configuration utility for your PC, and sometimes specific BIOS settings can interfere with your PC and prevent it from shutting down properly.
Many versions of BIOS allow you to choose between several different shutdown modes, and sometimes choosing the wrong one can cause this issue to appear. However, you can fix that problem simply by resetting BIOS to default.
To do that, you need to enter BIOS and select the reset option. To see how to enter BIOS and reset it, we advise you to check your motherboard manual for detailed instructions.
If Windows skips BIOS, solve the issue quickly by following this fantastic guide.
In addition, users have reported that removing Intel Rapid Storage and Intel Security Assist helps fix this problem. So you might want to check out similar fixes just in case your Windows 10 laptop won’t shut down.
Why can’t I shut down my PC?
If your computer is not shutting down, it might be because of broken or corrupt system files. You can fix this quickly by running the Windows built-in repair tools or specialized third-party software.
Also, the issue might be down to the Fast Startup feature. We have shown how to disable this feature in this guide.
That would be all. We hope these solutions helped you to fix the shutdown button not working in Windows 10 issue.
While still on shutdown issues, you can check our detailed guide to schedule automatic shutdown on Windows 10.
For any more questions or suggestions, reach for the comments section below.





User forum
3 messages