Operating System not Found VMware: 3 Ways to fix
Follow this simple guide to get back to using VMware normally
4 min. read
Updated on
Read our disclosure page to find out how can you help Windows Report sustain the editorial team. Read more
Key notes
- This error appears in various shapes and affects multiple types of devices, but the solutions are the same.
- To resolve this problem, you should set your VMware app to use a physical drive instead of a virtual one.
Using any virtualization software, your PC will run two operating systems simultaneously, so issues are bound to appear if the setup is not completed correctly.
Before you start using virtualization on your PC, be sure to check if your PC meets the VMware requirements.
What does the operating system wasn’t found error mean?
An Operating system error is displayed when the BIOS cannot find an operating system on a hard drive from your system. This is just one of many VMware Workstartion errors that you can encounter.
As you can see below, there are plenty of variations to this error, including some common types of devices and error formats.
What are the most common variations for this error?
- An operating system wasn’t found; try disconnecting any drives from VMware – This issue can be caused by the virtual machine trying to boot from another drive.
- Exiting Intel PXE Rom operating system not found VMware – It is the same error with the VMware Intel PXE ROM OS.
- VMWare operating system not found VMDK – The VMDK (Virtual Machine Disk File) was not found and VMware is not booting.
- Operating system not found in VMware Workstation 16 – This issue is present mostly on version 16 of the WMware Workstation.
- The operating system was not found VMware ESXi – The ESXi is an optional component in WMware that partitions into multiple virtual machines.
- VMware operating system not found on Mac – Of course, this error manifests itself on Mac as well.
- The operating system was not found VMware on Ubuntu – You can create a virtual OS on Ubuntu and this error is also present.
Some of our readers also had errors when installing VMware on Windows 11 but this guide will help you fix it.
What can I do if the operating system is not found in VMware?
Before you attempt any advanced troubleshooting, there are a few checks you should perform:
- Unplug any external USB devices from the USB ports of your physical device.
- Check if the ISO image of the OS you’re trying to install on VMware is bootable.
- Restart the VMware application and your system. Take a closer look at our solutions if Windows 11 won’t restart.
- Check if VMware has the latest updates installed.
After going through all these prerequisite measures, let’s fix this problem by going through the solutions below.
1. Set VMware to work with a physical drive
- Open your VMware Workstation.
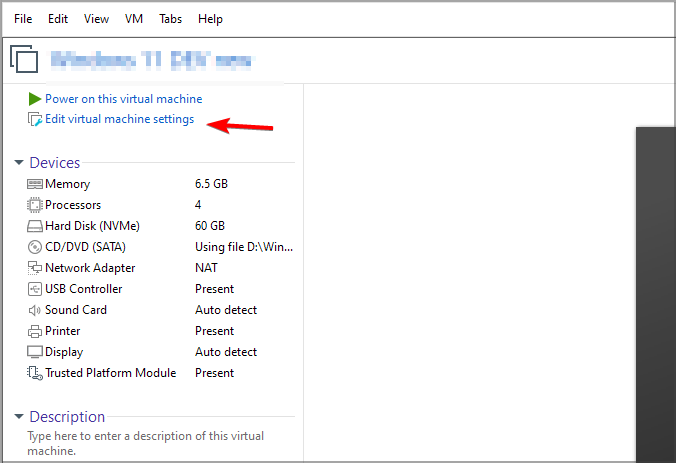
- Select your virtual machine and click on Edit virtual machine settings.
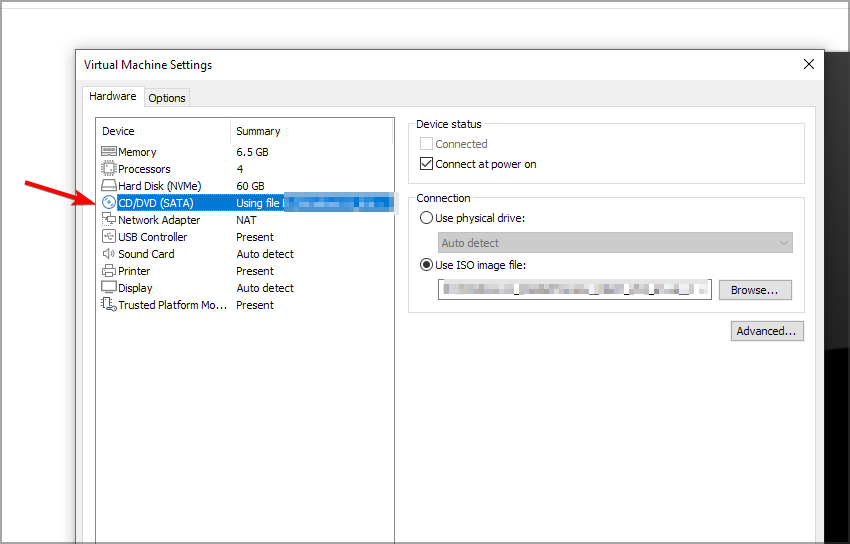
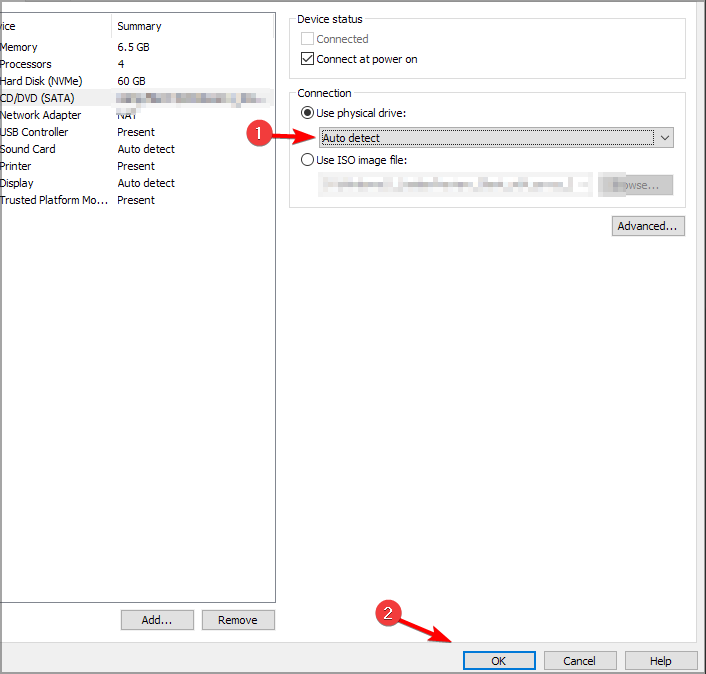
- Scroll down and click on CD/DVD (SATA).
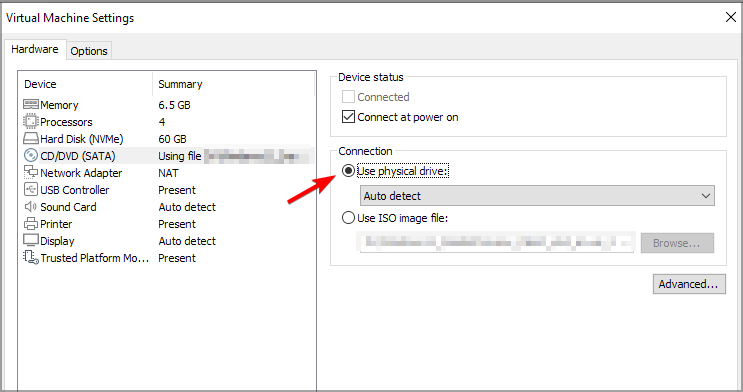
- Change the Connection to Use physical drive on the right-hand panel.
- Select the optical drive you’re inserting the installation media from the drop-down menu, and click OK.
- Start the Virtual Machine again.
2. Recreate the Virtual Machine
- Open your VMware application.
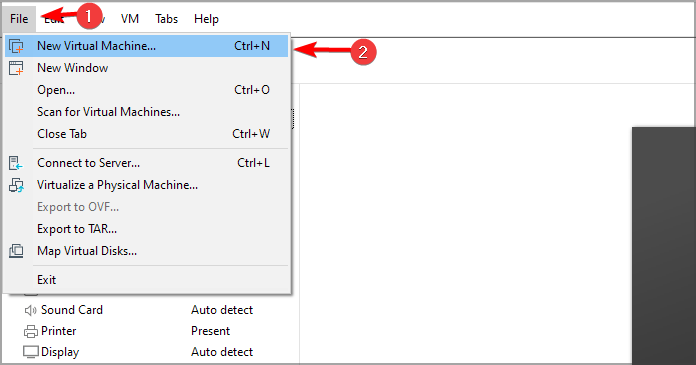
- Click on File and select New Virtual Machine.
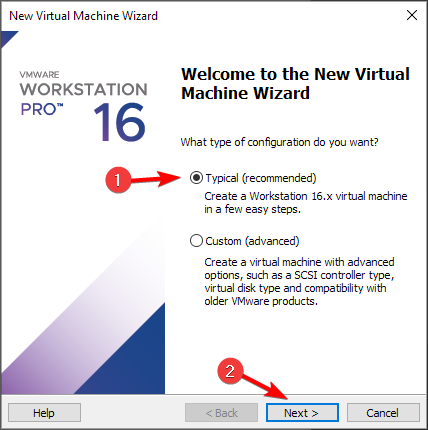
- Select Typical (recommended) and click Next.
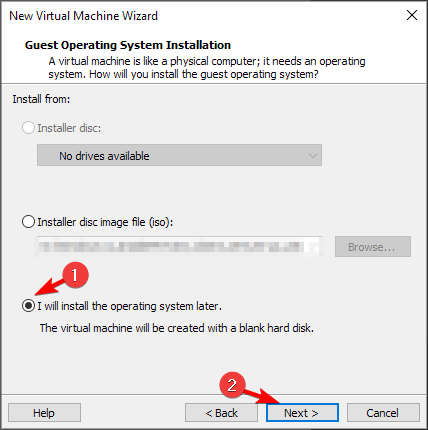
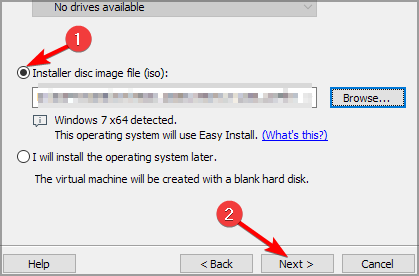
- Choose your installation media or select I will install the operating system later and click Next.
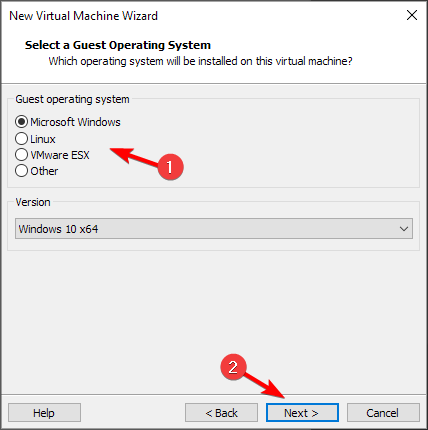
- Select the operating system and click on Next.
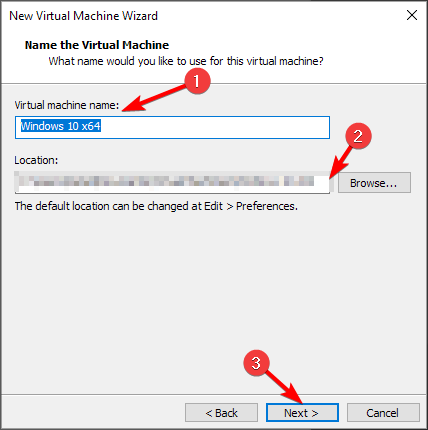
- Set a name for your VM and a location where the VM will be saved. After that, click Next.
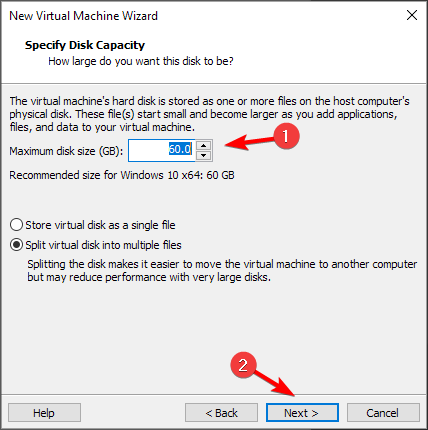
- Set the maximum disk size and the method of storing before clicking on Next.
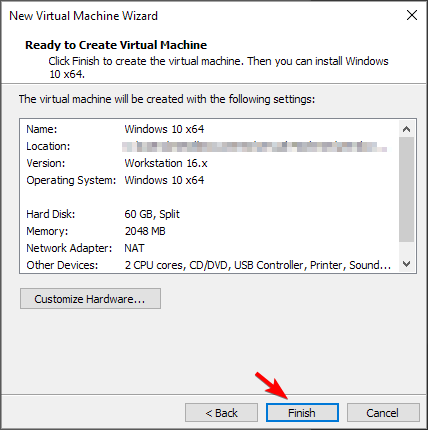
- Customize hardware settings if needed. Once done, click on Finish.
If you need to change the network adapter in VMware, we have a special guide that will help you with that.
3. Reinstall the OS in VMware Workstation
- Go to File and select New Virtual Machine.
- Select the Typical option, and click Next.
- Choose the Installer disc or Installer disc image file (ISO) if you face a disc drive or a file that contains the OS.
- Set a name for your VM and a location where the file will be saved, and click Next again.
- Define how storage should occur with this VM, and then press Next.
- Adjust the hardware settings if needed and click Finish.
- Follow any on-screen prompts to begin the OS installation.
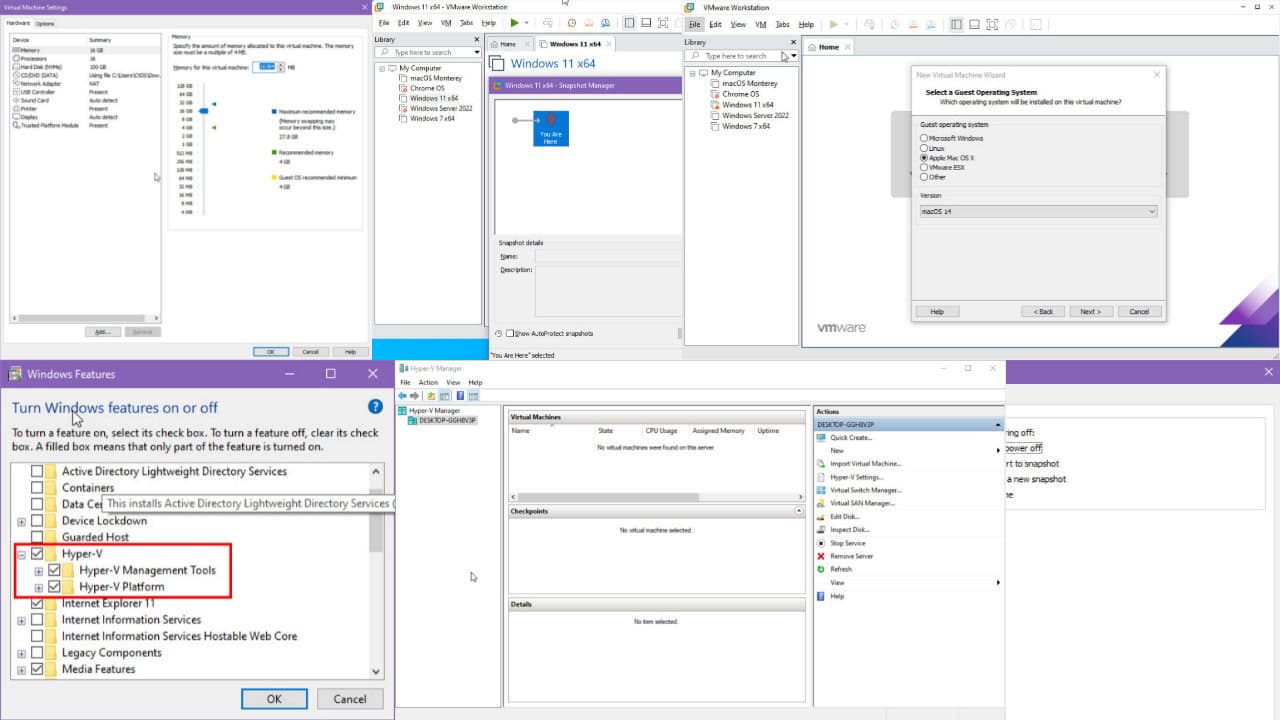
Speaking of hardware customization, if you’re planning to run Windows 11 on a virtual machine, you need to enable TPM in VMware first. Don’t worry, it’s simpler than you think. Also, don’t hesitate to check out the best VMs that work perfectly on Windows 11.
Check the link below if you want to learn more about the VMware Workstation and how to download and install it.
⇒ Get VMware Workstation for Windows
In case you have additional problems with this software, our VMware isn’t working guide will surely help you fix them.
Please let us know in the comments section below if you have any more questions or suggestions about this topic.


User forum
1 messages