Advanced IP Scanner Error 110 and 123: 5 Ways to Fix Them
Check expert solutions to get the software working in no time
![]() 4 min. read
4 min. read
![]() Updated on
Updated on
Share this article

Improve this guide
Read our disclosure page to find out how can you help Windows Report sustain the editorial team Read more
Key notes
- Advanced IP Scanner runtime errors appear due to incorrect installation path, missing permissions, or a corrupt app cache/system files.
- Most of the messages mean that the software could not locate its executable file on startup or that the file itself is damaged.
- To fix things, you can repair corrupt system file, clear the app cache, update the OS, or run as administrator, amongst other solutions.
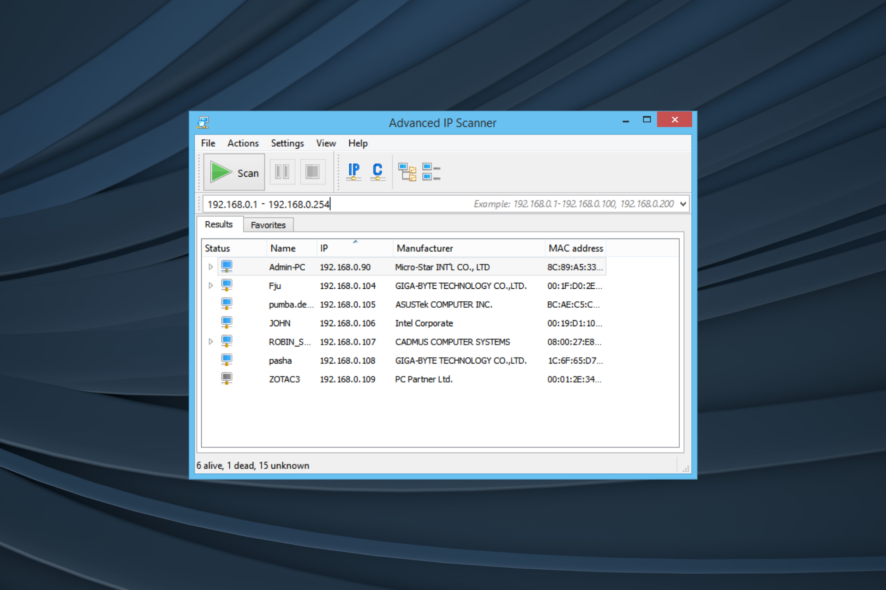
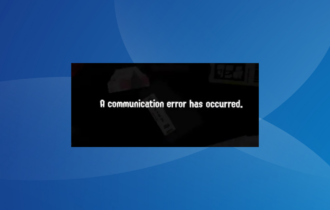
The Advanced IP Scanner is a network software to detect computers on the same network and manages them, everything in just a few clicks. Though advanced, the software is prone to errors, especially errors 110 and 123.
These are encountered during installation and while running the software and are usually due to a problem at the user’s end. If you, too, have been encountering these, let’s find out how to fix Advanced IP Scanner errors 110 and 123.
What causes Advanced IP Scanner error?
Here are a few reasons Advanced IP Scanner is not working and throwing an error instead:
- Problems with the installation path: One of the common reasons users encounter the error is an incorrect installation path, and changing it does the trick.
- Tool blocked by software or firewall: The built-in or third-party firewall can often block applications from accessing the network, triggering the Advanced IP Scanner error 110.
- Missing permissions: You need administrative privileges to run applications that require accessing critical parts of the OS, and in the absence of these, the app might throw an error instead.
- Improper installation: Several trivial issues during the installation, if not rectified right away, can lead to more serious problems in the future.
How can I fix Advanced IP Scanner errors Error 110 and 123?
Before we start making changes to the PC, here are a few quick things you can try first:
- Run Advanced IP Scanner (or its setup) with administrative privileges. To do that, simply right-click on the program, and choose Run as administrator.
- Check for any pending Windows Updates and install them.
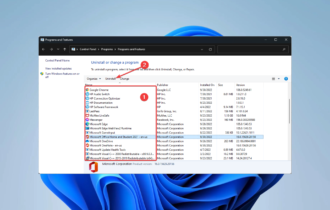
- If the Advanced IP Scanner stopped running after installing another program, uninstall the app, and then check whether things work out. Or you could perform a system restore.
If none work, head to the fixes listed next.
Advanced IP Scanner error 110
1. Whitelist Advanced IP Scanner in the firewall
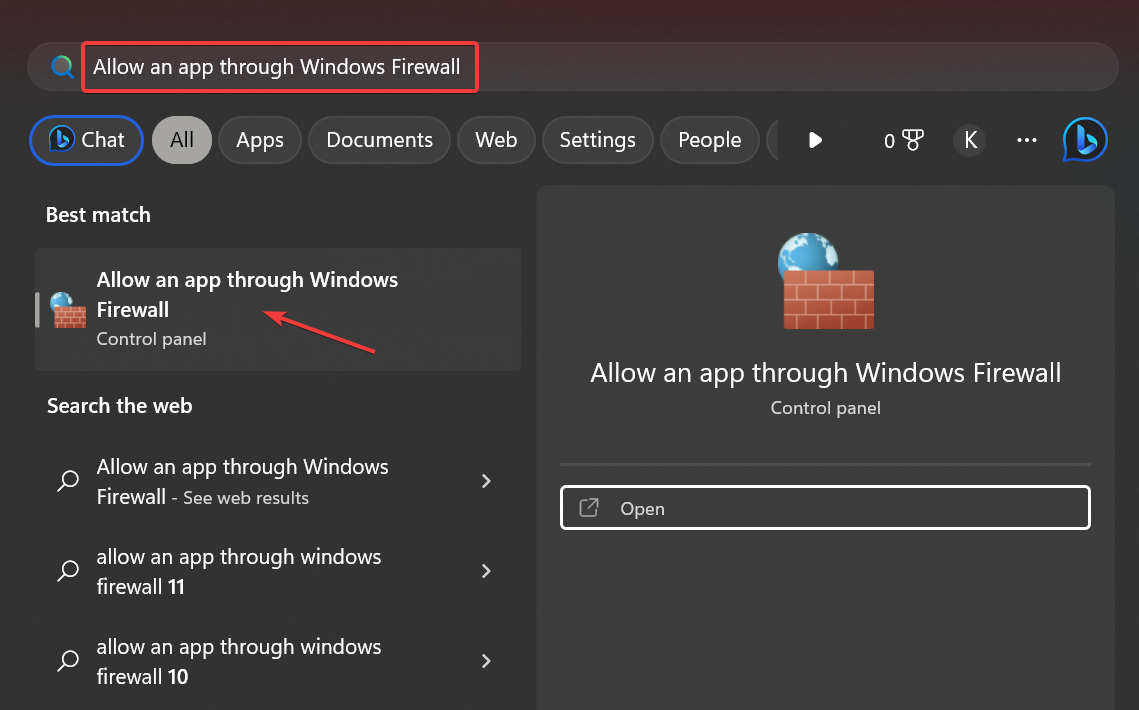
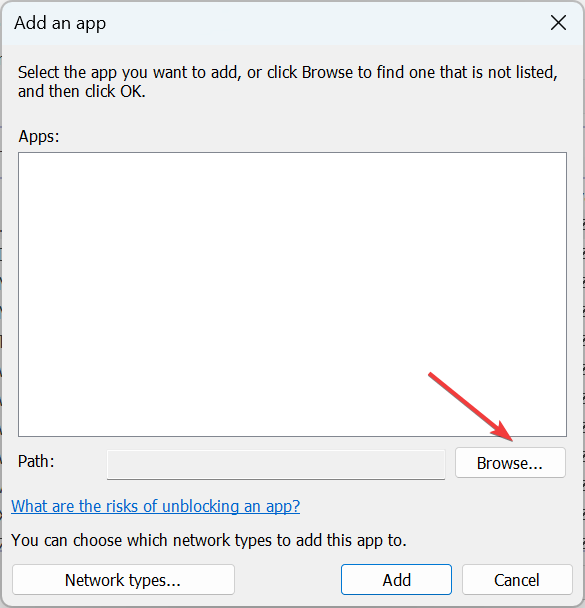
- Press Windows + S to open Search, type Allow an app through Windows Firewall, and click on the relevant result.

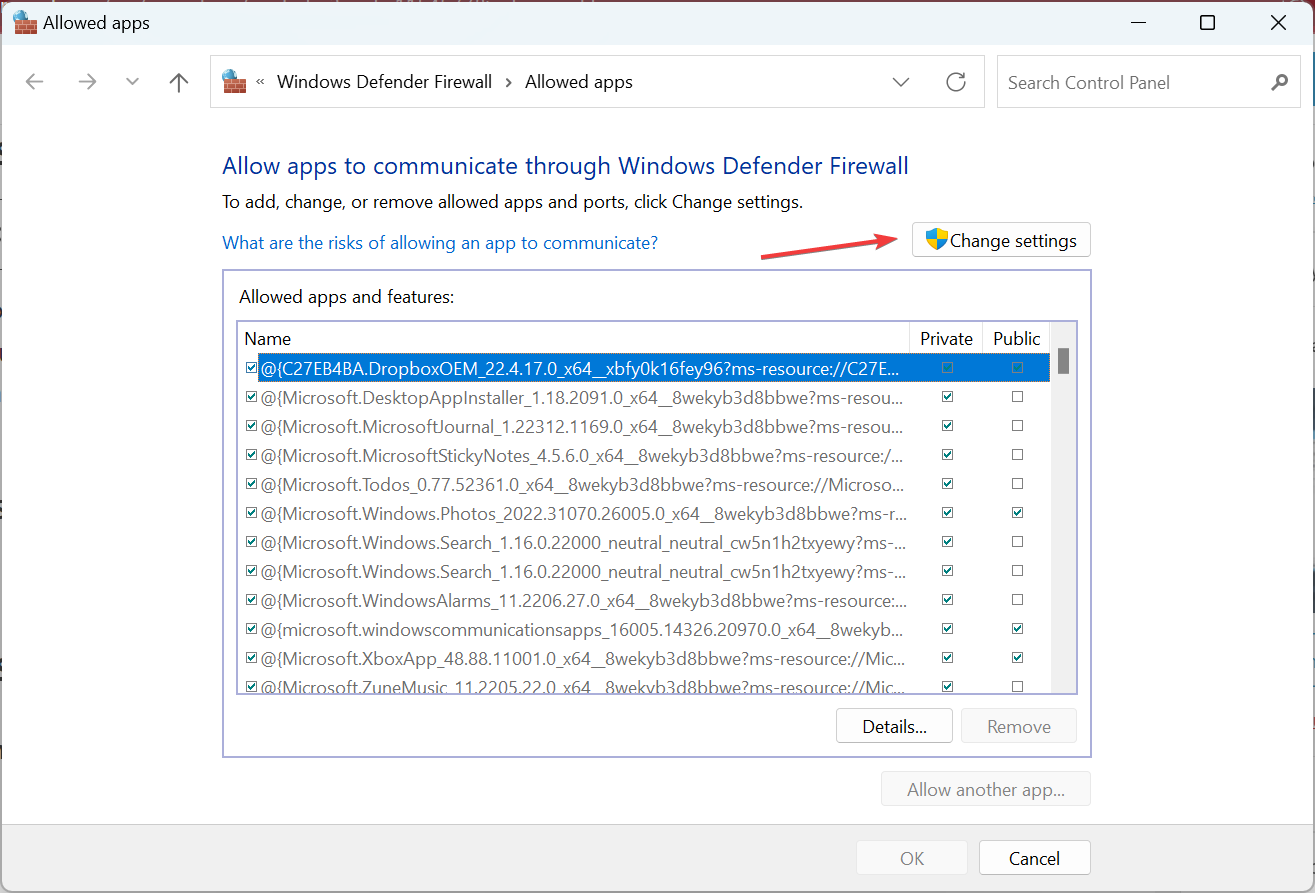
- Click the Change settings button.

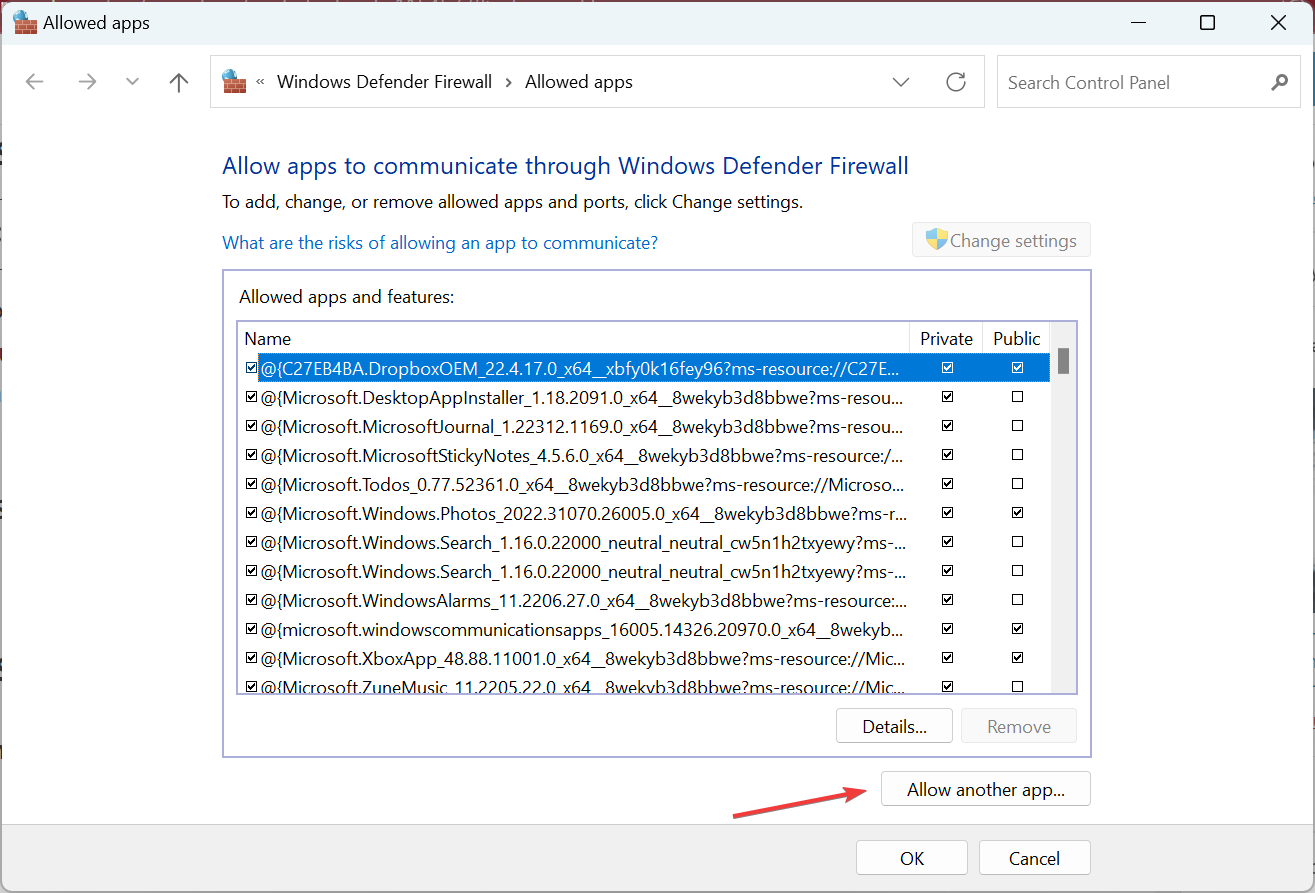
- Click on Allow another app at the bottom.
- Now, click the Browse button.

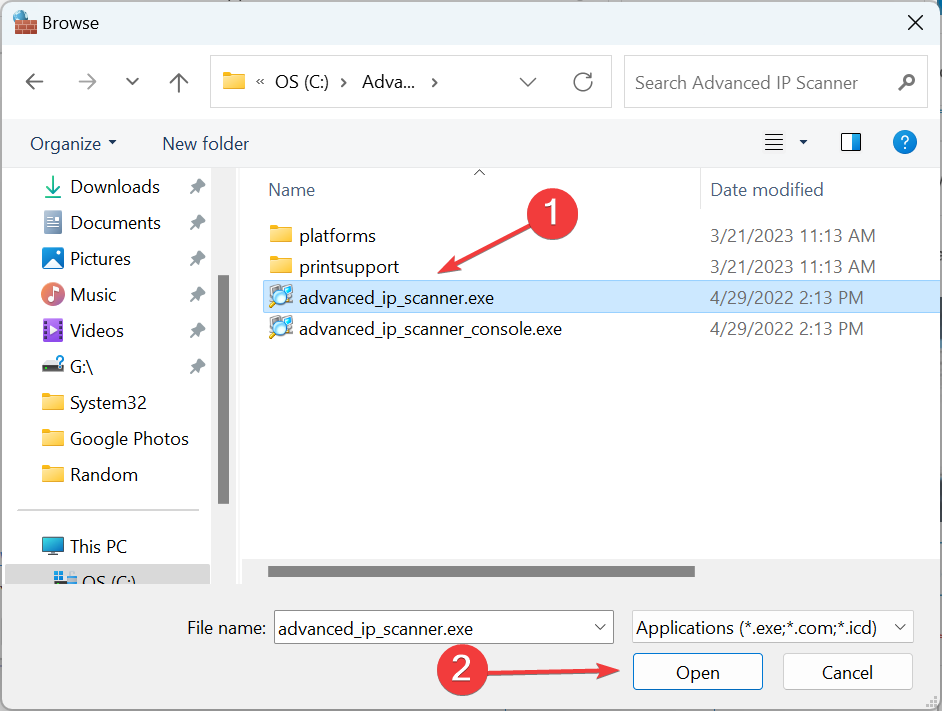
- Navigate to the Advanced IP Scanner install location, select the launcher, and click on Open.

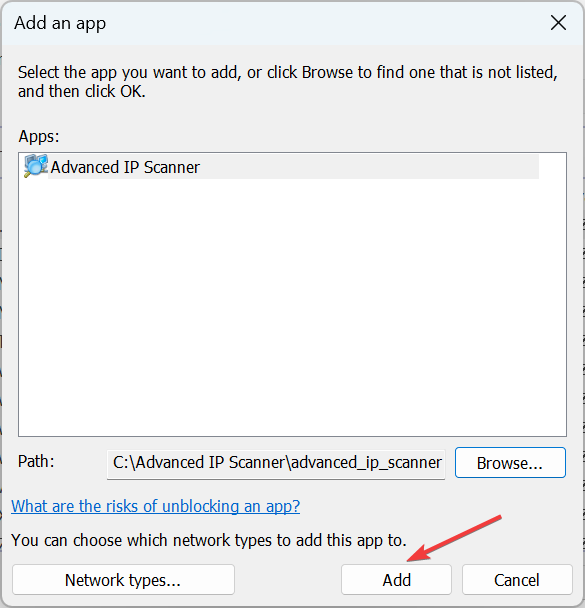
- Click Add.
- Finally, make sure both the Private and Public checkboxes are ticked for Advanced IP Scanner, and click OK to save the changes.
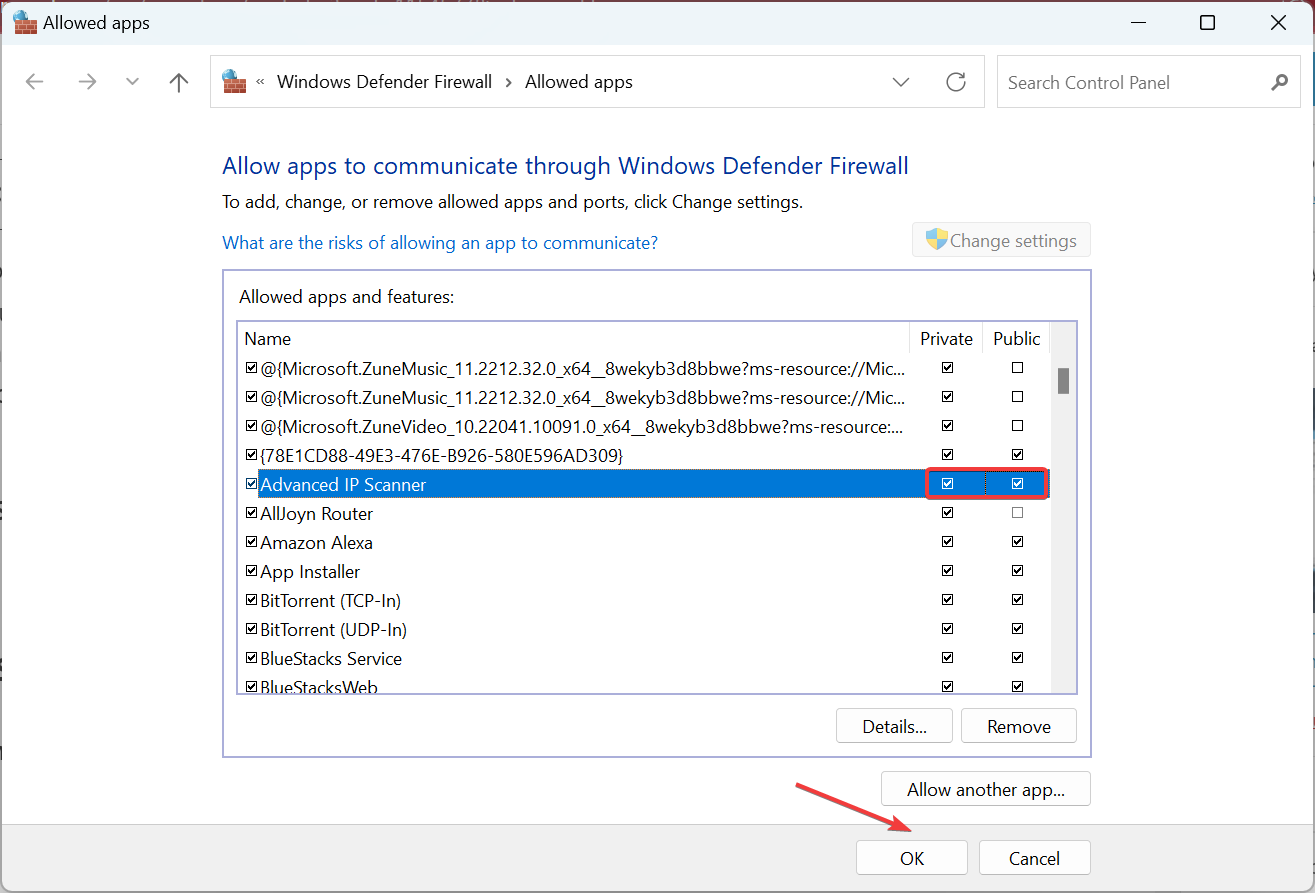
If it’s the firewall that’s blocking Advanced IP Scanner and triggering the error, your primary approach should be to whitelist the app. Also, if you use a third-party firewall, check the manufacturer’s website for the exact steps.
2. Perform a DISM and SFC scan
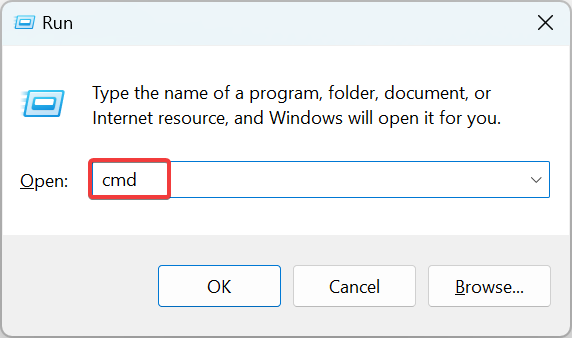
- Press Windows + R to open Run, type cmd, and hit Ctrl + Shift + Enter.

- Click Yes in the UAC prompt.
- Now, paste these three commands one at a time, and hit Enter after each:
DISM /Online /Cleanup-Image /CheckHealthDISM /Online /Cleanup-Image /ScanHealthDISM /Online /Cleanup-Image /RestoreHealth - Once done, execute the following command to run the SFC scan:
sfc /scannow
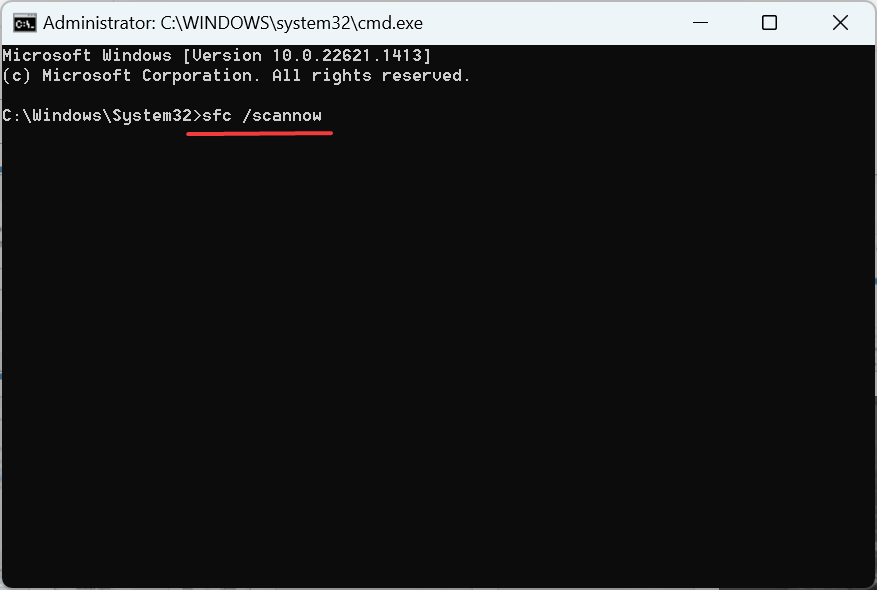
If it’s the corrupt system files triggering Advanced IP Scanner error 110, running the DISM tool and SFC scan should do the trick.
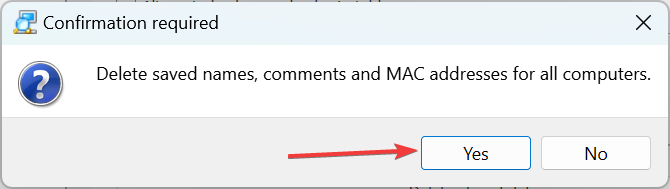
3. Clear Advanced IP Scanner cache
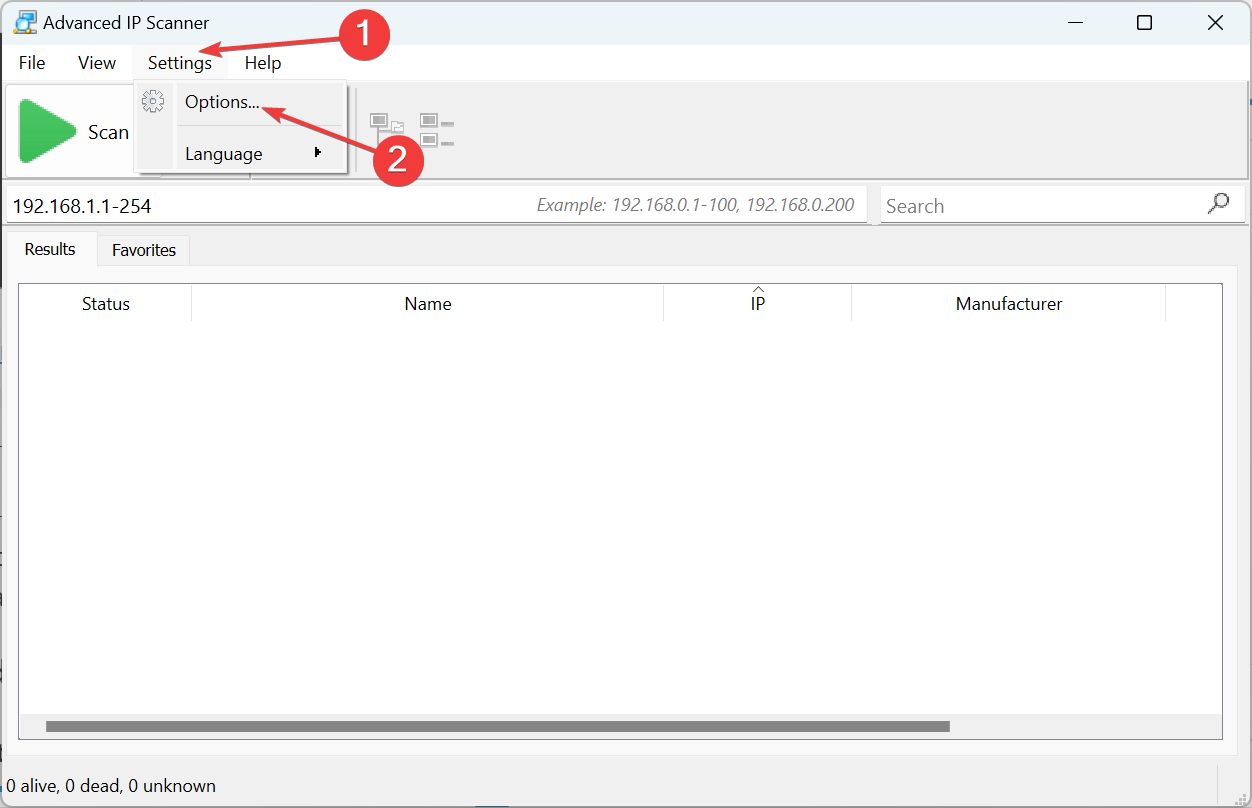
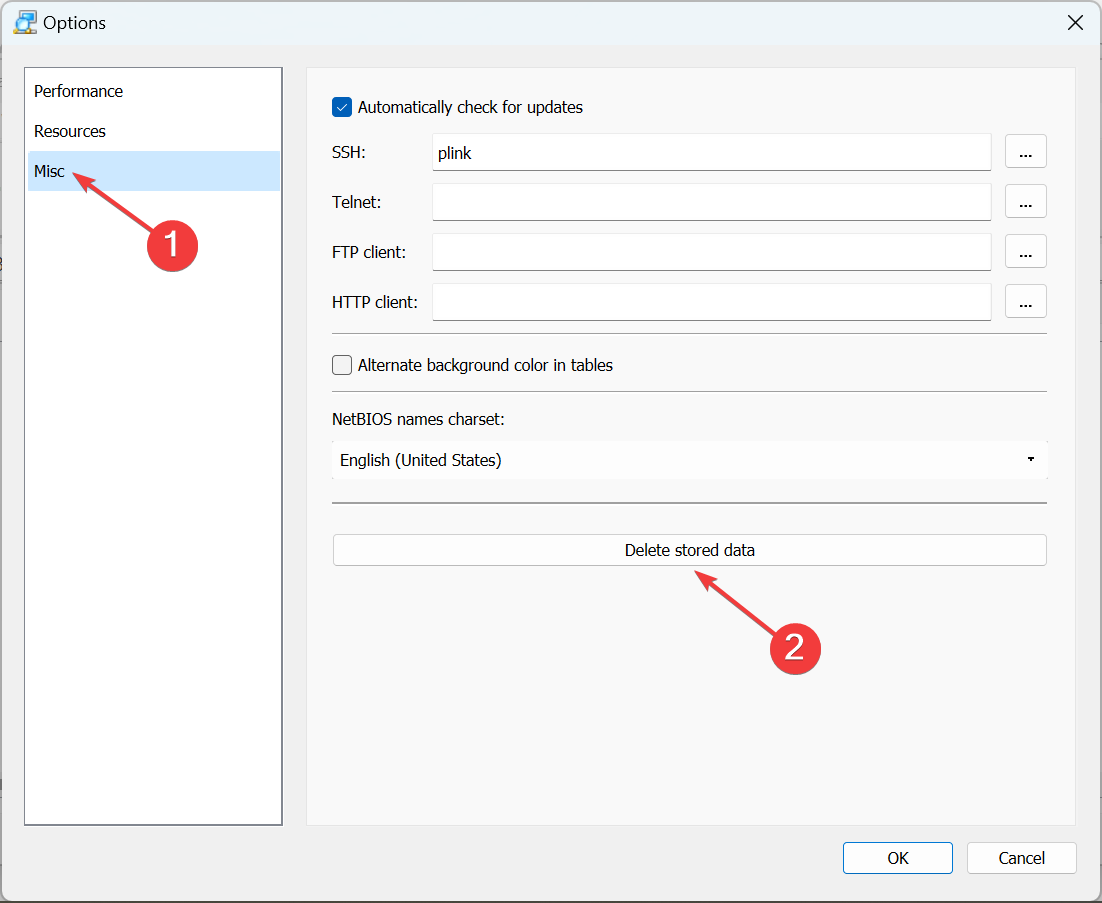
- Open the Advanced IP Scanner, click on the Settings menu, and select Options.

- Navigate to the Misc tab, and click on Delete stored data on the right.

- Click Yes in the confirmation prompt.

Advanced IP Scanner error code 123
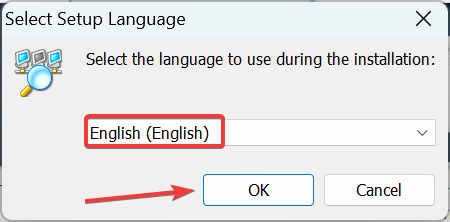
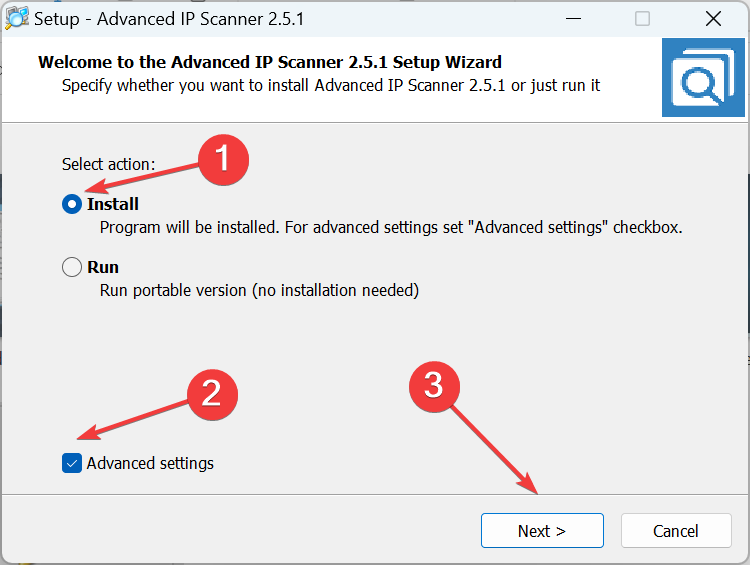
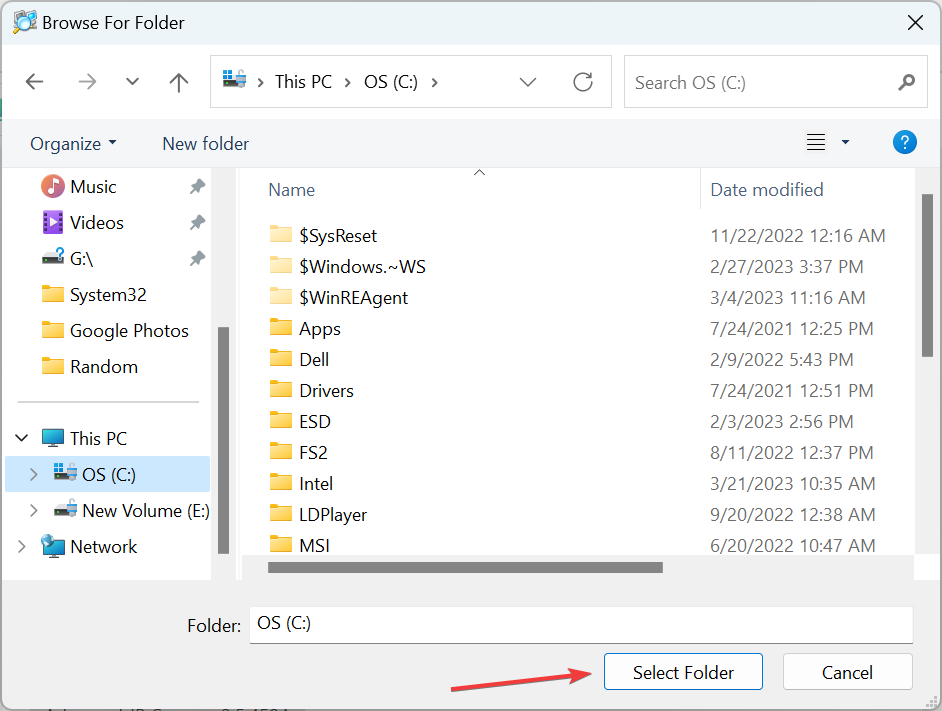
1. Change the installation path
- Run the Advanced IP Scanner setup, choose English as the language, and click OK.

- Select the Install option, tick the checkbox for Advanced settings, and then click Next.

- Click Browse.
- Choose a different directory, probably the C: drive directly, and click on Select Folder.
- Click Next to proceed.
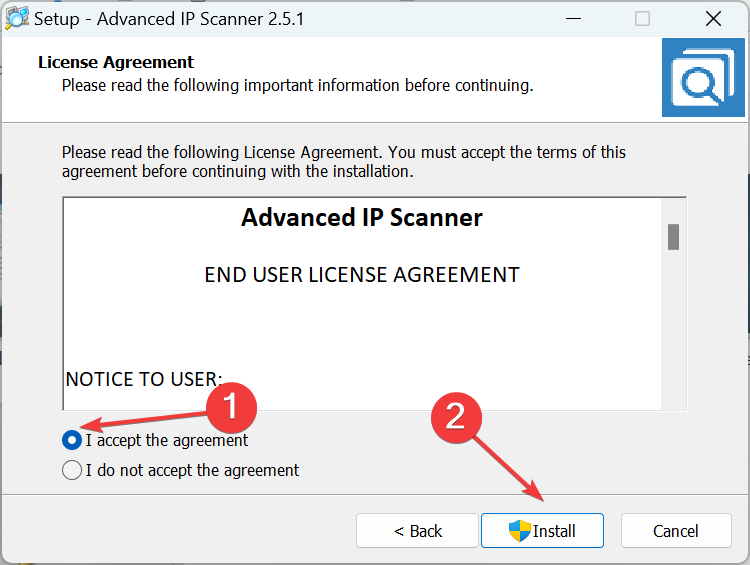
- Select the I accept the agreement option, and then click Install.
- Wait for the installation to complete.
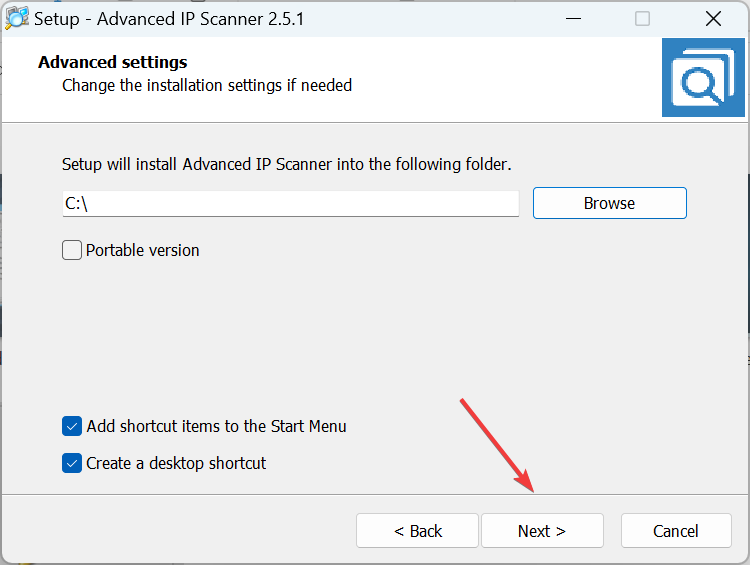
When getting the Advanced IP Scanner error 123, changing the installation path helps get things running again. Also, you could use the Run portable version option for Advanced IP Scanner when shown in the setup.
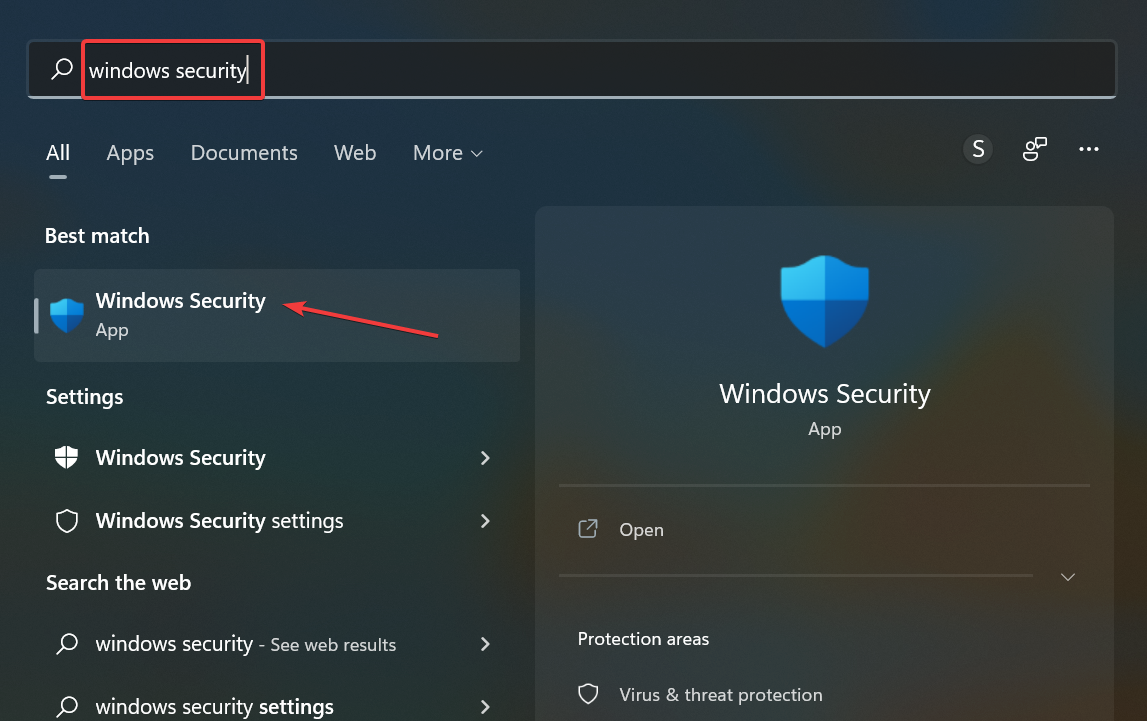
2. Disable the antivirus during installation
 NOTE
NOTE
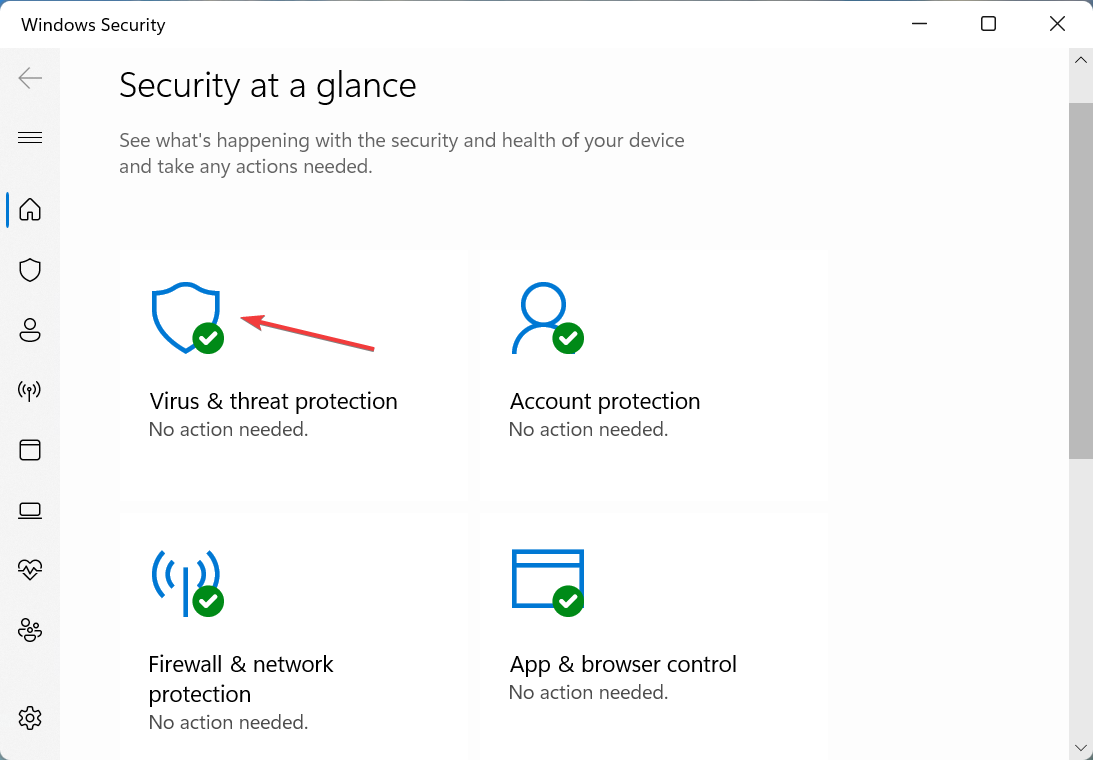
- Press Windows + S to open Search, type Windows Security, and click on the relevant result.

- Click on Virus & threat protection.

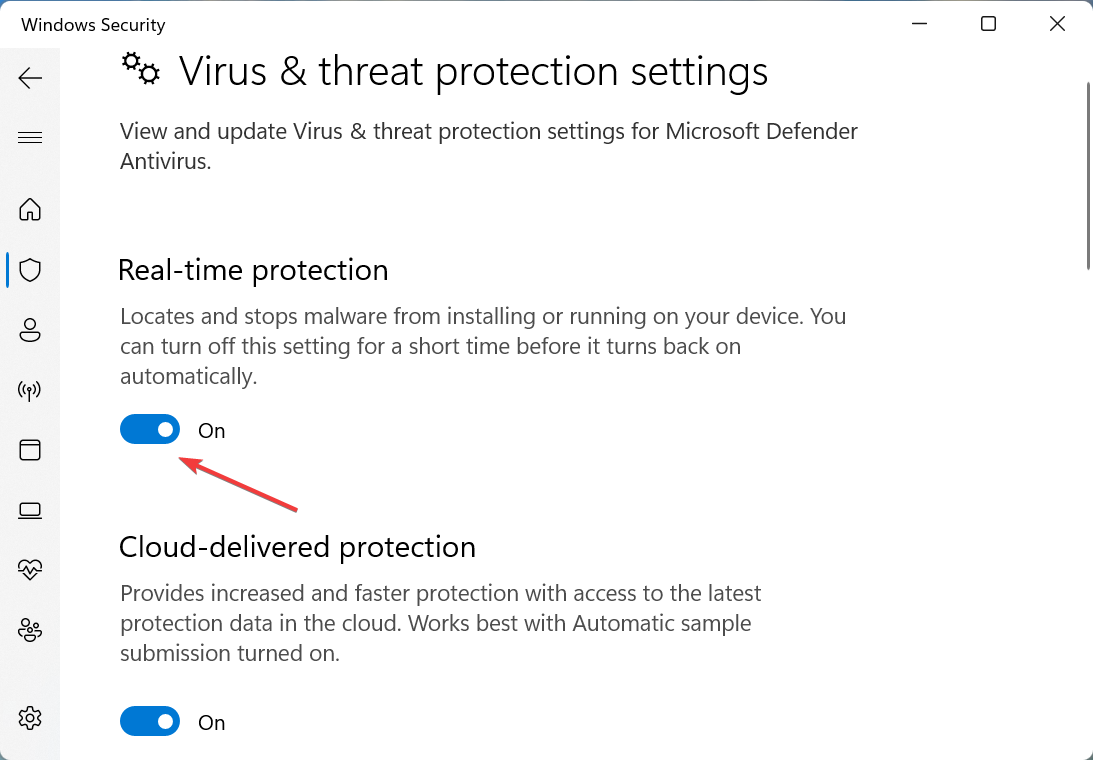
- Choose Manage settings.
- Turn off the toggle for Real-time protection.
- Click Yes in the UAC prompt to confirm.

That’s it! These are all the ways you can fix Advanced IP Scanner errors in Windows. Also, several users reported getting Advanced IP Scanner Error 1603, which usually appears when another installer is running.
Also, find some quick tips and tricks to speed up the Internet in Windows.
For any suggestions or questions, please use the comments section below and leave us a few lines about that.