Bluestacks: Your Device Isn't Compatible with This Version [Fixed]
Reinstalling Bluestacks might do the trick if it's unable to run on this device 💡
7 min. read
Updated on
Read our disclosure page to find out how can you help Windows Report sustain the editorial team Read more
Key notes
- If Bluestacks says your device isn't compatible with this version, you need to take immediate action.
- Here's what to do when an app isn't compatible with your device: try changing the engine settings.
- You should also make sure that you have the latest version of Bluestacks or consider reinstalling it.
- We'll show you how to fix your device isn't compatible with this version emulator error step by step.
One of the most popular Android emulators on the market is Bluestacks, but many users reported an app incompatibility error stating that your device isn’t compatible with this version in Bluestacks.
This happens when trying to run certain applications or games and obviously, it can be a problem as it will prevent you from doing so.
Don’t worry, in today’s article, we’re going to show you how to fix your device isn’t compatible with this version in Bluestacks error.
Why BlueStacks is not compatible with my device?
Now, this isn’t the only issue that users are dealing with. In fact, there are various problems that can appear in Bluestacks, and here are some similar anomalies that users reported:
- Your device isn’t compatible with this version Bluestacks PUBG, Fortnite – The Bluestacks game not compatible issue is usually caused by your settings. To fix it, increase the number of cores and amount of RAM in Bluestacks settings.
- Your device is not supported Mobile Bluestacks, at the moment PUBG Bluestacks – In order to run certain games, you’ll need to have a 64-bit version of Bluestacks installed. A 64-bit version offers better performance by better utilizing your hardware, so be sure to switch to the 64-bit version as soon as you can.
- Bluestacks device not compatible Pokemon Go – If certain applications aren’t supported, you can maybe avoid this issue simply by downloading the application from a third-party source.
- Bluestacks this app is incompatible with your tablet – Sometimes you might not have the latest version of Bluestacks installed, and that can cause the Bluestacks app not compatible issue.
- Your device isn’t compatible with this version emulator (Bluestacks Nikke, Genshin Impact)
- Bluestacks 5, 4, 10 your device isn’t compatible with this version
How do I fix the Device not compatible error in Bluestacks?
- Change the engine settings
- Install the 64-bit version of Bluestacks
- Try downloading the APK file from a third-party source
- Delete the data and cache for Google Play Store
- Install the latest version of Bluestacks
- Reinstall Bluestacks
- Try a different emulator
1. Change the engine settings
- Open Bluestacks.
- Navigate to Settings, and select Engine.
- Change the number of cores to 4, and change the memory to at least 3GB.
- Next, check the option Use advanced graphics mode.
- Save changes and check if that solves your problem.
Sometimes you might get a Device not compatible message in Bluestacks due to your settings, and this can prevent you from running certain applications and games.
However, you can fix this problem simply by making a couple of adjustments, just follow the above steps to quickly solve this issue.
If you encounter a Bluestacks black screen on your PC, just follow our detailed guide and fix it in no time.
2. Install the 64-bit version of Bluestacks
Many users reported Device not compatible message while trying to run Fortnite in Bluestacks. It turns out that in order to run Fortnite, you need to have a 64-bit version of Bluestacks installed.
In case you don’t know, most software comes in 32-bit and 64-bit versions, and if you have a 64-bit processor, which you most likely do, it’s advised to use a 64-bit version of Bluestacks.
The 64-bit version will make better use of your hardware and CPU and bring you improved performance, so there’s no reason not to use it.
After you switch to the 64-bit version of Bluestacks, try running Fortnite again and check if the problem is still there.
3. Try downloading the APK file from a third-party source
If you’re getting Device not compatible message in Bluestacks, the problem might be related to the application you’re trying to run. Some applications won’t be able to run or download on Bluestacks at all.
However, you can always circumvent this problem simply by downloading the APK file from a different source.
There are many third-party websites that host APK files, so download the application from one of these websites and run the APK file that you’ve downloaded in Bluestacks.
You should then just install the application and the problem should be resolved.
4. Delete the data and cache for Google Play Store
- Navigate to the System app in Bluestacks.
- Go to the Apps and select All.
- Select Google Play Store, and click Clear data.
- After doing that, repeat the previous step for Google Play Services.
According to users, one way to fix this problem is to delete data and cache for Google Play Store.
Sometimes your cache can become corrupted and that can interfere with the application download. To fix this problem, you just need to clear the cache by following the above steps.
Once you clear the cache and data for both applications, check if the problem is still there. Alternatively, you can download HD GuestCommandRunner from Bluestacks and use it to clean the cache.
Also, find the quickest solutions to the Latest version already installed error in our comprehensive guide.
5. Install the latest version of Bluestacks
If you’re getting a Device not compatible error in Bluestacks, it’s possible that the issue is caused by an outdated version of Bluestacks.
The older version might have certain bugs, or they might not support the latest features, and that can lead to this and many other errors. To fix this issue, update Bluestacks to the latest version.
After updating your application to the latest version, try running the app that is giving you this error and check if that solves the problem.
6. Reinstall Bluestacks
- To manually uninstall Bluestacks, open Control Panel and click on the Programs icon.
- Select Uninstall a program.
- Find Bluestacks in the program list and double-click it.
- If an Are you sure you want to uninstall? dialog box will show up, select Yes and wait for the process to complete
- When the uninstallation is finished, you will receive a The product has been successfully uninstalled prompt.
At this point, there is a possibility that some empty files or the installation wizard are still on your computer.
The Device not compatible error may appear because your Bluestacks installation files are corrupted, in which case we recommend a full reinstallation of the software.
This can step in the way if you want to reinstall the program, and it is also unnecessarily using resources. To make sure that everything related to the Bluestacks software is removed from your computer:
- In your main drive (the one where Windows OS is installed) head to the ProgramData folder. The folder may be hidden, in which case you will have to manually type the location of your main drive and the name of the folder into the location tab, for example, if your main drive is C, then you will type: C:ProgramData.
- Find the Bluestacks Setup folder and delete it.
- Open the Run command prompt by pressing Windows key+R or by typing Run in the Windows Search Box.
- Type %temp%, and click Ok.
- Delete everything in the Temp folder.
Now the uninstallation is fully completed, we can proceed to reinstall Bluestacks:
- Head to the Bluestacks’ homepage.
- Click on the Download Bluestacks button.
- Open the installation wizard.
- Click the Install now button.
- When the installation is complete, the user interface will open automatically.
7. Try a different emulator
If you simply cannot shake off the Bluestacks device not compatible error, consider a different option. Which app can I use instead of BlueStacks? Here’s the big question and obviously, the big answer will follow.
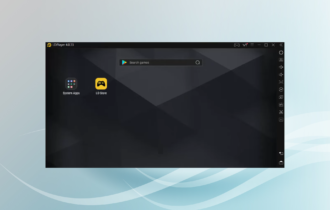
If we had to pick a solid Bluestacks alternative, we would recommend trying out LDPlayer.
It allows you to play mobile games on a PC without facing any issues, at a higher speed compared to a phone or tablet.
This great emulator comes both with Google Play Store and its own LD Store, plus itt has a very straightforward, easy-to-use UI.
Bluestacks is a great application overall, but Device not compatible message can be a problem for some users.
This issue is usually caused by your settings, but we hope that you managed to solve this problem by using one of our solutions.
For more suggestions or other questions, feel free to access the comments section below.


