The Computer Has Rebooted From a Bugcheck: 4 Tested Fixes + Video
You should start by reinstalling or updating device drivers

The computer has rebooted from a bugcheck is one of the Blue Screens of Death errors in Windows 11. As the name indicates, this error occurs after having performed a reboot.
The primary causes of the error include outdated or corrupt system drivers, memory issues or insufficient primary storage. To detect and fix these problems, you need to run Mdsched.exe to check the memory.
Any of the above may make your system freeze, enter a booting loop, restart frequently, or even crash completely. Running a BSoD fixer tool is always a good idea but you might want to see some more helpful steps.
How do you fix the computer has rebooted from a Bugcheck?
1. Uninstall and reinstall drivers
- Press the Windows key + R, type devmgmt.msc, and click OK to open Device Manager.

- Double-click any option from which you want to remove drivers to expand it.
- Now, right-click on the faulty driver and select Uninstall device.

- Now, click the Uninstall button to confirm the action.
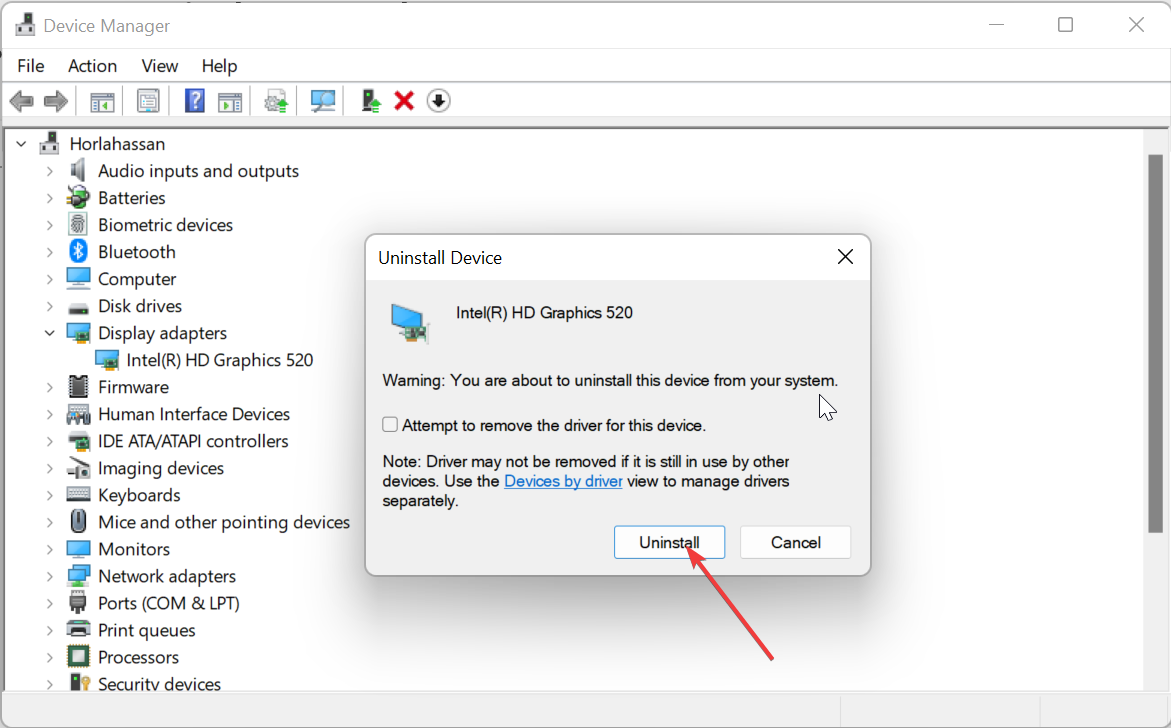
- Finally, restart your PC and the driver will be reinstalled automatically.
If you have recently installed a peripheral device on your computer, it is a good idea to remove it first. Next, you need to uninstall the device from the Device Manager to fix the computer has rebooted from a bugcheck 0x00000d1 issue.
Take note of your graphics and audio drivers especially as they have been reported to cause the problem.
If you can’t manage to remove them without any problems, you can also pick a dedicated tool from our list including the best driver removal software.
2. Update your drivers
1. Launch Device Manager.
2. Double-click any option (Disk Drivers, Keyboards, Mice, etcetera) you want to update drivers for.

3. Right-click each of the drivers there and select Update driver.
4. Select Search automatically for drivers.
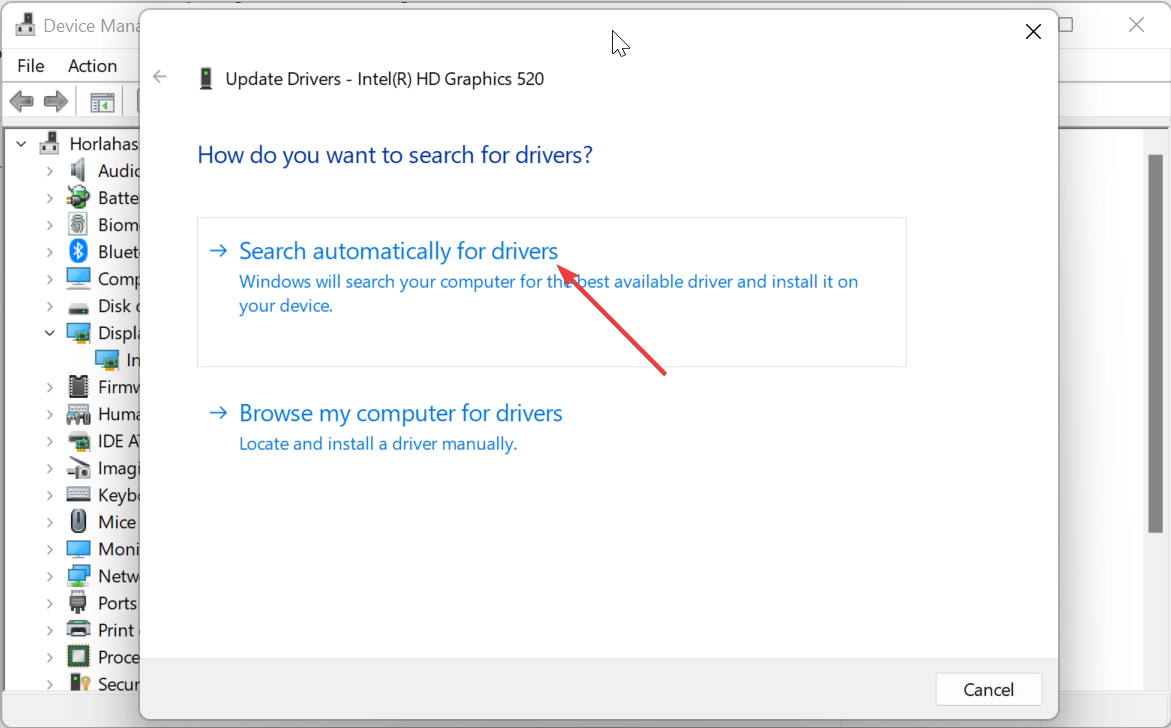
5. Install the available updates after the scan is complete.
If you have not updated your drivers for long, they might be the cause of the computer has rebooted from a bugcheck with the error code 0x00000116, and when you get the error on Server 2012.
The first way to update your drivers is via Device Manager and it takes very few minutes.
Aside from using the built-in driver updater, you can download and install the drivers from the manufacturer’s website. However, there is always the risk of installing the wrong drivers.
To prevent this, we advise you to use a dedicated tool, such as PC HelpSoft Driver Updater. This software will update your drivers automatically with the latest options from a large, always-updated database.
⇒ Get PC HelpSoft Driver Updater
3. Run a memory check for your computer
- Press the Windows key + R to start the Run utility and type mdsched.exe.
- Press Enter or click the OK button.

- Click on one of the options from Restart now and check for problems or Check for problems the next time I start my computer.
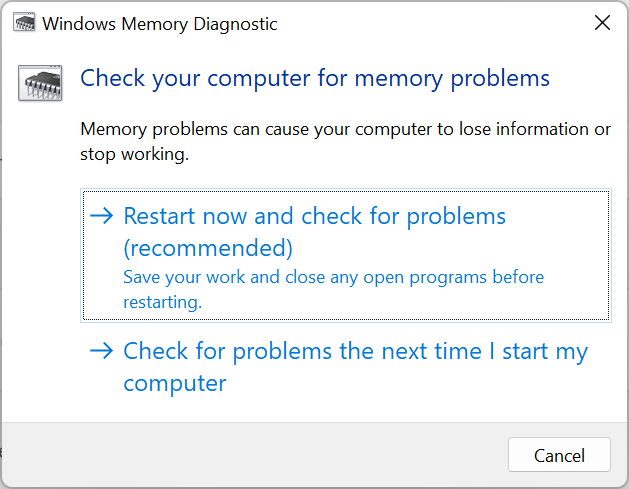
- If this does not work, you can use MemTest to check your memory for errors.
The computer has rebooted from a bugcheck 0x50, event id 1001 error can also be caused by a memory fault, so you should check your memory by performing this troubleshooting as instructed above.
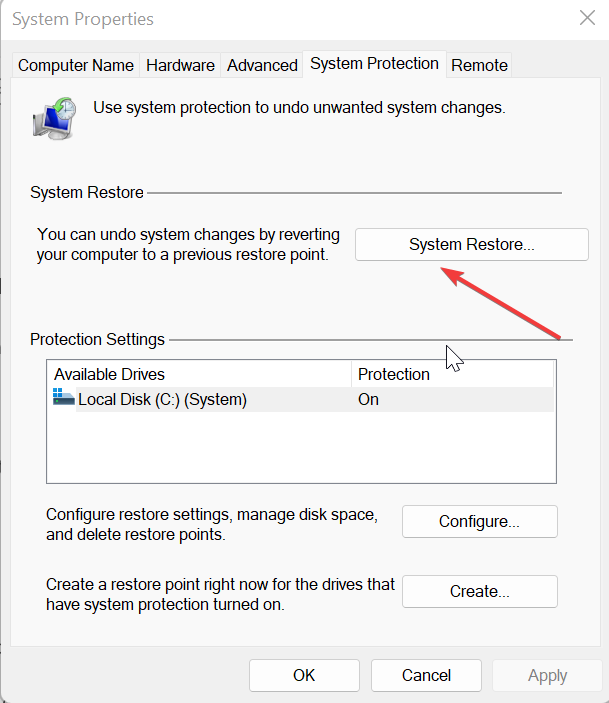
4. Use a Restore Point
- Press the Windows key, type restore, and click on Create a Restore Point option.
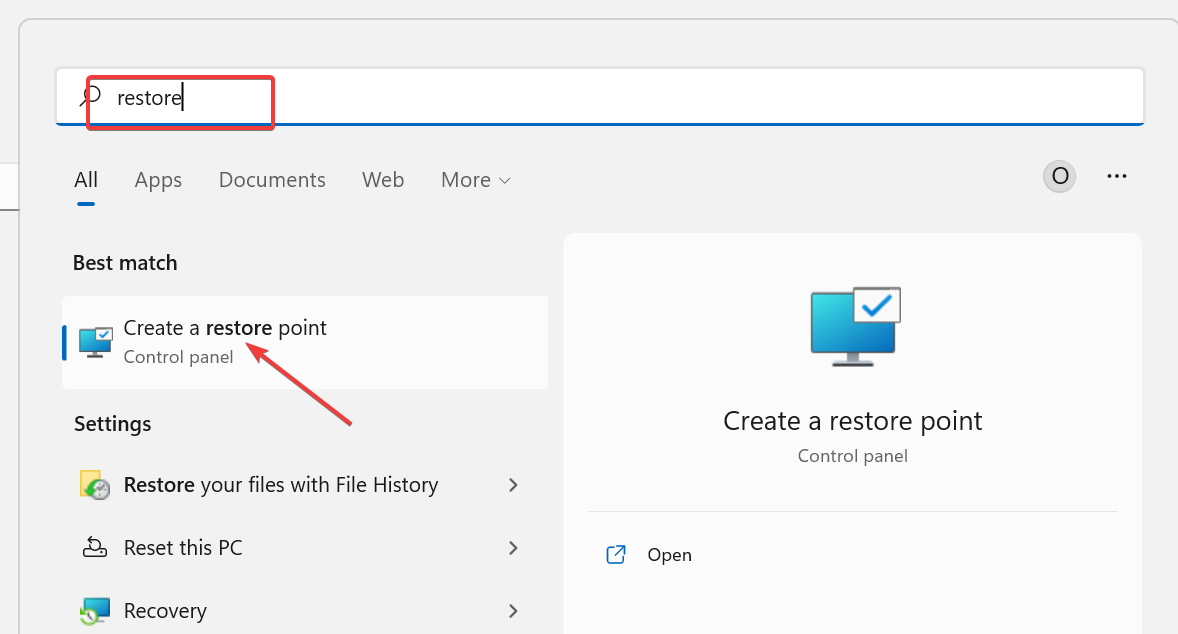
- Click on the System restore button.
- Click the Next button when prompted.

- Select a point that was created before your computer started to crash and click Next.

- Read the warning message and click on Finish.
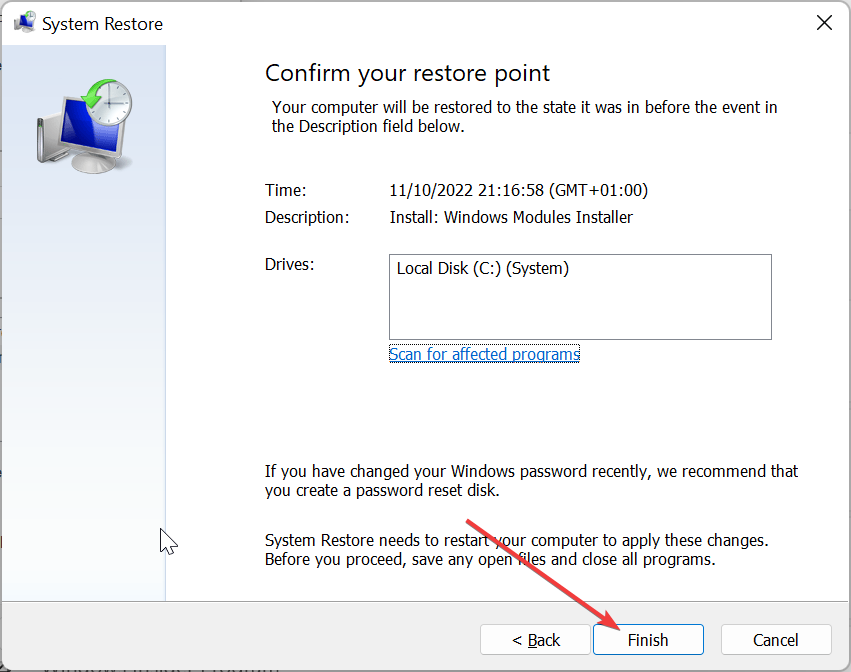
- Wait for the restore point to restore your PC to an earlier state where it was working without any issues.
Using a previous restore point can bypass this problem completely but you might not find a useful one. After you manage to clear the problem, don’t forget to create a new restore point to have at hand for the next time your device runs into a problem and needs to restart.
Here are the most common scenarios when you encounter a bugcheck BSoD:
- Various Windows versions: the computer has rebooted from a bugcheck Windows 11
- the computer has rebooted from a bugcheck Windows 10
- Servers: the computer has rebooted from a bugcheck Server 2012
- the computer has rebooted from a bugcheck Server 2016
- Specific events: the computer has rebooted from a bugcheck Event ID 1001
- the computer has rebooted from a bugcheck 0x00000d1
- the computer has rebooted from a bugcheck memory DMP
For a more general guide on blue screen issues, check our list containing the best software to fix BSoD issues on your PC.
If you have any other suggestions or advice, don’t hold back, let us know about them in the comments section below.
Read our disclosure page to find out how can you help Windows Report sustain the editorial team. Read more


Improve this guide


User forum
0 messages