How to Deploy Fonts Using SCCM [3 Simple Steps]
To install fonts, you need to use a specialized script
3 min. read
Updated on
Read our disclosure page to find out how can you help Windows Report sustain the editorial team. Read more
Key notes
- Deploying fonts using SCCM allows you to deploy the same font across multiple computers connected to the Distribution Point.
- After downloading the font script, you need to change the extension of the file from .txt to .vbs to be able to create its package.
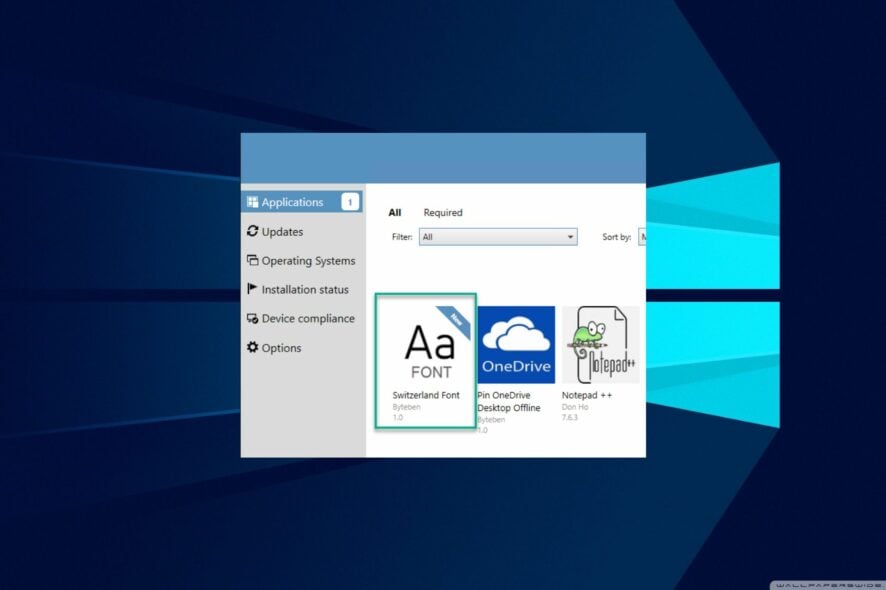
Deploying font packages on multiple computers requires using System Center Configuration Manager (SCCM). However, not all users know how to go about it. This guide will discuss how to deploy fonts using SCCM in a few steps.
Also, we have a detailed article about what to do if you can’t install fonts on Windows PC.
Can I deploy a font to all users?
One of the benefits that come with deploying fonts with Microsoft System Center Configuration Manager (SCCM) is its ability to deploy the same font on multiple computers.
It uses dedicated scripts to deploy a script (SCCM Package) to install the font and extends it to all users.
How do I deploy fonts using SCCM?
1. Download the Install_fonts script
 NOTE
NOTE
- Download the install_fonts script from a trusted source and save it in a folder.
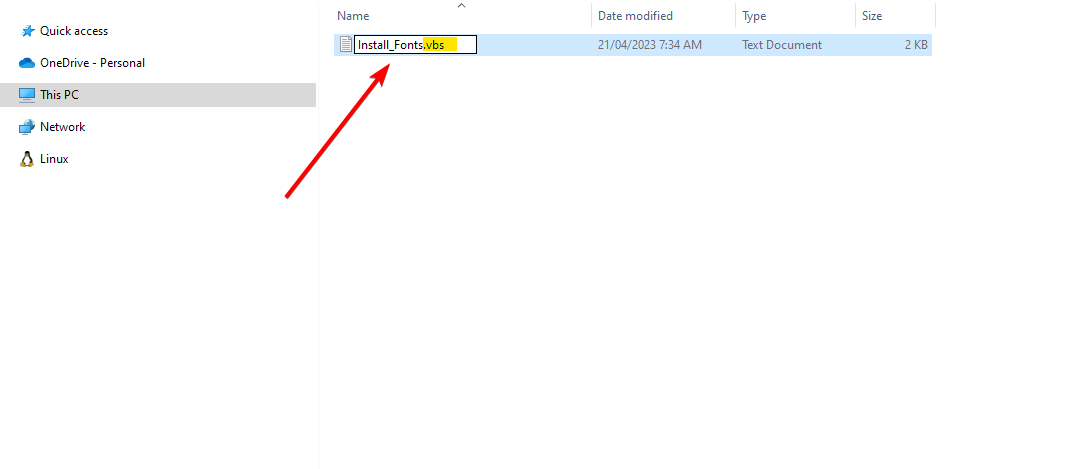
- Right-click on the downloaded file, select Rename from the drop-down menu, then change the file extension from .txt to .vbs.
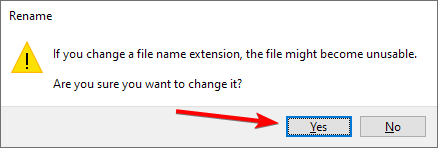
- You should get a warning. Click Yes. If the warning doesn’t appear, it means you didn’t change the file extension.
- Copy the script file and font to a shared folder.
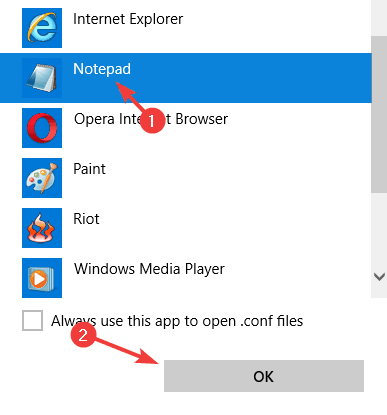
- Right-click on the script file, select Open with from the drop-down, then click on Notepad or any editor.
- Set the font source path to the location where the font is saved, save, and close the file.
2. Create a package containing the source file
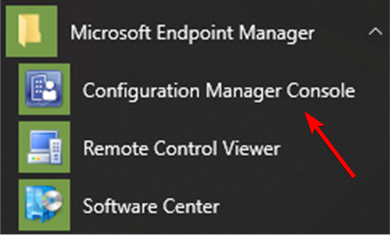
- Left-click the Start button, type Configuration Manager console, then press Enter to open the SCCM console.
- Go to the Software Library, then select Overview.
- Expand the Application Management entry, then select Packages.
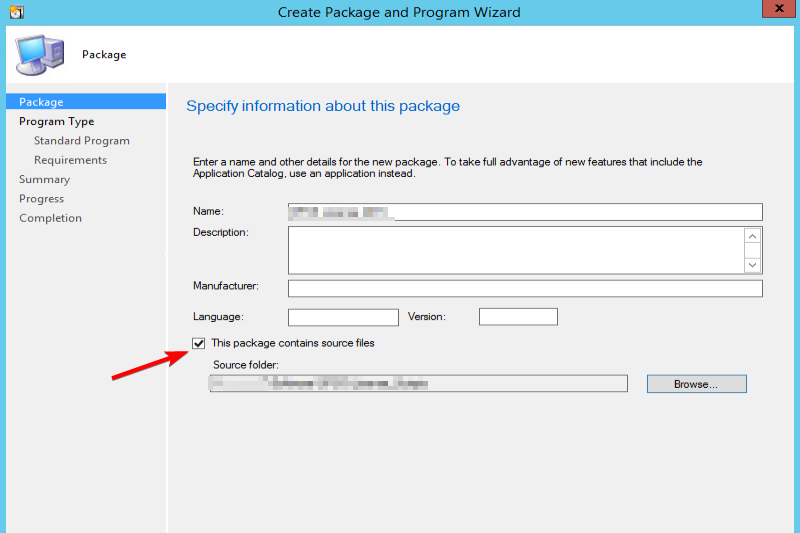
- Right-click Packages and select Create Package from the drop-down menu.
- Specify the Name, Source folder and click the Next button.
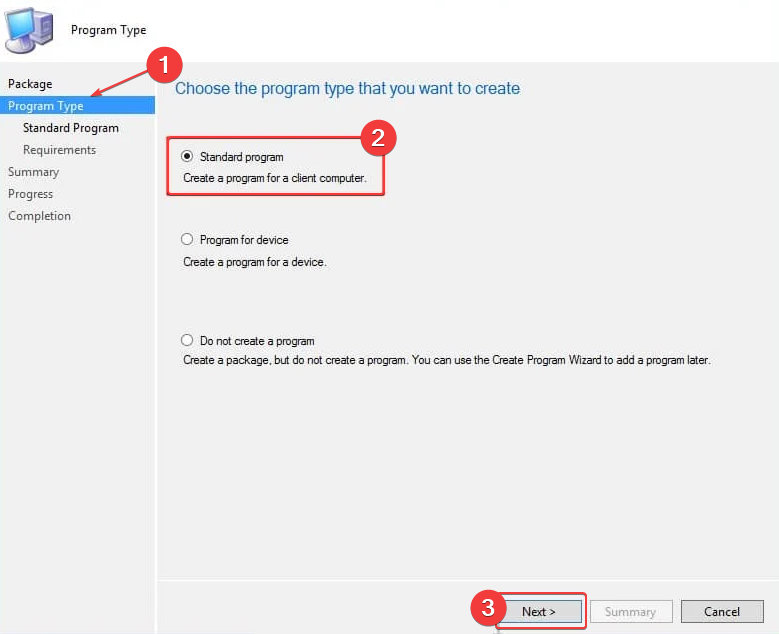
- On the Choose the Program Type menu, select Standard Program, then click Next.
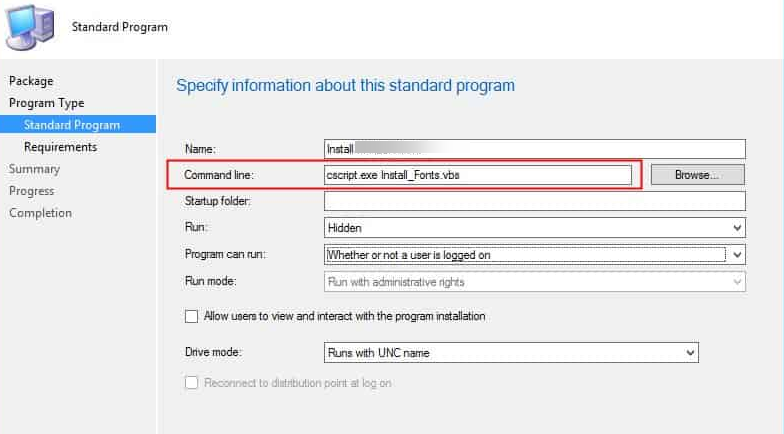
- Specify the Name for the standard program, and enter the Command line as:
cscript.exe filename.vbs - Under the Program can run tab, choose the Whether or not a user is logged on option, then click Next.
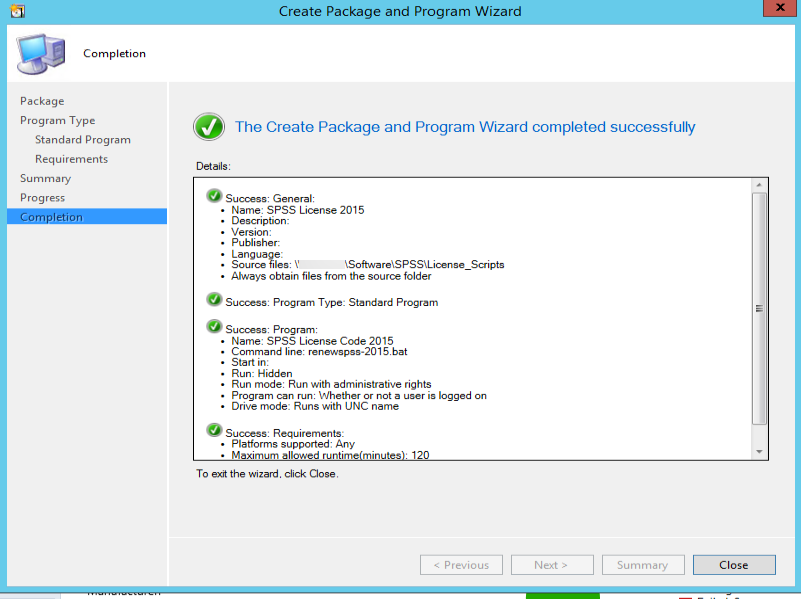
- On the Create Package and Program wizard completion page, click Close.
- Click on the created package, and at the bottom pane, click the Programs tab.
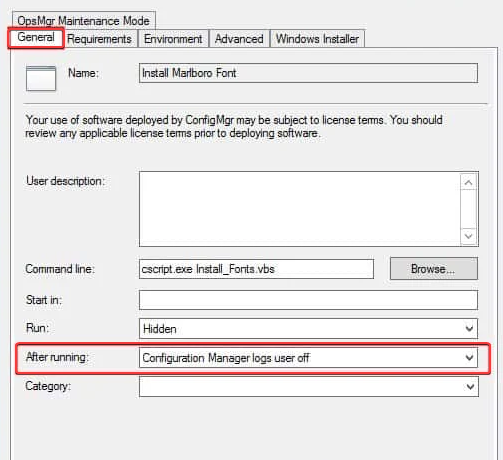
- Right-click the Program and click Properties from the drop-down.
- Select the General tab, go to the After running option, and set it to the Configuration Manager logs user off option.
- Click Apply, then OK.
3. Test the Font Deployment in SCCM
- Right-click on the package and Distribute the content to the Distribution Point (DP).
- After the content is available in the DP, right-click the package and click Deploy, then deploy the package to the desired collection.
- Go to Deployment purpose and select either Available or Required.
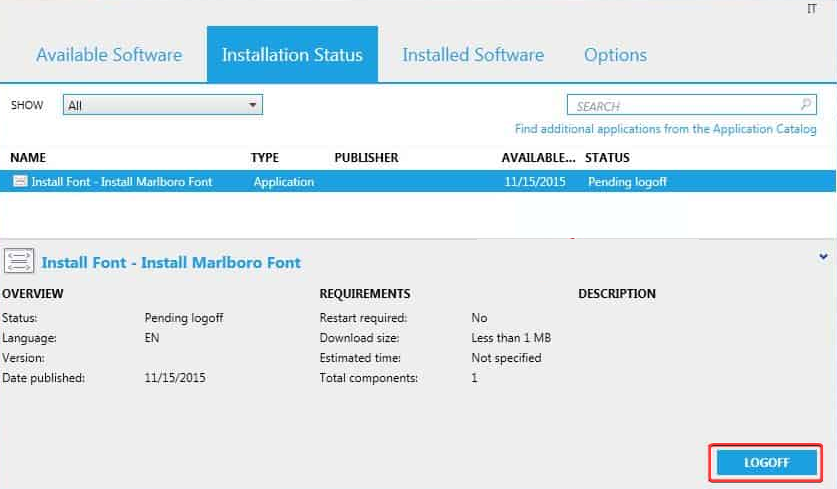
- In the Software Center, click Install Selected. After the software is installed, the status will show Pending Logoff.
- Click on the Logoff button to log off.
- After the user logs in, the font will be available in the Fonts repository in the Control Panel.
The above steps will allow you to deploy fonts to multiple computers with the Microsoft System Center Configuration Manager (SCCM).
In addition, our readers can check our guide about how to fix blurry fonts on Windows. Likewise, we have a comprehensive guide on ways to fix font bugs on your PC.
If you have further questions or suggestions, drop them in the comments section.



User forum
0 messages