How to Dual Boot Windows 11 and Ubuntu [Both Ways]
A step-by-step guide to help you out
Key notes
- If you want to dual boot Windows 11 and Ubuntu and use the two operating systems side by side, note that Ubuntu has basic hardware requirements.
- To achieve your goal, just create a separate partition and install the operating system to the new partition.
- If GRUB is not showing when you dual boot Windows 11 and Ubuntu, there’s an easy fix you can apply right away.

Although Windows is the dominating operating system on the market, Linux is slowly gaining popularity, with Ubuntu being one of the most interesting Linux distributions.
To know more about the differences between the two operating systems, check our Windows 11 vs Ubuntu article for an in-depth comparison.
As for this guide, we will show you how to dual boot Windows 11 and Ubuntu and use the two operating systems side by side.
What are Ubuntu’s hardware requirements?
- CPU: 2GHz or better
- RAM: 4GB or more
- Storage: 25GB or more
- GPU: Graphics card with at least 256MB of memory
As you can see, Ubuntu has relatively humble hardware requirements compared to Windows 11’s requirements, and some distributions can work on PCs that are below these requirements.
Dual booting is the most viable way to have two operating systems that you intend to use regularly, and it can be done in more than one way.
Like most users, follow the procedure below if you already have Windows 11 installed on your PC. Sometimes, it is the other way around, and you can install Windows 11 after Ubuntu, too.
How can I dual boot Windows 11 and Ubuntu?
Install Ubuntu after Windows 11
1. Create a dedicated Ubuntu partition
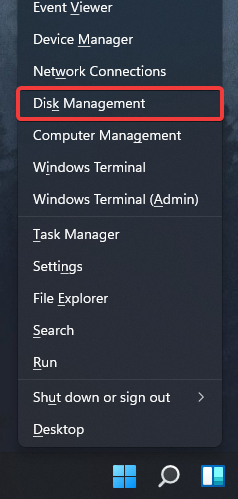
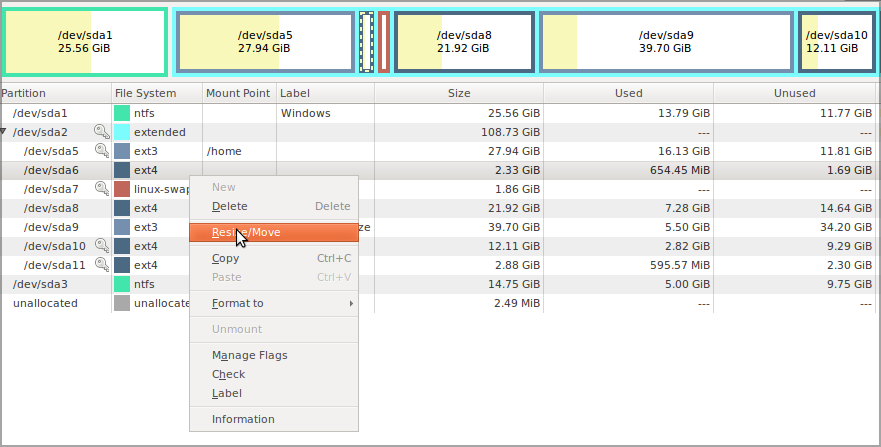
- Open Disk Management. You can do that by pressing Windows Key + X and selecting Disk Management from the list.
- Now, you need to select a drive that you want to shrink. Choose one with at least 50GB of free space, but if you plan to use Ubuntu extensively, you might need even more space.
- Right-click the desired drive and choose Shrink Volume from the context menu.
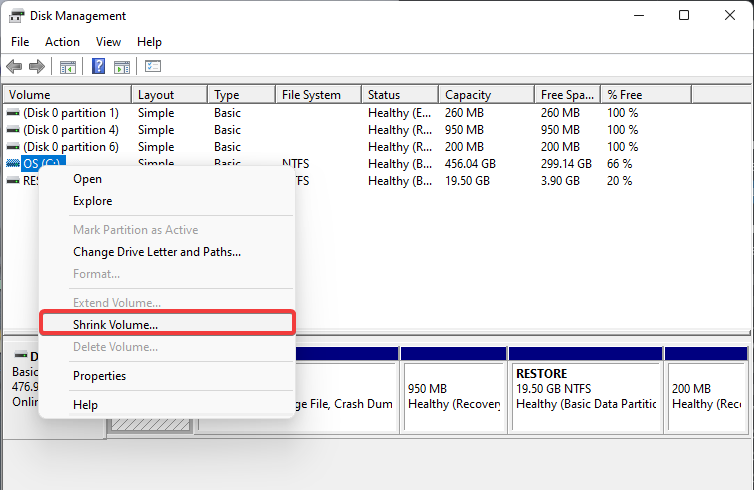
- Set the Enter the amount of space to shrink in MB to 50000 or more and click Shrink.

- Next, click the Unallocated space that you just created and choose New Simple Volume.
- Set the Simple volume size in MB to the maximum value and click Next.
- Finally, set the desired drive letter and label and click Finish once you’re done.
You can also give a try to Paragon Partition Manager, which is much more efficient and has other features that are useful for correctly formatting partition drives.
2. Download Ubuntu ISO and create a bootable flash drive
- Visit Ubuntu’s download page and click the Download button to download the ISO file.

- Wait for the download to finish.
- Connect a USB flash drive to your PC. You’ll need 4GB or larger.
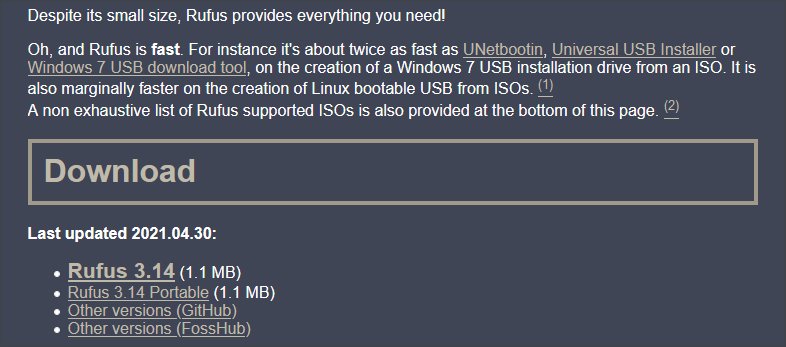
- Download Rufus and run it.
- Select your flash drive on the list of devices.
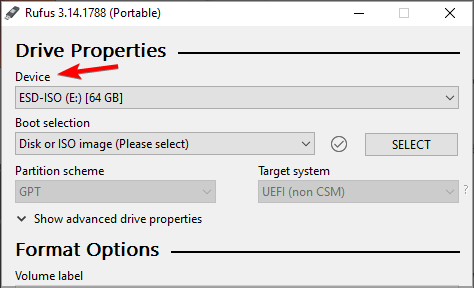
- Click the Select button and locate your Ubuntu ISO file.
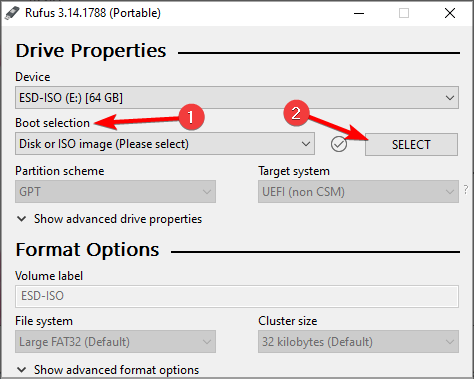
- Click Start to begin the process.

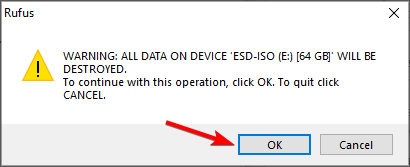
- You’ll be asked to format the drive, so click OK to proceed.
Wait for the process to finish. After creating Ubuntu Live drive, you can install Ubuntu.
3. Select the Ubuntu drive and install Ubuntu
- Make sure that the Ubuntu flash drive is connected to your PC.
- While your PC boots, keep pressing F2, F10, or F12 to access the boot menu and select your USB drive. The key might be different depending on your motherboard.

- If you can’t open the boot menu, access BIOS and then set your flash drive as the first boot device and save changes.

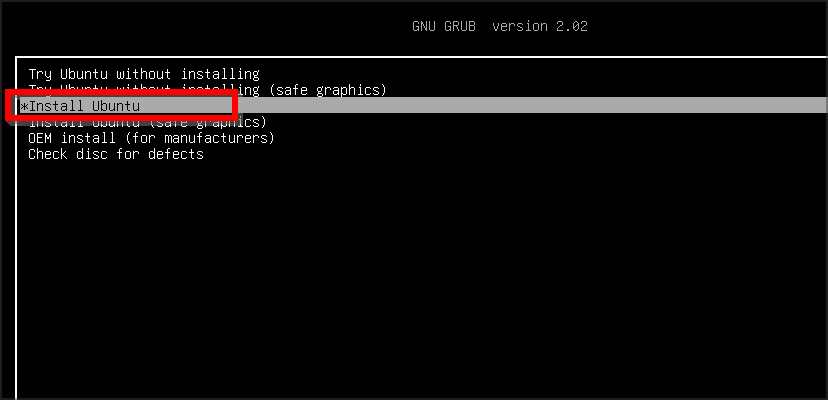
- When your PC boots from the flash drive, choose the option to Install Ubuntu.
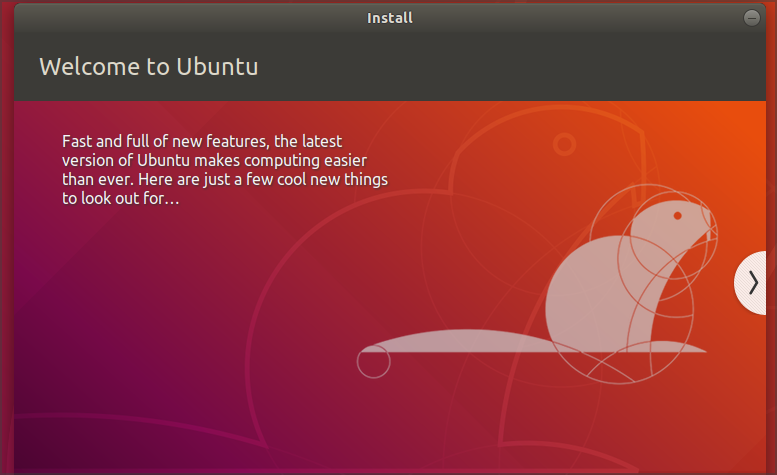
- Select the language and the keyboard layout that you want to use.
- Then, select Normal installation and click Continue. You can also use Minimal installation and download the necessary updates later.
- Select Something else.

- Up next, select the partition that you created for Ubuntu and format it to the ext4 file system.

- Click on Install Now.
- Select your location.
- Enter the login details for Ubuntu and click on Continue.

- Wait for the installation to finish.
- Click the Restart Now button.

After doing that, you just need to select the operating system that you want to boot to and that’s it. As you can see, it’s easy to dual boot Windows 11 and Ubuntu, especially if you already have Windows installed.
If you change your mind and war to remove Ubuntu from dual boot on Windows 11, this guide will show you how.
Install Windows 11 after Ubuntu
1. Create a dedicated Windows partition
- Open the Terminal and enter the following command:
sudo apt install gparted - Press Y to proceed.
- Now open GParted.
- Find the partition that you want to shrink. Keep in mind that you can’t shrink the Ubuntu partition while Ubuntu is running. If you want to do that, you need to use an Ubuntu flash drive.

- Right-click the partition and choose Unmount.

- After unmounting the partition, click on Resize/Move.
- Set the New size to 50000 or more and click on Resize/Move.

- Click the Apply icon in the toolbar to save changes.
- Unallocated space will now appear. Right-click it and choose New.
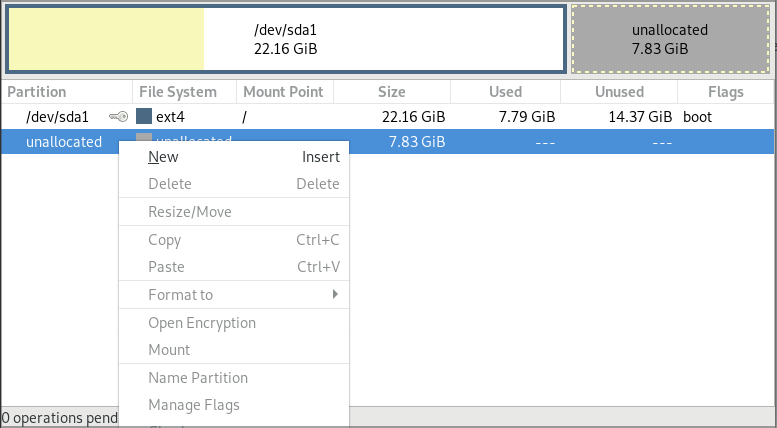
- Set the File system to ntfs and set the maximum size for the partition. Now click Add.

- Click Apply icon to save changes.
- Lastly, locate the partition that you unmounted, right-click it and choose Mount.
2. Download Windows 10 and make a bootable media
- Head over to the Microsoft download page.
- Select the version of Windows 10 that you want to download.
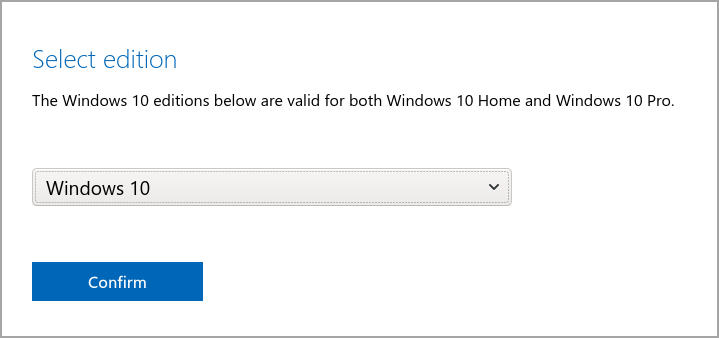
- Select the language and make sure to choose the 64-bit version.

- Download the ISO file.

- Connect a USB flash drive to your PC. You’ll need an 8GB drive, but a larger one might work better.
- Open GParted and select your USB flash drive from the top right corner. It should be named /dev/sdb.
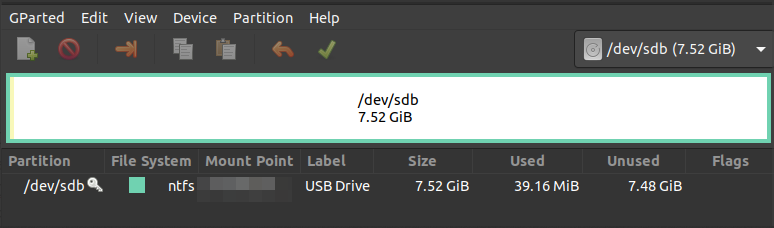
- If any partitions have a key icon next to their name, right-click them and choose Unmount.
- Right-click the partition and choose Format.
- Set the size of the partition to the maximum value and set the file system to ntfs or exfat.
- Click Apply in the toolbar to save changes.
- Locate the Windows 10 ISO file, right-click it and choose Open With, and then select Disk Image Mounter.

- Open the mounted ISO file.
- Select all files and copy them.

- Move to your USB flash drive and paste the files there.
We’ve discovered that not all users have the option to mount the ISO files in the context menu. If that’s the case, do the following:
- Open the Terminal.
- Now run the following commands:
sudo mkdir /mnt/windows10/
sudo mount -t auto -o loop /path/to/window-10-iso /mnt/windows10/ - After doing that, you should be able to access Windows 10 ISO by going to the
/mnt/windows10/
 NOTE
NOTE
3. Boot from the flash drive and install Windows 10
- Enter BIOS and go to the Security section. Disable Secure Boot.
- Save changes and exit BIOS.
- Press the dedicated key to open the boot menu and select your flash drive. If you don’t know the key, you can set the USB flash drive as the first boot device.
- When you boot from your flash drive, select the desired language time format.
- Select the version that you want to install and accept the terms of service.
- Then, select Custom: Install Windows only (advanced).

- It’s important to select the partition specifically for Windows. If you select the wrong partition, you’ll permanently lose your files.

- The installation will now start. Wait while Windows is being installed.
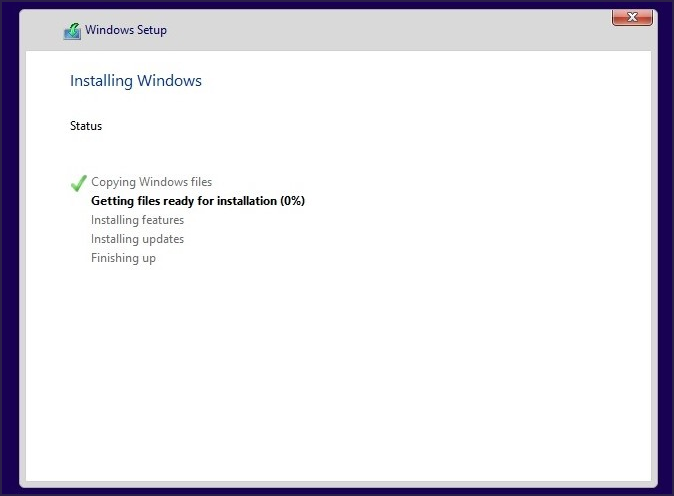
- Once the installation is finished, your PC will restart.
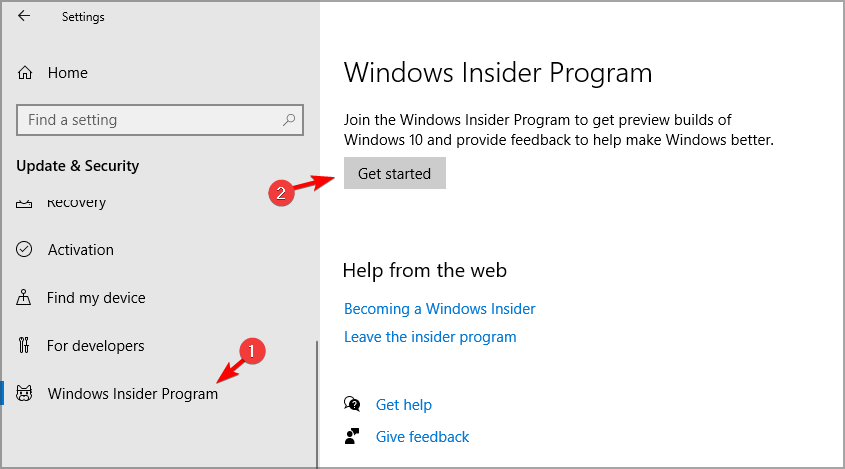
4. Join the Windows Insider Program and upgrade to Windows 11
- Open the Settings app and head over to the Update & Security section.

- In the left pane, select Windows Insider Program. Now click the Get started button in the right pane.
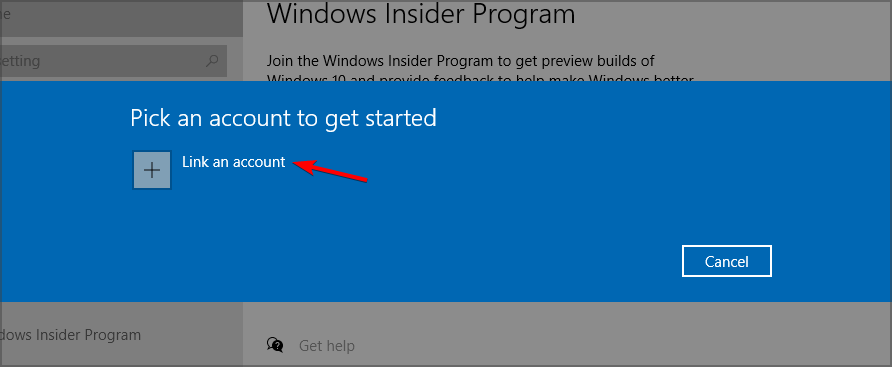
- Click on Link an account and select your Microsoft account.
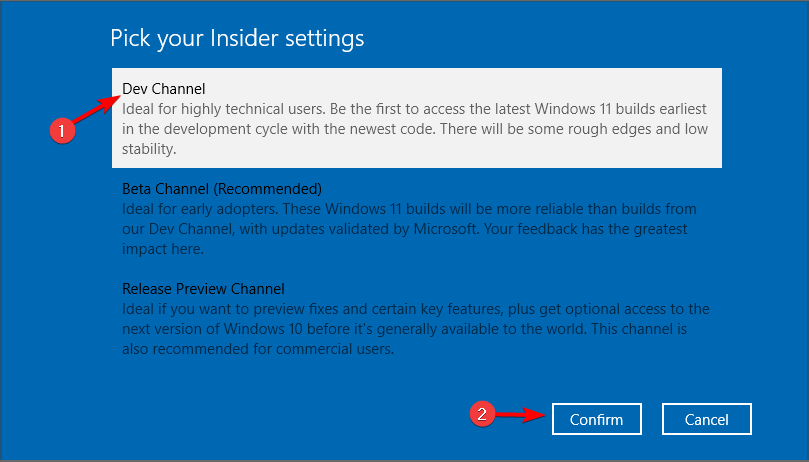
- Select Dev Channel and click on Confirm.
- Accept the privacy statement and click on Restart Now.
- After you’ve joined the Windows Insiders program, go back to the Settings app.
- Head over to the Update & Security section and click on Check for updates button.
- Windows will now automatically download the Windows 11 update.
- Once the update is downloaded, restart your PC to install it.
How do I repair GRUB?
Many users reported that if you dual boot Windows 11 and Ubuntu, the latter isn’t available from the boot menu at all. To fix that, you need to do the following:
- Press the boot menu key and select Ubuntu from the list.
- Make sure that you’re connected to the Internet.
- Open the Terminal and run the following commands:
sudo add-apt-repository ppa:yannubuntu/boot-repair
sudo apt-get update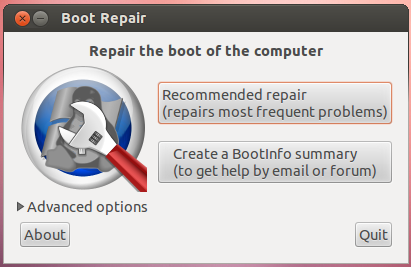
sudo apt-get install -y boot-repair && boot-repair - After the Boot-Repair is installed, type boot-repair in the Terminal to start it.
- Select Recommended repair.
- After the repair is finished, check if the problem is still there.
Alternatively, you can fix this problem by doing the following:
- Boot to Ubuntu, as we showed you in the previous section.
- Open Terminal and run the following command:
sudo update-grub2 - Once the process is finished, go back to BIOS.
- Head to the boot section and set Ubuntu as the first boot device.
Windows will always replace your bootloader, especially if you install it after Ubuntu or any version of Linux. Still, hopefully, this method will help you fix the problem on your own.
To learn more, check our guide on how to fix Windows 10 and Ubuntu dual boot issues.
NOTE
Does Ubuntu support Secure Boot?
Secure Boot is a technology that verifies the code launched by the firmware to prevent rootkits. Many Linux distributions don’t support Secure Boot, so you must disable it first if you want to install them.
Ubuntu has been compatible with Secure Boot since version 12.10, and it should work on most PCs with Secure Boot enabled.
However, only Microsoft signed the first-stage EFI boot loader, which may lead to some boot issues on certain PCs. If this happens, you’ll have to disable Secure Boot from BIOS.
What are the disadvantages of dual booting?
Regarding the disadvantages, dual booting requires a lot of space on your PC, especially if you plan to use both operating systems regularly and install various software.
This isn’t a problem with larger hard drives, but if you’re running low on storage space, you might want to free up some space or consider upgrading your storage.
Another disadvantage of dual booting is multitasking. There’s no quick and easy way to boot to the other operating system when using the dual boot.
Instead, you must restart your PC and choose the operating system you want to access. Remember that you have to do this every time you want to switch to another operating system.
This isn’t a major problem, but it can sometimes become tedious, primarily if you use both operating systems frequently.
Lastly, booting issues can occur, but this mostly happens when installing Windows after Ubuntu or any other version of Linux.
What Ubuntu distros can I dual boot with Windows 11?
Ubuntu has eight different official distributions, and they are the following: Kubuntu, Lubuntu, Ubuntu Budgie, Ubuntu Kylin, Ubuntu MATE, Ubuntu Server, and Ubuntu StudioXubuntu.
As for third-party distributions, there are about 40 of them, if not more. Regarding popularity, these are the top 3 most popular Ubuntu-based distributions:
- Linux Mint
- Pop!_OS
- elementary OS
All Ubuntu distributions can be dual-booted with Windows 11 without any major problems, and installing them in dual-boot mode is similar for all of them.
The only issue might occur if you have Secure Boot enabled and are trying to install an older version of Ubuntu, but that can be easily fixed.
If you want to dual-boot Windows 11 and Ubuntu, follow our guide’s instructions.
As an extra tip, with WSL2 advancements, you can now access EXT4 partitions in Windows 11.
Things are no different if you want to dual boot Windows 11 and Windows 7. Create a separate partition for the other operating system and follow our detailed procedure.
Now with Windows 11 Insider Preview Build 26052, you can use Sudo command in Windows 11, check out this guide to learn how to do that.
Have you ever tried Ubuntu, and are you planning to dual-boot Windows and Ubuntu once Windows 11 is released? Let us know in the comments below.
Read our disclosure page to find out how can you help Windows Report sustain the editorial team. Read more


Improve this guide


User forum
0 messages