FIX: Can't update spyware protection on Windows 10/11/7
7 min. read
Updated on
Read our disclosure page to find out how can you help Windows Report sustain the editorial team. Read more

Having everything up-to-date is paramount. One could justify moving from Windows 7 to Windows 8 or Windows 10 by up-to-date protection updates which subdue virus and spyware threats. However, even the most distinctive advantage sometimes fall short. Namely, a moderate number of users wasn’t receiving any Windows Defender update on Windows 10 or Windows 8/8.1, respectively.
In order to address this, we provided the list of the most viable solutions. If you’re not seeing any definition updates for Windows Defender, move gradually through the list.
What to do if Windows 10 won’t update virus and spyware protection?
- Check for updates
- Make sure there’s no a third-party antivirus installed
- Restart services
- Run SFC
- Use CMD to enforce the updates
- Check Group Policy
- Download updates manually
- Reset PC to factory values
1. Check for updates
All chances are that you already tried this. As you already know, the Defender’s updates for virus and spyware protection come via Windows Update. However, as we already saw so many times before, these updates tend to misbehave. In order to surpass the automatic distribution (which is obviously failing in this case), you can navigate to Windows Defender Security Center and check for updates by hand.
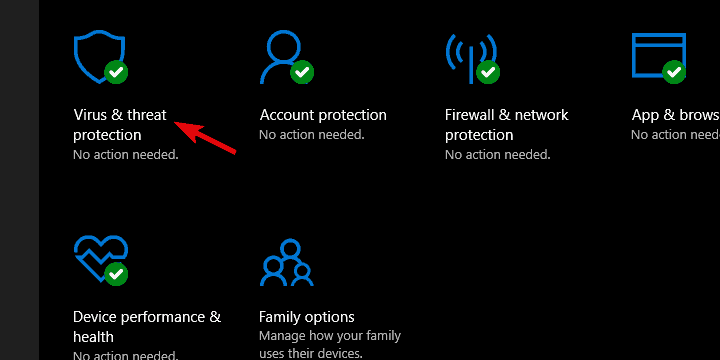
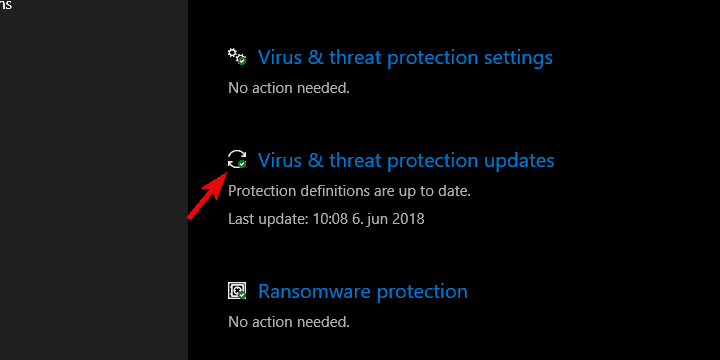
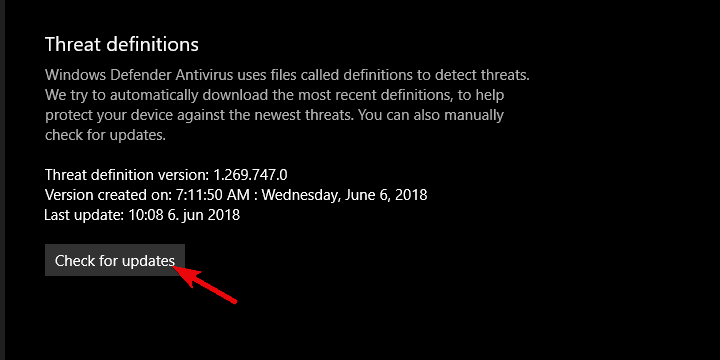
Follow these steps to update Windows Defender via Security Center:
- Open Windows Defender Security Center from the Notification area.
- Choose Virus & threat protection.
- Open Virus & threat protection updates.
- Click on the Check for updates button.
If the error is persistent, follow the additional steps we provided below.
2. Make sure there’s no a third-party antivirus installed
Now, you already know that there’s no place for two antimalware solutions on Windows 10. Or any Windows iteration, for that matter. If you decide to place your trust in a third-party antivirus, Windows Defender will be disabled automatically. Now, if you, in the meantime, decide to use Windows Defender instead, it’s really important to delete all traces of the third-party antivirus which preceded it.
So, a thorough clean up is necessary in order for Windows Defender to work without any issues. You can navigate around and clean the associated files on your own, or use a third-party tool which will do it for you. There’s a huge list of available Uninstallers and Cleaners, so we recommend checking our list of the best available tools.
These tools will clear all remaining files and, after a restart, Windows Defender should work fine. However, if that’s not the case, there are a few more things you can do.
3. Restart services
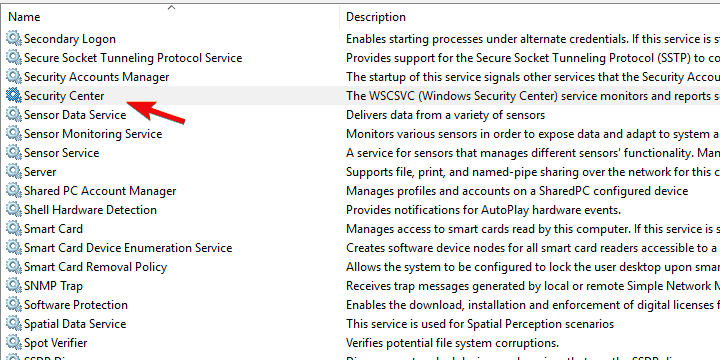
Restarting the dedicated service for Security Center might help, as well. If Windows Defender is active, this service should automatically start with the system. However, due to a minor bug, certain system services tend to stop. Also, by restarting the service at hand, you’ll restart the system application, and this just might get Windows Defender going.
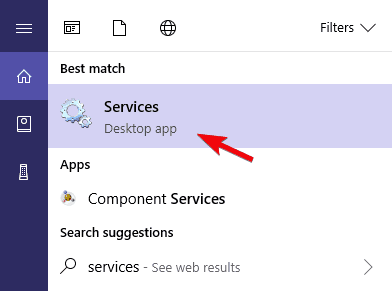
Here’s where to find the service and how to restart it:
- Type services in the Windows Search bar, and open Services from the list of results.
- Navigate to “Security Center” service and make sure it’s running.
- If it isn’t running, right-click on it and click Start.
4. Run SFC
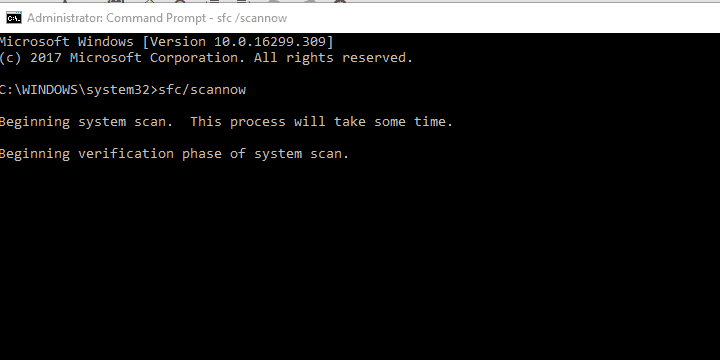
When the built-in system resources start failing, the troubleshooting steps we commonly use on third-party applications are out of the reach. What we can do instead is employing the built-in tools. One commonly-used tool for addressing system errors is System File Checker also known as SFC. This tool runs through a command line and it verifies the integrity of system files.
Here’s how to run SFC in Windows 10:
- In the Windows Search bar, type cmd, right-click on the Command Prompt and run it as admin.
- In the command-line, type sfc/scannow and press Enter.
- Wait until the procedure ends and restart your PC.
- Try updating Windows Defender‘s virus and spyware definition again.
5. Use CMD to enforce the updates
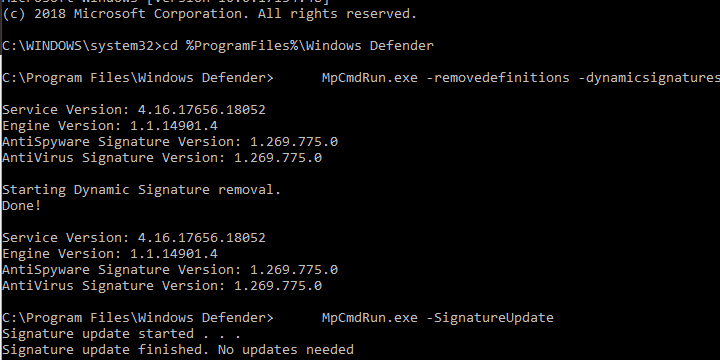
Command Prompt comes into play in the scenarios when you need to take complete control of your system. Clearing updates with caused stuck and restarting the update process can be easily done with a few commands. Once you’ve done it, the update cycle should continue working as intended — without errors and on time.
Follow these steps to enforce Windows Defender updates with Command Prompt:
- In the Windows Search bar, type cmd, right-click on the Command Prompt and run it as admin.
- In the command-line, copy-paste the following lines and press Enter:
- After that, press Enter again to update signatures and restart your PC.
6. Check Group Policy
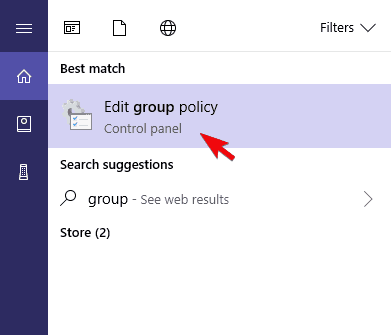
As we already said, when you install a third-party antivirus, Windows Defender automatically disables. The system will see to it. However, if you’ve changed your mind, getting back to Windows Defender can, for some users, be quite a chore. Namely, in order to re-establish Windows Defender, you’ll need to confirm that the feature is enabled in the Group Policy Editor.
Here’s what you’ll need to do:
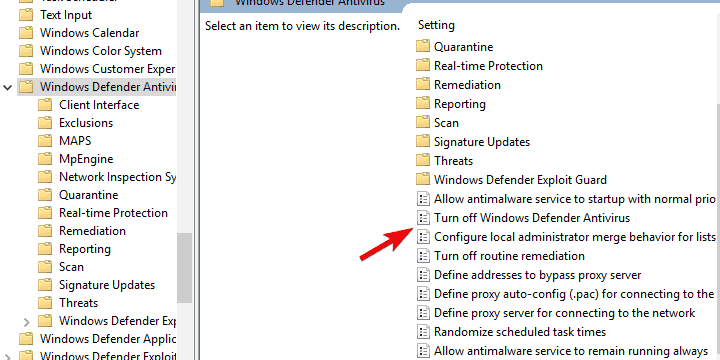
- Type group policy in Windows Search, and open “Edit group policy“.
- Navigate to: Computer Configuration/Administrative Templates/Windows Components/Windows Defender Antivirus.
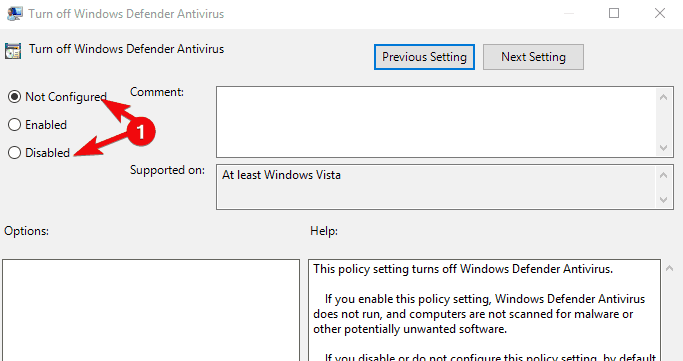
- Make sure the “Turn off Windows Defender Antivirus” is disabled or not configured.
If you can’t access the GPE, there’s still a way to re-enable Windows Defender. You can navigate to Registry Editor and make some needed changes. However, please do be careful, as these are the risky grounds and a misuse can lead to critical system damage.
Follow these steps to tweak Defender-related Registry settings:
- Type regedit in Windows Search, right-click on Regedit and open it as an administrator.
- Navigate to: HKEY_LOCAL_MACHINESOFTWAREPoliciesMicrosoftWindows Defender.
- If there’s an entry DisableAntiSpyware, right-click on it and open Properties.
- Change its value to 0 (zero) and exit Registry Editor.
7. Download updates manually
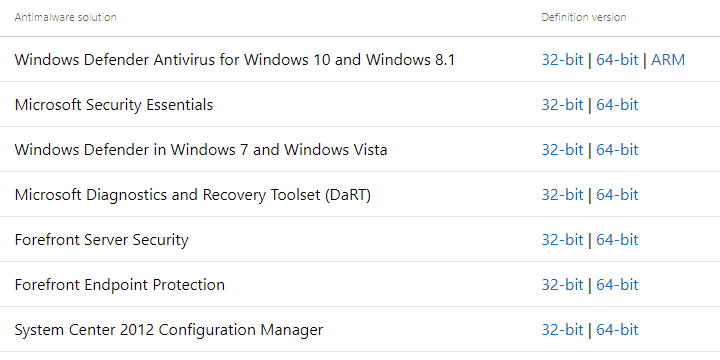
If the issue is persistent and Windows just won’t comply, you can try to update the virus and spyware database manually. Namely, all latest definitions are stored online, on a dedicated website. You can navigate there and download fitting definition updates, depending on your OS version (Windows 10 or Windows 8/8.1) and the system architecture.
Follow these steps to install updates for Windows Defender manually:
- Navigate to the official site with definition updates, here.
- Scroll down and download the proper version suiting your system’s version and architecture.
- Install it like any other application and restart your PC.
8. Reset PC to factory values
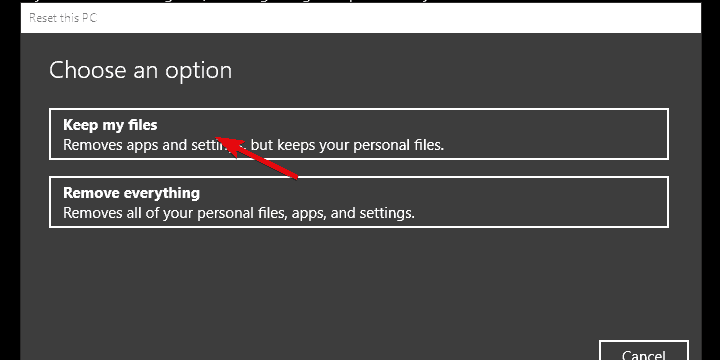
Finally, if you’re still unable to resolve the issue at hand after all previous steps, we suggest restoring Windows to its default values. This is much better than the reinstallation, as you get to keep your files. This is more of a refresh for the system and it’s a viable last resort if system features are giving you a hard time.
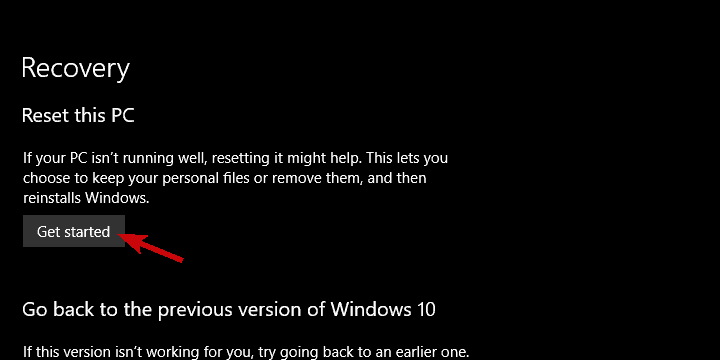
Follow these steps to reset your PC to factory settings:
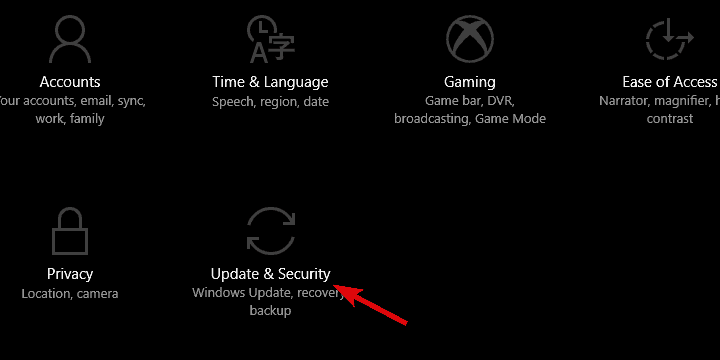
- Press Windows key + I to open Settings.
- Choose Update & Security.
- Select Recovery.
- Click ”Get started” under Reset this PC.
- Choose to keep the files and continue with the resetting procedure.
That’s it. We hope this was an informative read and that you’re now able to update Windows Defender without issues. You need that definition up-to-date at all the times, so it’s quite dangerous to neglect it.
Also, don’t forget to speak your mind about this issue and provide alternative solutions. The comments section is just below.
RELATED STORIES YOU SHOULD CHECK OUT:




User forum
0 messages