Best Green Screen Software for Windows 10: 7 Top Solutions
Seamlessly remove the green screen with effective tools
Key notes
- Cinematography is a complex domain, so there is a considerable need for editing and adding visual effects in the video production stage.
- Green Screen technology is a must-have tool for marketing agencies and cinematography specialists in video production.
- The Adobe suite has some amazing green screen editors for you to work with, so check them out below.
- If you are looking for the best green screen app for Windows, keep reading our article for more information!

Chroma Keying or popularly known as Green Screen technology is commonly used in video production.
Be it your favorite superhero flying in space or the news channels showing a giant weather forecast map behind the presenter on Live TV.
Much of this is achieved with the help of Chroma keying using green screen software. If you are into video production, you already know how useful green screen is.
Irrespective of the size, almost every production house uses a green screen to record the videos as it gives the flexibility to edit and add visual effects in the video production stage while keeping the cost low.
How does a green screen work?

Have a look at the image above. A person is standing in front of a green screen. In the first phase, production houses shoot the videos using the green screen as shown in the image.
The next phase involves a process called Keying.
Keying is the process of isolating a single color from a still or multiple frames (videos) and replacing it with a new image (commonly backgrounds). To achieve this, you need a video editing tool or green screen software.
Note that, Chroma keying does not necessarily involve green screen but any color and mostly blue apart from Green.
Companies use Chroma keying to produce professional-looking marketing and informative videos about the products, and product updates quickly without overspending on the production cost.
In this article, we will explore the best free green screen software as well as paid Chroma key software for Windows 10 which will help you choose the right software for your next video project.
What is the best green screen software for Windows 10?
Adobe After Effects (recommended)

Green screens are all about special effects, be it for cinematography or just your typical YouTube video, and in this day and age, you cannot talk about videos with special effects without mentioning Adobe After Effects.
This program was specially created for digital visual effects, motion graphics, and compositing. Its popularity made it a must-have in the post-production process of film making, video games, and television production.
In short, describing it as the Photoshop of videos would be an understatement, but it surely does act as a very relevant summary.
Of course, you don’t have to settle just for the base program. Getting Adobe After Effects you are now open to using the many plugins that it can handle.
A variety of plug-in styles exist, such as particle systems for realistic effects for rain, snow, fire, etc.
All these together with the typical green-screen setting of creating videos means that editing and post-production will be a piece of cake, without actually needing any prior experience with similar tools.
All in all, if you want to bring your videos to life in a whole new way by making images brighter, colors more vivid, and transforming an otherwise boring presentation into something ripped out of a sci-fi movie.
How do I remove green screen in Adobe After Effects?
- Click once on the green screen video footage.
- This will make it active in Adobe After Effects.
- Click on Effect, Keying, and Keylight.
- This is a plug-in effect for Adobe After Effects that comes pre-installed
- Go to the Effect Controls tab.
- Choose the Eyedropper icon.
- It is next to the Screen Color option.
- Select a section of the green screen somewhere around the middle of your video.
- Click on View and then choose Status.
- You can use it to see any parts of the green screen that were not removed.
- These areas will appear white and gray around the object.
- Increase the Screen Grain until the outer edges of gray and white disappear and all you see is the shape of the object.
Adobe After Effects
Let your imagination roam free with this fantastic tool that allows you to create movie titles, add sensational effects to clips or remove objects.Adobe Premiere Pro (suggested)

Adobe Premiere Pro is the industry standard when it comes to video editing software. Adobe is not new to the digital editing software game.
Like its other tools, Adobe Premiere Pro shines with its state-of-the-art tools, collaboration capabilities, and the support for 360 VR and 4K content despite our love-hate relationship with its signature nonlinear user interface.
The latest iteration of Premiere Pro comes with a more polished user interface and adds more tools to its already huge arsenal.
The Chroma keying is not new to Adobe Premiere Pro and those who can go through the learning curve involving the use of Premiere Pro can do miracles in the digital world.
How do I remove green screen using Adobe Premiere Pro?
The Chroma Keying process with Adobe Premiere Pro is not as easy it is with Camtasia. But, Adobe is a professional video editing tool and has robust green screen footage editing tools on offer.
Once you have a green screen video imported to the editing screen (sequences), go to Videos Effect and select Keying. All the tools required to edit a green screen video is available under the Keying tab.
Begin with adding the Ultra Key effect onto your clip; You can use either Color Key or Ultra Key effect. For this guide, we are using the Ultra Key effect. Use the eyedropper tool and select the green area in the video.
Fine-tune the selection by using the settings option to set the best effect and also adjust numbers under Matter Generation to reduce noise.
There are multiple settings here, play with the options and numbers until you get the desiring result.
After removing the green screen from the video, you can add any object (image) to the background of the video to create a clean and professional-looking video.
The only bitter part is Premiere Pro’s pricing which may not be affordable for everyone. But, if you are a professional with a budget, the Pro in Adobe Premiere Pro indeed holds to its name.

Adobe Premiere Pro
As one of the best video editing software out there, this tool will bring all your projects to a professional level.Camtasia

Camtasia has been my go-to video editor ever since I started making YouTube videos. I may not have been a great video editor, as my post-production videos speak for themselves, but Camtasia is undoubtedly one of the best video editors to start with for any beginner content creator.
Even for professionals who find the sophistication of Adobe Premier suite a little too much, Camtasia has enough tools in its arsenal to help you produce a clean, professional-looking video in no time. The learning curve is simple as drag, drop, edit, and render.
Talking about the green screen bit in Camtasia, the tool offers a “remove a color effect” in the software. The users can remove any color from a video by following a simple procedure.
How do I remove green screen using Camtasia?
The working of Remove a color effect is simple. The user needs to drag the Remove a Color effect on any video on the timeline. From the properties panel, select the effects and pick a color that you want to replace with the green screen.
After the selection is made, make sure to fine-tune the properties like tolerance, softness, and defringe to make the video look as real as possible.
Once done, proceed with adding a new background that will replace the green screen by adding the background below the edited clip.
Camtasia is an excellent tool particularly for new content creators who want to create eLearning courses and how-to videos for their audience as it offers screen recording and web capturing features as well.
It is also less expensive than other sophisticated tools like Adobe Premiere Pro, and the vast collection of how-to videos makes it a go-to tool even for a novice.

Camtasia
Create videos like a pro with this easy to use tool, without spending countless hours with complex commands.MAGIX VEGAS Pro

Vegas Pro (formerly known as Sony Vegas Pro) now owned by Magix is a professional video editor with tons of editing features for the professionals. The latest iteration of Vegas Pro has put the tool right back in competition with Adobe Premiere Pro and other premium video editing software.
Vegas Pro now offers an improved user interface along with excellent import and export format support.
It also comes with support for motion tracking, video stabilization, HDR and 360-degree videos. In addition, Vegas Pro now supports Bézier masking OFX plug-in and Boris FX Continuum Lights Unit for applying masks to multimedia files.
Like any other Professional-grade video editors, Vegas Pro can be used to remove green from a video. The Chroma keying process in the tool is straightforward for beginners.
For the pros, Vegas Pro does have the option to fine-tune green screen videos to achieve Hollywood grade results.
Our only complaint about Vegas Pro is with its performance which can be improved with the update and also the media library that doesn’t look as robust as Premiere Pro.
How do I remove green screen using Vegas Pro?
Launch Vegas Pro. Import the green screen clip and drop it on the video track in the Timeline. Also, import the background-clip or image that you want o to replace with the green screen and drag it to Track 2.
Click on Video Fx drop-down menu, select Chroma Keyer and drag and drop it on the green screen video in the video track. Use the eyedropper under the Color section and select the green color.
On the preview window, click on the green screen to remove the green screen from the video and the background image will become visible.

Magix Vegas Pro
A powerful editing tool that offers features based in artificial intelligence that will help get your work done faster.DaVinci Resolve 15

Blackmagic Design has done real magic with the launch of Davinci Resolve 15. The updated version of the ever-popular Davinci Resolves video and audio editor is more or less on par with premium video editing tools like Apple’s Finalcut Pro and the Adobe Premiere Pro with its stunning list of features and an unbeatable price of 0$.
The biggest addition to the DaVinci Resolve 15 is the integration of the Fusion app used by Hollywood studios. The software is easy to learn and looks better optimized than the Adobe Premiere Pro when it comes to importing media files. In the exporting process, Premiere Pro still takes the lead, though.
DaVinci Resolve 15 also has impressive chroma key features that let you edit any green screen video with precision. You can import visual effects from After Effects to DaVinci Resolve for chroma keying as well.
How do I remove green screen using DaVinci Resolve?
Launch DaVinci Resolve. Import the background-clip or image and place it on Track 1. Also, import the green screen video and place it on Track 2.
Go to the Color tab and select the eyedropper. Select the green background in the video. Use the highlight visualizer to see if the background is selected correctly.
You can further fine-tune the keying from the qualifier tab. Also, the use of the blur radius effect will smoothen the edges to make the precise transition between the subject and the background.
DaVinci Resolve 15 is the best free video editor available for Windows. If you are looking for serious video editing software with a green screen removal feature, DaVinci Resolve well worth the time you would spend learning it.
HitFilm

HitFilm is one of the best free green screen software for Windows 10. This free utility is brimming with features, and with some trade-offs, HitFilm is said to be the best free Adobe Premier Pro alternative.
It also comes in a pro version, but we will keep this discussion to the free version of the popular video editor.
HitFilm offers a clean user interface with a good selection of tools. The playback option in the tool can help the user in faster editing. One can also edit the videos when the export is in progress.
In addition, the latest versions add new features from the pro version, including animation keyframing, motion blur, improved layout panel, masking options, additional workspaces, etc.
For those wondering, HitFilm does offer Chroma Keying functionality to remove the green screen and blue screen from videos and images.
Just like Adobe Premiere Pro, the keying effects are placed under the Visual Effect tab. There are multiple options, but the one we need is the Color difference key to remove the green screen.
Tip: HitFilm has video tutorial guides explaining all the features of the tool, including the use of Chroma Keying. You can find it in the Video Tutorials tab.
How do I remove green screen using HitFilm?
- To remove the green screen, import the green screen video clip. Right-click on the video and create a new composite shot.
- In the effects library’s search box, search for green screen / blue screen. Or directly go to Visual Effect, select Keying, and choose Color Different key.
- Find the Color Key difference effect from the result and drag the effect onto your video clip. Next, you need to adjust the gamma slider to remove the major part of the green screen.
- Once it goes black, drop Spill Removal and Matter Cleaner effects onto the video to clean the mess, I mean green.
- Finish the video by adding a new video clip or image to the background of the edited clip replacing the green screen.
Lightworks
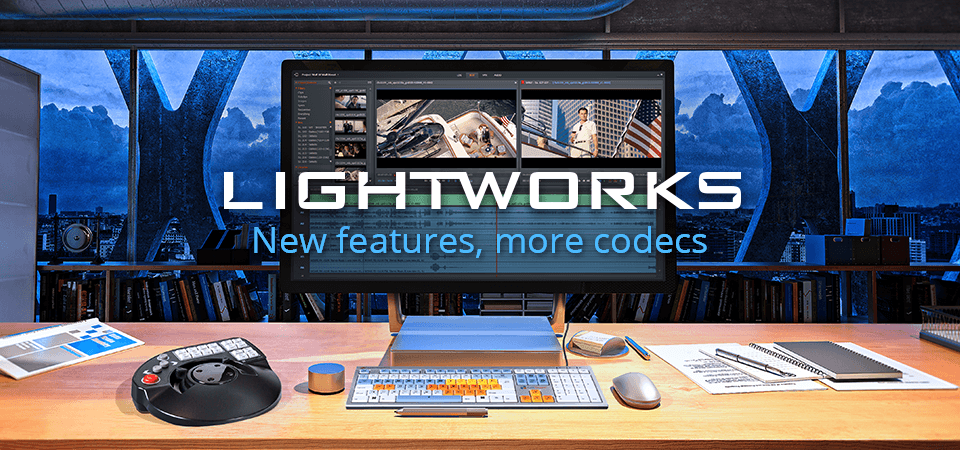
Lightworks is one of the most ALSO free video editors available for Windows. The software comes in free and paid versions. While the free version has almost all the features of the paid version, the exporting process is what makes it a difficult choice despite having excellent importing support.
Lightworks offers a good number of visual effect tools to fine-tune any image or video to its perfection. However, using these effects requires more than just drag and drop work.
Using the free version one can export videos in 720 HD (max) and only in MPEG4/H.264 format. But, for YouTube creators, the videos can be directly uploaded to the streaming platform including Vimeo.
Lightworks also offers Chroma keying to edit green screen videos on Windows computers. The keying process in Lightworks is a little more tedious than other video editors mentioned earlier.
How do I remove green screen using Lightworks?
Launch Lightworks and create a new project. Select a frame rate and import an image or video that you want to use as the background. Click the Edit tab and import your green screen clip onto the V1 track of the timeline.
In the preview window, right-click and select Tracks and add video. Now drag the green screen video onto V1 track and background video/image onto the V2 track. Make sure to match the length of the background video with the original video.
Go to VFX tab. From the timeline select V1 track and click + icon on the left pane. Click the favorite button and select Key and choose Green Screen. Click Add Effects.
Use the eyedropper tool to select the green screen background you want to remove. The auto-selection does a pretty decent job.
However, you still need to do some fine-tuning to get a 100% result. Adjust Saturation and Luminance sliders to achieve the best effect while minimizing the spill.
In the Reveal box, you can preview the video before proceeding with the export. The marked white areas are the parts that will be removed and replaced with the background image.
Read our disclosure page to find out how can you help Windows Report sustain the editorial team. Read more


Improve this guide


User forum
0 messages