How to Update your Asus BIOS [3 Ways]
Three simple and straightforward methods to update your BIOS
6 min. read
Updated on
Read our disclosure page to find out how can you help Windows Report sustain the editorial team Read more
Key notes
- There are different methods of updating ASUS BIOS depending on your motherboard.
- One effective method is the EZ Flash Utility, which lets you update your BIOS online.
- Another effective method is to use the USB Flashback feature that allows you to complete the process without a CPU.
The BIOS plays an important role in the control of the hardware components of your PC and thus should be kept up-to-date. For ASUS users, you can use different ways and tools to update your BIOS.
In this guide, we will detail the steps you need to follow for each method to make the process effortless.
Is it necessary to update ASUS BIOS?
It is necessary to update your ASUS motherboard BIOS just like every other PC makes. This is because an outdated BIOS is prone to different issues and errors.
However, it should be noted that unless security or hardware benefits come with it, you should avoid updating your BIOS. This is because the risk involved is high, and any mistake can be costly.
So, you must check your BIOS version first to see if you need an update before proceeding to the next section of this guide.
How do I update my ASUS BIOS?
1. Using EZ Flash 3 Utility
1.1. Extract the BIOS Update file
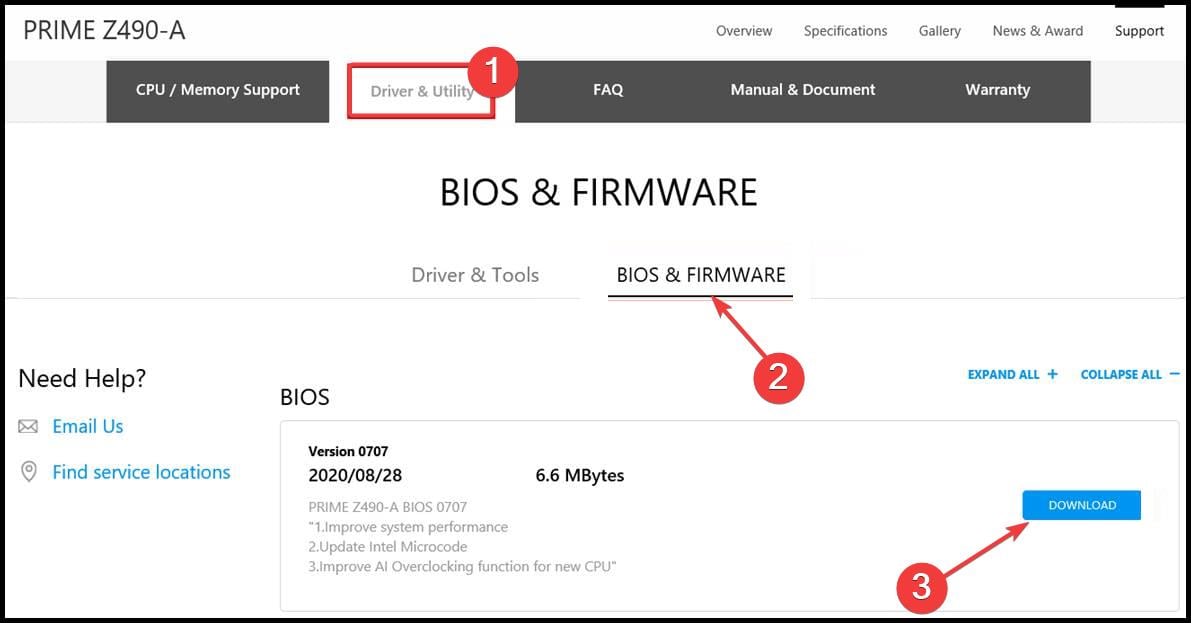
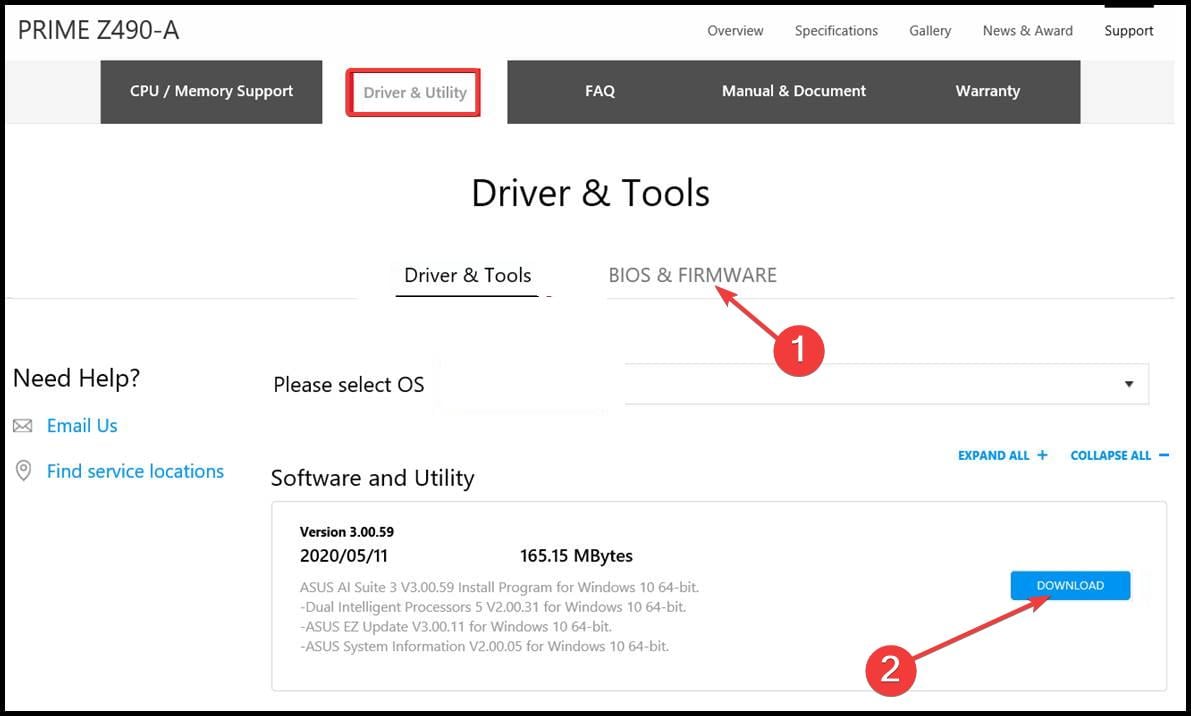
- Visit the official ASUS download center and search for your motherboard’s model name.
- Click the Driver and Utility option.
- Now, select the BIOS & FIRMWARE tab.
- Next, download the BIOS and right-click the downloaded file.
- Choose the Extract files option.
- Finally, copy the extracted file with the largest size to a USB size. Ensure the USB drive is formatted to FAT32 format before using it.
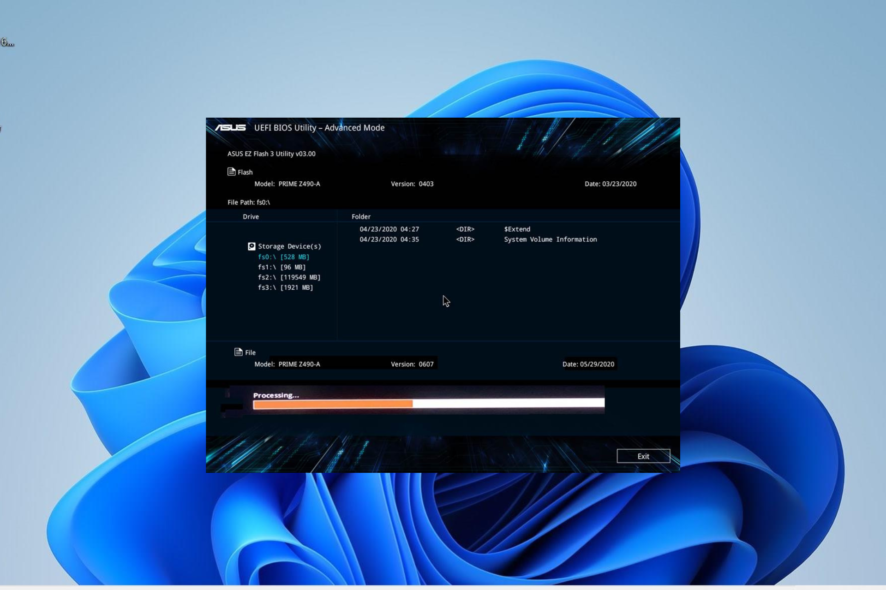
The EZ Flash feature is a unique feature of the ASUS motherboard. It is built into the UEFI BIOS and can be used to update your ASUS BIOS with a USB or online.
Only motherboards with the ASUS EZ Flash 3 feature built-in can use the feature. If you want to use a USB flash drive, follow the steps above to prepare the BIOS file.
1.2. Employing the EZ Flash Utility
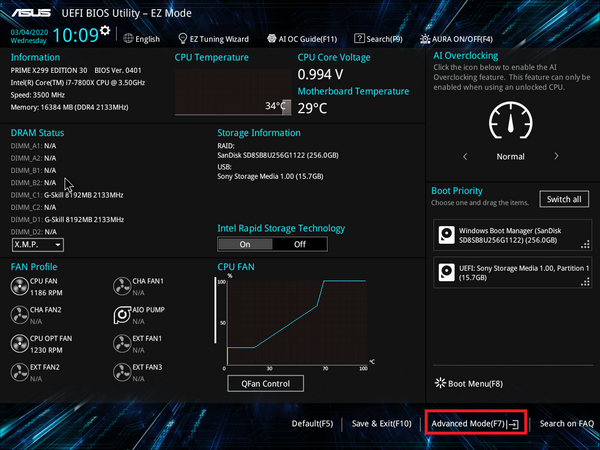
- Shut down your PC. Now, power it on again and keep pressing the BIOS key (F2 or Del) to enter BIOS.
- When you enter the BIOS, click the Advanced Mode option at the bottom of the page.
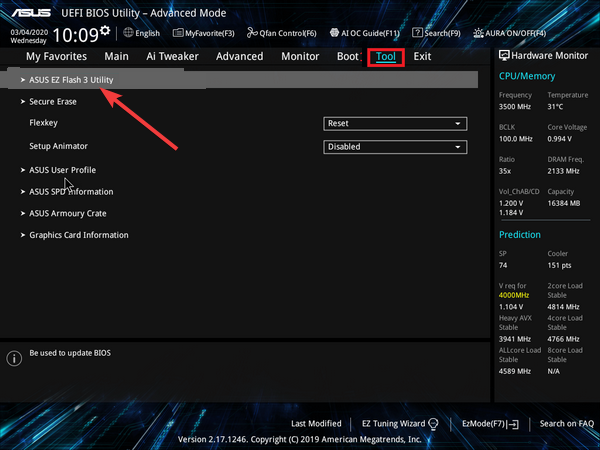
- Click the Tool tab at the top.
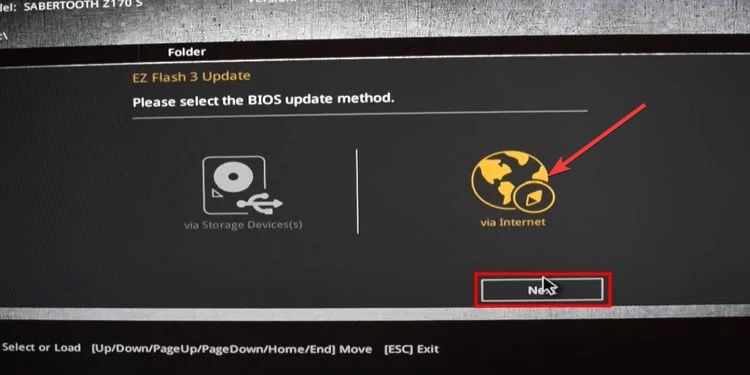
- Now, select the ASUS EZ Flash Utility option in the left pane. If you have the ASUS EZ Flash 2 Utility, you can only use USB for the update, while ASUS Flash 3 can use both USB and the internet.
- To use the USB drive:
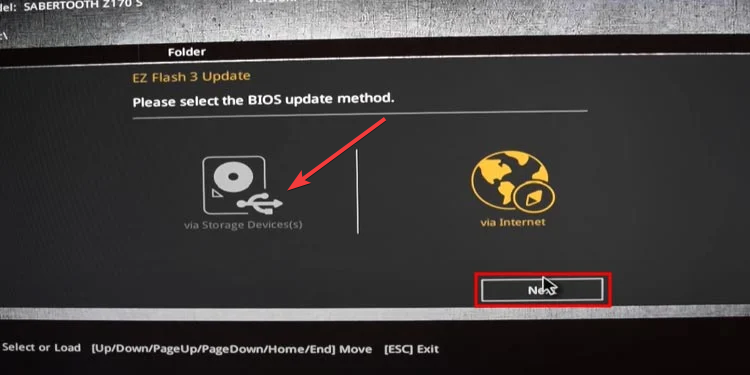
- Select via Storage Device on the next page and click Next.
- Now, choose the USB drive created above and select the BIOS update file you extracted.
- Click the Yes button when the confirmation page to read the drive pops up.
- Lastly, click the Yes button again to confirm the update, and your PC will restart when the process is complete.
- Select via Storage Device on the next page and click Next.
- If you have ASUS EZ Flash 3 and want to use the internet (note that you can only use a wired connection):
- Finally, note that you must not press any key or allow your PC to power off when it restarts after the BIOS update.
With the above steps, you should be able to update your ASUS BIOS using the EZ Flash Utility. To confirm the success of the process, you can check your BIOS version.
2. Using AI Suite
- Download the AI Suite 3 app from the Download Center and extract the files.
- Double-click the AsusSetup.exe file to run it. Follow the onscreen instructions to complete the process and restart your PC.
- Next, download and extract the BIOS update file on your PC.
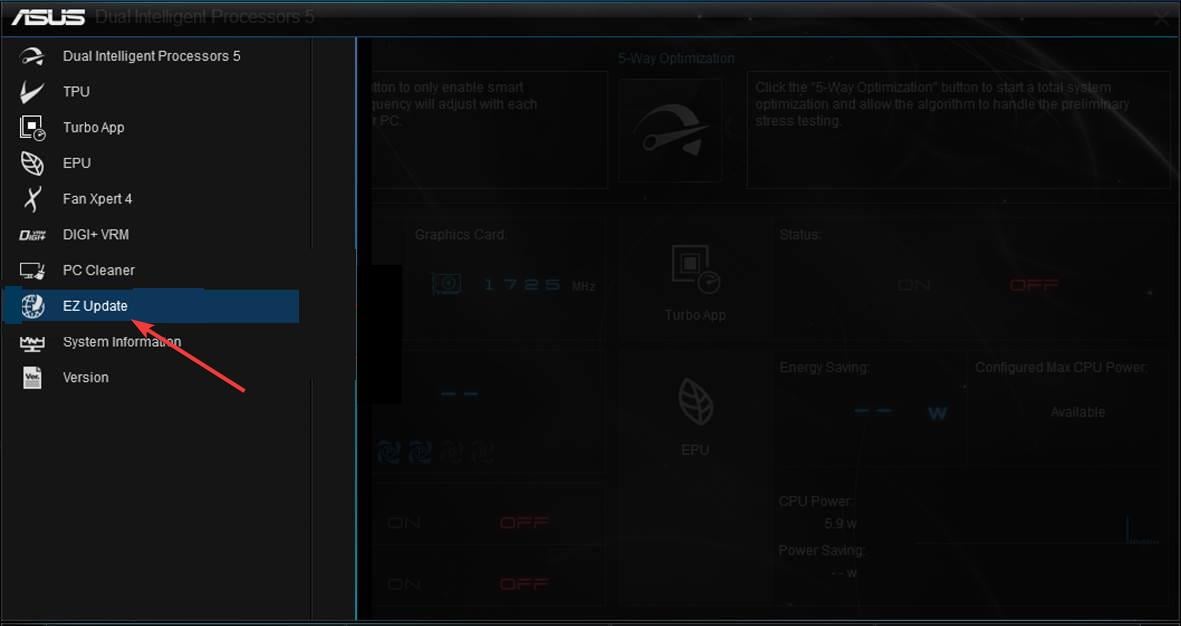
- Now, launch the AI Suite 3 app and click the More button (three horizontal dots) in the top left corner.
- Choose the EZ Update option in the left pane.
- To download the update online:
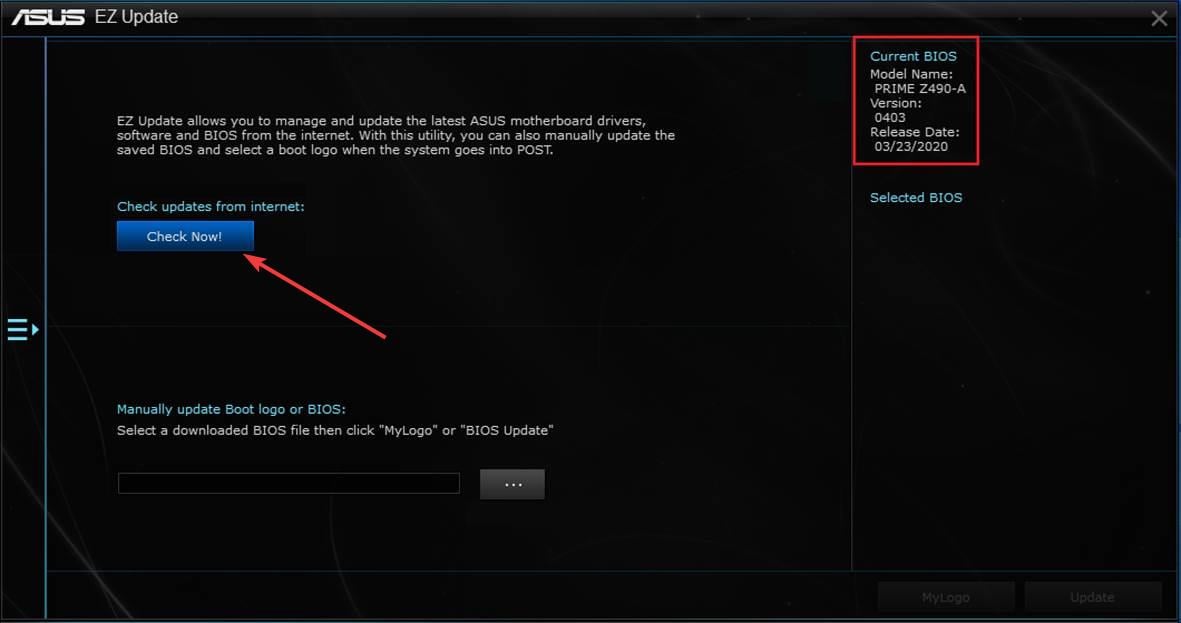
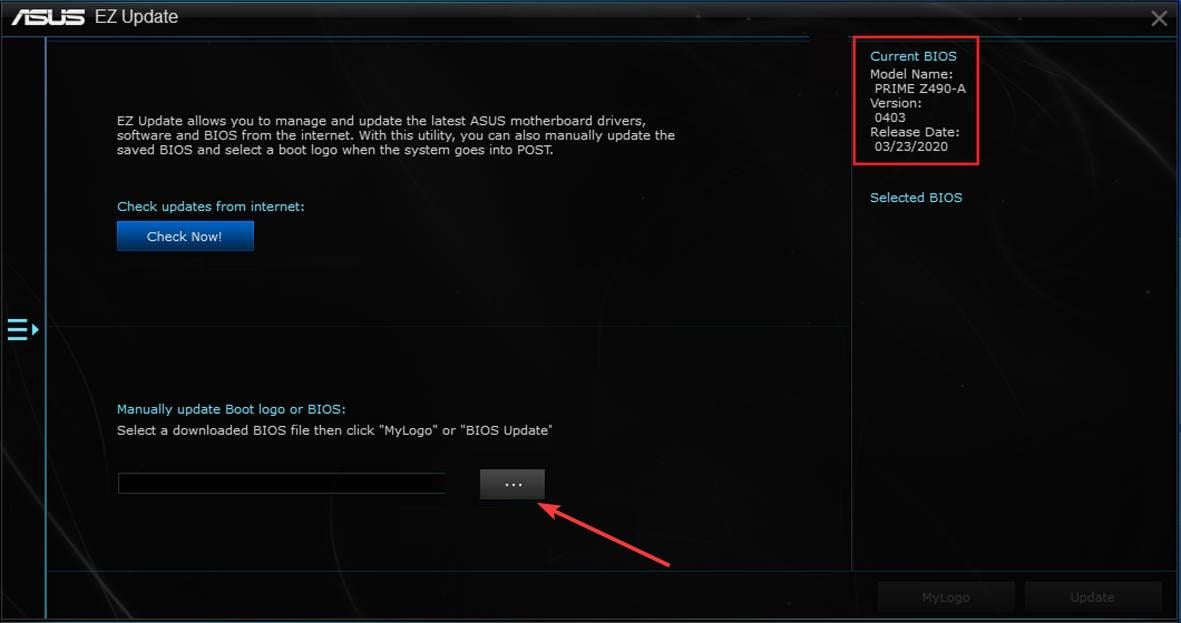
- Click the Check Now! button.
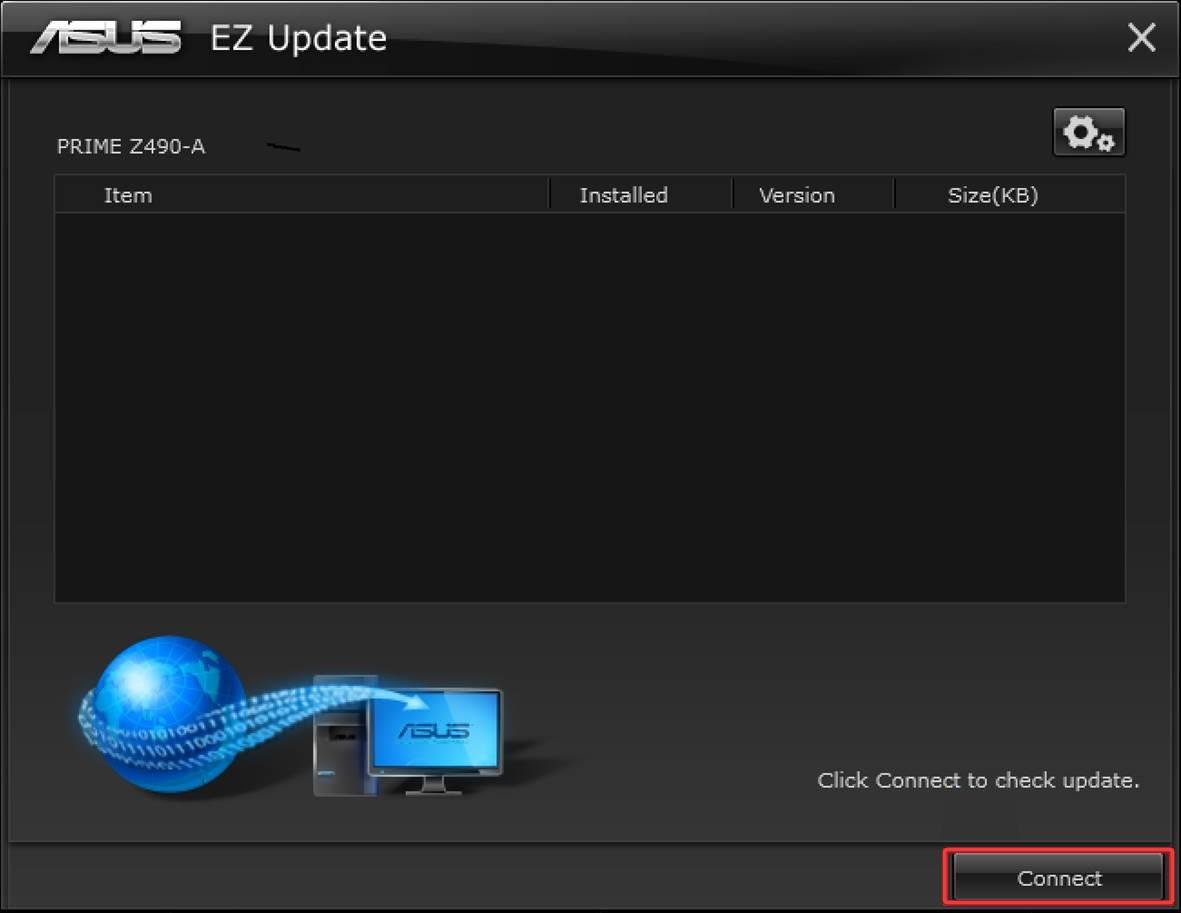
- Now, click the Connect button to connect to the Internet and check for updates.
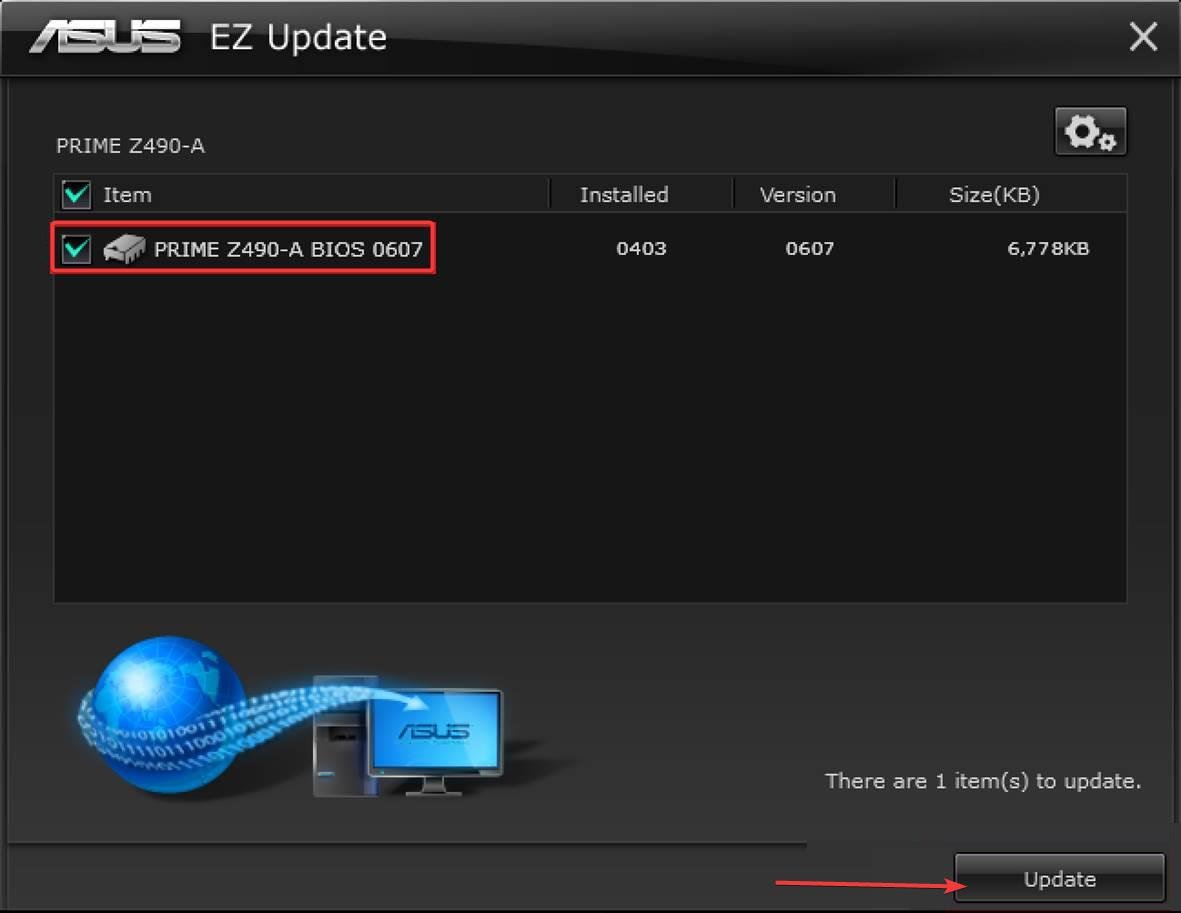
- If there is an update available, click the Update button.
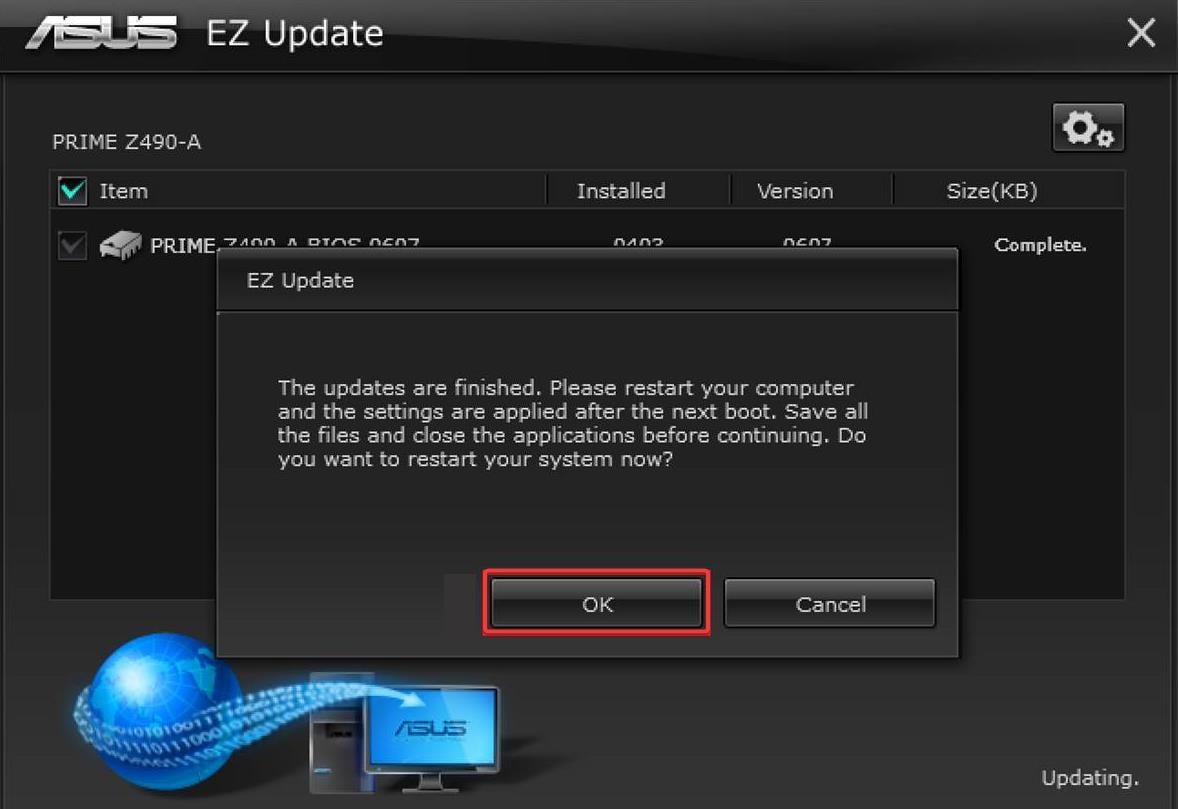
- Click the OK button when prompted to restart your PC.
- When your PC restarts, the EZ Update will be loaded automatically to complete the process.
- Click the Check Now! button.
- To use the update file extracted on your PC:
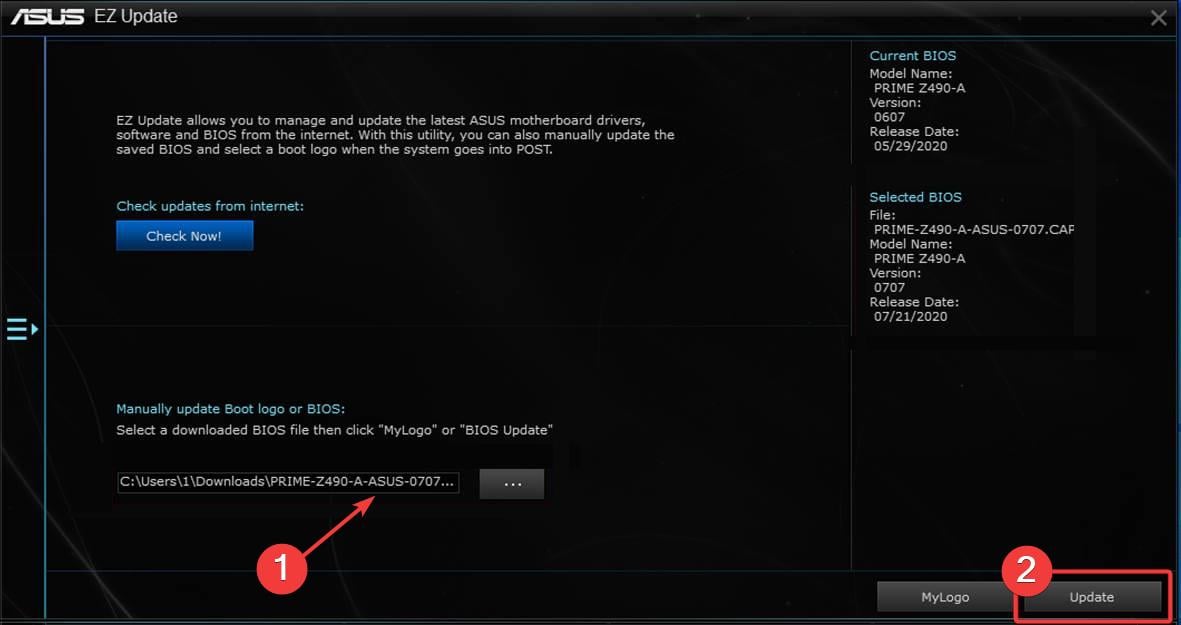
- Click the three horizontal dots under the Manually update Boot logo or BIOS.
- Choose the update file you extracted in Step 3 above.
- Now, click the Update button in the bottom right corner.
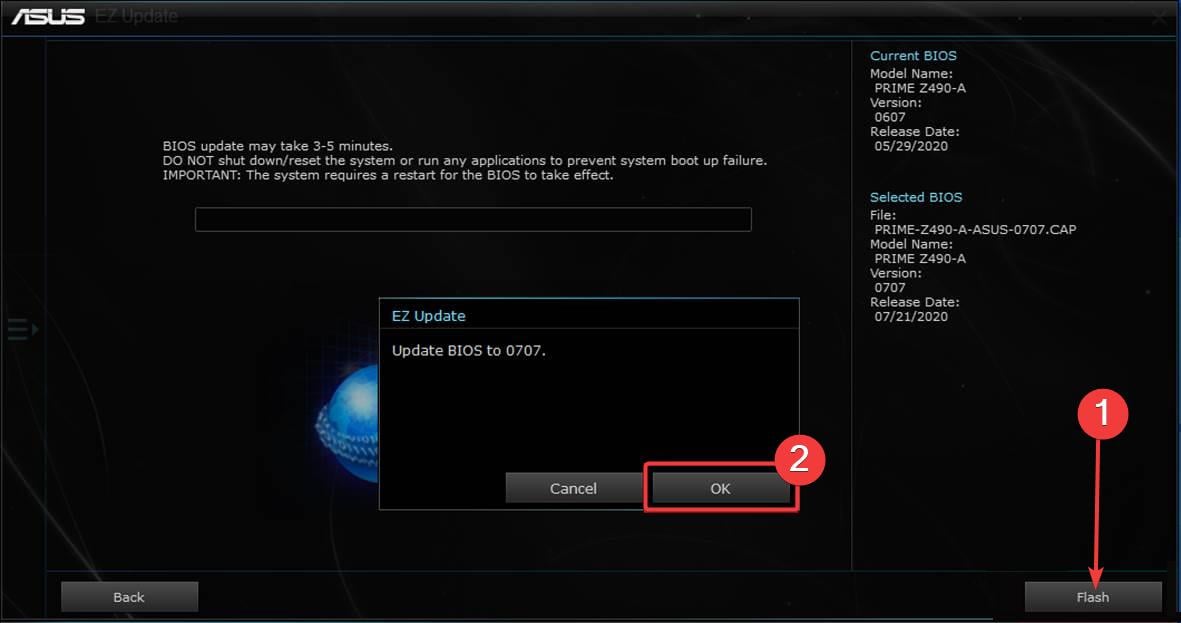
- Click the Flash button and confirm the BIOS file.
- Finally, click the OK button and wait for the process to complete.
- Click the three horizontal dots under the Manually update Boot logo or BIOS.
If you want to update your ASUS BIOS with the update file available locally on your PC, the AI Suite is your go-to option.
3. Using the Flashback USB
 Tip
Tip
- Download the BIOS update file and extract its content.
- Double-click the BIOSRenamer.exe file to run it.
- The BIOS update file will be renamed automatically (.cap will be added to the name). Press any key on the command page to end the renaming process.
- Now, copy the renamed update file to the root file of an empty USB flash drive that is formatted in the FAT32 file format.
- Next, insert the USB drive in the Flashback USB port. Note that this port is usually marked with a flashback near it on the I/O panel. In some cases, it will simply be a USB port with a colored outline.
- Now, locate the flashback button on the I/O pane. Press and hold this button for about three seconds till you notice a LED light blinking.
- Finally, don’t press anything on your PC, nor let it shut down till the LED light stops blinking.
This method of updating your ASUS BIOS is especially useful if your PC is not detecting the CPU for some reason. But as mentioned earlier, not all motherboards support this option.
We have reached the end of this detailed guide on updating your ASUS BIOS. You should now be able to perform the update effortlessly, provided you follow the above steps carefully.
It should be reiterated that you need to be careful when updating your BIOS, as any mistake can damage your PC.
If you want to know how to update the BIOS if your PC won’t boot, check our dedicated guide to do it quickly.
Feel free to let us know if you encounter any problems while applying the steps above.


