FIX: Malwarebytes won't update on Windows 10
5 min. read
Updated on
Read our disclosure page to find out how can you help Windows Report sustain the editorial team Read more
Key notes
- Many users had encountered the error message: Malwarebytes won’t install in Windows 10.
- This error can be fixed once a user installs the latest updates for the Malwarebytes software.
- Be sure to check the settings in your Windows Firewall if this anti-malware program doesn’t update.
- Using third-party software fixes the error when Malwarebytes fails to update.
The all-around protective nature of Malwarebytes put it at the top of the free antivirus tools market. The main Malwarebytes suite, besides dealing with those pesky viruses, also deals with PuPs and adware.
With both free and premium variations of the suite. However, the integration with Windows 10 (like with so many 3rd-party solutions) is failing users.
Namely, some of them are unable to update the Malwarebytes client, even after multiple tries.
We conveyed a search and provided you with some viable solutions. Give them a try and inform us if they work.
- Install updates manually
- Check Windows Firewall
- Use third-party software
- Update Windows
- Reinstall Malwarebytes
How can I fix the Malwarebytes fails to update error?
1. Install updates manually
Firstly, we need you to do one thing before installing updates manually. The first thing you should do is confirm that Windows Defender is disabled.
Two antimalware services with real-time protection enabled and working at the same time isn’t exactly a good idea.
With the initial installation, the system disables the Defender automatically, but that can change after a major update. Navigate to Windows Defender > Virus & threat protection > Virus & threat protection settings and disable Real-time protection.
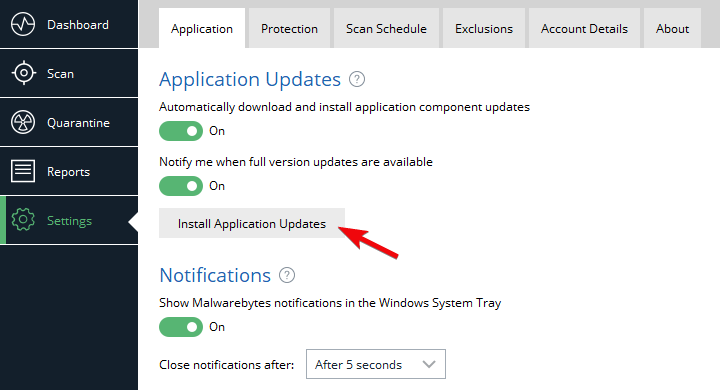
After that, restart your PC and open Malwarebytes. Navigate to Settings and, under the Application tab, click Install application updates.
2. Check Windows Firewall
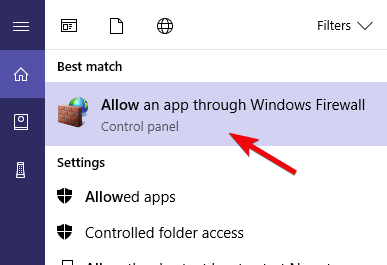
- In the Windows Search bar, type Allow and open Allow an app through Windows Firewall.
- Click on the Change settings button.
- Click Allow another app.
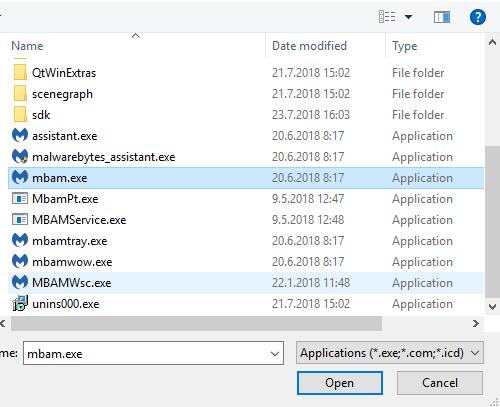
- Navigate to the Malwarebytes installation folder and add the executable file.
- Allow it to communicate freely with Public and Private networks.
- Confirm changes and restart your PC.
- Try updating Malwarebytes again.
Another thing worth inspecting is Windows Firewall. As we already mentioned in the preceding step, a major update can really make some essential changes to your system.
This includes meddling with your Firewall permissions. Some users reported instances when their VPN didn’t work as it was blocked by the Windows Firewall.
For that reason, we encourage you to navigate to Windows Firewall settings and allow Malwarebytes to freely communicate to an update server.
3. Use third-party software
When you encounter the issue when Malwarebytes won’t install in Windows 10, we recommend third-party software that will solve this problem.
There is a chance your operating system might be infected with viruses or malware.
Hence, using professional tools should clean your computer of any malicious apps and leave it in an optimized state.
Once the software has scanned and cleaned your Windows 10 of viruses, you are free to either use Malwarebytes again or keep using this application.
Whenever you browse the Internet, there are lots of online threats that can damage your operating system and cause your computer to have a poor performance.
Your privacy may also be compromised by unauthorized third parties.
You and all other modern users should benefit from advanced online protection against malicious software. Do not worry about your privacy when you use the online space to work, communicate, shop or do online banking with this performant solution.
4. Update Windows
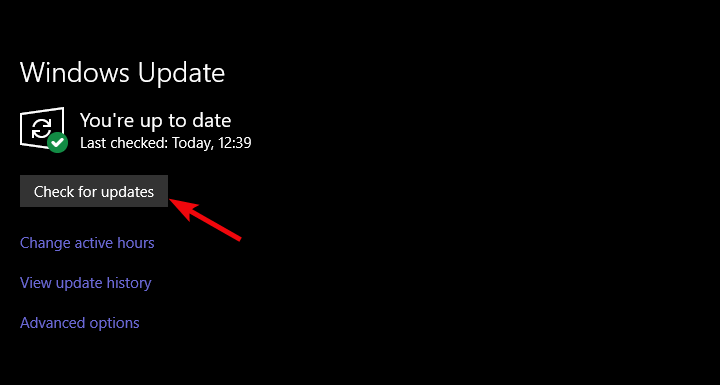
- Open Settings.
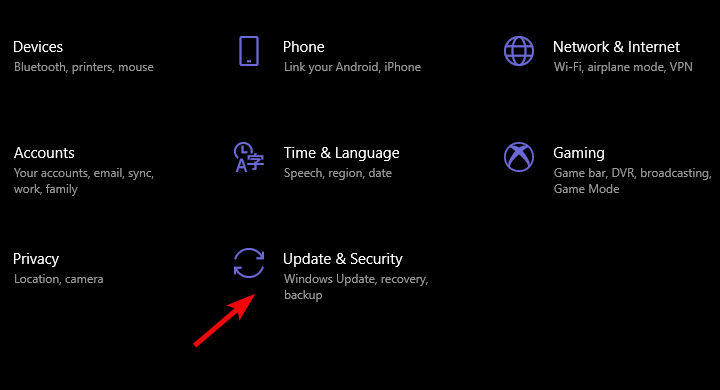
- Choose Update & Security.
- Click Check for updates.
- Install all available updates and reboot your PC.
- Check whether the Malwarebytes client can update.
And, as a final note, we must remind you of the most usual cause of failing updates. Major Windows 10 updates are known for breaking third-party tools.
Most reports regarding the Malwarebytes updating issues emerged after a major update (specifically, Creators Update).
With that in mind, you should install system patches and updates as soon as possible. Hopefully, one of them should help you resolve the issue at hand.
To make sure that all updates are on point, we encourage you to check for updates manually. Follow the steps shown in this solution to check for Windows 10 updates.
5. Reinstall Malwarebytes
- Download Malwarebytes Cleanup Utility.
- Run the tool and accept the EULA terms.
- The tool with start with the uninstall procedure and will, eventually, ask for a reboot.
- Restart your PC.
- After the restart, choose to install the latest version of Malwarebytes.
Now, if you’ve ever installed a previous version of Malwarebytes (or any other antimalware software), the remaining associated files might corrupt the current installation.
Thus, some of the main features might not work as intended. This requires a complete reinstallation of the application.
But, as we already stated, the antivirus integrates much deeper than your usual third-party program. That’s why the good folks from Malwarebytes offer a special tool that should help you clean all the associated files.
Afterward, you can install the Malwarebytes suite and, hopefully, be able to update without any issues.
Finally, you can use the log file to share your concerns with the developer. You can post it as an attachment on the official forum. If the prior steps failed to resolve the issue, of course.
That’s it. If you’re still plagued by the same error and unable to retrieve the latest updates from Malwarebytes, make sure to share your concerns on their dedicated forum.
In addition, if you have any questions or suggestions, don’t shy away from posting them in the comments section below.

