NSIS Error on Windows 11: How to Get Rid of It
NSIS errors can have many causes, but we've got your covered
Key notes
- Several users have reported encountering the NSIS error when installing programs in Windows 11.
- This is primarily due to problems with the installer and its files, the presence of malware or virus on the system, or conflict with the language.
- Also, please find out how to prevent the NSIS error and avoid all the trouble fixing it in the future.

Third-party programs form a critical part of our work or student life. You are required to install various programs, such as editing software, learning apps, data collection, and storage tools. But, while doing so, users encountered the NSIS error in Windows 11.
NSIS (Nullsoft Scriptable Install System) is an open-source tool that facilitates the creation of installers for Windows. When you encounter the error, it indicates a problem with the installer or an unfavorable situation preventing it from running.
If the setup continues to run despite the NSIS error, the installed software may be damaged and wouldn’t work as designed. To prevent this, you should identify the issues causing the problem and eliminate them.
There are many reasons behind the NSIS error in Windows 11, each having a specific fix. We have discussed them in the later sections for you to understand and resolve the problem.
Why do I get NSIS error?
Issues that lead to the NSIS error in Windows, both about the installer setup and the system, are listed below:
- Some files of the program to be installed are missing – When important program files are missing, any future program activity will be hindered.
- Downloaded files are modified – Modified data means modified system information which will cause miscommunication across the program.
- System infected with malware – By performing a system scan, you may eliminate any existing malware.
- Corrupt system files – Corrupt system files significantly contribute to many Windows errors, including this one.
- Installation media is damaged – For those trying to figure out what causes NSIS error, damaged installation media is a likely underlying cause.
Now that you have a fair understanding of the error and the underlying causes, let’s walk you through the methods to eliminate it.
How can I fix the NSIS error in Windows 11?
Before we start with the complex changes, here are a few quick things to check:
- Restart the computer
- If you have a RAM disk or drive (space on RAM used as a storage drive) set up, ensure the Temp is not full. A user pointed this out and reported that clearing some files there fixed things when there was an NSIS error launching the installer when uninstalling.
If these don’t work, head to the fixes listed next.
1. Rename the installer setup
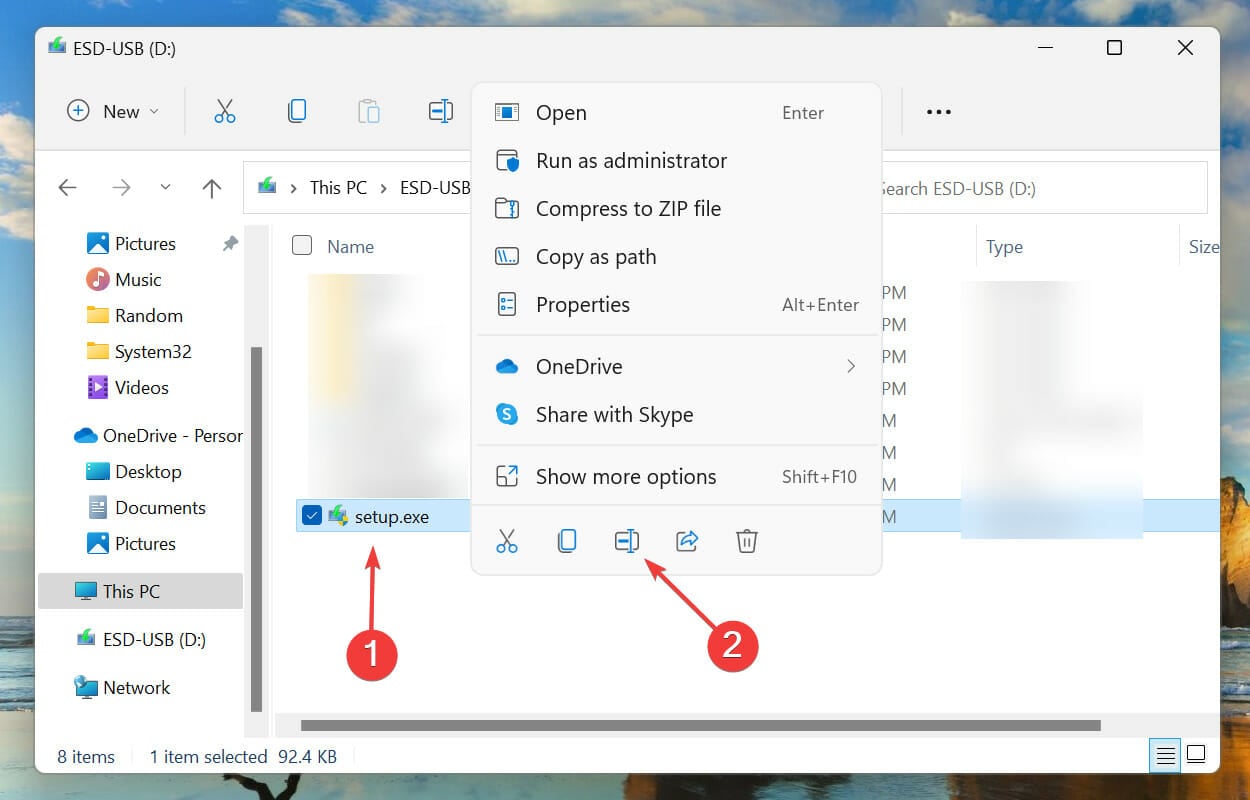
- Locate the downloaded files for the program, right-click on the installer setup, and select the Rename icon from the context menu. Alternatively, you can select the setup file and hit F2.

- Change the name to one word and try to keep it simple. Also, avoid using special characters or non-English alphabets since they are known to cause problems running the setup. The NSIS Error launching installer will be solved afterward.
This is, undoubtedly, the simplest and quickest method to fix the NSIS error in Windows 11. However, you may encounter trouble running it if the setup file name is long or has special characters that the OS fails to recognize. Hence, it’s recommended that you use a simple name for it.
2. Move installer setup to another folder
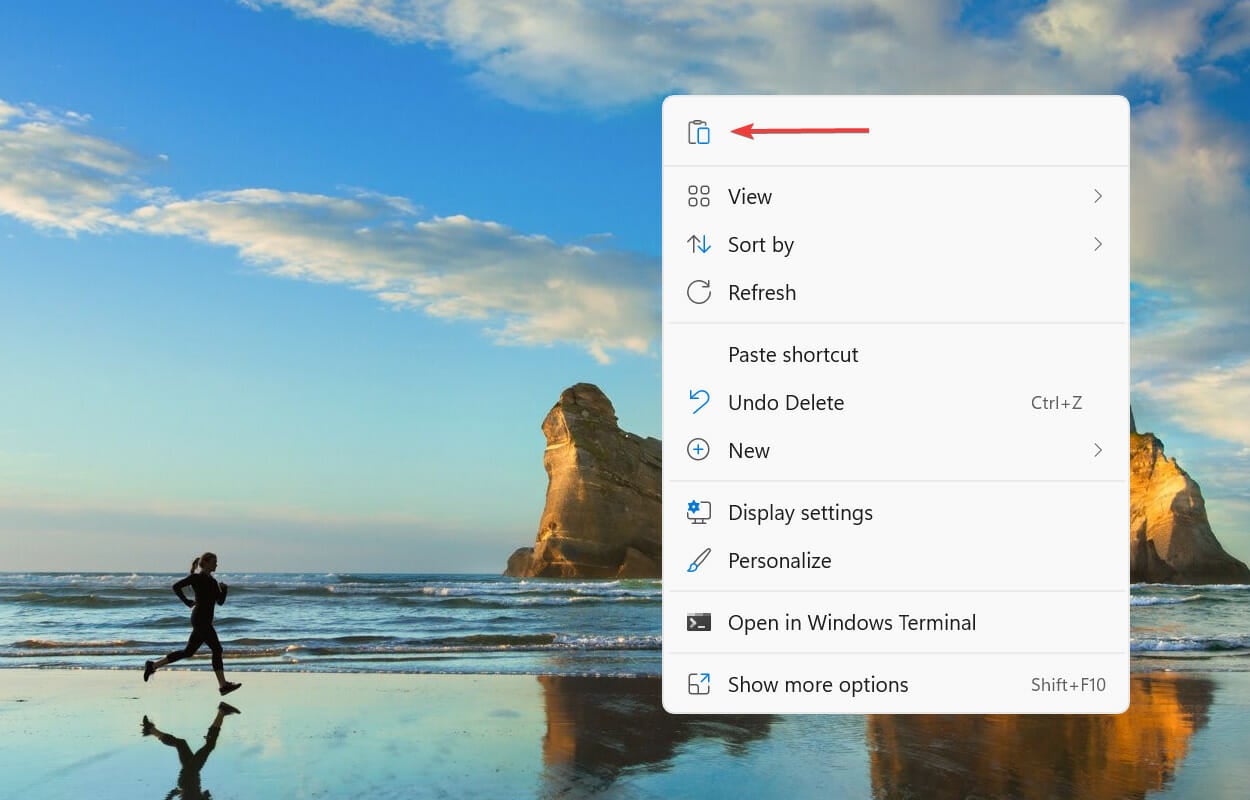
- Locate the program installer, right-click, and select the Copy icon from the context menu.

- Now, go to the desktop, right-click on the empty portion, and select the Paste icon from the context menu. The NSIS error while uninstalling the program will be fixed.

In some instances, the file path caused the NSIS error in Windows 11. Hence, it’s recommended that you change the location of the file and check whether the NSIS error during uninstall or install goes away.
3. Use a third-party repair software
To resolve the TeamViewer NSIS error in Windows 11 and others, you may need to perform a search for corrupted or damaged Windows files.
The best part is that you won’t have to seek a needle in a haystack; all of this and more can be accomplished with an automated repair solution.
4. Run a malware scan
- Press Windows + S to launch the Search menu. Enter Windows Security in the text field at the top, and click on the relevant search result.

- Next, click on Virus & threat protection from the listed options.

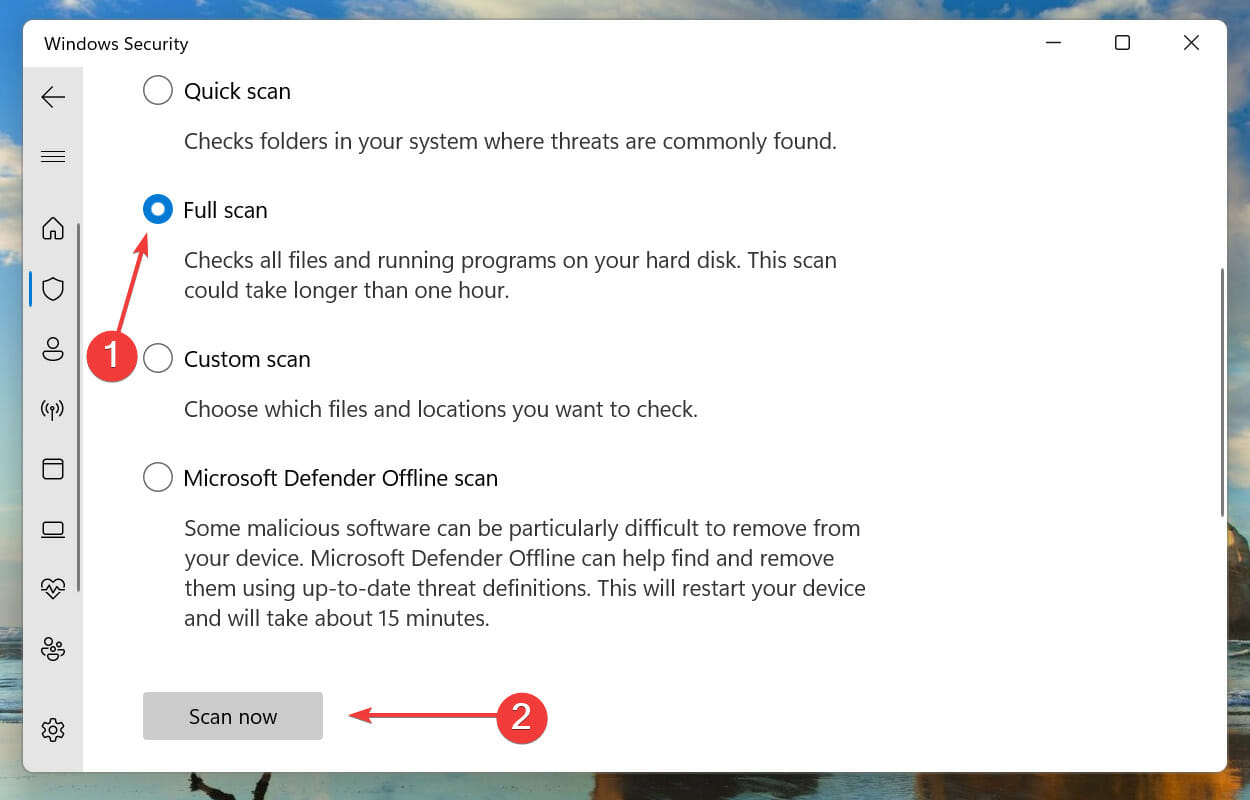
- Click on Scan options.

- Now, select the Full scan option and click on the Scan now button under it.

Running a malware scan can fix the NSIS error in Windows 10 and the previous iterations as well.
We also recommend you a third-party antivirus like Malwarebytes. Due to its advanced security options, it can detect and remove risky malware immediately. Thus, you ensure your constant protection from different forms of online threats.
5. Update Windows 11
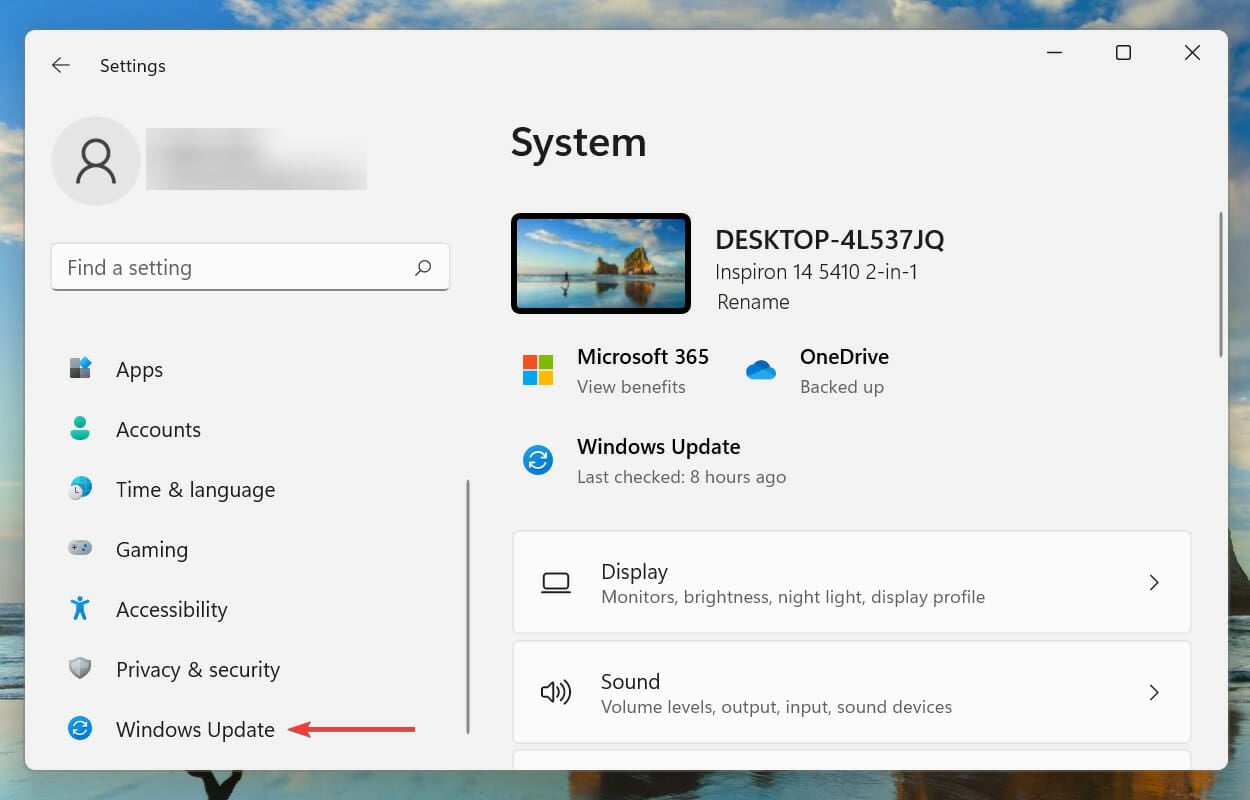
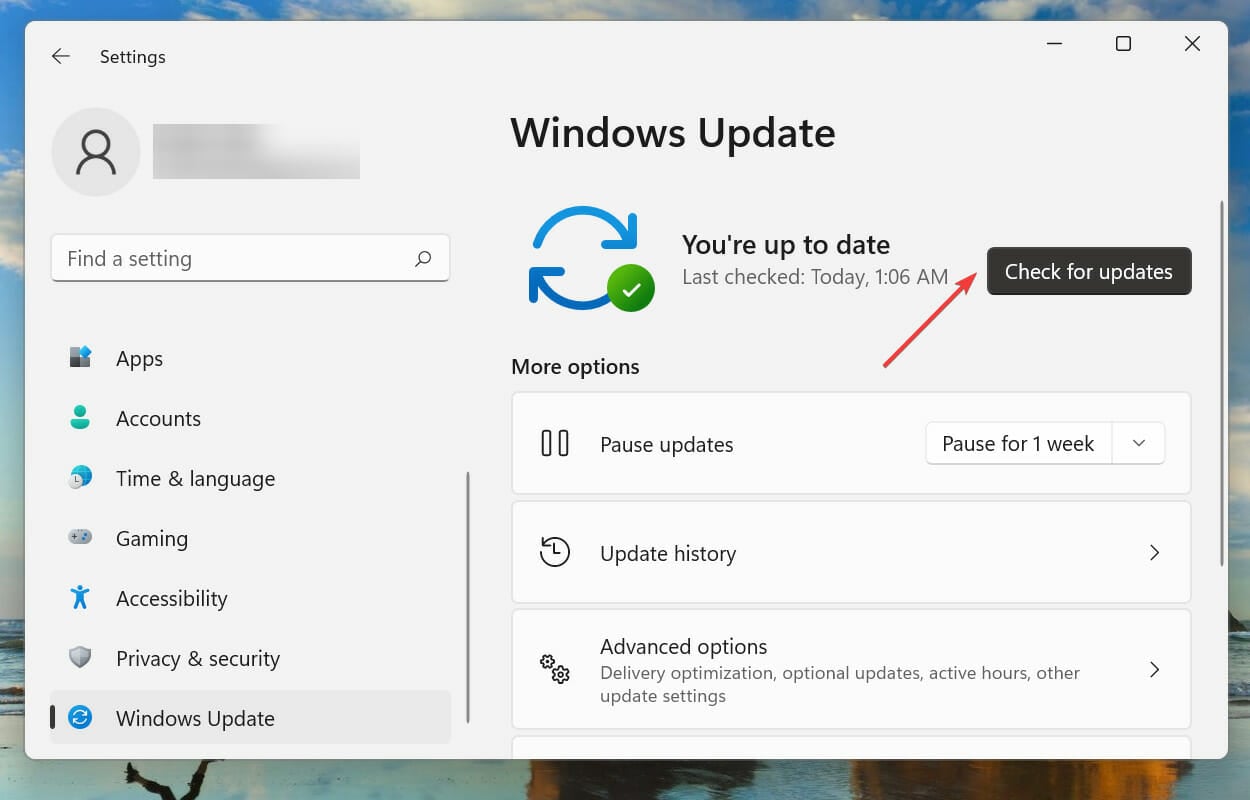
- Press Windows + I to launch the Settings app and select Windows Update from the list of tabs in the navigation pane on the left.

- Click on Check for updates to scan for any available newer versions of Windows.

- If any are available, download and install them.
Updating the OS can also fix things in the event you have an NSIS error launching installer in Windows 7.
If you encounter the 0x80070643, 0x80070422, or 0x800f0831 Windows 11 installation error, click on the relevant linked guide and fix it in no time.
Also, if you are facing trouble launching the Settings app, learn how to eliminate the problem.
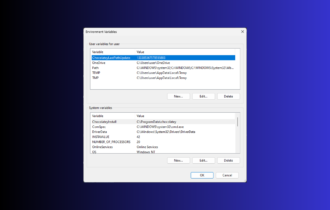
6. Change system language
- Press Windows + S to launch the Search menu, enter Control Panel in the text field at the top, and click on the relevant search result.

- Click on Clock & Region.

- Next, click on Region.

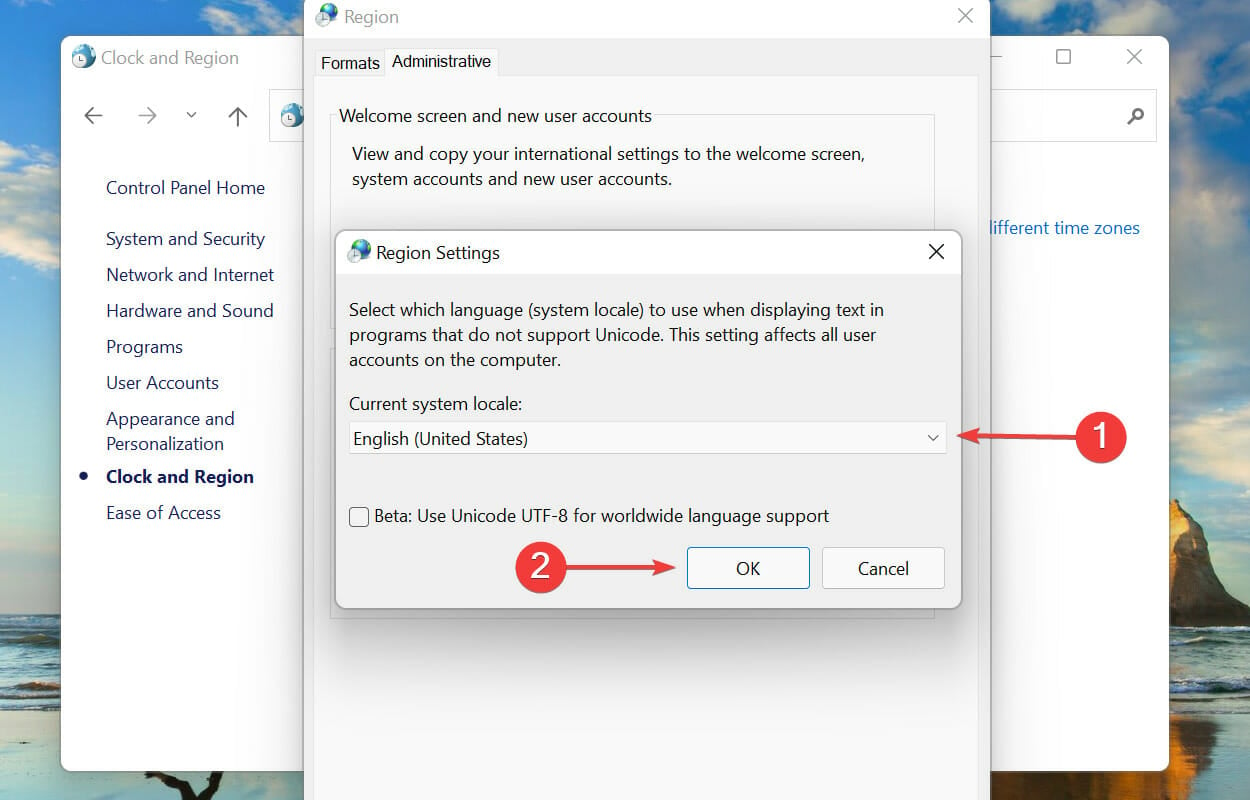
- Navigate to the Administrative tab from the top, and click on the Change system locale button.

- Click on the dropdown menu, select an appropriate language that matches the installer’s, and click OK to save the changes.

7. Perform a quick SFC scan
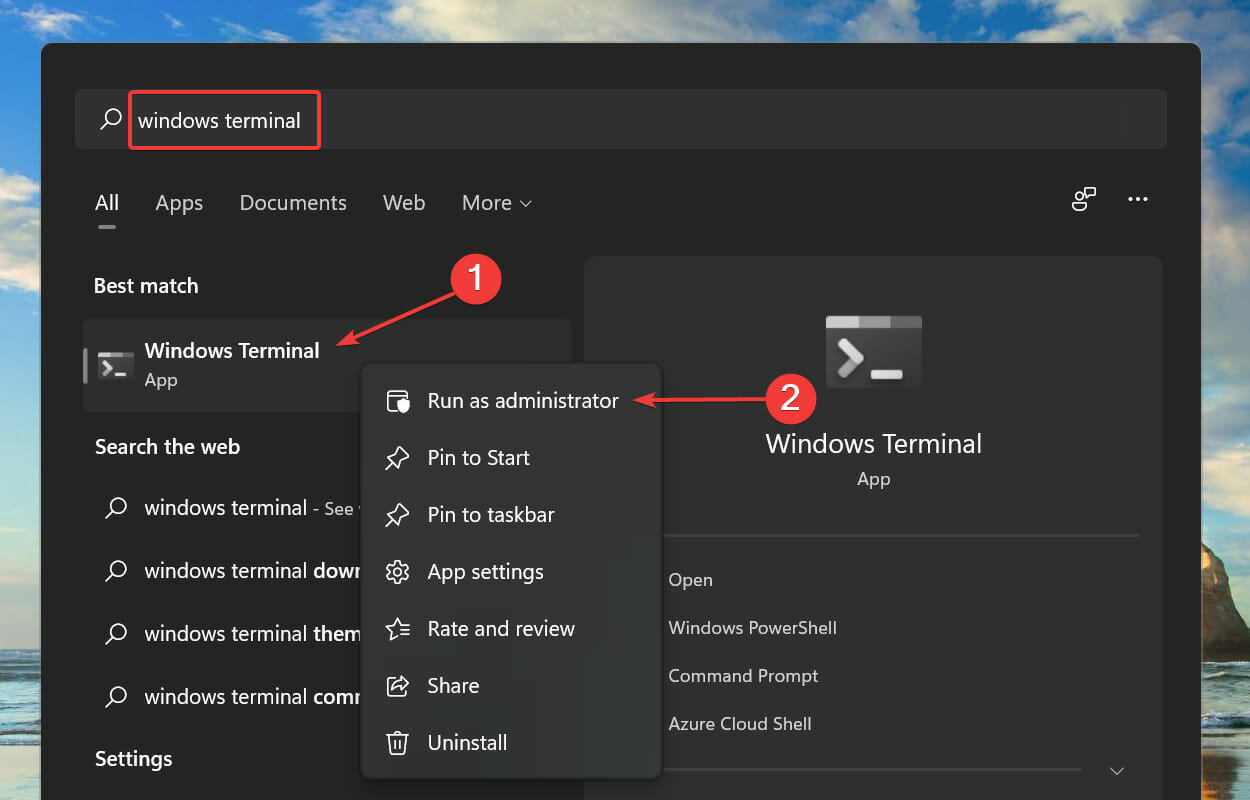
- Press Windows + S to launch the Search menu. Enter Windows Terminal in the text field at the top, right-click on the relevant search result, and select Run as administrator from the context menu.

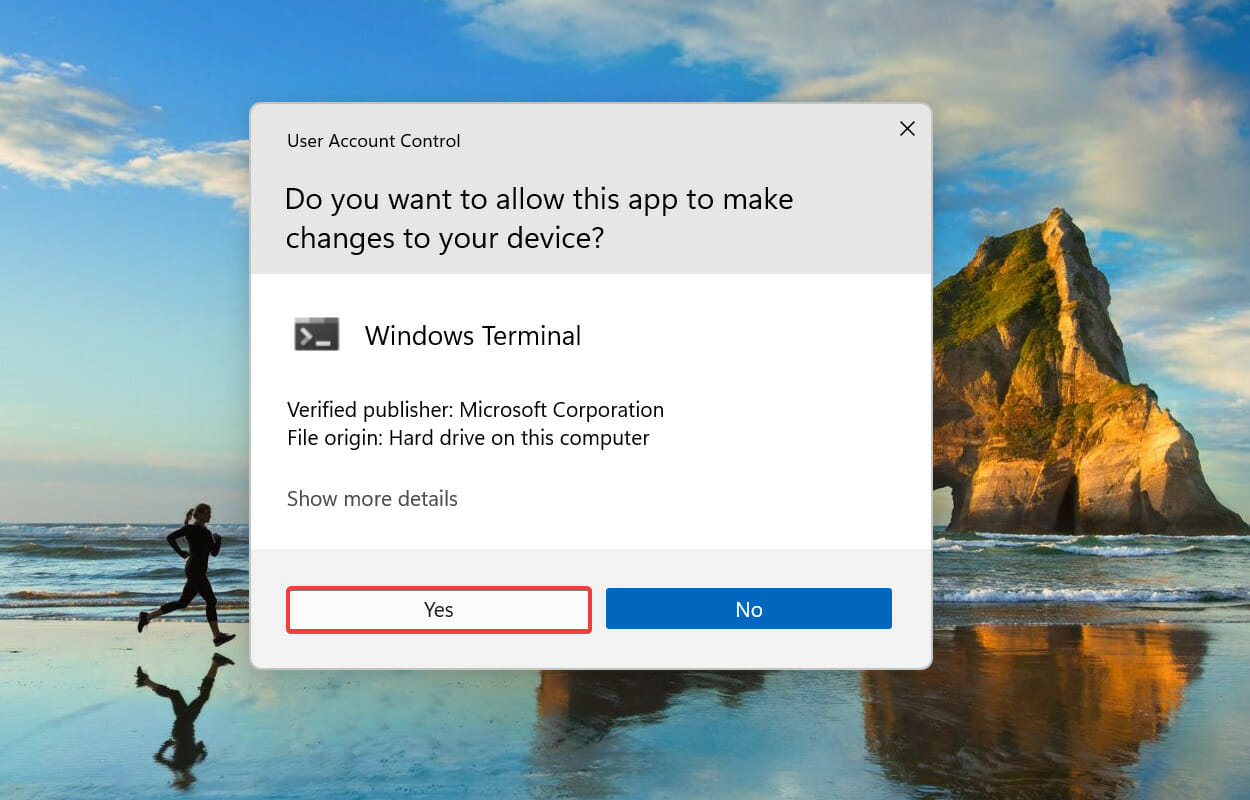
- Click Yes on the UAC (User Account Control) prompt.

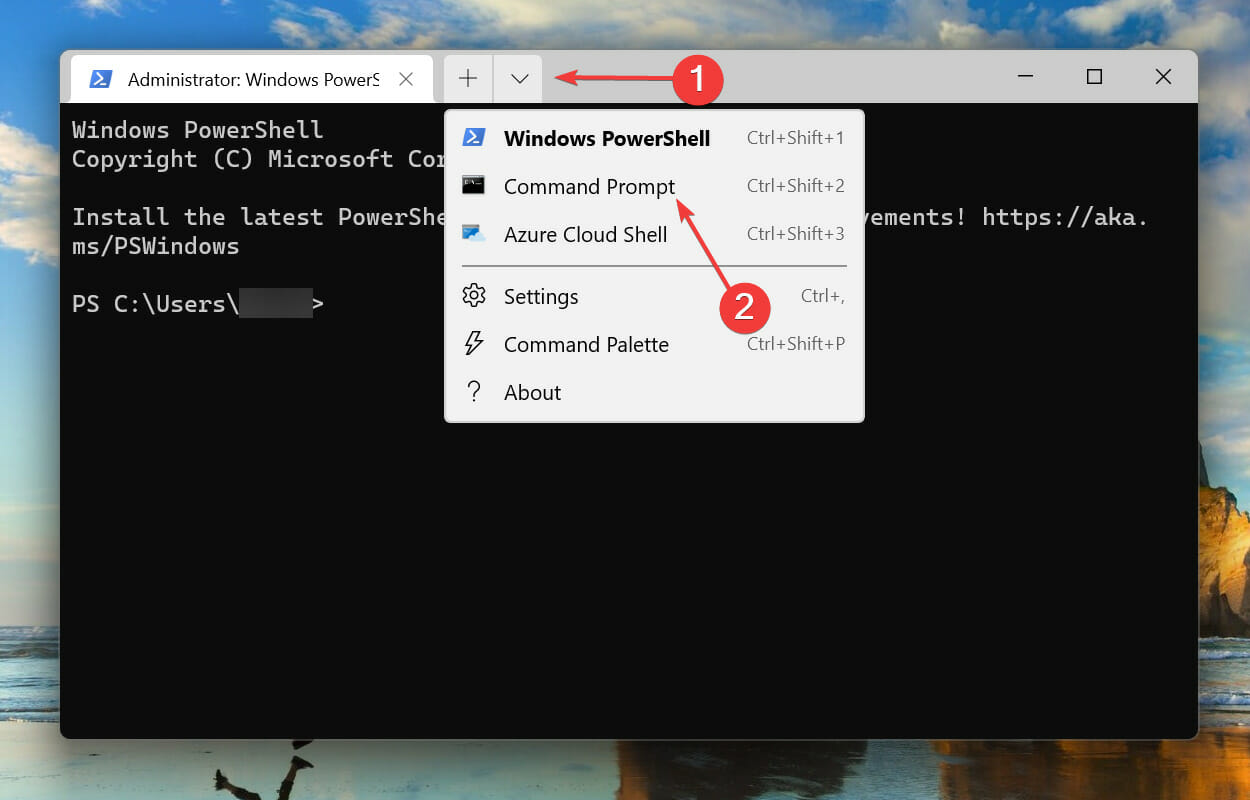
- Click on the downward arrow at the top, and select Command Prompt. Alternatively, you can press Ctrl + Shift + 2 to launch the tab.

- Type/paste the following command and hit Enter to run the SFC scan. The NSIS writing temporary file error will be solved:
sfc /scannow


The SFC (System File Checker) scan identifies corrupt system files and replaces them with their cached copy stored on the system. So, if you are trying to find out how to fix NSIS error in Windows 11 and it’s the corrupt system files to blame, performing the scan should do.
8. Install program via Command Prompt
- Press Windows + S to launch the Search menu, enter Windows Terminal in the text field at the top, right-click on the relevant search result, and select Run as administrator from the context menu.

- Click Yes on the UAC (User Account Control) prompt that appears.

- Click on the downward-facing arrow at the top, and select Command Prompt from the list of options. Alternatively, you can press Ctrl + Shift + 2 to launch the Command Prompt tab.

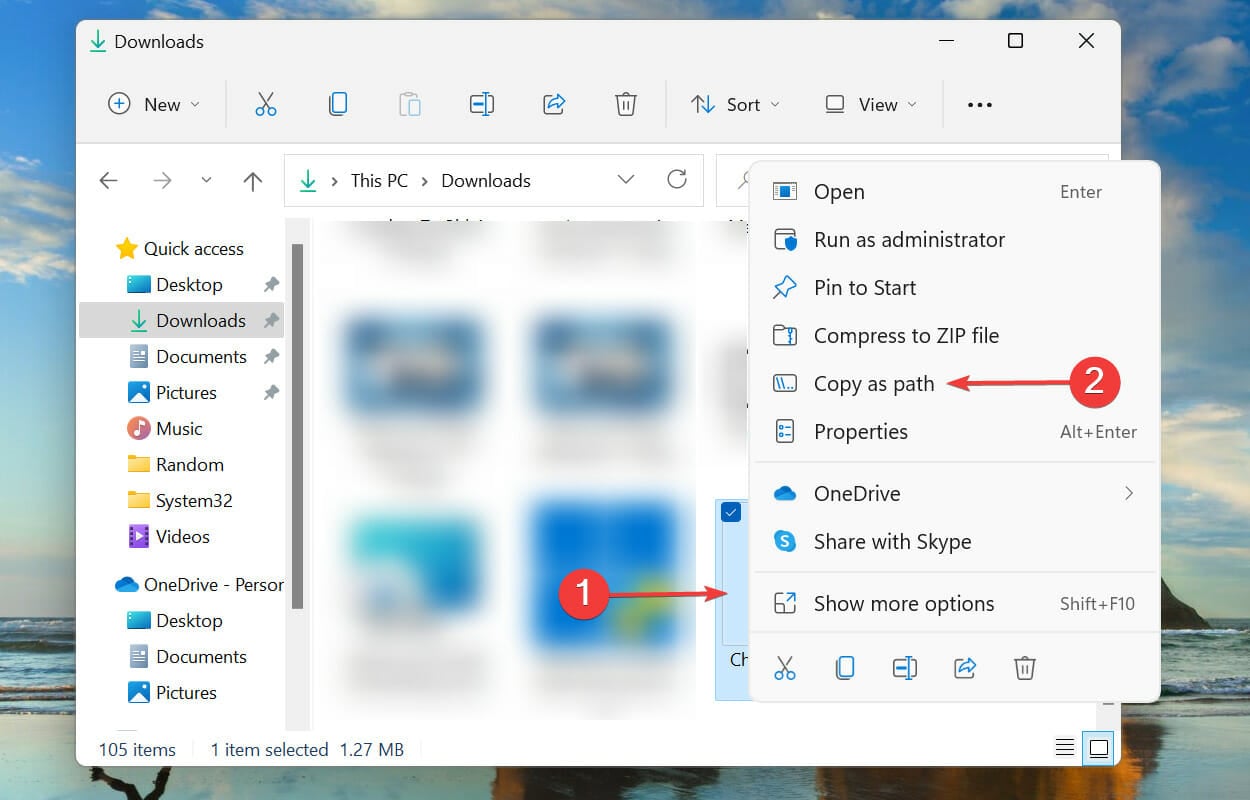
- Now, please navigate to the folder where the installation setup is saved, right-click on it and select Copy as path from the context menu.

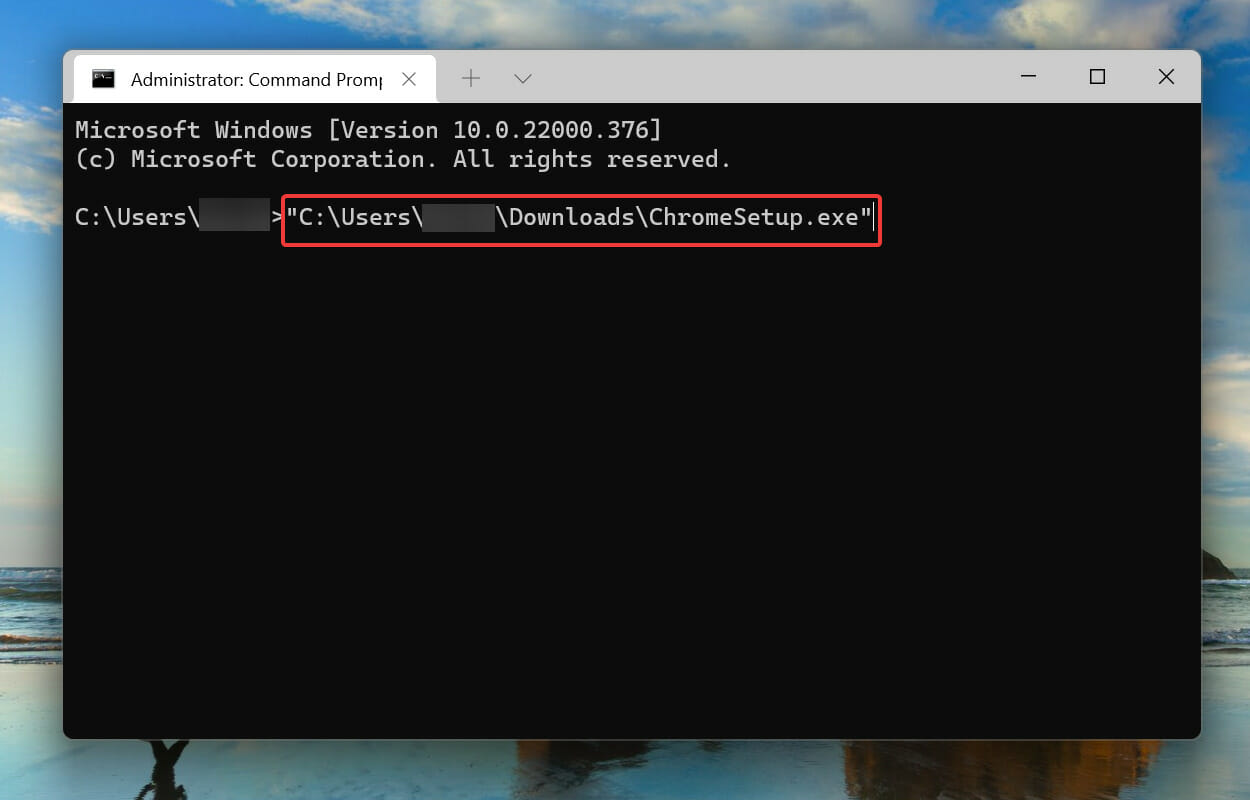
- Go to Windows Terminal and press Ctrl + V to paste the path.

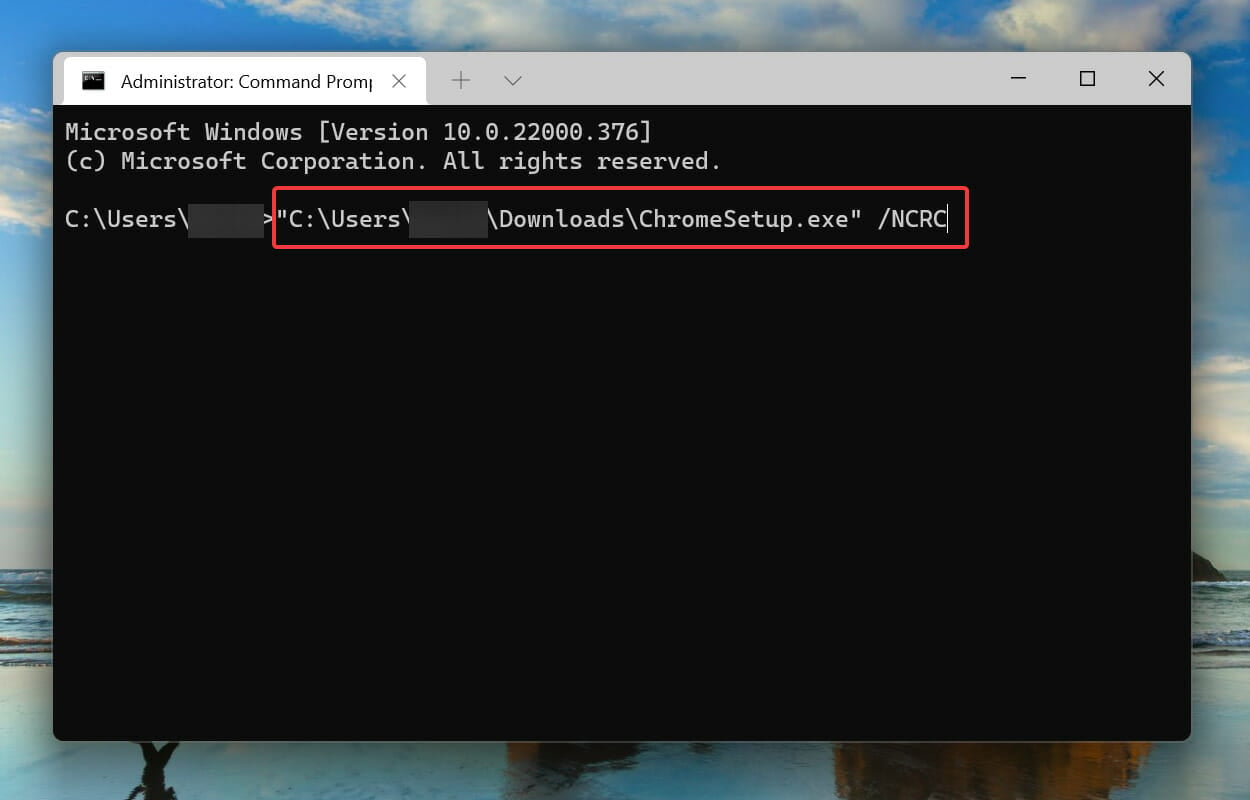
- Next, hit the Spacebar key to add space, type the following command, and hit Enter to run the installer:
/NCRC
- Once the setup launches, follow the on-screen instructions to complete the installation process.
With this method, the installer will bypass any corruption check and run anyway. But, if there’s a major underlying issue, there could be problems with the installed programs. Therefore, we recommend it as the last fix.
Is NSIS a virus?
No, it isn’t a virus. You have access to the NSIS source code and may verify its accuracy. However, some people use this to spread malware, so make sure not to download any unknown NSIS packages from random websites.
Although most contemporary antivirus vendors are familiar with extracting files from NSIS installers and scanning them, some continue to build signatures on the installer stub itself rather than the files included within it.
How can I prevent the NSIS error in Windows 11?
By now, you already know why the NSIS error is encountered and its most effective fixes. But wouldn’t it be much simpler if you could prevent it in the first place?
To do that, make sure you download the program installer setup from the official website, and in case that’s not possible at least a reliable source. This ensures that all the files are downloaded in a single go with no corruption or missing files.
These are all the ways you can resolve the NSIS error in Windows 11. Some users also reported encountering the NSIS error launching installer for AMD drivers, so learn how to fix it.
The methods listed above should also solve the NSIS error launching the installer when uninstalling a program if that’s the issue you are facing.
Let us know which fix worked for you, along with your experience of Windows 11 thus far, in the comments section below.
Read our disclosure page to find out how can you help Windows Report sustain the editorial team. Read more


Improve this guide


User forum
0 messages