OpenJDK Platform Binary: How to Fix its High CPU Usage
Try these quick fixes if OpenJDK binary is using too much CPU
4 min. read
Updated on
Read our disclosure page to find out how can you help Windows Report sustain the editorial team. Read more
Key notes
- OpenJDK platform binary using 100% CPU usage can occur for various reasons. Outdated drivers on your PC may lead to this.
- Disabling the Integrated GPU can help fix the OpenJDK platform binary high CPU usage.
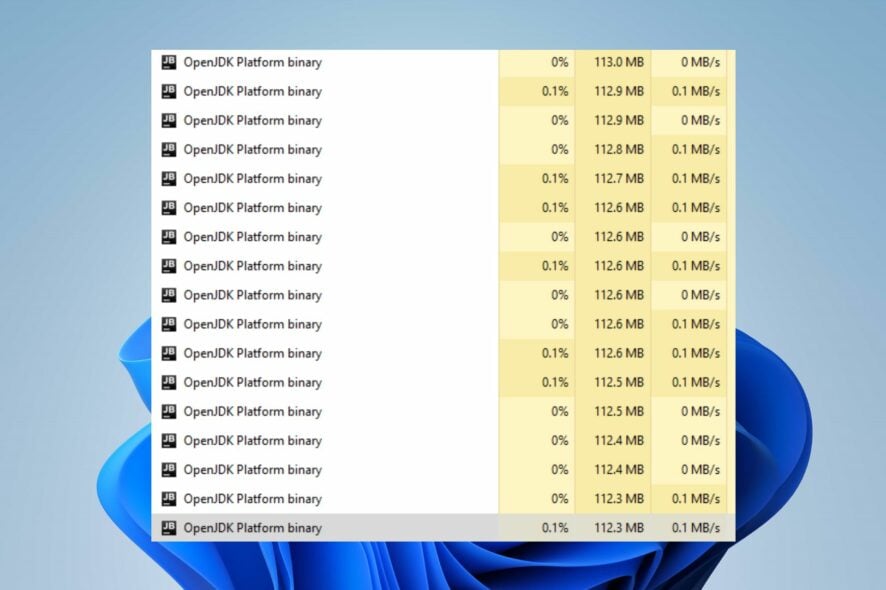
Using the OpenJDK (Open Java Development Kit) platform to compile and execute your classes is beneficial as it guarantees security and performance. However, the OpenJDK platform binary using 100% CPU is an issue plaguing the platform.
Also, users complain about not knowing how to install Java JDK 11 on Windows 11, which is essential.
Why does the OpenJDK platform binary cause high CPU usage?
OpenJDK platform binary CPU usage can skyrocket in no time for many reasons. It mostly happens when playing some games on your PC, and the CPU works at 100% from the OpenJDK Platform Binary client.
However, an outdated driver is a notable cause of the OpenJDK platform binary using 100% CPU. When your drivers are outdated, they can’t run at full capacity, resulting in issues with other system components.
Other factors that can be responsible for the problem are:
- Issues with the game prompting the problem – You may experience OpenJDK platform binary using 100% CPU if your game is not running properly. It can affect the OpenJDK Platform binary application.
- Issues with integrated GPU – Users can also have an OpenJDK Platform binary high CPU usage due to the effect of the integrated GPU. Concerns with the integrated GPU can impact its functionality, causing it to use more CPU.
The causes of the problem may vary for different users. Nonetheless, we have some fixes to help you get around the problem.
How do I fix the OpenJDK platform binary when using 100 CPU?
Before trying any advanced troubleshooting, apply the following:
- Free up enough disk space on your computer.
- Turn off background apps running on your PC.
- Restart your PC in Safe Mode and check if the problem persists.
If you can’t fix the problem, proceed with the solutions below.
1. Update your graphics driver
- Press Windows + R keys to prompt the Run dialog box, type devmgmt.msc, and click OK to open the Device Manager.
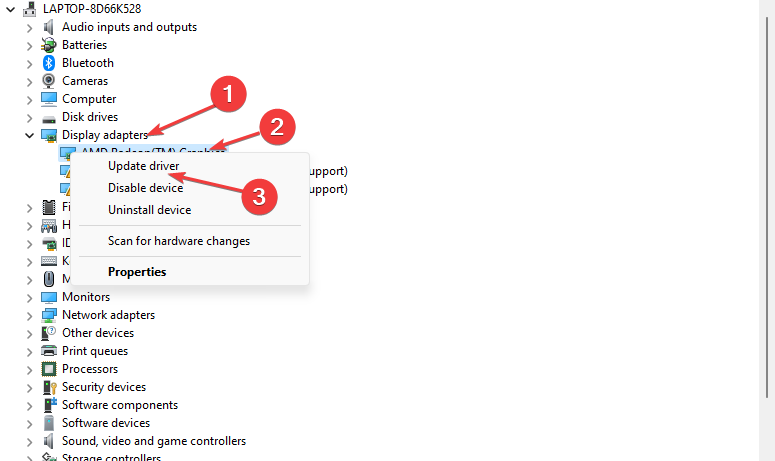
- Click on Display adapters, right-click the driver, and select the Update driver option.
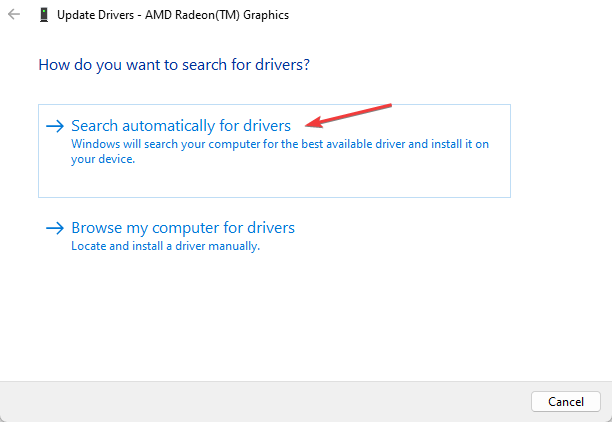
- Select Search automatically for drivers.
After the update is complete, restart your device and check if the issue persists. You can read our guide about updating graphics drivers on Windows 11 if you have any issues with the steps above.
Another reliable and recommended option you can try is using a third-party software that can help you update your graphics driver automatically.
- Download and install Outbyte Driver Updater.
- Launch the software.
- Wait for the app to detect all faulty drivers.
- Now, it will show you all the malfunctioning drivers listed to select the ones to Update or Ignore.
- Click on Update & Apply Selected to download and install the newest versions.
- Restart your PC to ensure the applied changes.

Outbyte Driver Updater
Secure your Windows PC with Outbyte from various errors caused by problematic drivers.2. Disable Integrated GPU through BIOS
- Press Windows + I key to open Settings.
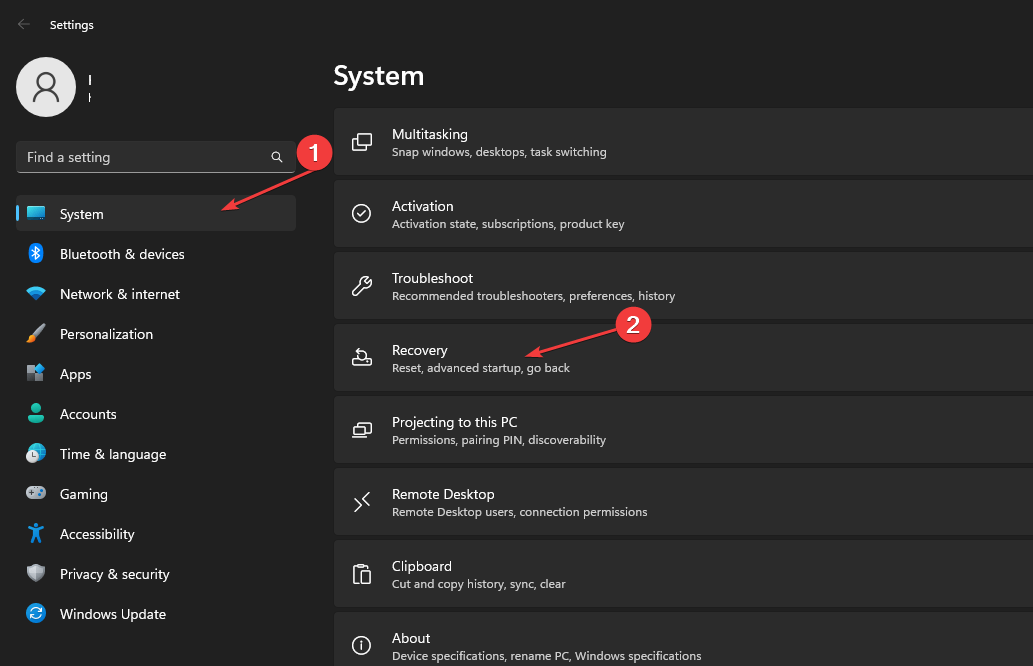
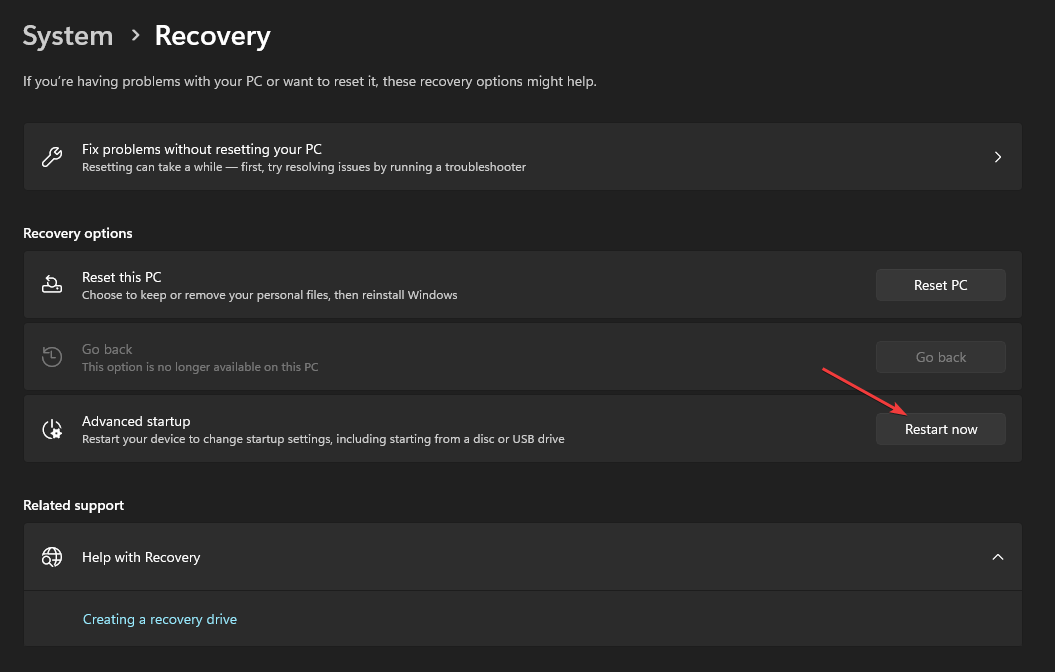
- Navigate to System and select Recovery.
- Go to the Advanced Startup tab, then click the Restart now button to reboot the PC into the advanced menu.
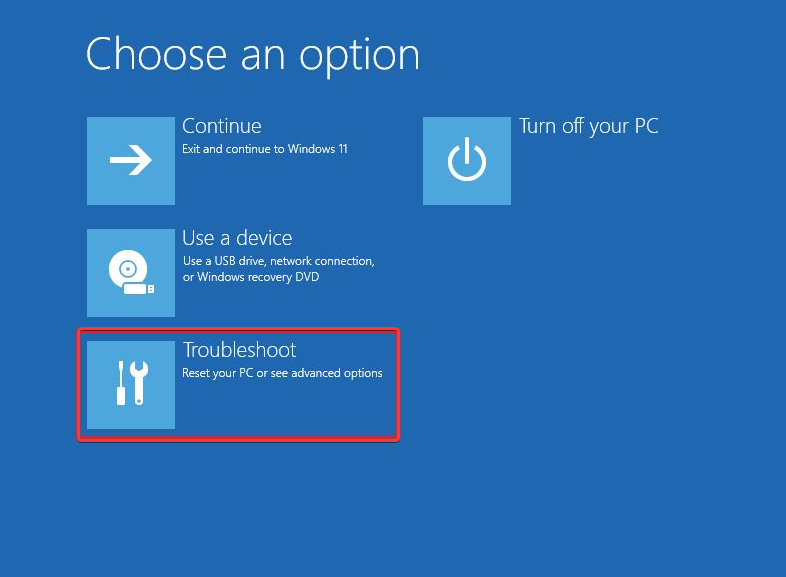
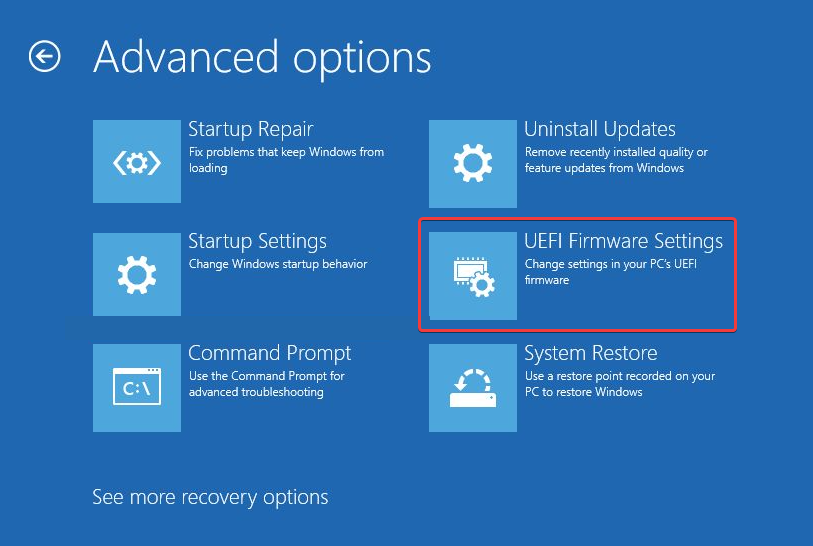
- On the Choose an options tab, select Troubleshoot, then click the Advanced options button.
- Select UEFI Firmware Settings and click the Restart button to prompt your PC to restart and launch BIOS.
- Find a setting with onboard, integrated video, VGA under Integrated Peripherals, Onboard Devices, or Built-in Devices.
- Choose Disable or Off for the Integrated graphics, then press Enter.
- Following the on-screen instructions, press the corresponding F-key to save your changes, then click Y to confirm the process.
Disabling the Integrated GPU will fix any issues it causes with the OpenJDK Platform binary and prevent conflicts with the Dedicated graphics cards.
Read through our article about the methods to enter BIOS on a Windows 7, 10 & 11 PC if you can’t open BIOS on your PC.
3. Run System Restore
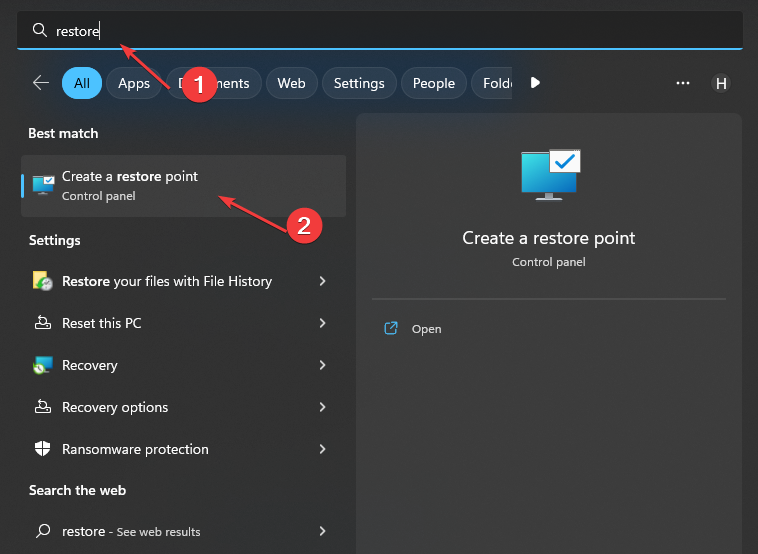
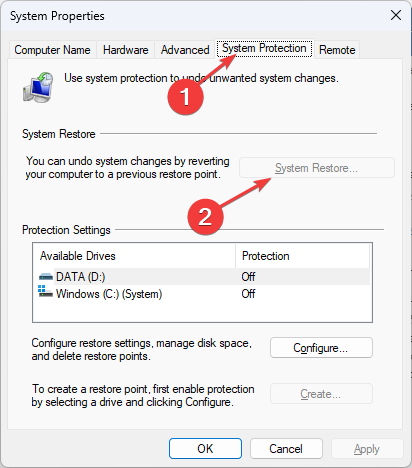
- Left-click the Start button and type Restore, then click on Create a Restore Point.
- Go to the System Protection tab and select System Restore.
- Choose a different system restore and click Next to select a specific Restore Point.
- Select the last time your PC worked perfectly, and click Next.
- Click the Finish button.
Performing a system restore will backdate your PC to when it has no issues, removing the corrupt items causing problems.
If you have any issues running it, check how to fix Restore Point if it’s not working on your PC.
The above steps should fix the OpenJDK platform binary using 100% CPU. Conclusively, you can check our fixes for error 2 while loading the Java VM on Windows.
For further questions or suggestions, kindly drop them in the comment section.



User forum
0 messages