Stop Start Menu From Resetting to Default Automatically
Corrupt system files can cause this problem
Key notes
- Start menu resetting to default whenever you reboot the system clears your customized settings.
- It can occur due to corrupted system files and faulty updates on your computer.
- Uninstall recent Windows updates and create a Start menu backup to resolve the problem.

The Start menu is the home for all the apps and features on your computer. Many users complain about their Start Menu resetting to default automatically when they reboot their computers. It is annoying because it discards earlier set Start menu customization.
Also, users report the critical error Start menu isn’t working on a Windows PC. Check our guide for ways to fix it.
Why does the Start Menu reset to default automatically?
The Start menu resetting to default whenever you restart your system can be due to many factors. Some factors liable to cause the issue are:
- Corrupt system files – System files aid the response and interaction between the system and its components. However, corrupted system files can affect how the Start Menu works and infect the registry files responsible for its operation.
- Corrupt or faulty update – Sometimes, users can install faulty or corrupt updates during the normal Windows update process. It causes the system to malfunction and can result in the Start Menu resetting to default whenever you restart your system.
- Third-party apps interference – You may experience issues with the Start menu disappearing or malfunctioning on your computer due to interference from apps not compatible with the system.
Other factors not mentioned above can cause the issue. We’ll take you through some basic steps to fix the problem.
How can I stop the Start Menu from resetting to default automatically?
Go through the following before trying any advanced troubleshooting steps:
- Turn off apps running in the background on your computer.
- Disconnect all the external devices connected to your PC.
- Restart Windows in Safe Mode and check if the issue persists.
If you can’t fix the problem, proceed with the solutions listed below:
1. Run SFC and DISM scans to repair system files
- Left-click the Start button, type Command Prompt, then select Run as administrator.
- Click Yes on the User Account Control (UAC) prompt.
- Type the following and press Enter:
sfc /scannow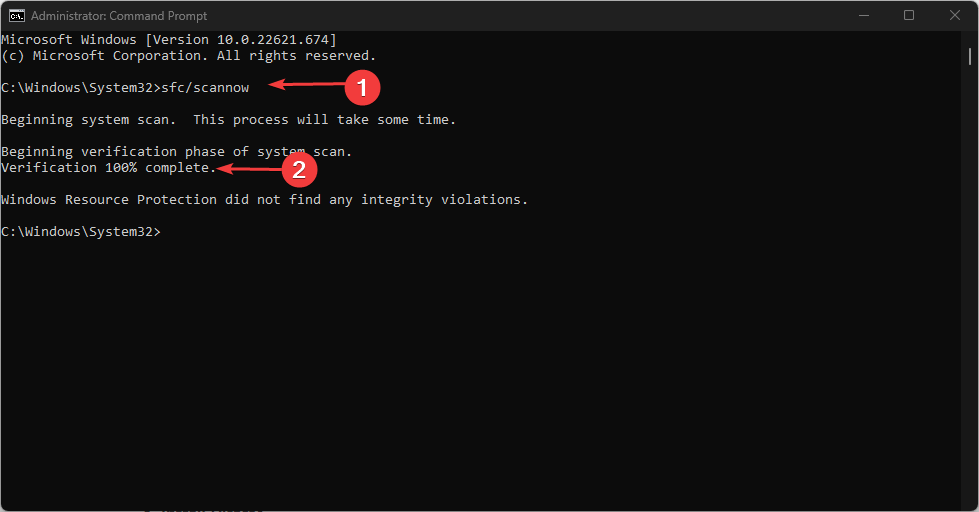
- Type the following commands and press Enter after each:
DISM /Online /Cleanup-Image /RestoreHealth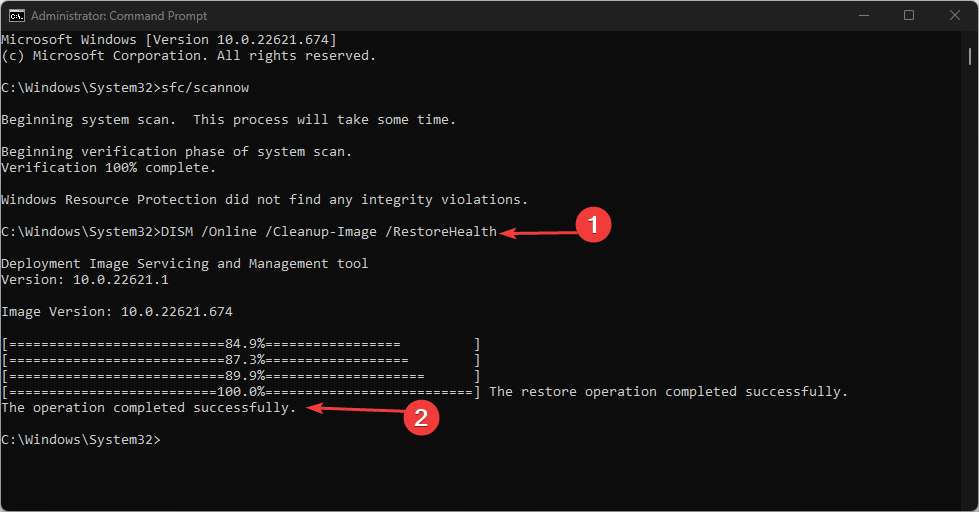
- Restart your PC and check if the Start menu issue persists.
Running the SFC and DISM scans will detect and repair corrupt system files causing the issue on your PC. Read about how to fix the run as administrator option if it’s not working on your PC.
2. Uninstall recent Windows updates
- Press Windows + I key to open the Settings app.
- Go to Windows Update and select Update history.
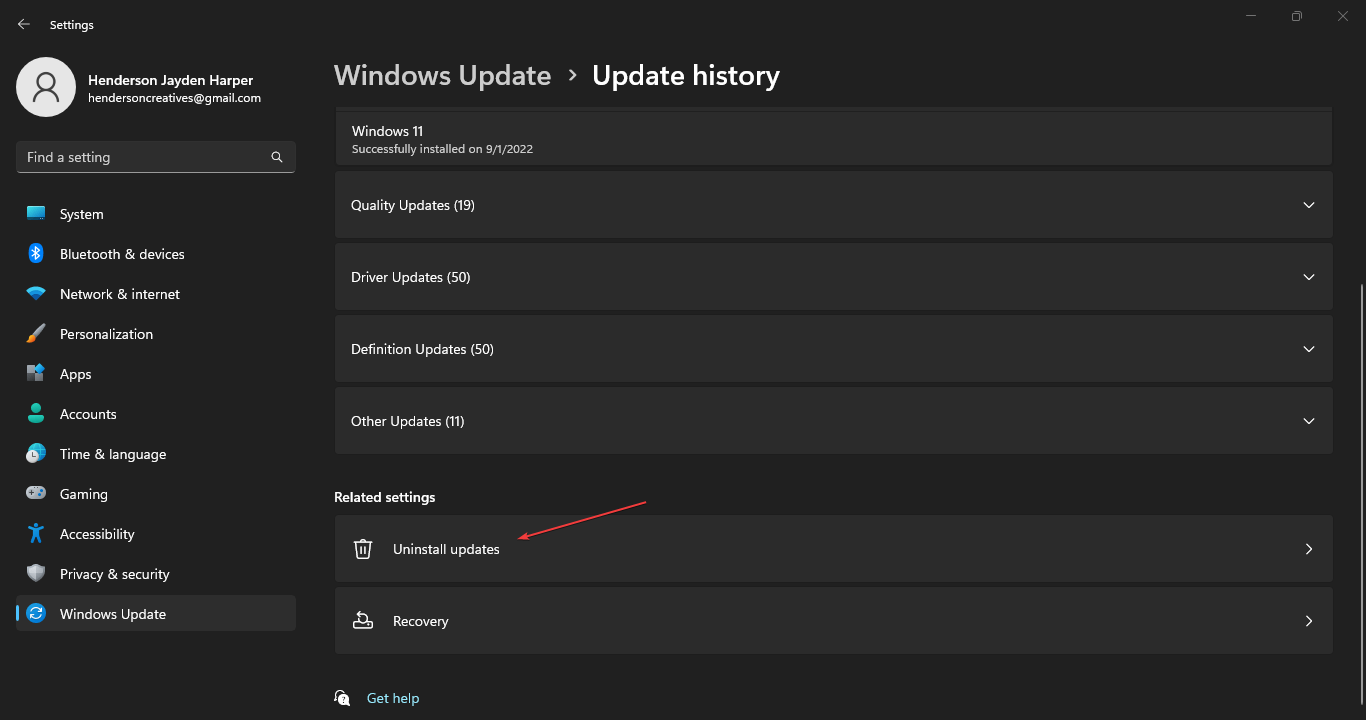
- Click the Uninstall updates button and select the most recent update.
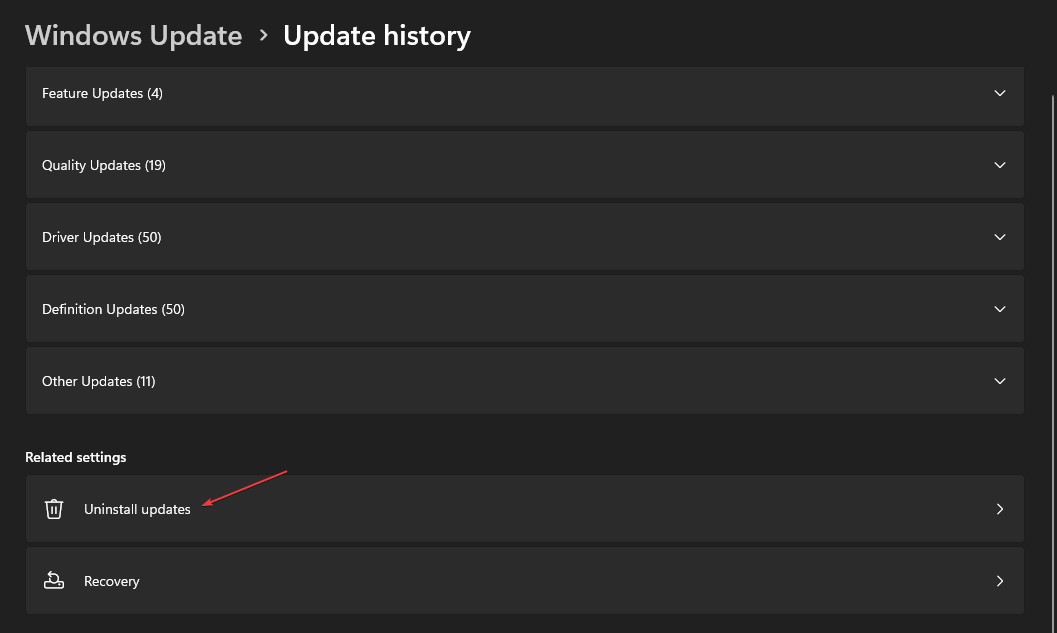
- Click on Uninstall.
Uninstalling the recent Windows update will delete the last build causing the Start menu to reset. Read our guide on how to uninstall updates on Windows 11 for more steps.
3. Re-register the Start Menu
- Left-click the Start button, type PowerShell, and click Run as administrator.
- Click Yes on the User Account Control prompt.
- Copy and paste the following lines of commands and press Enter:
0Get-appxpackage -all *shellexperience* -packagetype bundle |% {add-appxpackage -register -disabledevelopmentmode ($_.installlocation + “\appxmetadata\appxbundlemanifest.xml”)}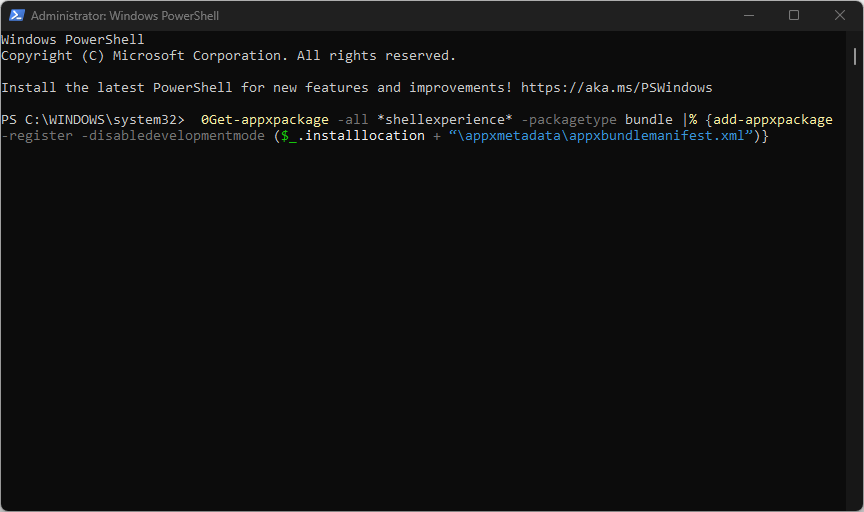
- Close PowerShell and restart your PC.
Re-registering the Start menu will refresh its processes and fix issues affecting it. You can check our guide about PowerShell not showing the full output and some fixes to get it working if you experience it.
4. Run System Restore
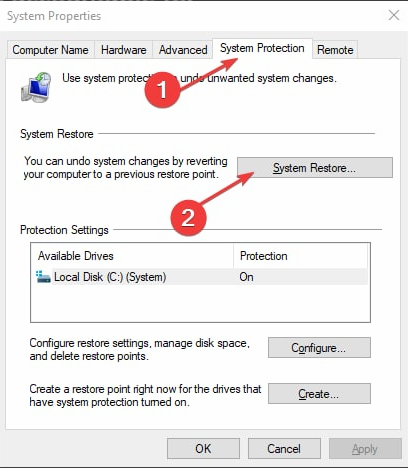
- Left-click the Start button, type Restore, and click on Create a Restore Point.
- Then the System Protection tab, and click System Restore.
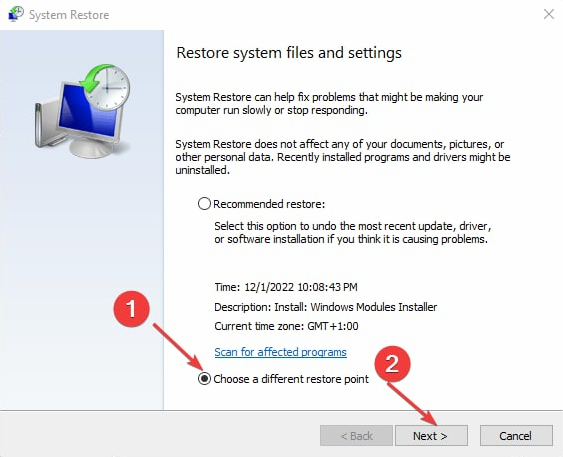
- Choose a different system restore and click Next to select a specific Restore Point.
- Select the last time you were able to install updates on your PC, and click Next.
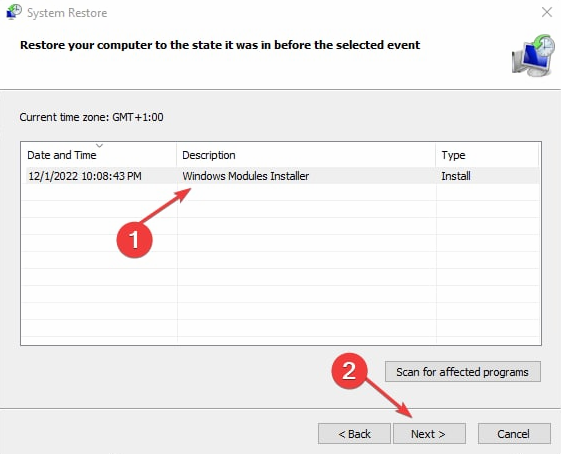
- Click the Finish button.
System Restore backdates your system to the select restore point and fixes issues causing the netfilter2.sys errors. Check how to fix Restore Point if it’s not working and if you have any issues running it.
Additionally, you can try an alternative to the manual process above, such as dedicated repair software to solve this situation in no time.
It is a safe and automatic program that helps you repair your device by removing malfunctioning files detected during the scan and replacing them with fresh Windows files from its substantial database.
5. Create a Start menu backup
- Left-click the Start button, type Command Prompt, and click the Run as administrator option.
- Click Yes on the User Account Control (UAC) prompt.
- Type the following lines of commands and press Enter to run them:
reg.exe export “HKCU\Software\Microsoft\Windows\CurrentVersion\CloudStore\Store\Cache\DefaultAccount” “%userprofile%\desktop\StartLayout.reg” /y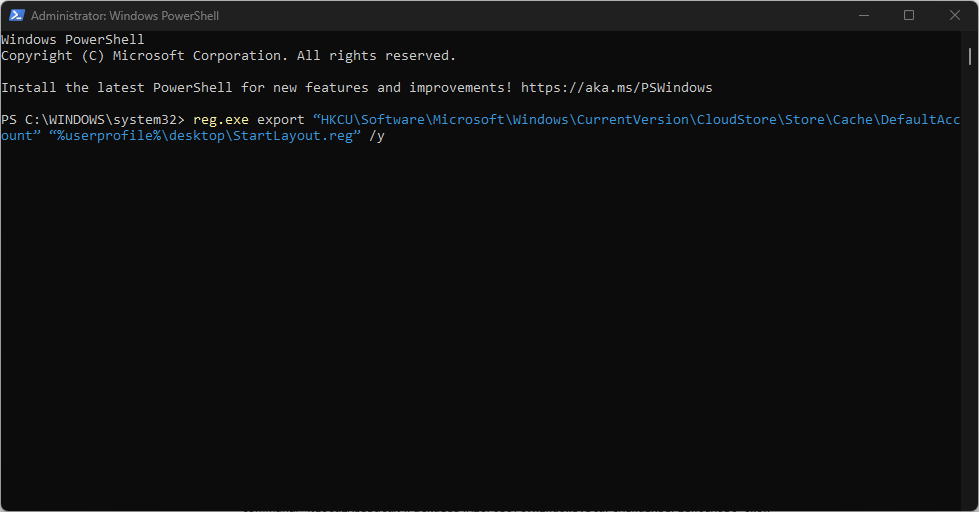
- Run the following command:
“%LocalAppData%\Packages\Microsoft.Windows.StartMenuExperienceHost_cw5n1h2txyewy\LocalState\start.bin” “%userprofile%\desktop\”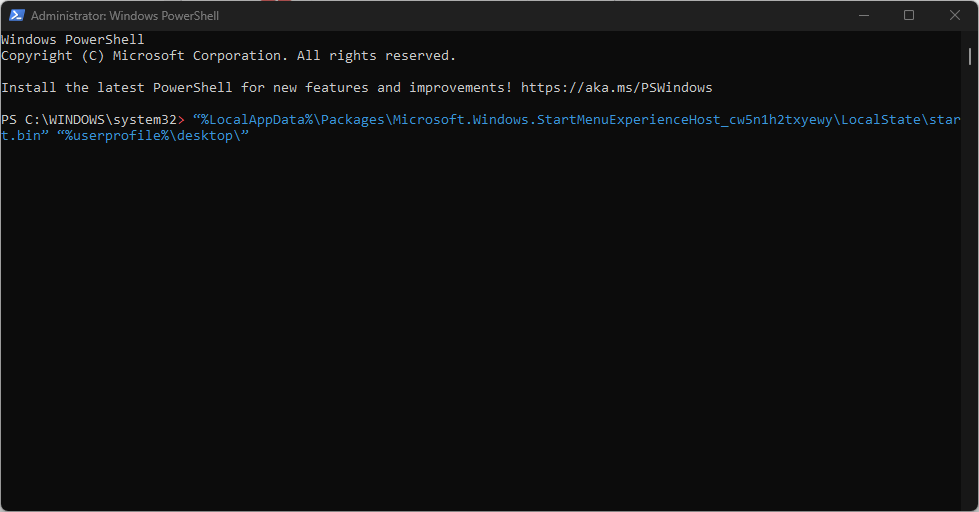
- Close the Command Prompt and restart your PC.
The above commands will create a backup of your Start Menu and allow you to refer to it whenever needed.
Read our guide on what to do if Command Prompt keeps crashing on your PC.
Conclusively, our readers can check our fixes for the Start menu not working on Windows 11. You can also read how to customize the Start Menu in Windows 11.
Read our disclosure page to find out how can you help Windows Report sustain the editorial team. Read more


Improve this guide


User forum
0 messages