How to fix Windows 10 Wi-Fi lag spike issues for good
![]() 8 min. read
8 min. read
![]() Updated on
Updated on
Share this article

Improve this guide
Read our disclosure page to find out how can you help Windows Report sustain the editorial team Read more

One issue Windows 10 users have often been vocal about is the Wi-Fi lag that often tends to spike beyond appreciable limits, leading to a below-par internet browsing experience each time that happens. That again is something that is very inherent to the way Windows update works given that it uses a peer2peer method of propagating the update among the masses.
That way, your PC might very well serve as a download location for other users to be provided the update. However, any drop in upload or download speeds might not be too perceptible with a fast internet connection though things can truly become a chore during days when your internet connection isn’t at optimum.
However, like with most other problems, there sure is a solution to the issue. And it’s simple and quick too. So, let’s get started right away.
Ways to deal with Wi-Fi lag spikes in Windows 10
1. Turnoff peer2peer system
As has been stated above, the peer2peer system is the reason Wi-Fi lag spikes. So the most logical method to deal with it will obviously be to turn it off. Here is how you do it.
- Go to Settings > Update & Security.
- In the Windows Update page that you are led to, select Advanced Options.
- In the Advanced Options page, select Delivery Optimization along the bottom of the page.
- Here, toggle Allow downloads from other PCs to Off.
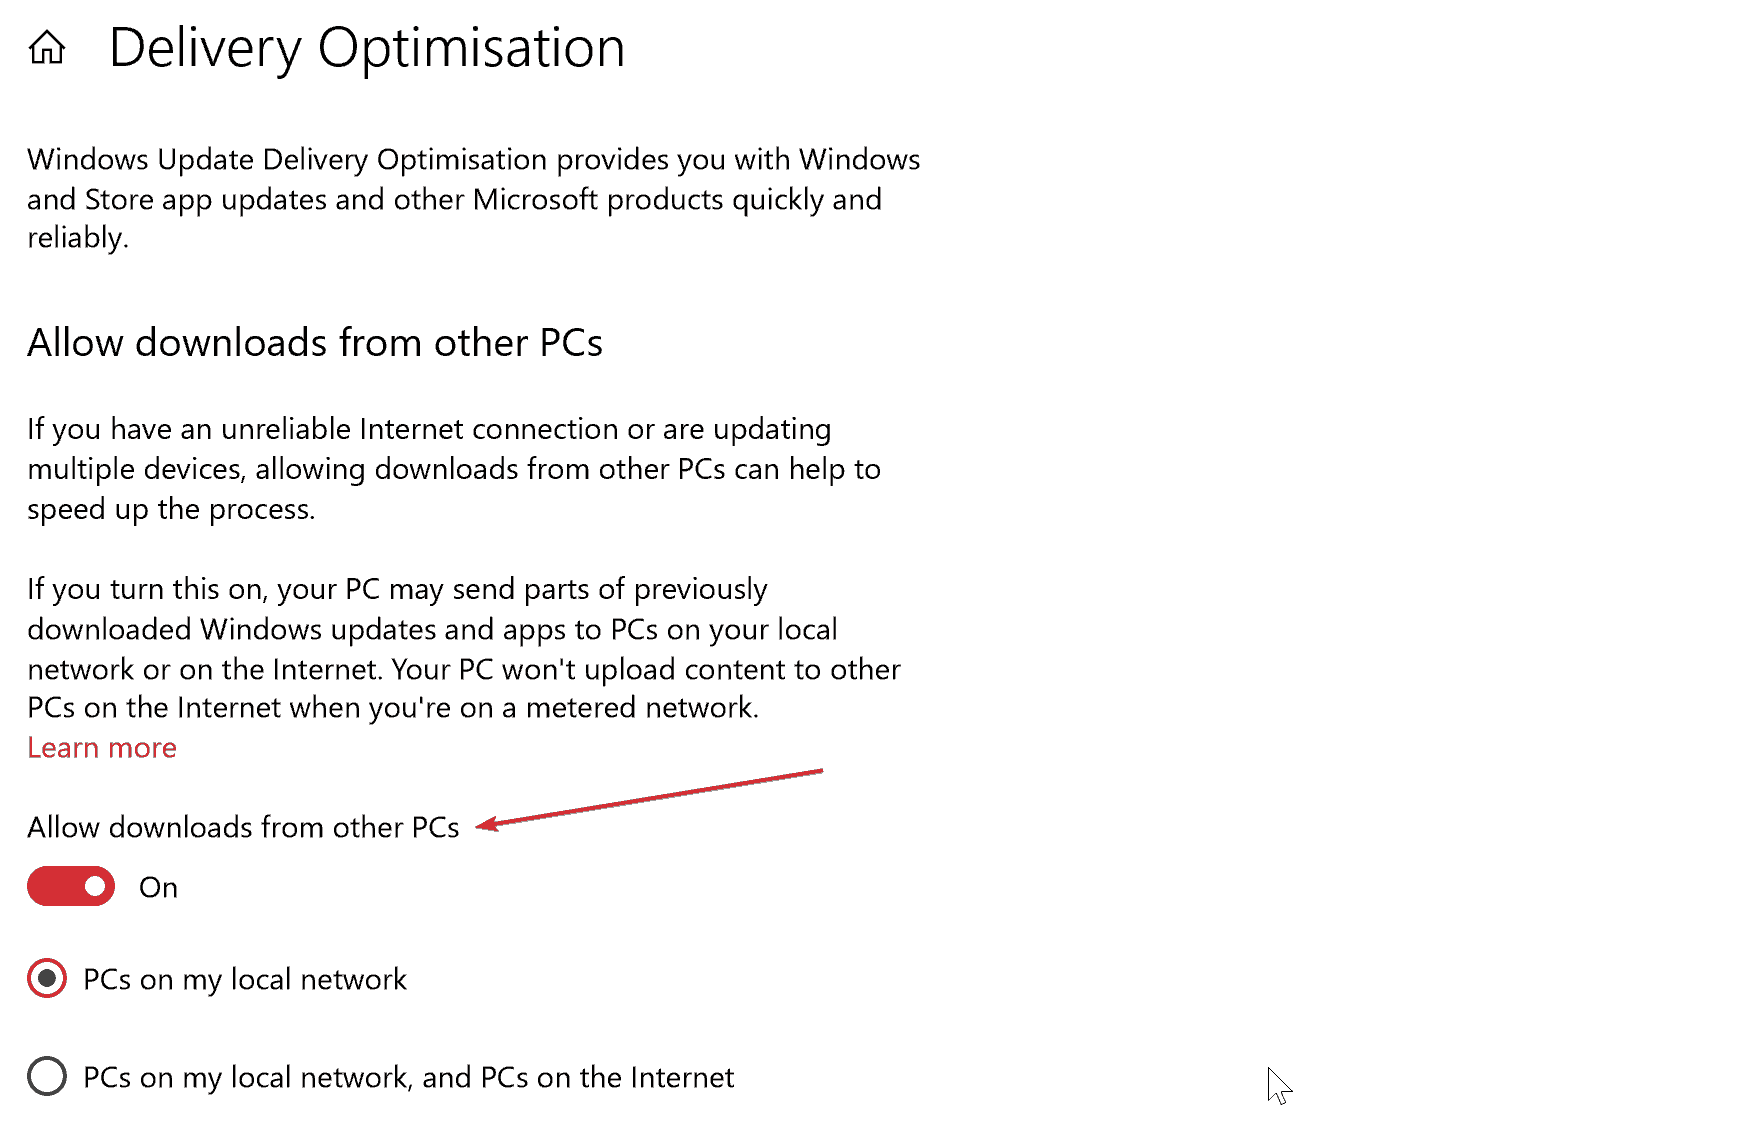
While the above process has been designed to ensure you get your updates over even an unreliable internet connection, or when speeds aren’t that great, toggling the above setting off will still make sense if you find yourself at the receiving end of the above phenomenon.
— RELATED: FIX: WiFi Stopped Working after Update to Windows 10
2. Turn off Background Intelligent Transfer System
Just in case the above failed to realise the desired outcome, here is another method that disables Windows Update as a whole. Hence, this makes for a reliable method of dealing with the Wi-Fi lag spikes though what also needs to be kept in mind is that this will deprive the PC of key updates that Microsoft makes available from time to time to patch critical vulnerabilities. As such, it is advisable to install updates manually from time to time when BITS is turned off.
Here are the steps:
- Open msc. You can do this just by typing services in the Cortana search box and select from the results provided.
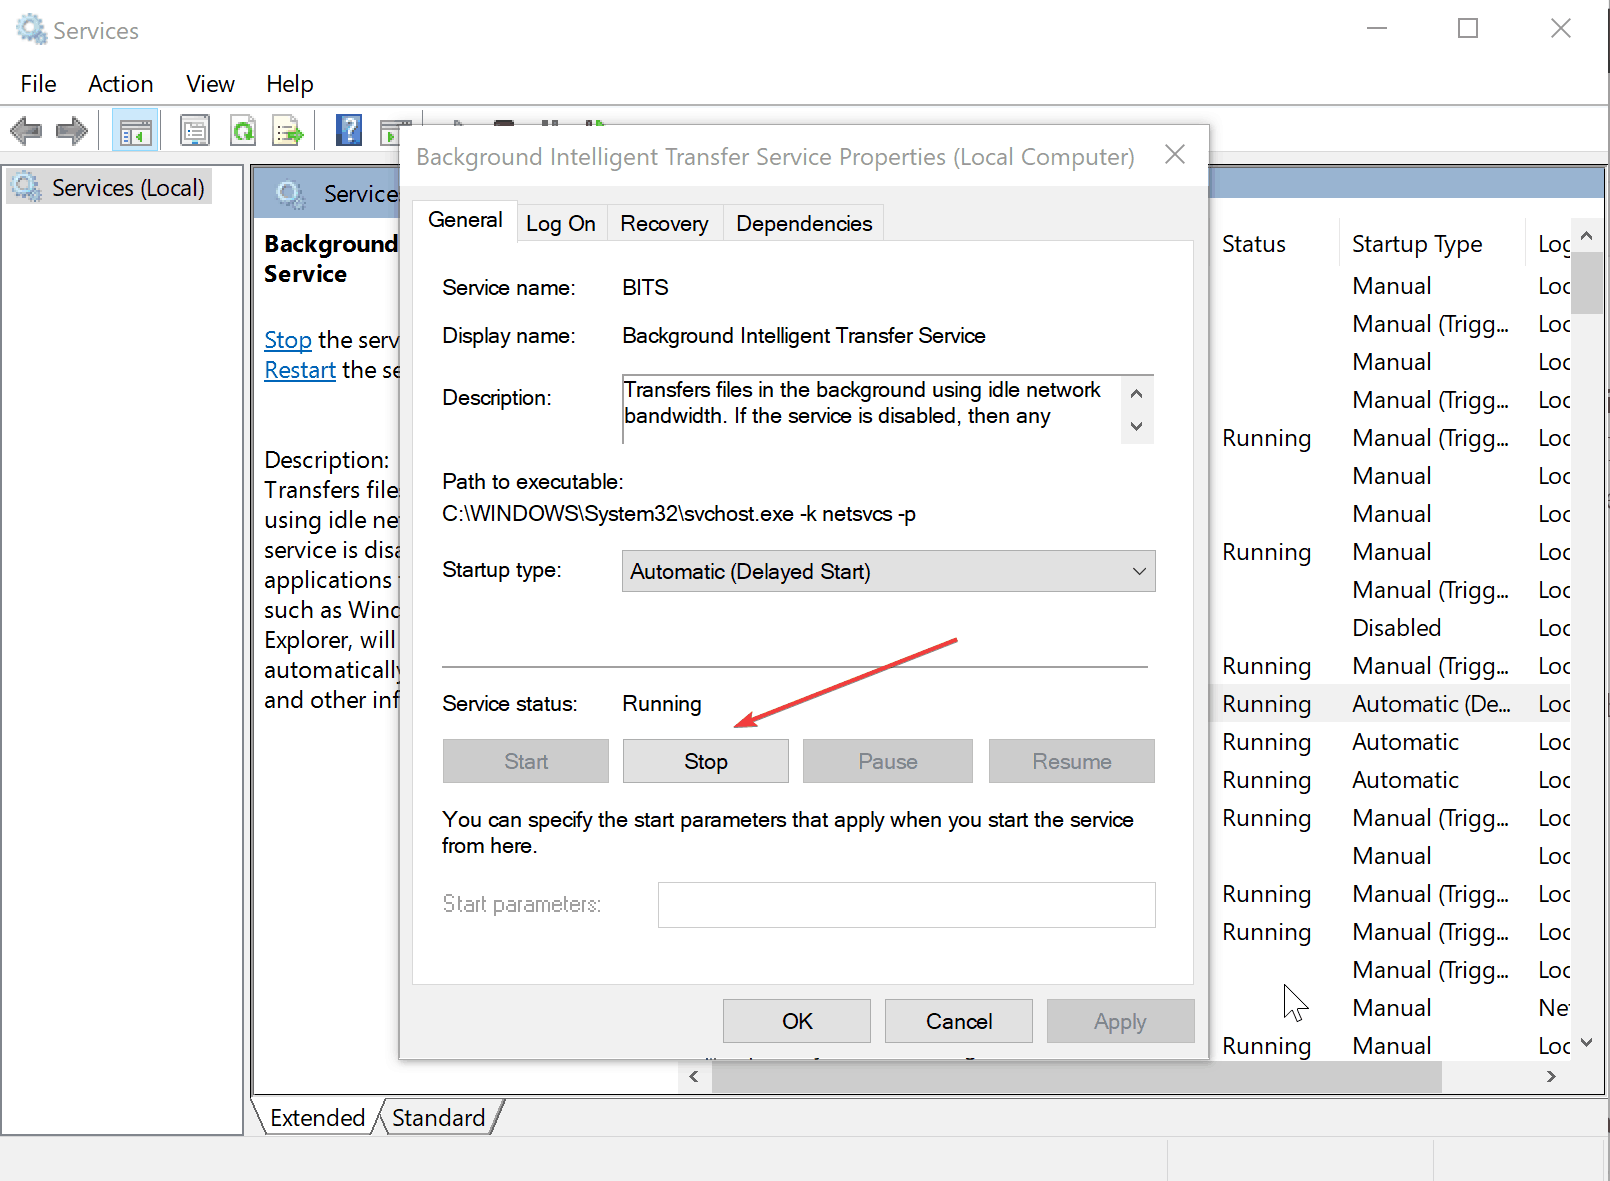
- In the Services app, locate Background Intelligent Transfer System.
- Right-click on it and select Properties.

- Under the General tab, click on Stop for the process to be stopped.
- For Startup type, select Disabled from the dropdown box.
- Under the Recovery tab, for First failure and Second failure, select Take No Action.
- Click OK for the changes to take effect
This should effectively kill BITS forever so that the service won’t start again even when the PC restarts. However, as has been stated above, the user’s discretion is advised when turning off BITS. Also, downloading the updates manually is highly recommended to ensure protection against all emerging vulnerabilities.
3. Uninstall Autodesk Application Manager
The Autodesk Application Manager aims to provide you information with all the latest updates and solutions available pertaining to the apps installed on your device. However, the same has also been found to be another reason Wi-Fi lag spikes and the solution here is to uninstall the software. Here is how you do it.
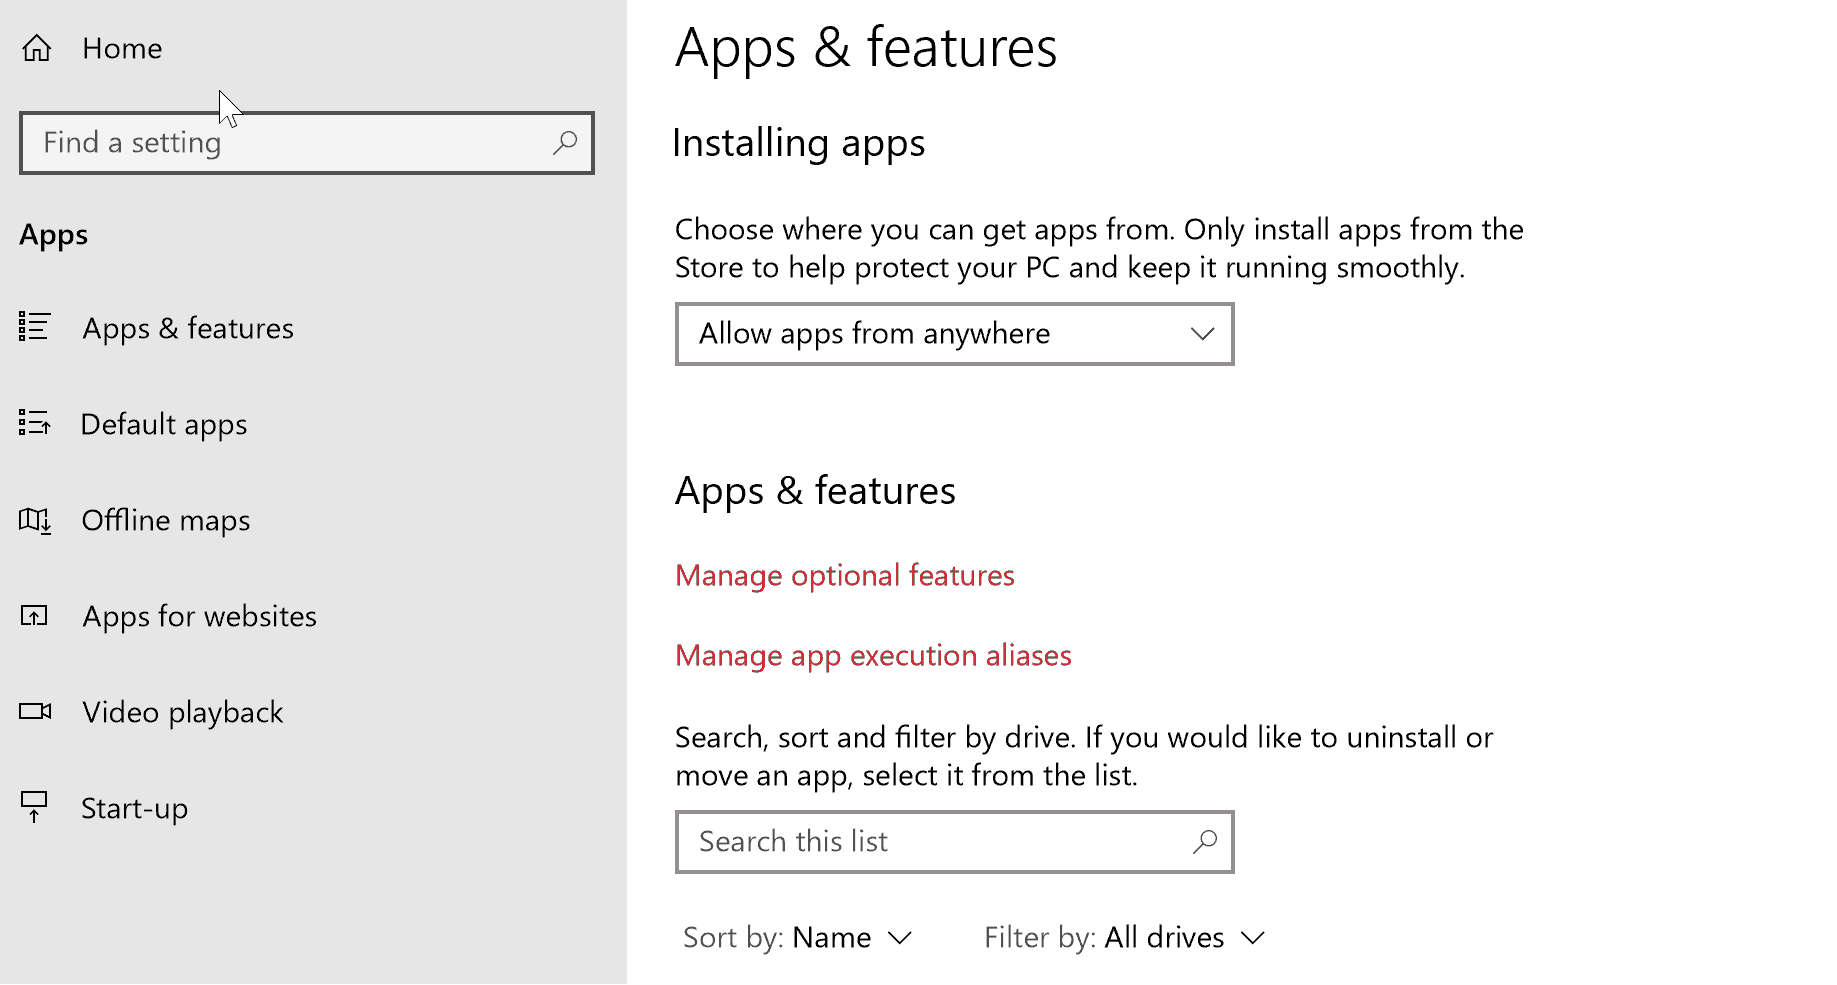
- Go to Settings > App.
- In the Apps & features page, scroll down to locate Autodesk Application Manager. Select the same.
- You will be provided the option to Uninstall the software. Click on it.

- Follow on-screen instruction to complete the uninstallation process.
— RELATED: How to fix poor WiFi signal on Windows 10, 8.1, 8
4. Disable IPv6
Any error with IPv6 can be a reason for Wi-Fi lag spikes. And one way to deal with it is to disable the same. Here is how you do it.
- Locate the Network/Wi-Fi icon at the bottom right corner of the taskbar and right-click on it.
- From the options provided, select Open Network and Internet settings.
- In the Settings window that shows up, select Change adapter options.
- In the next window that opens, you will get to see all the network adapters relevant for your PC.
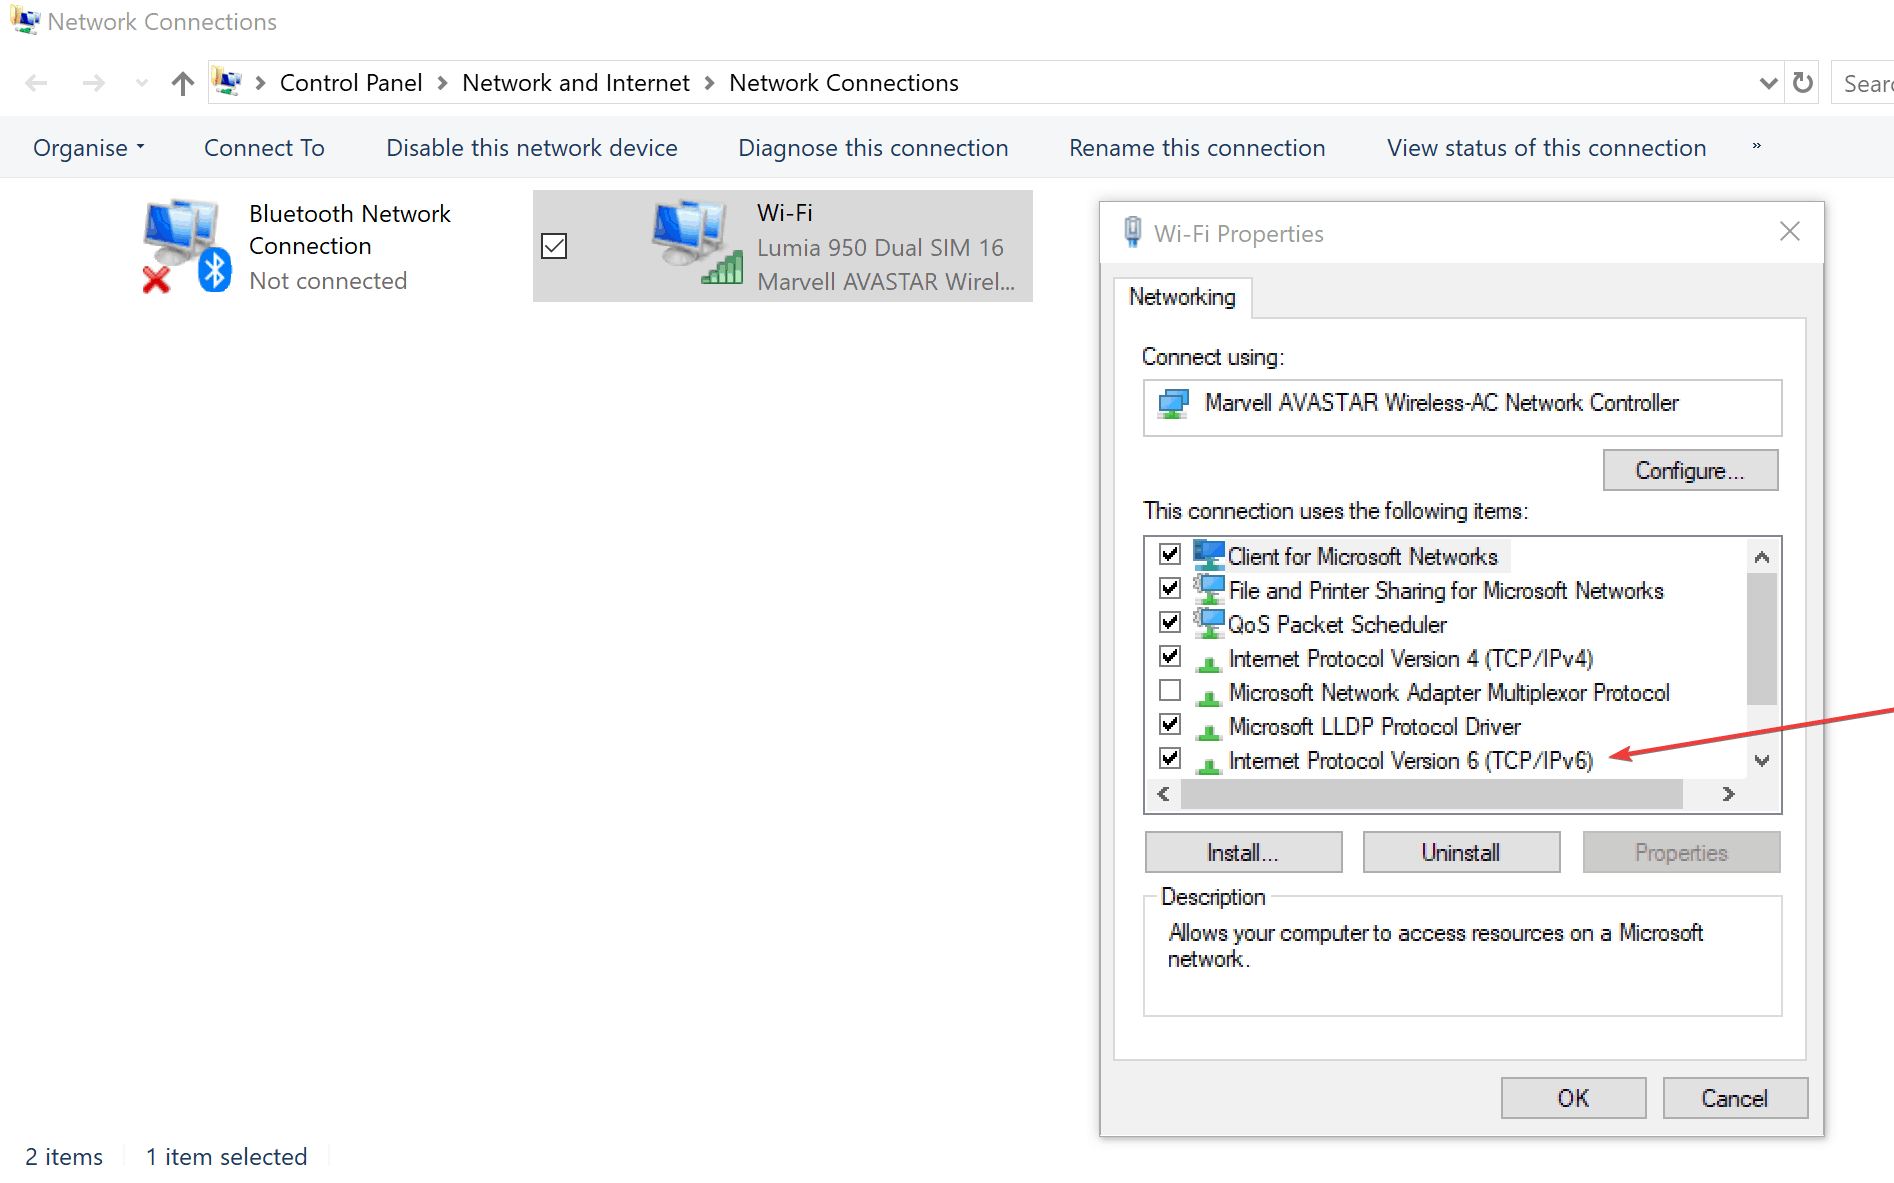
- Right-click on the active network adapter, the one used to connect to the internet and select Properties.
- In the Properties window, locate Internet Protocol Version 6 (TCP/IPv6) and un-check the checkbox for the same.

- Click on OK and re-start your PC for the changes to take effect.
5. Disable Connected User Experience and Telemetry service
That sure is a bit of a mouthful though, in simple terms, it refers to the controversial Microsoft practice of collecting Windows 10 usage info and passing it back to the company servers. Microsoft claims that it is done to improve the Windows 10 experience though many have claimed it to be just spying in another name and form. And the same also eat up our bandwidth as well. Here is how you can stop it.
- Launch Services You can do that by pressing Windows + R > type services.msc and press enter. Or simply type Services in the taskbar search box.
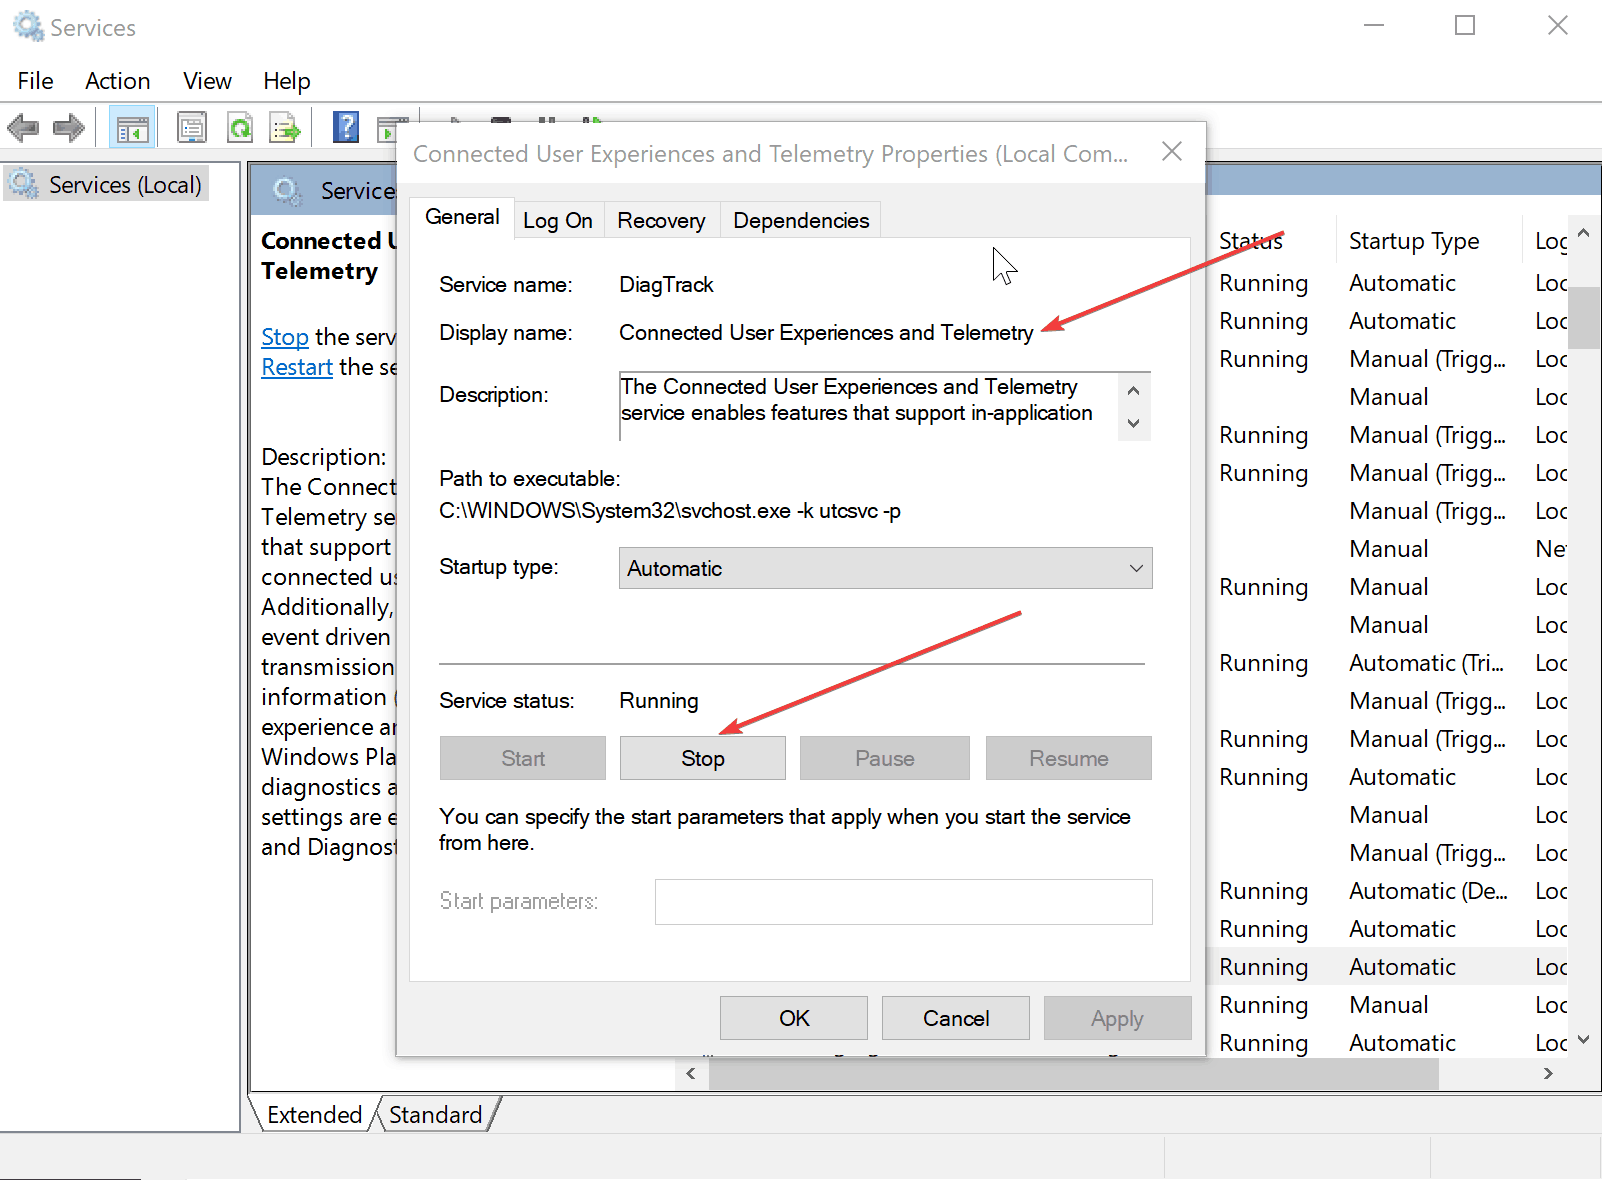
- Here, under ‘Services (Local)’, locate Connected User Experiences and Telemetry and double-click on it.
- In the Connected User Experiences and Telemetry properties window, under General tab, click on Stop in the Service Status.

- For Startup type, select Disabled from the drop-down menu.
- Click on OK and that’s it.
— RELATED: Fix: Windows 10 WiFi not connecting automatically
6. Disable Cortana
Cortana can be beneficial when it comes to getting some of your mundane or repetitive tasks done. However, the service also requires an active internet connection for it to get its job done. And that is how it might also end up contributing to your Wi-Fi lag spikes. That also makes it a wise choice to disable the service if its drawback far outstrips the benefit it comes with. Here are the steps (it applies to Windows 10 Home).
- Launch Registry Editor. You can do that by simply typing regedit in the taskbar searchbox. Or you can also press Windows + R and typing regedit.
- On the left panel, search for HKEY_LOCAL_MACHINE\SOFTWARE\Policies\Microsoft\Windows\Windows Search.

- On the right panel, right-click on the empty space and select New > DWORD (32-bit) Value.
- Give it a name, say YesCortana. Give it the Value – 0.
- Click on OK and this will save the new key.
- This, in turn, will disable Cortana, saving you some bandwidth.

7. Disable OneDrive
OneDrive is Microsoft’s cloud storage solution that you can fall back on to store files that you might need across multiple devices. However, that might also consume a lot of your data if you deal with voluminous files each time. However, if OneDrive isn’t part of your daily diet, you might as well turn it off for better internet experience. Here is how you do it.
- Press Windows key + R to launch the Run command windows.
- Type gpedit.msc in the Run box and click on OK to launch Local Group Policy Editor windows.
- Here, select the Administrative Template from the left panel.
- Double click on Windows Components folder in the right panel.

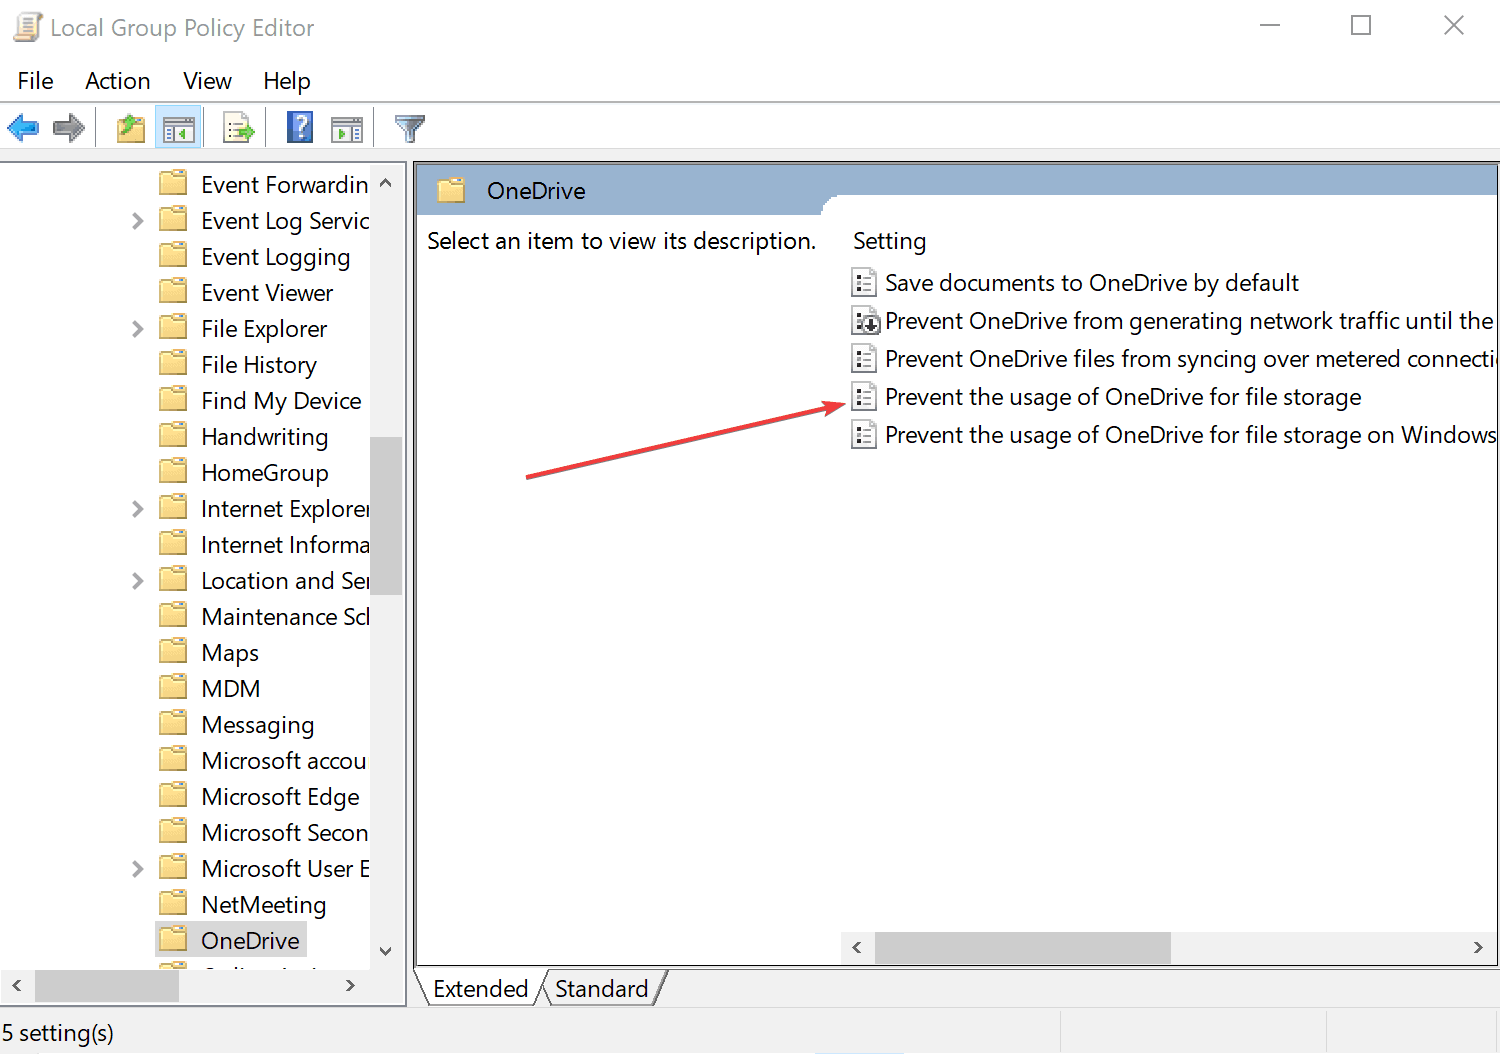
- Next, double-click on the OneDrive
- Double-click on Prevent the usage of OneDrive for file storage.
- In the separate window that opens up, select Disabled and click on OK.
This should shut out OneDrive on your device.
— RELATED: How to fix OneDrive access issues on Windows
8. Disable GameDVR
Disabling GameDVR has also helped many overcome Wi-Fi lag spike issues though this applies more to those who are into serious gameplay. Nonetheless, these are the steps to shut out GameDVR on their Windows 10 computers.
- Launch the Settings app and click on Gaming.
- Select GameDVR from the left panel.
- There, under the Background recording section, make sure the Record in the background while I’m playing a game is set to off.

This will prevent all back-end recording process.
So, this should make for a comprehensive list of all that might be contributing to Wi-Fi lag spikes. However, shutting off all might lead to a less than optimum Windows 10 experience. As such, users can exercise their individual discretion at switching off a particular feature so that they have the best of both worlds, getting to most out of the latest Windows platform with Wi-Fi too performing within appreciable limits.
Meanwhile, here is some related info that might be of interest to you.