How to Create a Windows 11 Bootable USB Installation Media
Perform clean reinstalls with a bootable USB drive
4 min. read
Updated on
Read our disclosure page to find out how can you help Windows Report sustain the editorial team. Read more
Key notes
- Creating a bootable drive for Windows 11 is possible, and you can do it with Media Creation Tool.
- Before starting the procedure, you need to make sure that your PC can handle this OS.
- If you’re looking for the Windows 11 bootable ISO, it’s available for download from Microsoft’s website to everyone.
Windows 11 has been officially released, and the OS brings an array of new features. The biggest change is the visual interface which makes it look more streamlined.
Besides the UI, it comes with improved security features, support for multiple displays, countless multitasking options, and much more.
You can enjoy the OS in the form of a system update, but what if you want to create a bootable drive and install Windows 11 on a different PC?
That is also possible, and in today’s guide, we’re going to show you how to properly make a Windows 11 bootable USB drive.
Can I download Windows 11 for free?
Yes, just like the previous OS, Windows 11 is available as a free download. You can enjoy it as a free system update and install it.
If you prefer to make a clean install, we’re happy to inform you that you can download the ISO file completely free as well and use it to install Windows 11 on your PC.
How can I upgrade to Windows 11?
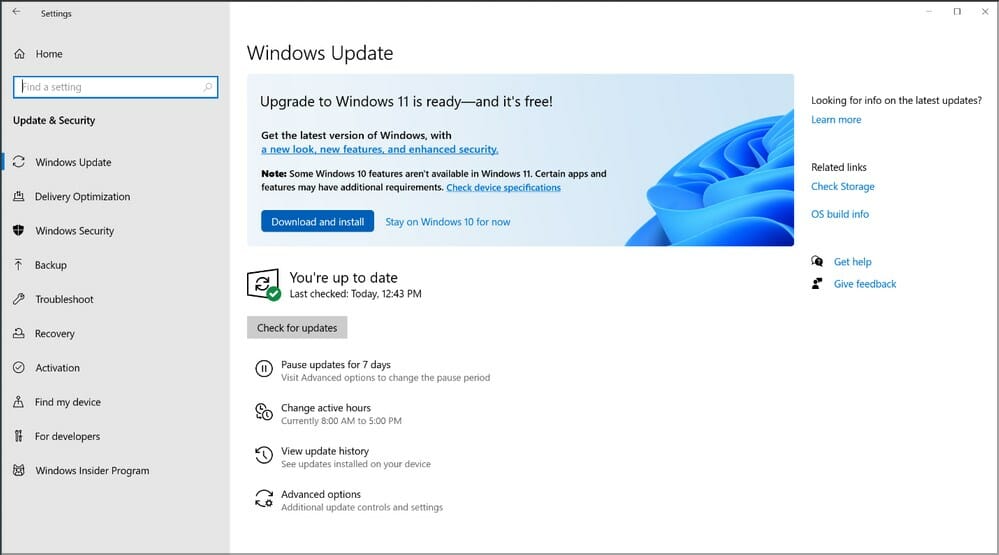
- Press Windows Key + I to open the Settings app.
- Now head over to the Update & Security section.
- Click the Download and install button.
- Follow the instructions on the screen.
How can I make a Windows 11 bootable drive?
1. Check the requirements
To create a Windows 11 bootable USB drive, you’ll need a flash drive that is at least 8GB in size. However, a larger flash might be a better choice in case anything goes wrong.
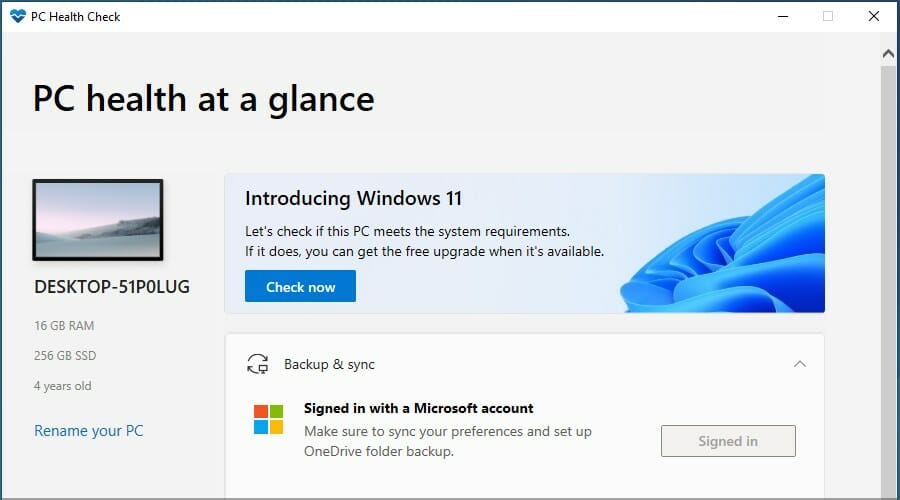
Lastly, you need to check the official Windows 11 requirements and make sure that your PC can handle this OS. Now that everything is ready, you just need the proper software to create a bootable drive.
2. Use the Media Creation Tool
1. Connect your USB flash drive to the PC.
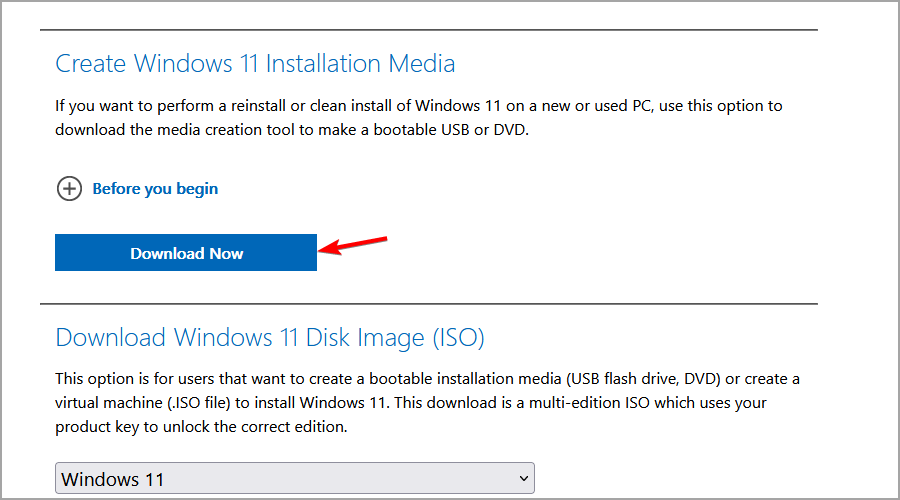
3. You will see multiple options. Navigate to Create Windows 11 Installation Media section and click on the Download Now button.
4. Once the software is downloaded, run it.
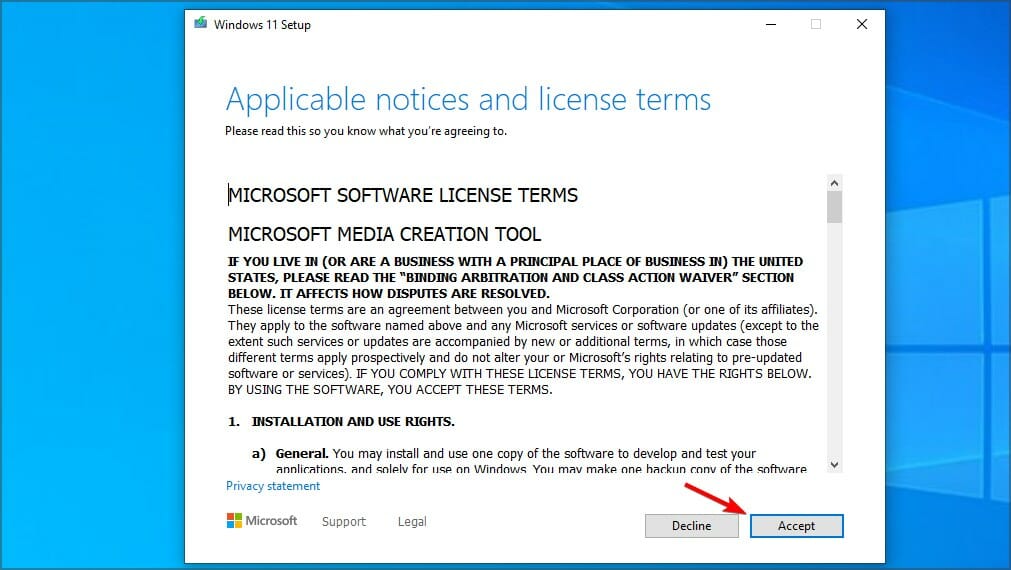
5. Accept the terms of service.
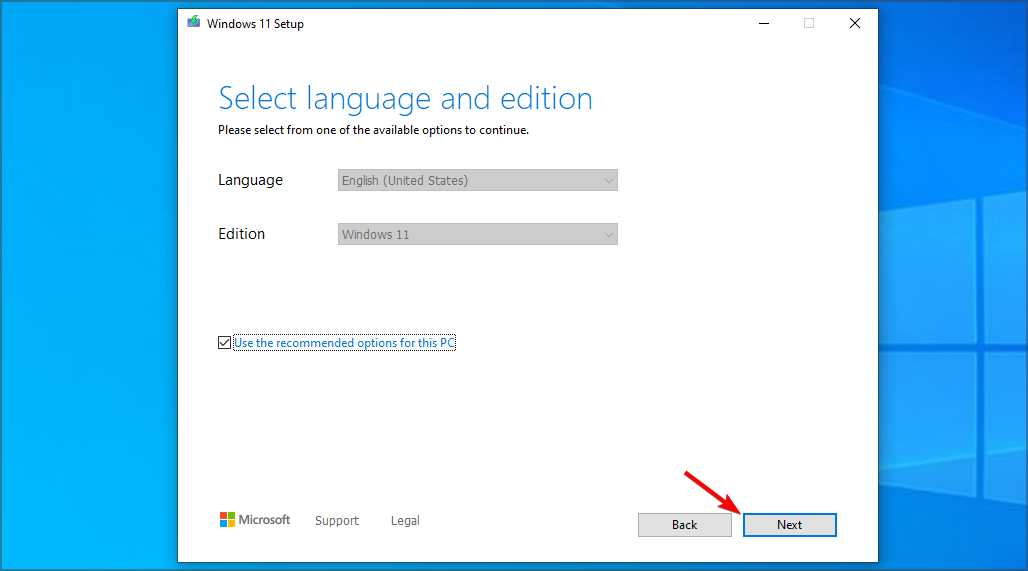
6. Make sure you have the correct edition selected. Click Next to proceed.
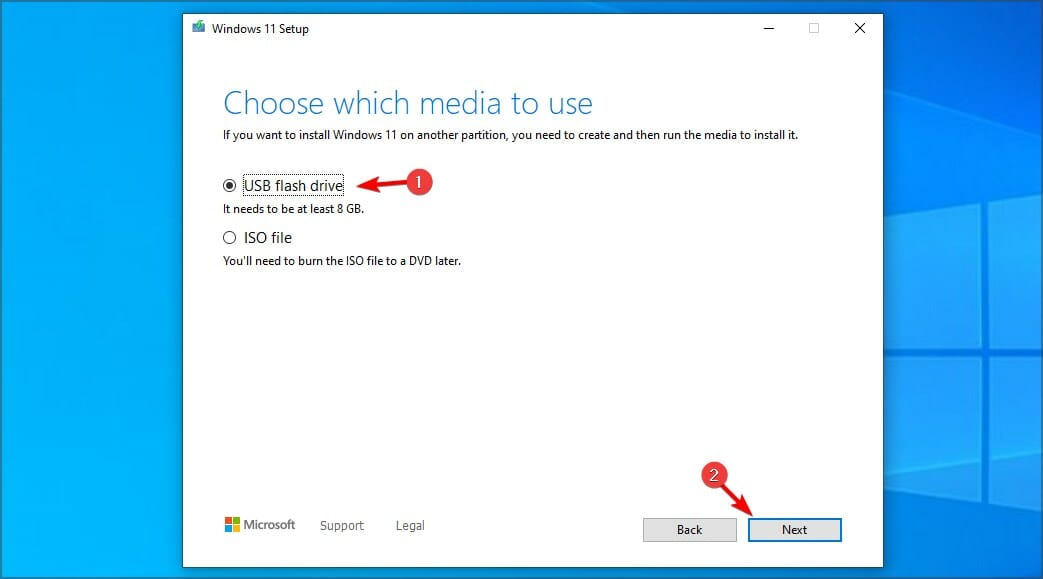
7. Now select USB flash drive and click Next.
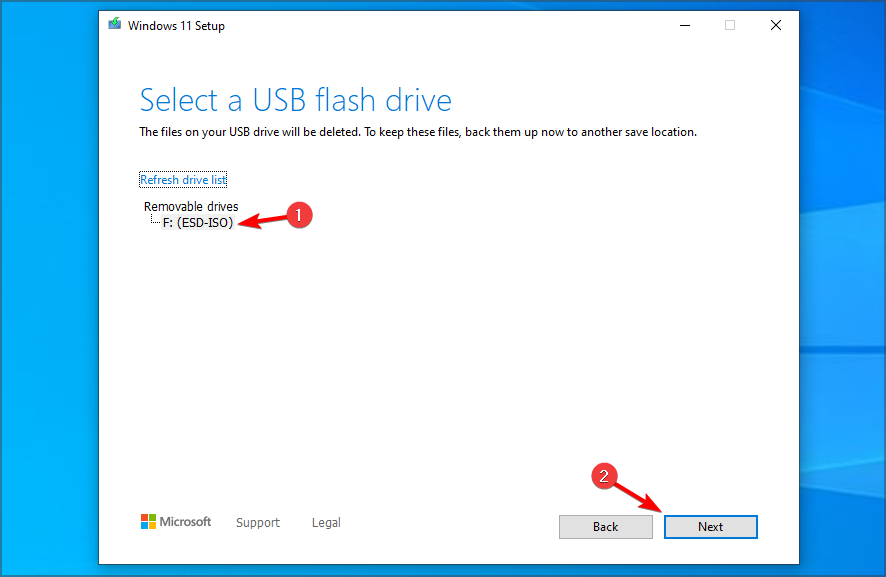
8. Pick your flash drive and choose Next.
9. Wait for the process to finish.
10. You have created a Windows 11 bootable USB.
If you want to create a Windows 11 bootable USB, you can easily do this using the Media Creation Tool. This is a Microsoft tool that allows users to download and store the install file for Windows 11, so that they can later use it to reinstall the OS.
3. Download Windows ISO
- Visit the Windows 11 download page.
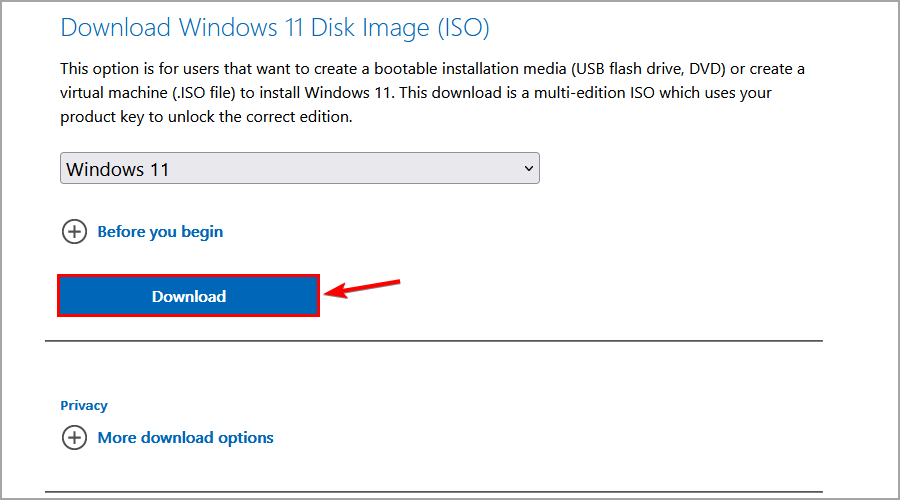
- Click the Download button in the Download Windows 11 Disk Image section.
- Select the desired language and click on Confirm.
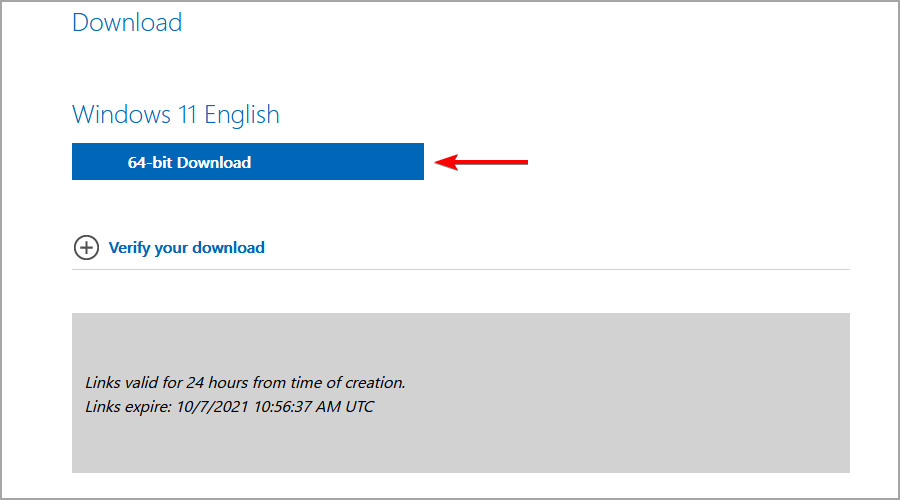
- Click on 64-bit Download button.
- Wait for the ISO file to download.
4. Use dedicated software
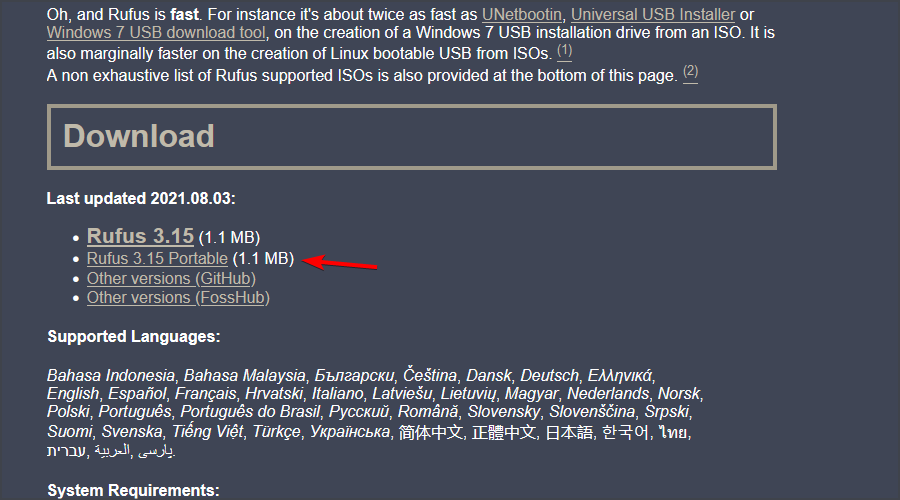
- Download Rufus.
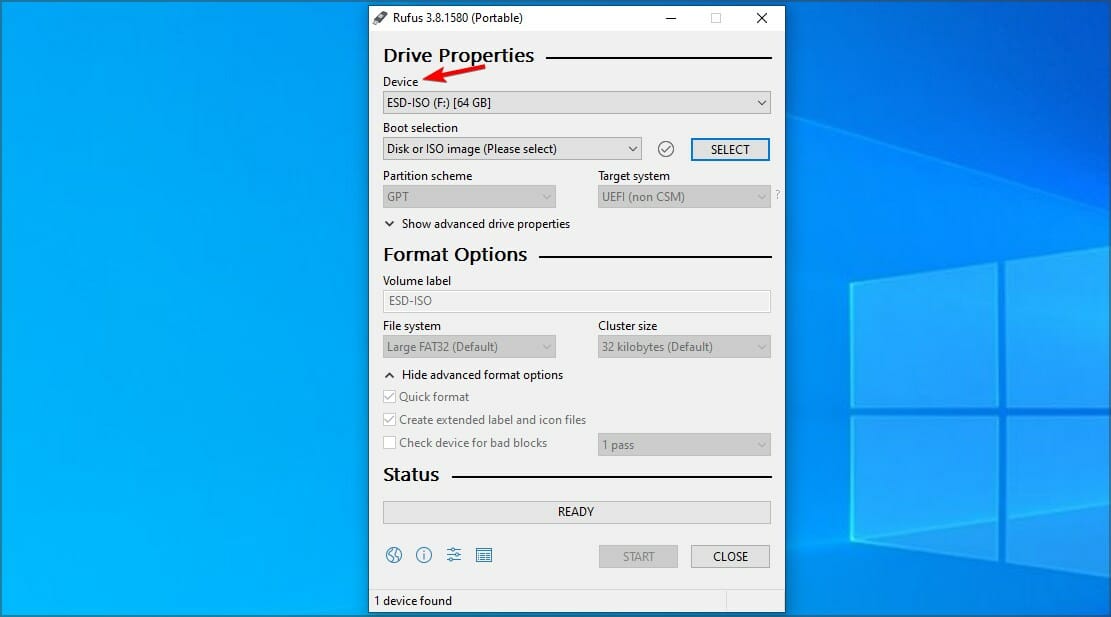
- Make sure that the correct device is selected. This is especially important if you have multiple USB storage devices connected to the PC.
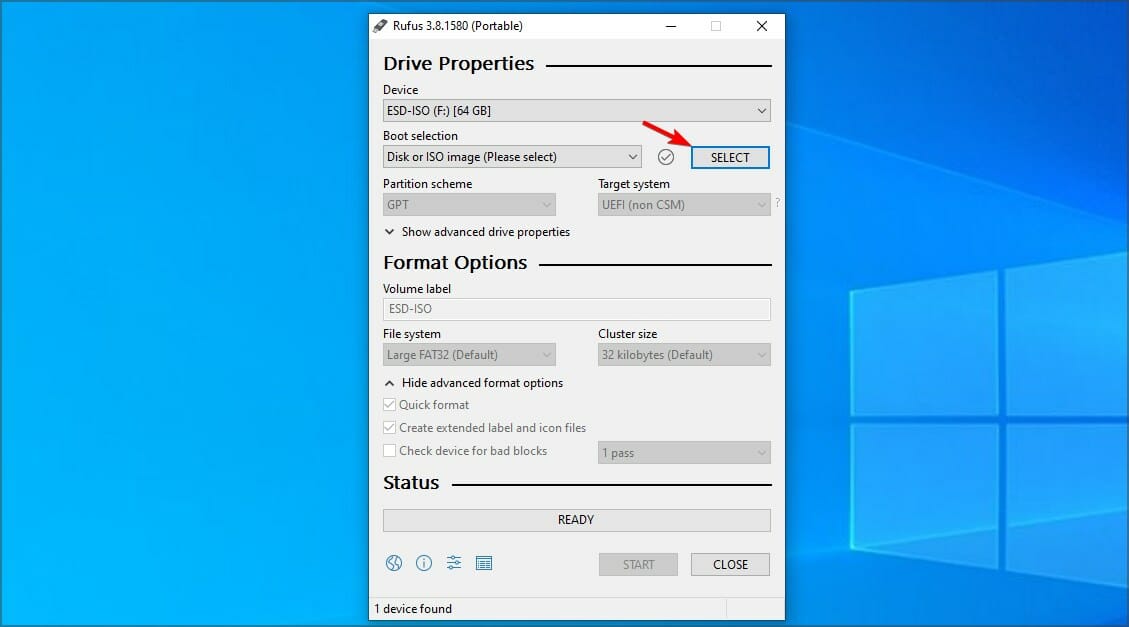
- Make sure that Boot selection is set to Disk or ISO image. Now click the Select button.
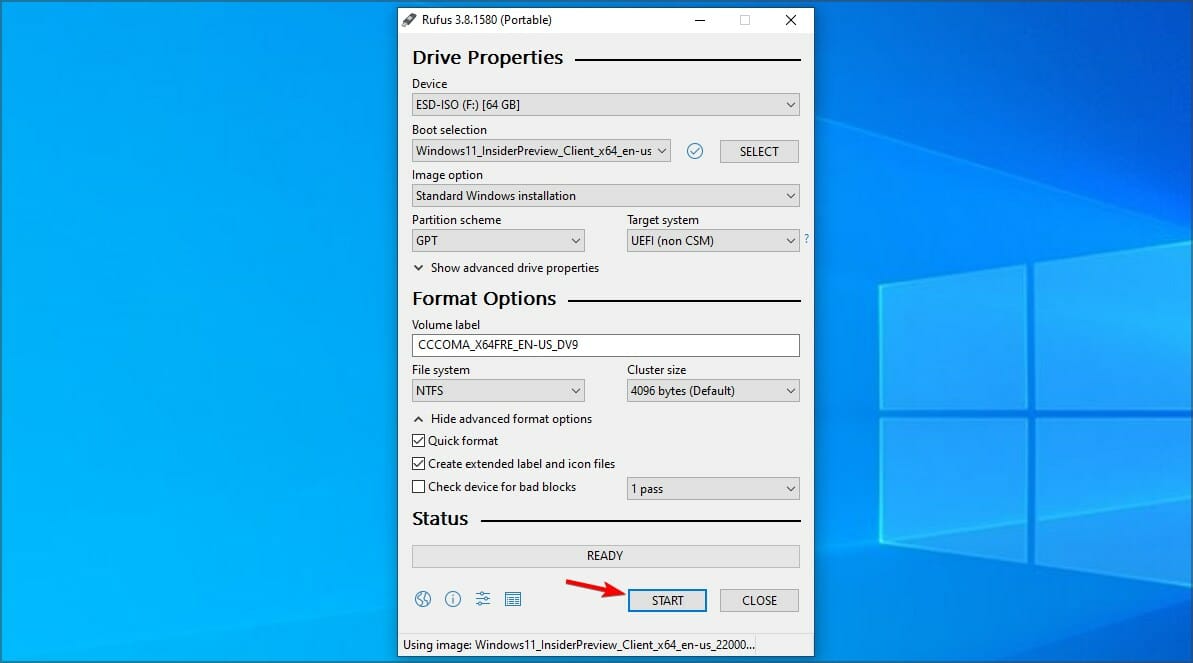
- Select the Windows 11 bootable ISO file.
- Set Image option to Standard Windows installation. Now set your Partition scheme to GPT.
- After doing that, click on Start.
- A warning window will appear asking you to confirm that you want to format your flash drive. Select OK.
- Wait for the process to finish.
Also, don’t forget to use the Rufus settings for Windows 11 if you want to have a smooth and error-free installation.
What are Windows 11’s requirements?
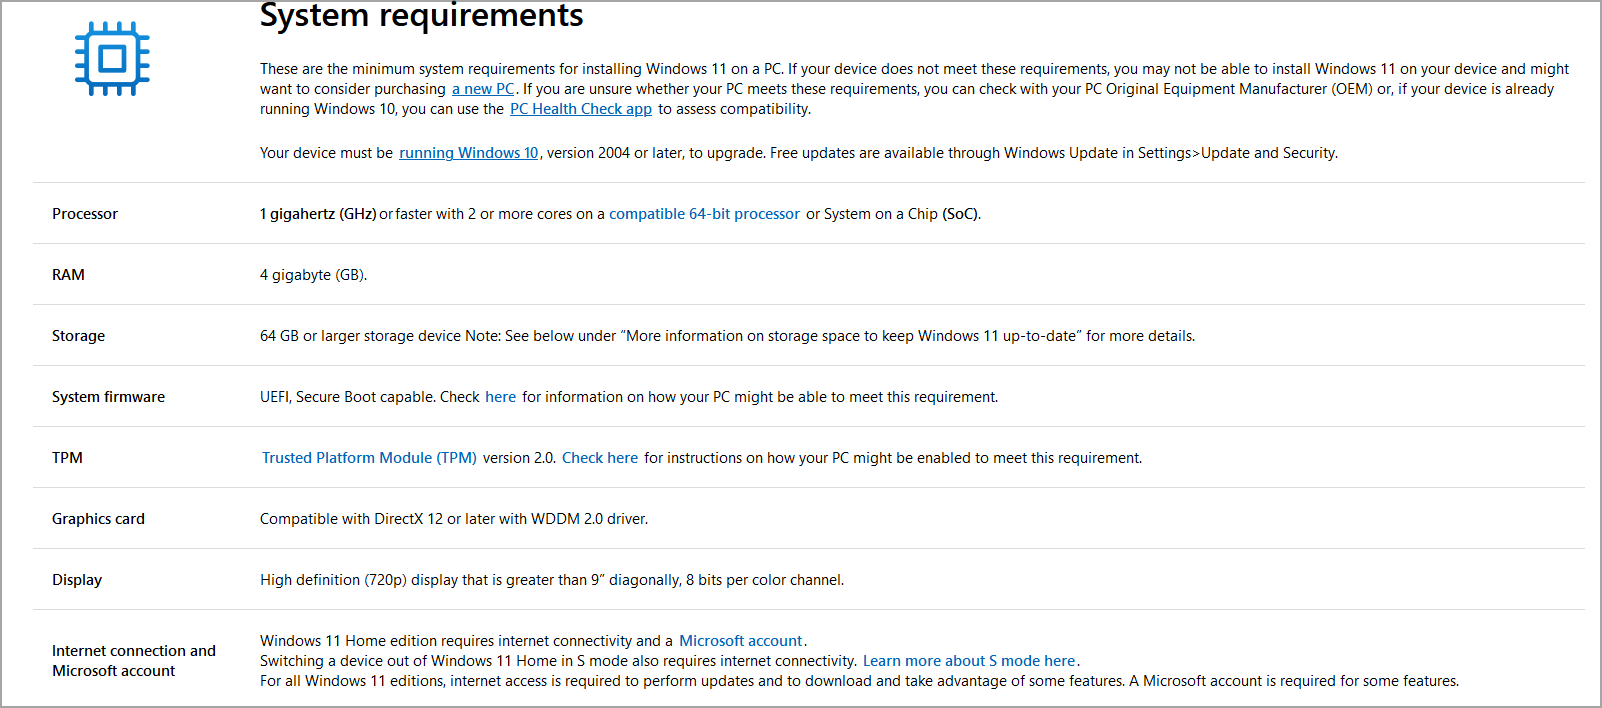
- CPU: Compatible 64-bit processor
- RAM: 4GB
- Storage: 64GB
- TPM: TPM 2.0
The requirements are slightly higher compared to the previous version, but if your CPU is on the list of supported devices, you won’t have any problems installing the update.
One big issue for some users is the TPM, and to learn more about it, visit our Windows 11 and TPM guide for more information.
Is it better to upgrade or clean install Windows 11?
Usually, it’s better to upgrade to Windows 11 since this is the best method to use if you want to keep all your files and applications.
However, if any issues occur after upgrading, you might want to try performing a clean install. By doing so, you’ll remove all files from your system drive, and you’ll start fresh.
Before doing that, we strongly recommend that you back up all important files, in order to prevent data loss.
Creating a Windows 11 bootable drive is simple, and you can do it by following the steps mentioned in this guide. In case you’re not sure if you should switch, visit our Windows 11 vs Windows 10 guide for more information.
You can use any method that you like, but for most, it would be the simplest to use the Media Creation Tool. If you’re a more advanced user, you can download the ISO file manually and then create a bootable drive.
We hope that you found this guide useful and that you managed to create your bootable drive. What is your favorite method in that regard? Let us know in the comments below.






User forum
0 messages