Windows 11 Not Updating Time? How to Sync it Again
Expert verified methods to handle time not updating issue
Key notes
- Several Windows 11 users have reported that they are facing Windows 11 not updating time issue.
- Restarting the PC and setting the date and time to automatic, hasn’t helped them and they are looking for effective measures to fix this.
- If you are one of those, then you can check this guide to possibly resolve the time not updating issue.

Windows 11 keeps updating the date and time automatically, provided that it is not set to manual. It makes use of the time.windows.com server to fetch the exact date and time.
But there are several users, who have reported that for them, the date and time on their Windows 11 PCs aren’t updating automatically. And they haven’t set the settings to manual either.
Windows 11 users have reported that even after keeping the time and date change on automatic, the operating system is not updating the time.
Well, if you are one of those users, then you will face several issues with the software installed on your Windows 11 PC. In particular, the browser app will throw up multiple errors due to incorrect time and date.
This is not something new, and sometimes Windows can act strangely. The Windows Time Service may stop without any reason, and you will face Windows 11 not updating time error.
Thankfully, this guide is here to help you out, as we have listed some of the best and most effective solutions that have helped users fix the Windows 11 not updating time errors. Let us check them out.
What are the different ways of changing the date and time on Windows 11?
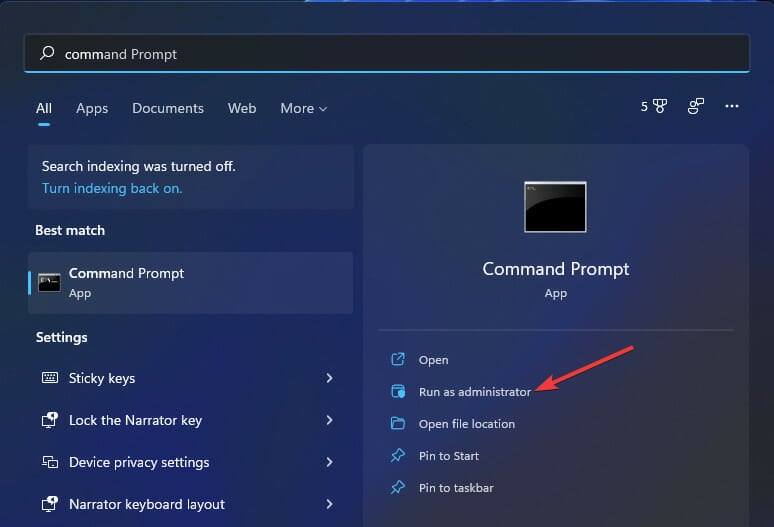
1. Using Command Prompt
- Open the Start menu.
- Search for Command Prompt and open it as an administrator.
- Using the date format datedd/mm/yyyy, you can change the date of your PC.
- For example, if you wish to change the date to 12/April/2022, in the above format, you need to type in 12/04/2022. Do note that the date format depends on the format that your PC is set with. If you have the date format as mm/dd/yyyy, then you need to type 04/12/2022. So, the command would be:
date 12/04/2022ordate 04/12/2022
- For example, if you wish to change the date to 12/April/2022, in the above format, you need to type in 12/04/2022. Do note that the date format depends on the format that your PC is set with. If you have the date format as mm/dd/yyyy, then you need to type 04/12/2022. So, the command would be:
- To change the time, use the format time HH:MM and press Enter.
- To change the time to 10:30 AM, you need to enter time 10:30 in the above format. If you want to change the time to 10:30 PM, then you need to enter time 22:30. So, the command would be:
time 10:30ortime 22:30.
- To change the time to 10:30 AM, you need to enter time 10:30 in the above format. If you want to change the time to 10:30 PM, then you need to enter time 22:30. So, the command would be:
- Exit CMD.
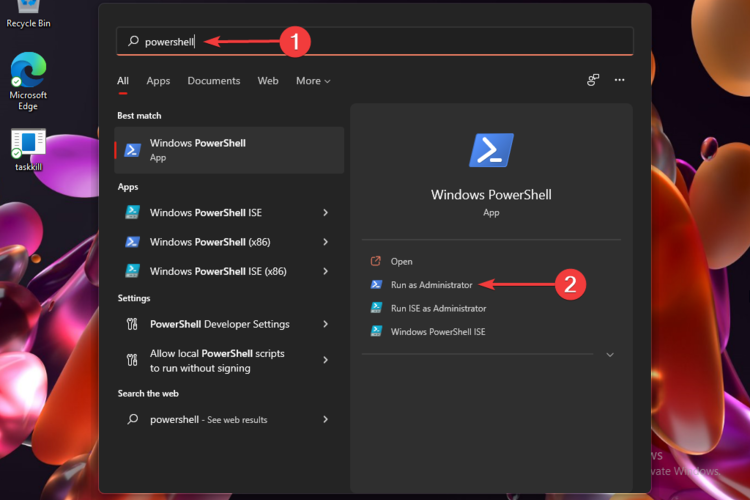
2. Using Powershell
- Open the Start menu.
- Search for Windows Powershell and run it as an administrator.
- Type the below command and press Enter to change the date and time in one go.
Set-Date -Date "dd/mm/yyyy HH:MM AM"orSet-Date -Date "dd/mm/yyyy HH:MM PM" - Exit Windows Powershell.
While you might already be familiar with other methods of changing the date and time, i.e., from the taskbar widget panel or the control panel method, the two methods mentioned above add to the flexibility.
How can I fix Windows 11 not updating time error?
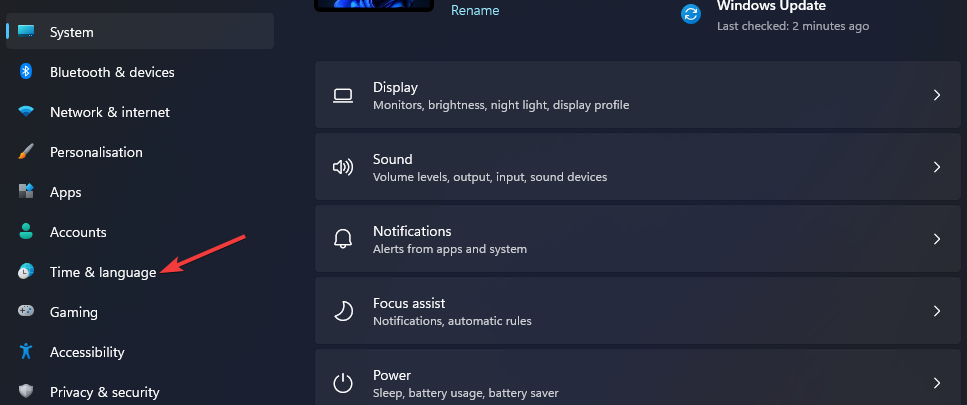
1. Check if time settings is set to manual
- Press the Win + I keys to open the Settings menu.
- Click on Time & language.
- Select Date & time.
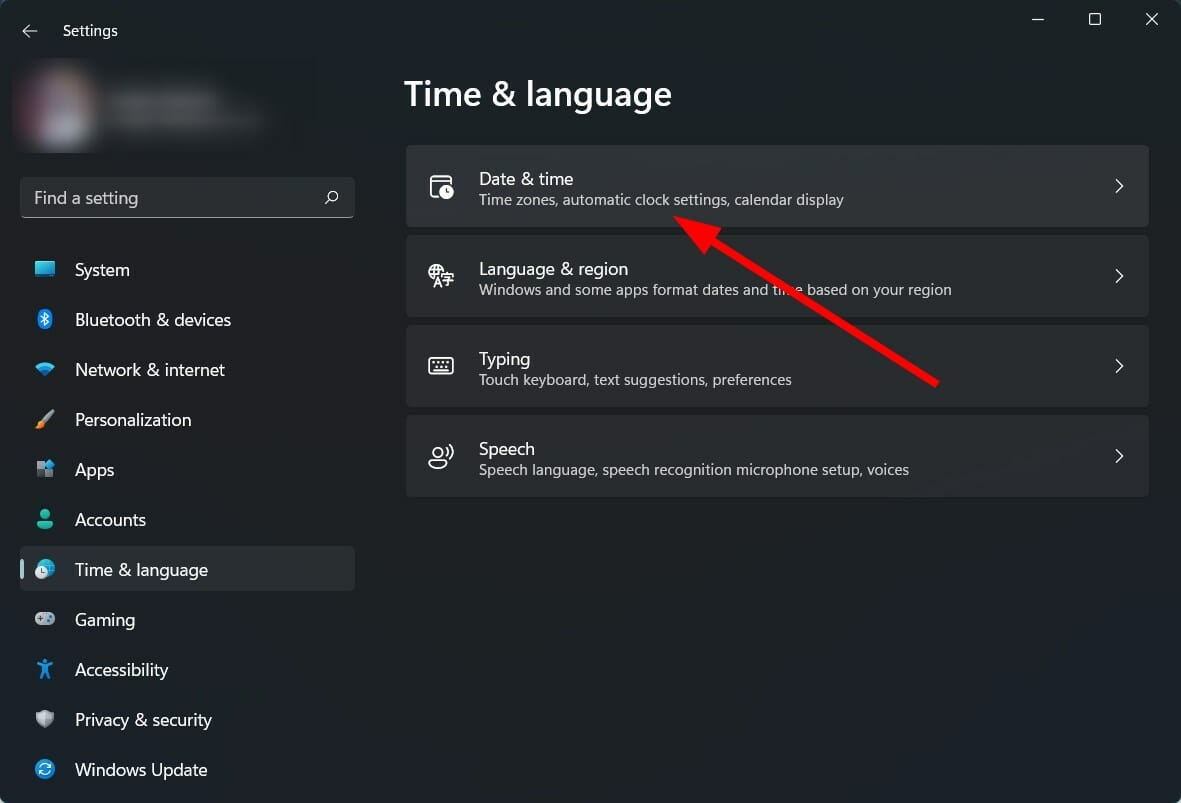
- Make sure to toggle on the Set time automatically option, if it is not already selected.
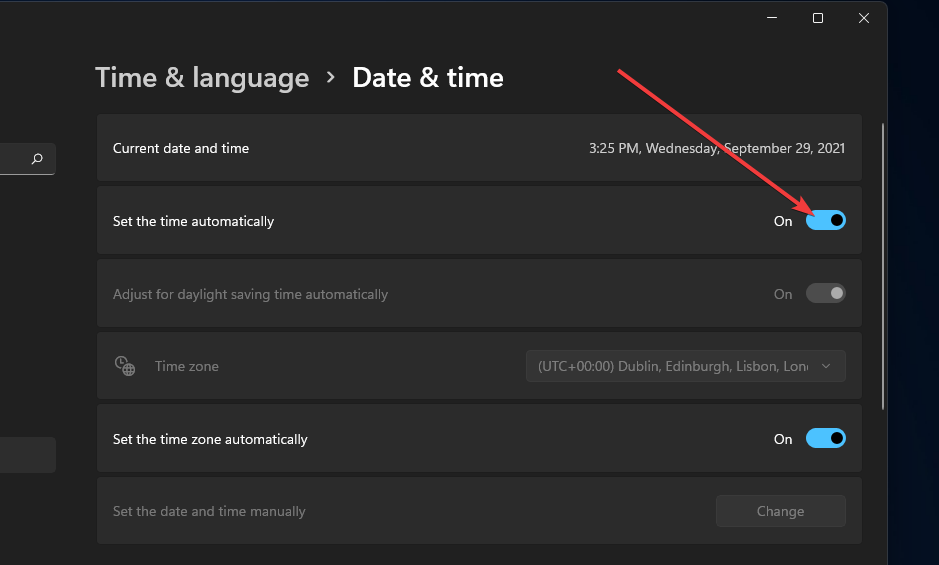
If the Set time automatically option isn’t selected, then problematic third-party apps, viruses, or malware on your PC can tweak the manual time settings, only to cause you more trouble.
Because, incorrect time not only deprives you of receiving the latest updates, it will also cause several issues with your browser and the update of virus definitions.
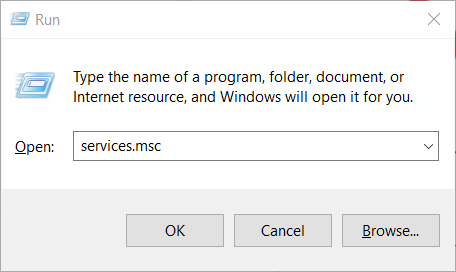
2. Start Windows Time service
- Press the Win + R keys to open the Run dialogue.
- Type the below command and press Enter.
services.msc
- On the right side, search for the Windows Time service and double click on it.
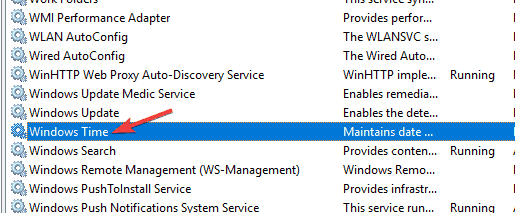
- Under Startup type, select Automatic.
- Select the Start button.
- Click Apply and OK to save changes.
Your Windows 11 PC makes use of the Windows Time service in order to keep the time and date up to date.
Sometimes, due to external factors, this service fails to operate or function correctly. This will ultimately result in issues such as Windows 11 not updating time error. Check if the service is running or not and if not, then enable it and see if this fixes the issue.
This also helps if the automatic time zone changes to a wrong one.
3. Use a different server
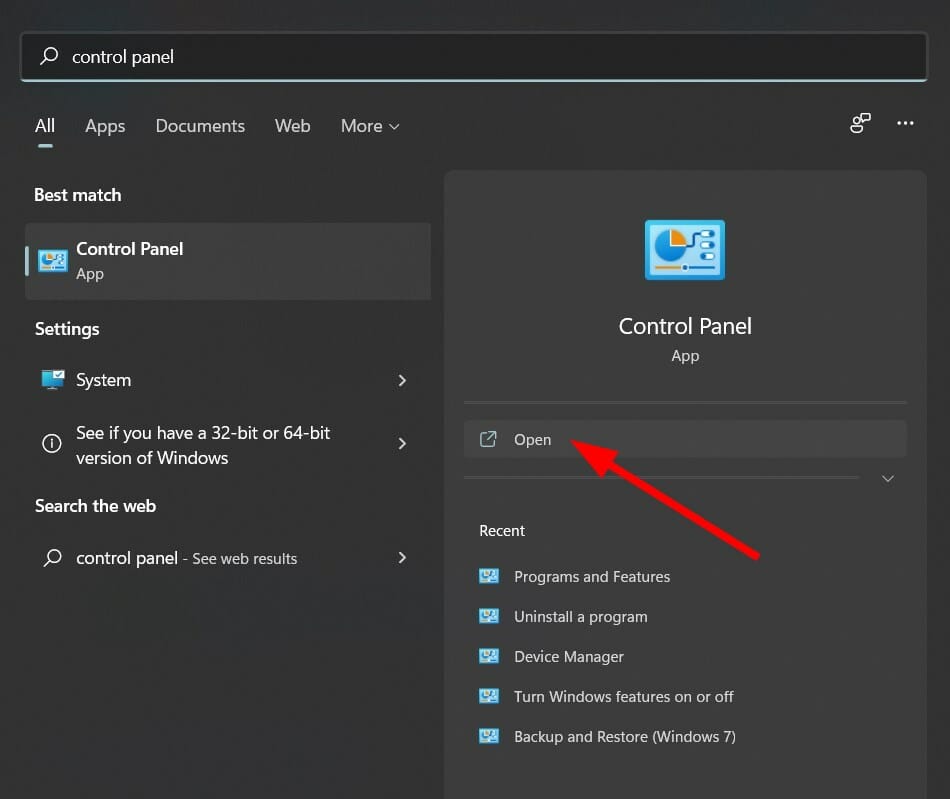
- Open the Start menu.
- Open Control Panel.

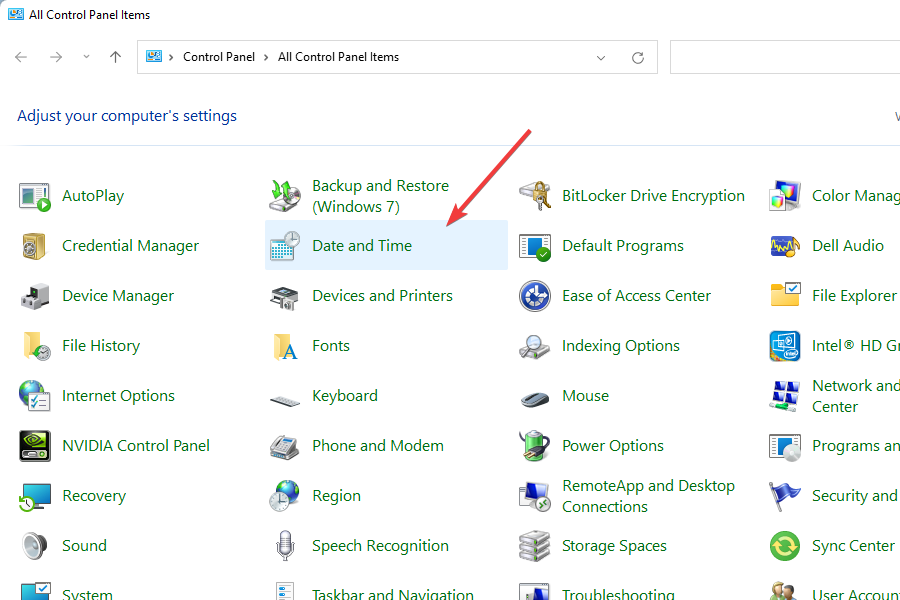
- Select Date and Time.

- Switch to Internet Time.
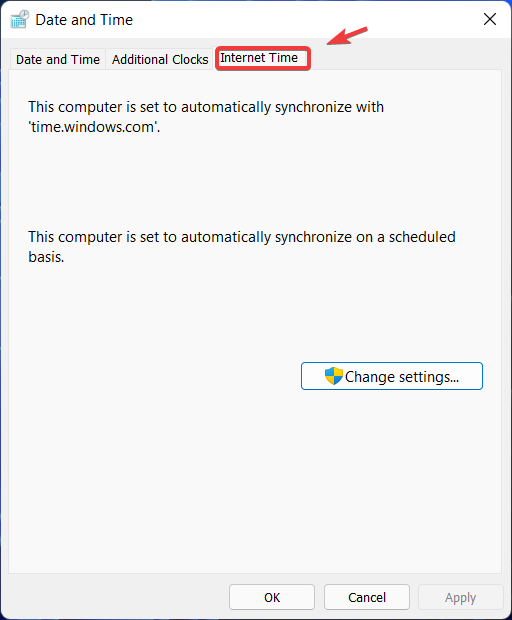
- Click on Change settings.
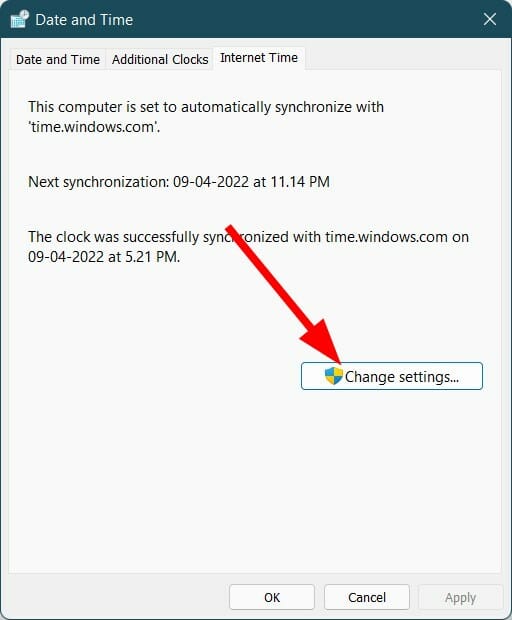
- Change the time server from the Server drop-down menu.
- Click on the Update now button.
Changing the time server has helped several users get their Windows 11 PCs to update the time. There are chances that the current time server you have selected is facing some issues. You can also give it a try and hopefully fix the issue.
4. Reset w32time.dll
- Open the Start menu.
- Search for Command Prompt and open it as an administrator.
- Execute the below command.
regsvr32 w32time.dll - Close the command prompt and restart your PC.
Using the above command, you are basically re-registering the w3time.dll file on your PC. Check if this fixes the issue or not.
5. Disable and enable Auto Time Zone Updater service
- Press the Win + R keys to open the Run dialogue.
- Type the below command and press Enter.
services.msc - On the right side, search for the Auto Time Zone Updater and double click on it.

- Double-click on it and under Startup type select Disabled.
- Set the Service status as Stop.
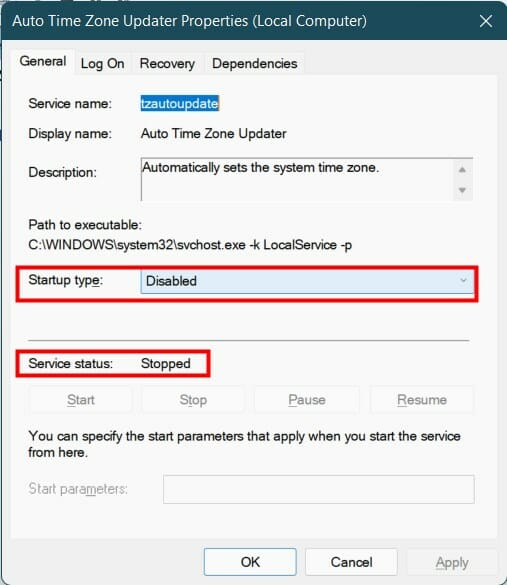
- Restart your PC.
6. Use Registry Editor
- Press the Win + R keys to open the Run dialogue.
- Type the below command and press Enter.
regedit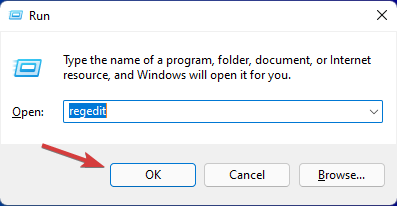
- Head over to the below path.
HKEY_LOCAL_MACHINE\SYSTEM\CurrentControlSet - Locate ControlTimeZoneInformation in the left pane. If it does not exist already, then right-click on CurrentControlSet and create a new key.
- Name this newly created key as ControlTimeZoneInformation.
- On the right side, right-click on empty space and select New > Dword (64 bit).
- Name it RealTimeIsUniversal.
- Double click on RealTimeIsUniversal.
- Change the Value data to 1.
Before you go ahead and tweak the registry settings of your PC, it is very important to take a backup of the default registry settings so that you can always revert back to the default settings in case things go south.
In order to take a backup, open the registry editor, and click on Files > Export. Select the location to save the registry editor backup and hit Save.
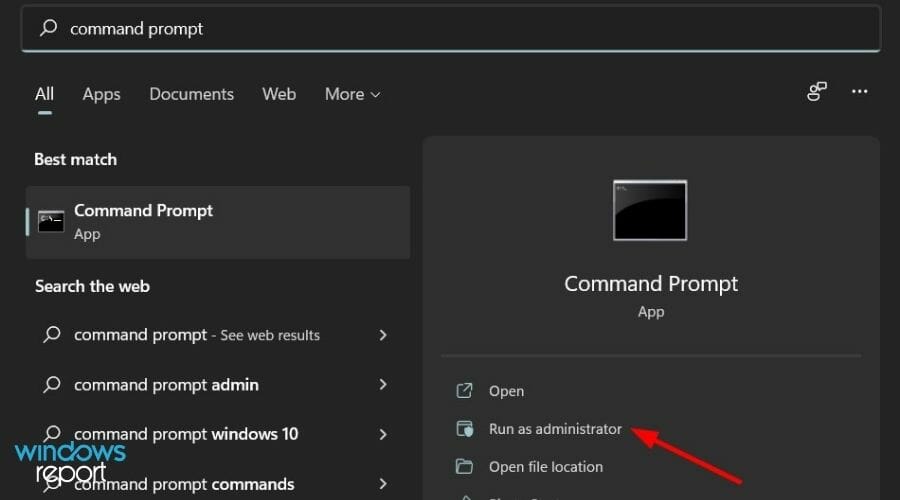
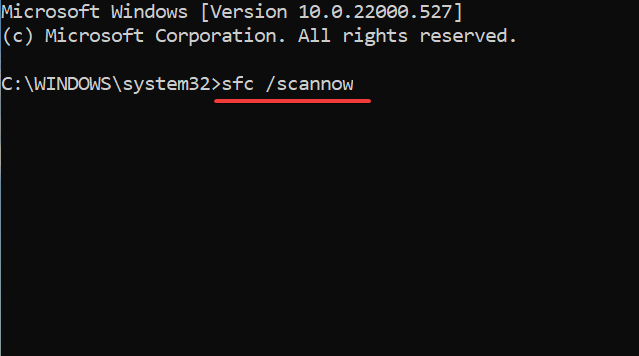
7. Run the System File Checker
- Click on Start.
- Search for Command Prompt.
- Open it as administrator.
- Type the below command and press Enter.
sfc /scannow
- Restart your PC.
If there are corrupt system files present on your PC, then it will interfere with the smooth functioning of all the system processes.
The System File Checker is an efficient Windows 11 tool that, alongside detecting corrupt files, also fixes them. All this is done automatically by executing a command.
Alternatively, there are reliable third-party tools, which will help you resolve several system-related issues triggered by corrupt system files.
What else can I do to fix Windows 11 not updating time error?
If none of the above-mentioned solutions helped you fix the problem, then there is a way, at least a temporary solution, that will help you have the correct date and time on your Windows 11 PC.
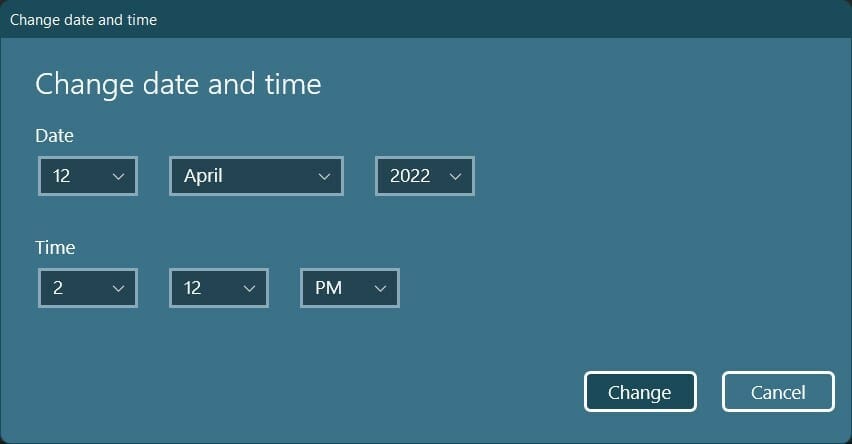
We are talking about setting the time and date manually on your Windows 11 PC. Here are the steps that you need to follow to set the time manually.
- Press the Win + I keys to open the Settings menu.
- Click on Time & language.
- Choose the Date & time.
- Toggle off the Set time automatically option, if it is on.
- Click on the Change button for the Set the date and time manually option.
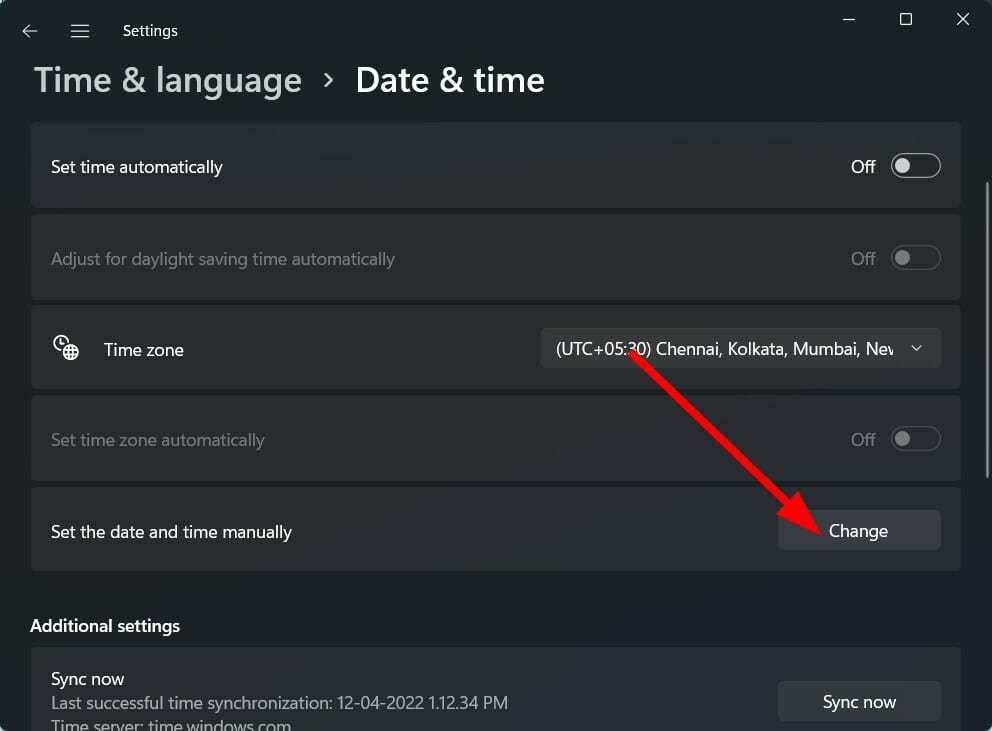
- A new window will show up, where you can set the date and time manually.
- Click the Change button after setting the correct date and time.
The above-mentioned solutions, along with the tip at the end, should be sufficient enough to help you resolve the Windows 11 not updating time issue.
However, in case nothing works, you can start afresh by either resetting your Windows 11 PC or reinstalling Windows 11 on your PC.
Let us know in the comments section which of the above methods helped you fix the error. Feel free to share any other solutions that helped you in the comments below.
Read our disclosure page to find out how can you help Windows Report sustain the editorial team. Read more


Improve this guide


User forum
0 messages