Word is Automatically Deleting Text? Stop it in 6 Steps
Disable the Overtype mode to regain control of your document
5 min. read
Updated on
Read our disclosure page to find out how can you help Windows Report sustain the editorial team. Read more

Imagine typing out a document but getting nowhere because Microsoft Word keeps deleting the text. You’ll be typing along and suddenly see that one or more letters or words have disappeared from your document. Sometimes even whole paragraphs will vanish.
The most likely reason is that some formatting applied to your document knowingly or unknowingly makes the text behave in unusual ways. So how do you get to type without having text disappear? Here’s how.
Why does Word keep deleting my text?
Have you encountered an issue where Word is automatically deleting your text? What could be the reason? We explore some possible causes below:
- App crash – It is possible that your Office application has crashed in the middle of typing something, and your text cannot be retrieved from the system’s memory.
- Accidental deletion – There are some shortcuts you can press while editing in Word that will delete your text. For instance, you may have intended to copy, but since Ctrl + X and Ctrl + C are so close, your fingers wandered, and you ended up deleting your text.
- Keyboard malfunction – Keyboards, like any other piece of hardware, can start to act up. It could be a specific key or just the entire keyboard that automatically deletes text in your Word application.
- Hidden formatting – Some documents contain hidden formatting, such as the overtype mode. This is common, especially if you’re not the document’s original author. In such instances, it can cause automatic deletion because it’s been programmed to replace anything you type.
- Virus infection – We are all aware of how a virus attack on your PC can upset the status quo of your system. It has the ability to change how certain apps behave, and Word may be the casualty hence why it is automatically deleting text.
- Driver errors – If your keyboard drivers are incompatible or outdated, they may cause errors.
How to stop text from erasing when typing?
Check the following first before you make any permanent changes:
- Open a different Word document and observe whether the same behavior persists.
- Test out your keyboard for any issues and ensure your drivers are up-to-date.
- Ensure you’re using a legitimate copy of Microsoft Word and that it is updated to the latest version.
- Restart your PC in Safe Mode and check if the problem persists.
1. Disable Overtype mode
- Launch your Word document, click on File, then select Options from the fly-out menu.
- Click on Advanced.
- Navigate to Editing options and uncheck the Use the Insert key to control overtype mode and the Use overtype mode boxes. Hit OK to save changes.
2. Clear all text formatting
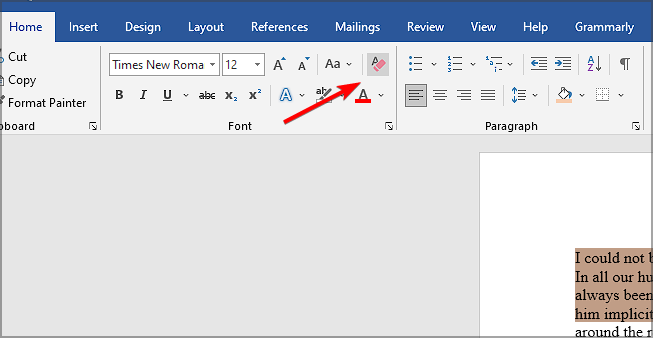
- Press the CTRL+ A combo to select all text on your Word document.
- Click on the Clear all formatting icon.
This will reset the document to default settings and get rid of any formatting previously applied that may have been interfering with your text.
3. Run Microsoft Word in Safe Mode
- Press the Windows key + R to open the Run command.
- Type the following command and press Enter or click OK:
word /safe
If you’re having issues with an app, try opening it while in Safe Mode and see if it works. If it does work, then one of the apps or services running in the background while using it may have been causing the issue.
4. Scan for viruses
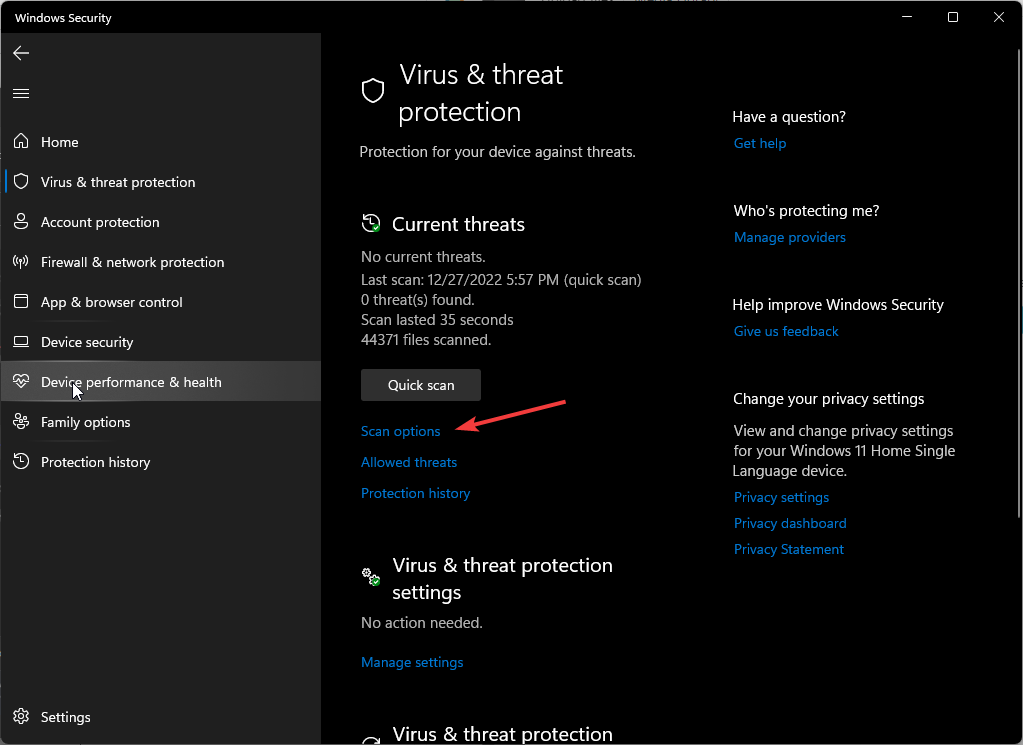
- Click on the Start Menu icon, search Windows Security, and click Open.
- Select Virus & threat protection.
- Next, press Quick scan under Current threats.
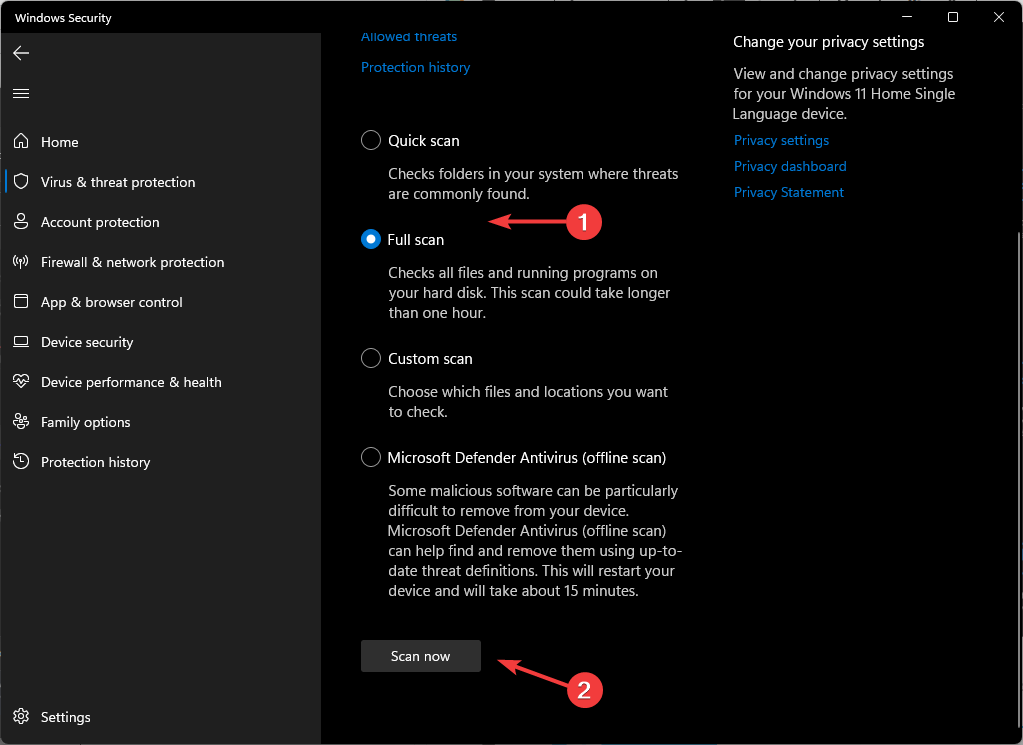
- If you don’t find any threats, proceed to perform a full scan by clicking on Scan options just below Quick scan.
- Click on Full scan, then Scan now to perform a deep scan of your PC.
- Wait for the process to finish and restart your system.
Besides Windows Defender, we recommend our users check this antivirus program list for the highest detection scores and the best protection for their devices.
5. Repair MS Office
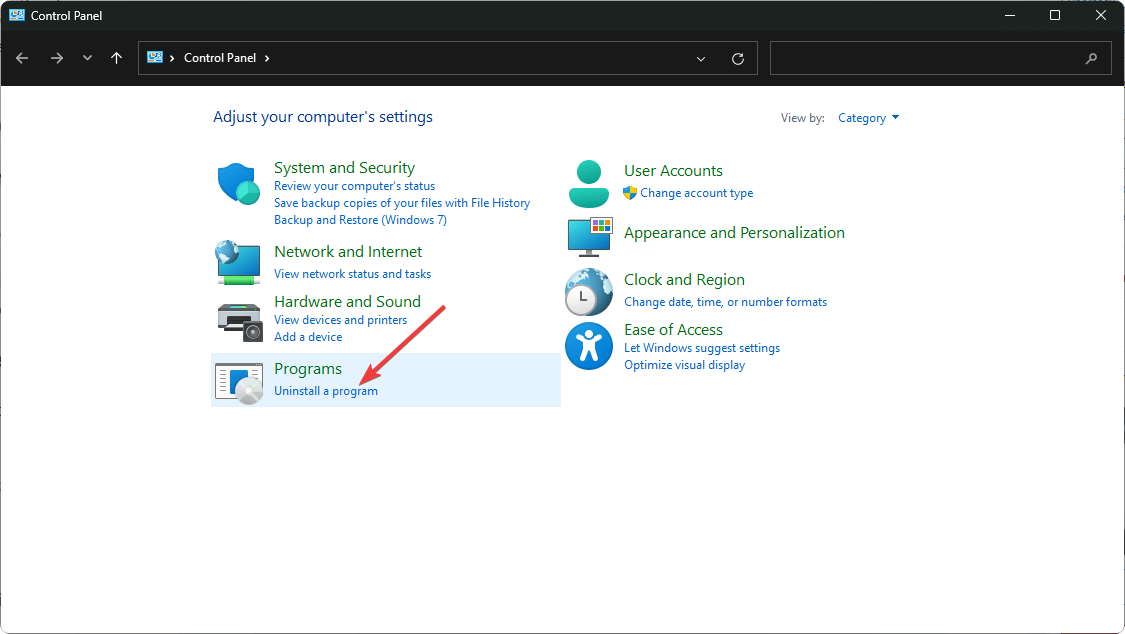
- Hit the Windows key, type Control Panel in the search bar, and click Open.
- Navigate to Uninstall a program under Programs.
- Locate MS Office, click on it, and select Change.
- Select the Online Repair option and click on the Repair button.
6. Reinstall Microsoft Office
- Hit the Windows key, type Control Panel in the search bar, and click Open.
- Navigate to Uninstall a program under Programs.
- Locate MS Office, click on it, and select Uninstall.
- Now, restart your PC and install the latest Microsoft Office version available for Windows.
So that’s it for this post. Hopefully, you’re feeling a little less stressed about the situation now. Moving forward, make it a habit to save every few minutes such that even if your document experiences such bugs, you can restore your saved work.
If you’re out of luck with the above methods, try using Word Online or other Microsoft Office alternatives. While you’re still here, check out what to do when your Word document won’t save.
To learn more, we have a great guide on what to do if PowerPoint couldn’t write to Microsoft Word, so don’t miss it.
For any additional thoughts or suggestions, feel free to comment below.












User forum
0 messages