PC Won't Boot After BIOS Update: 6 Ways to Fix Failed Update
Booting into Safe mode may come in handy
5 min. read
Updated on
Read our disclosure page to find out how can you help Windows Report sustain the editorial team. Read more
Key notes
- An interrupt BIOS update may trigger a broken boot operation.
- Booting in Safe mode may work in many cases, but you will need a clean installation in extreme situations.
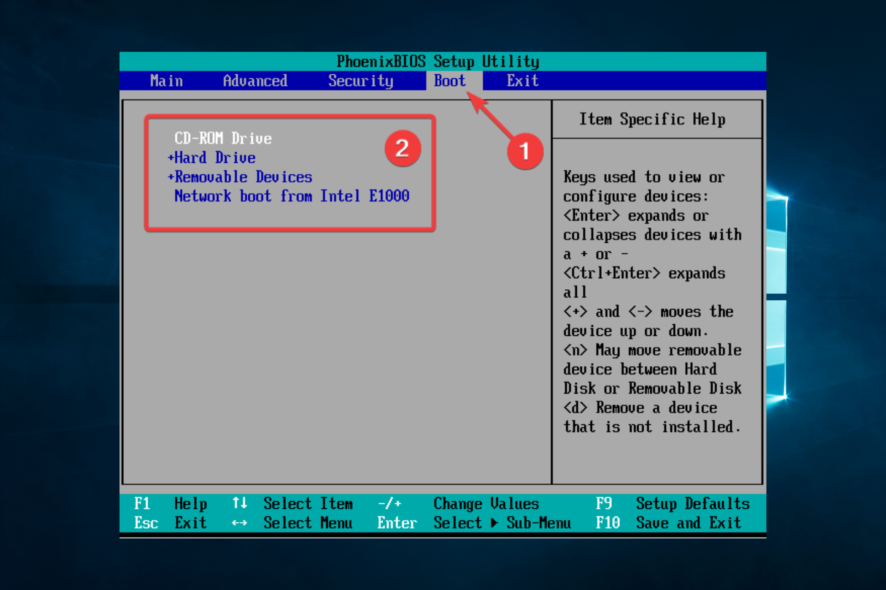
You have found this article because your PC won’t boot after a BIOS update. Here is all you should know.
Even though it’s hard to cause critical PC malfunctions without physical damage, it’s indeed possible.
Two words: BIOS update. BIOS flashing is the fertile ground for critical system errors, and some of them might result in a boot halt.
In addition, the worst-case scenario includes bricking your motherboard, which is a result that no one wants.
Why my PC won’t boot after BIOS update?
There are multiple reasons why the BIOS update prevents Windows from booting. A few include:
- Version problems – Users have noticed that when the BIOS is flashed with an unsupported version, it may ruin the booting process or end up in a verification ID error.
- Third-party apps – If you have used unsupported third-party software to perform this procedure, it may also break the boot process.
- Interruptions – It is also expected to have booting problems if a BIOS update has been interrupted.
All three can bring a lot of trouble and affect your PC. So today, we’ll try to offer you a few solutions in the hope that at least one of them will help you save or salvage your PC.
The solutions will work if your PC won’t boot after a BIOS change and will be helpful across multiple manufacturers, including HP, Dell, and ASUS.
How can I fix a PC that won’t boot after BIOS update?
1. Reset CMOS
- Shut down your PC completely.
- Unplug the power cord and remove the battery if it’s a laptop.
- Hold the power button for 60 seconds to completely discharge your PC.
- Open the PC case and touch a metal surface to discharge your static electricity.
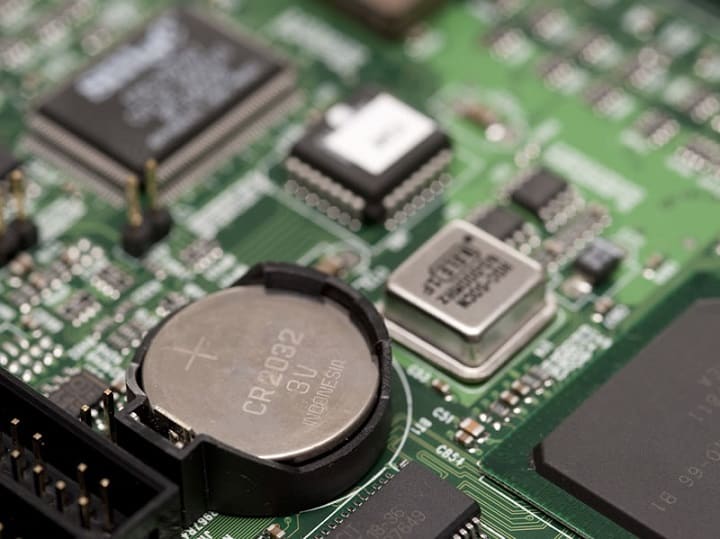
- Remove the CMOS battery; it should be a 3V standard flat wristwatch battery.
- Please wait for a few minutes and place it again carefully.
- Power On your PC and look for changes.
On the other hand, if you cannot reach and access the CMOS battery, you can reset BIOS settings by temporarily removing motherboard jumper pins and reconnecting them.
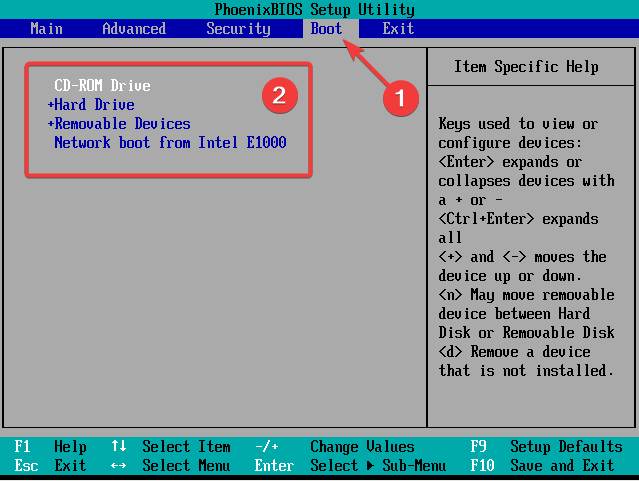
In addition, once you boot again, set the proper BIOS time in the Boot settings. Without it, you won’t be able to boot in Windows 10.
2. Try booting into Safe mode
- Plug in or insert a bootable drive (USB flash stick or DVD) and restart your PC.
- Access the boot menu by pressing the F8 key during Restart (this may differ depending on the make).
- Using the arrow keys, navigate to the Boot section and change the boot order to start with the bootable drive.
- The loading process of the installation file should commence.
- Select your preferences and hit the Next button.
- Select Repair your computer from the bottom left corner in the following dialog box.
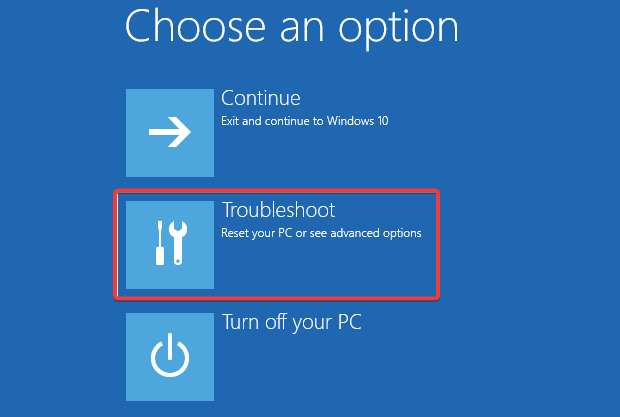
- Open Troubleshoot and choose Advanced Options.
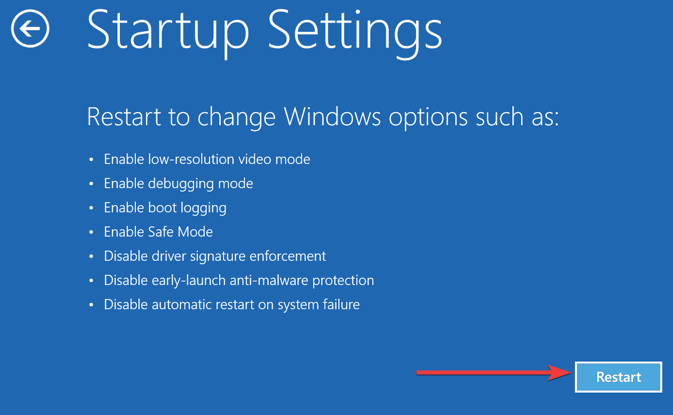
- Choose Startup Settings and select Restart.
- Once your PC restarts, press F4, F5, or F6 to boot in various Safe Mode options.
- When/if the system boots in Windows 10 finally, you can restart your PC and start the system in a standard manner.
Many users reported that, somehow, the Safe mode ‘forced’ the system to boot and resolved the stall caused by the flashing failure.
If you want to know how to create a Windows 10 installation media, follow the steps in this simple guide.
3. Tweak BIOS settings
Now, this highly depends on your PC’s configuration and motherboard model. We advise you to google your motherboard and look for the preferred settings for that purpose.
Explaining what you’ll need to change is redundant since the options are pretty diverse.
If you’re not 100% sure, don’t meddle with BIOS settings. Instead, you should contact the official support or explain your problem to knowledgeable folks or PC enthusiasts.
That’s your safest bet to tweak BIOS settings and retrieve full functionality.
4. Flash BIOS again
You flashed BIOS once, and the hell broke loose. It seems ludicrous to do it again, but that might resolve your problems. Namely, you probably installed the wrong version or interrupted flashing and bricked your motherboard.
Luckily, some users who managed to get over the initial boot screen (and get stuck in Windows 10 animation) resolved the problem by flashing BIOS again with the correct version.
Nevertheless, we advise you not to rush and to take every step carefully. To help you address this, we recommend reading the article below with a thorough explanation of flashing.
Make sure to check it out before you move to flash.
5. Reinstall the system
Some users reported that the problem could be solved by reinstalling the system completely. However, it seems that the failed flashing procedure affects the hard disk somehow, forcing you to start from scratch.
The Windows 10 reinstallation procedure isn’t as complicated as it was on some older Windows iterations back in the day.
Nonetheless, for a novice user, it can lead to prolonged hardship. To avoid that, make sure to read the complete instructions compiled in the article below.
6. Replace your motherboard
Finally, if none of the previous steps helped you, we’re sorry to inform you that you’ll need another motherboard.
On a side note, you can ask for a repair which is also an option, but that’s a long shot, and the odds are not in your favor.
That should conclude it. In case you have any questions or alternative solutions, make sure to share them with us. You can do it in the comments section below.






User forum
4 messages