How to Run Hardware Diagnostics on Windows 10 [5 Ways]
There are several tools that can diagnose your hardware
4 min. read
Updated on
Read our disclosure page to find out how can you help Windows Report sustain the editorial team. Read more
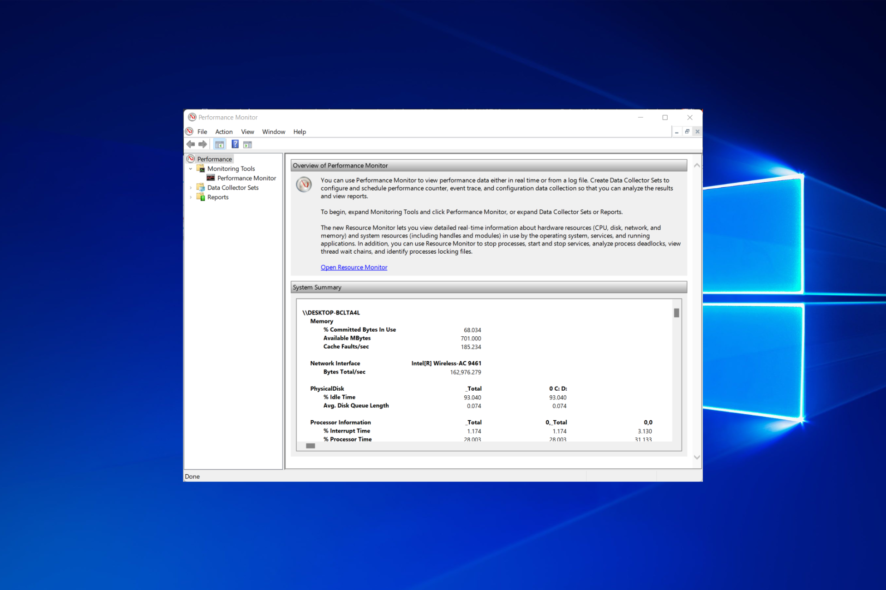
To prevent and troubleshoot issues, important to know how to run hardware diagnostics on Windows 10. You can use tools like Performance Monitor, Windows Memory Diagnostic, or specialized commands.
Wee cover these methods and other solutions to help you troubleshoot your system. Just follow the steps below.
How do I run hardware diagnostics on Windows 10?
1. Use the Performance Monitor tool
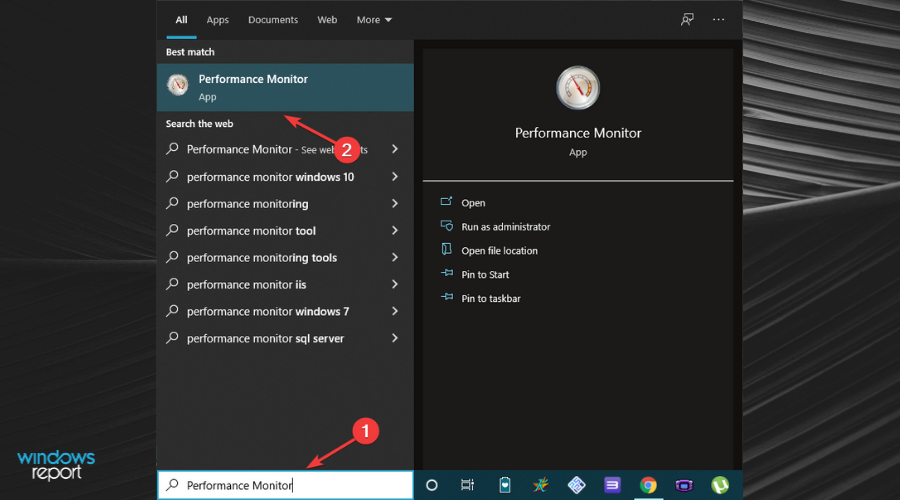
- Press the Windows key and search for Performance Monitor. Open the top result.
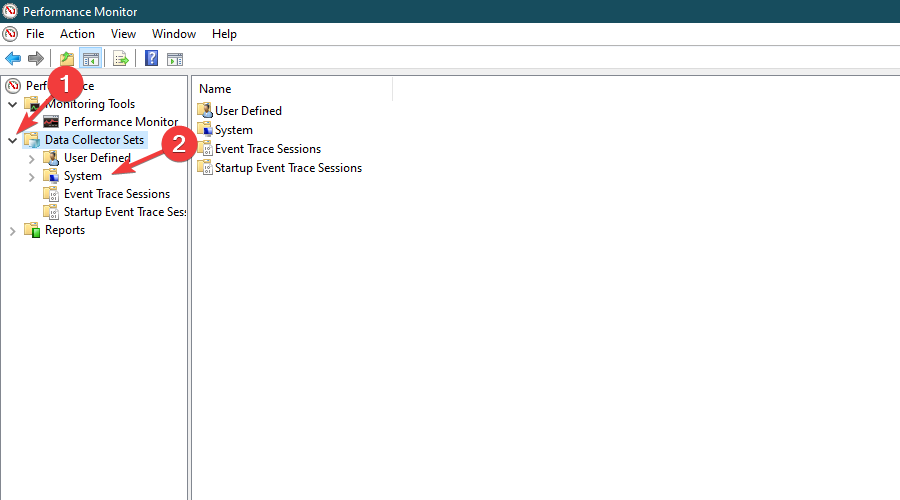
- From the left pane menu, expand the Data Collector Sets section. Click on the System option.
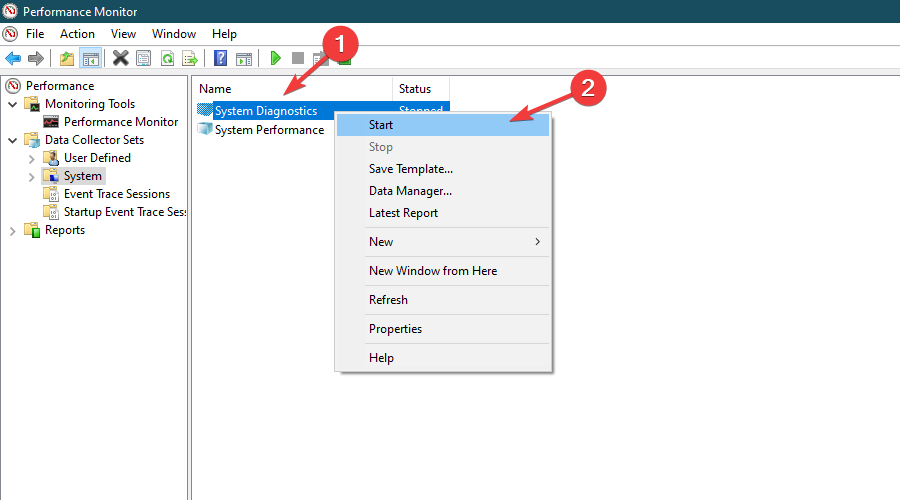
- Right-click System Diagnostics and select Start to begin system diagnostics tests.
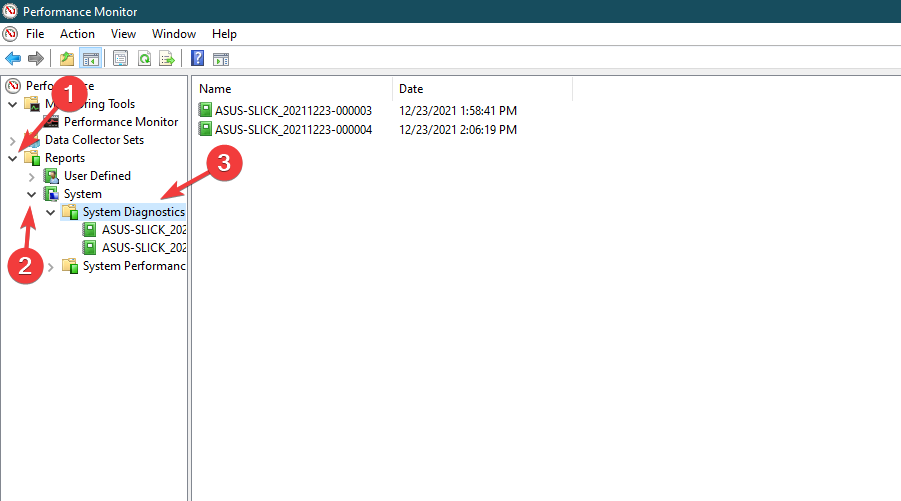
- Now, from the left pane menu, expand the Reports section, expand the System section, and open the System Diagnostics section.
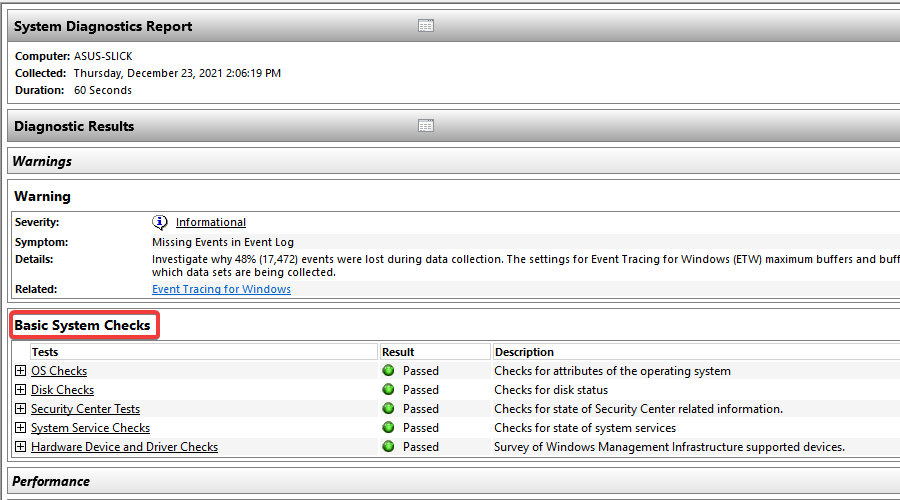
- You will find the generated system diagnostics test report here. Simply double-click the report to view it. Check out your PC’s Diagnostic Results.
2. Use the Windows Memory Diagnostic app
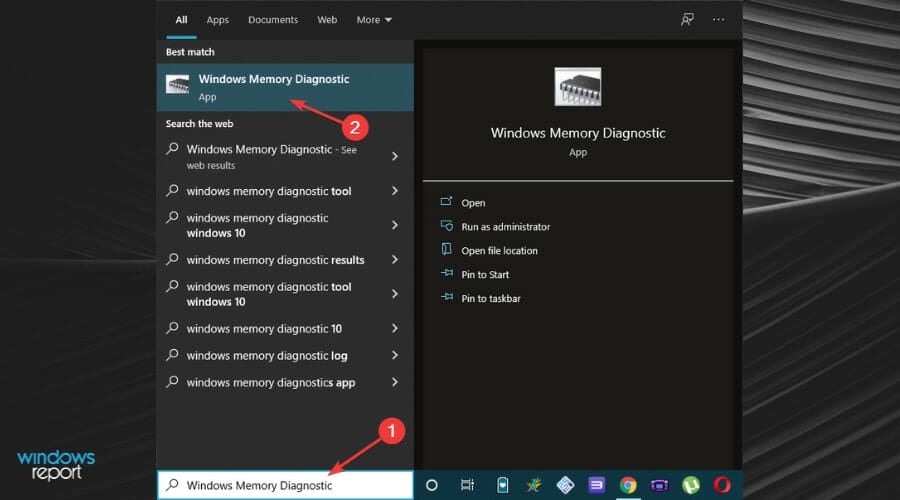
- Press Windows and search for Windows Memory Diagnostic. Click the first result to open it.
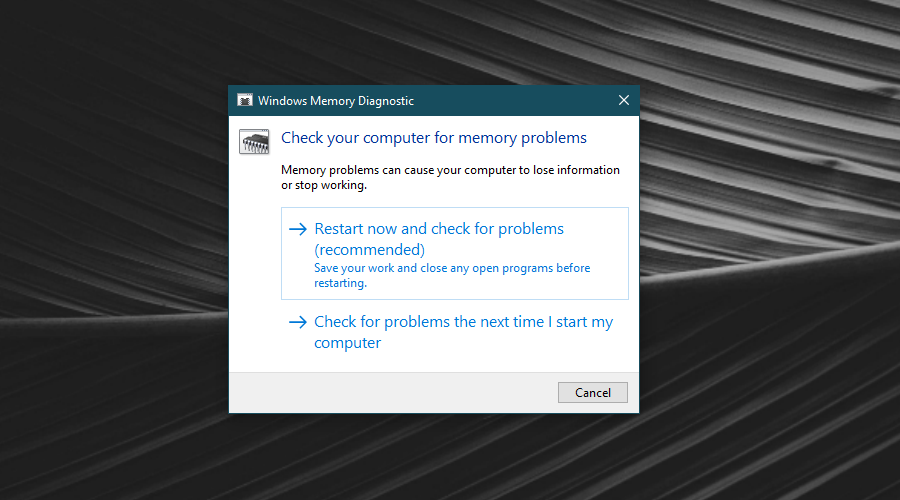
- Select the option Restart now and check for problems (recommended).
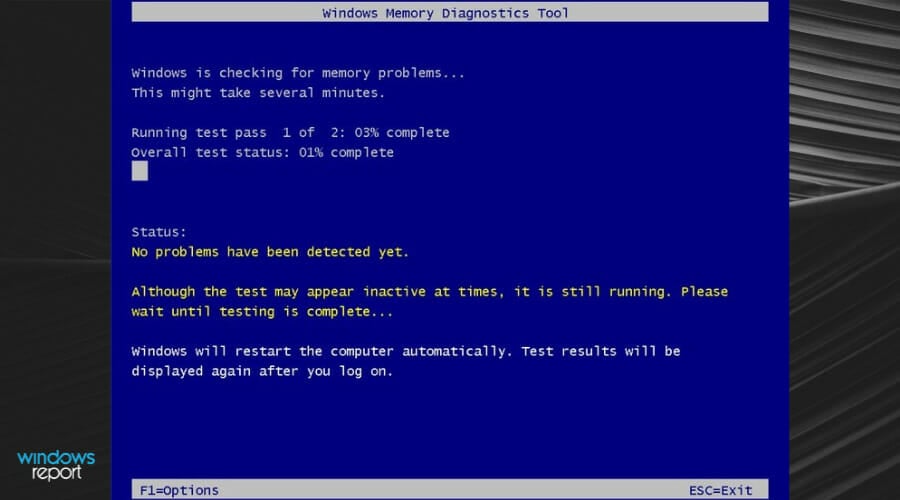
- Let the PC restart. Once the PC is restarted, the memory diagnostic scan will automatically begin. Wait for the process to finish. Your PC will reboot automatically afterward.
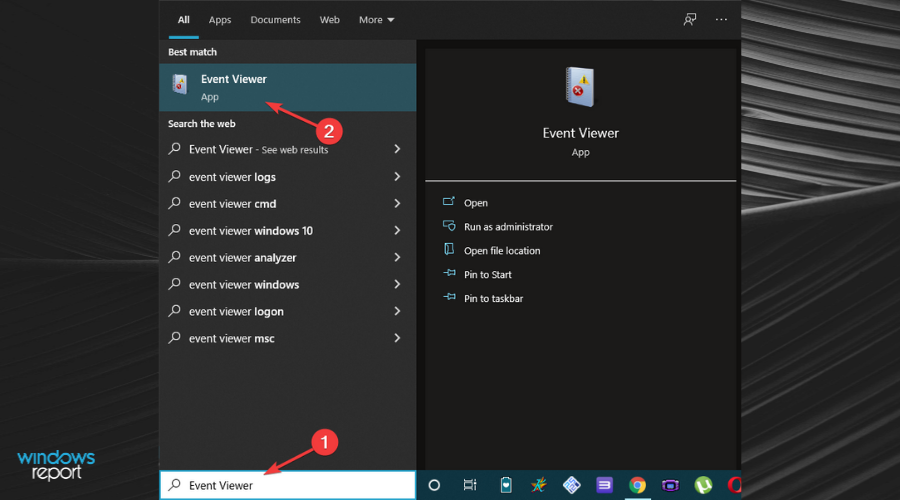
- After logging in, the results will be displayed on the desktop. In case the test results fail to show on the screen automatically, use the Event Viewer app to check the scan results. Thus, press Windows and search for Event Viewer in the Search bar. Open the first app.
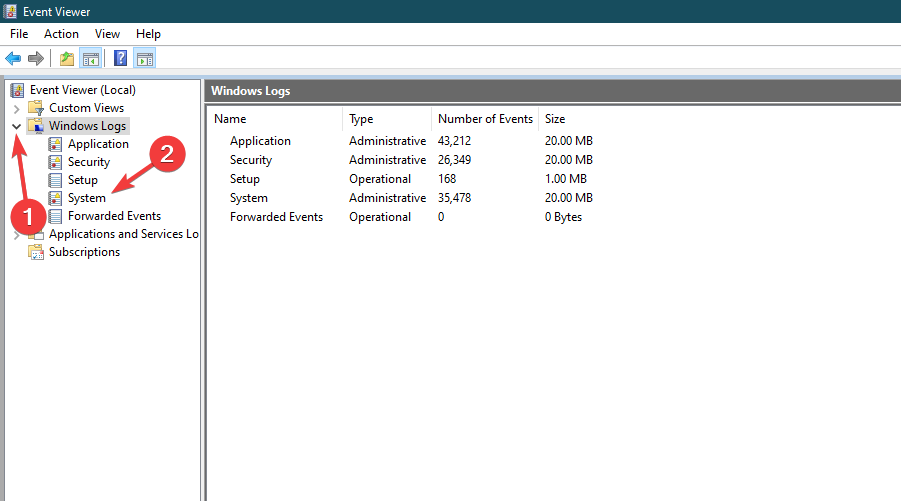
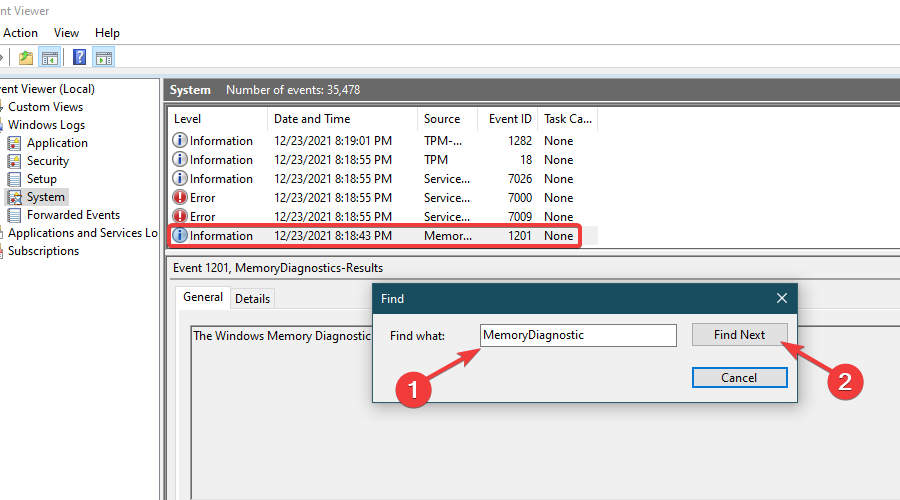
- From the left pane menu, expand the Windows Logs section and click on the System option.
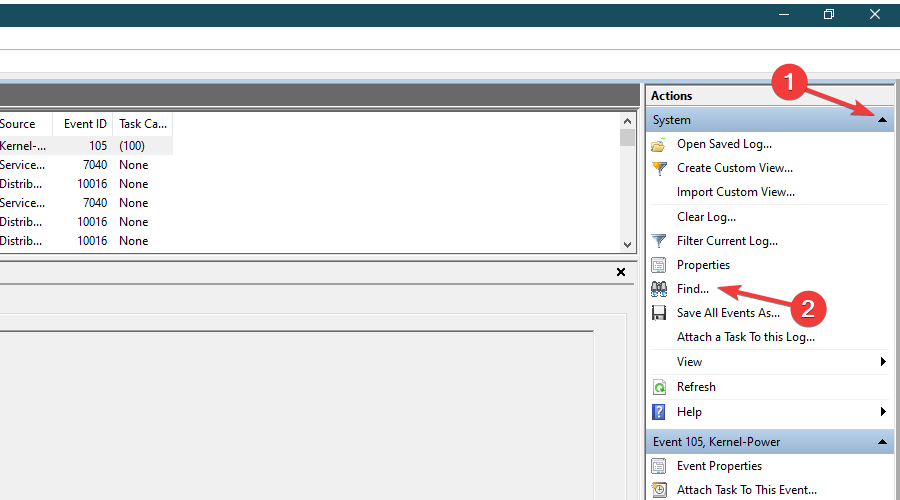
- In the right pane Actions menu, expand the System section. Click on the Find… option.
- In the text field, type MemoryDiagnostic and click on Find Next to look for the memory diagnostic scan log.
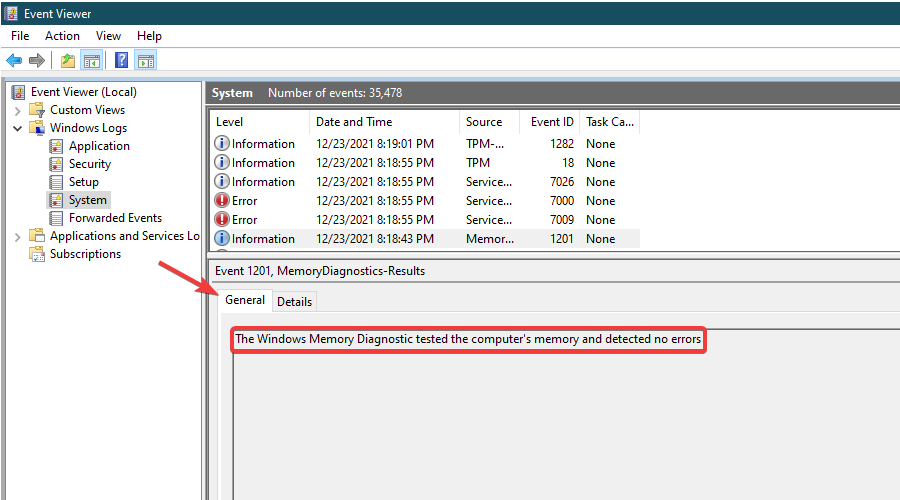
- View the results of the memory diagnostic scan in the General tab.
Unless you find any errors, your PC’s RAM is not a cause for concern. Check out more details on the Windows Memory Diagnostic Tool and how it can help keep your PC’s memory in check.
3. Run a CHKDSK scan to check for bad sectors
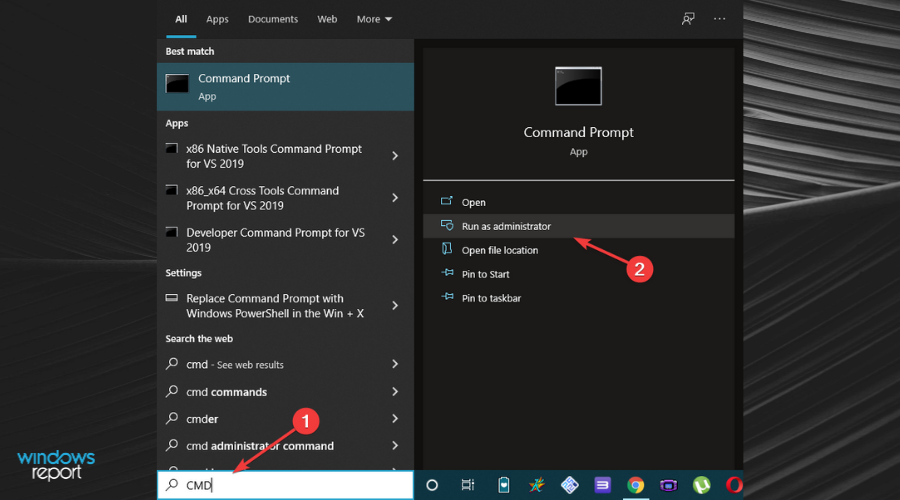
- Press the Windows key and search for CMD in the Search bar. Choose the Run as administrator option under the result.
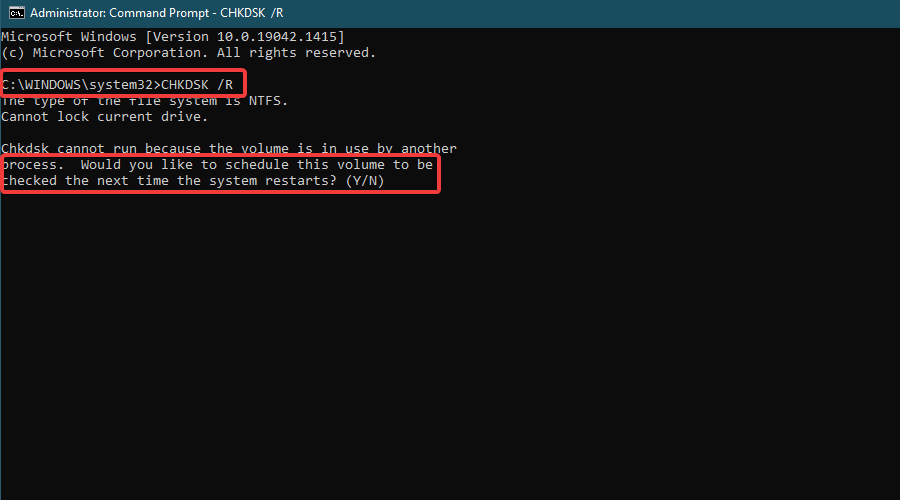
- Type the following command and run it by pressing Enter. A prompt will appear asking you to schedule the scan on the next restart. Type Y and then press Enter:
CHKDSK /R - Restart your PC. Once the PC restarts, the CHKDSK scan will begin automatically. Wait while hardware diagnostics is ran in Command Prompt.
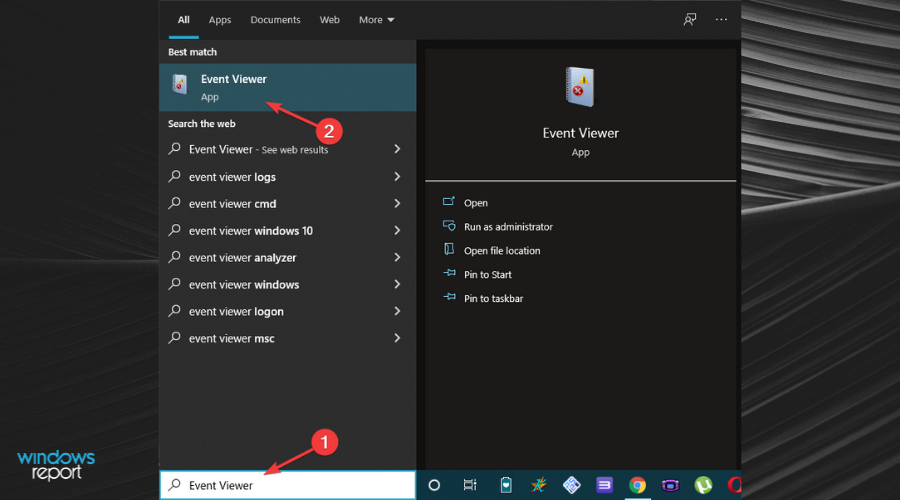
- Once the scan is complete and you log in, press Windows and search for Event Viewer in the Search bar. Open the app.
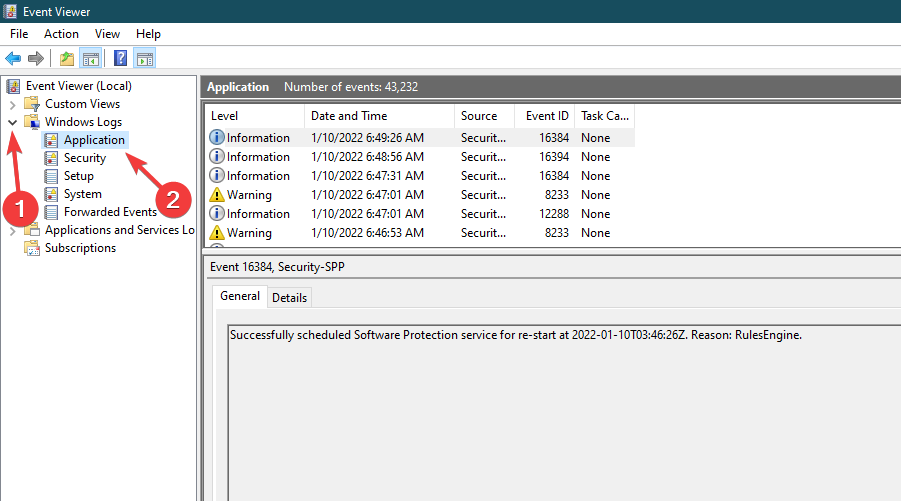
- From the left pane menu, expand the Windows Logs section and click on the Application option.
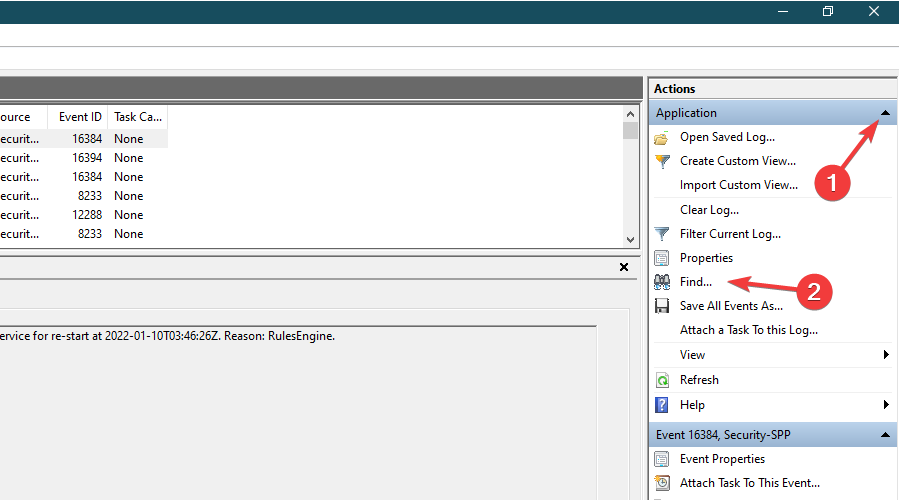
- In the right pane Actions menu, expand the Application section. Click on the Find… option.
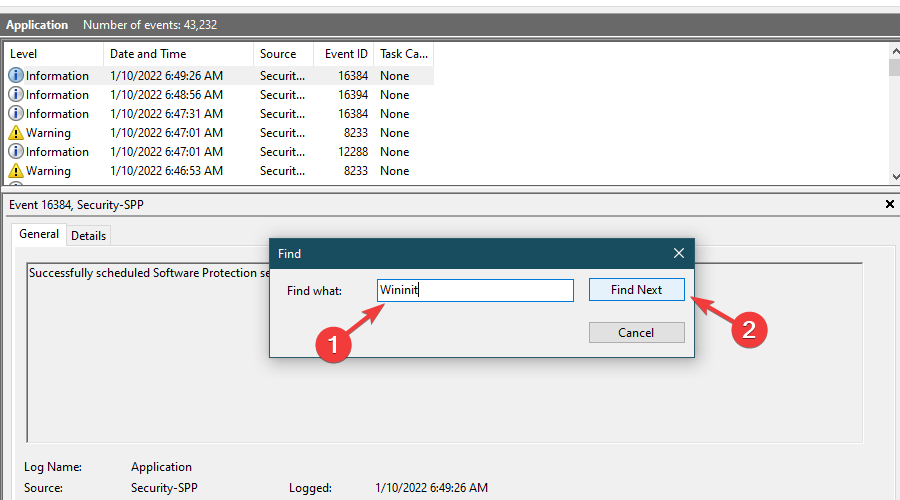
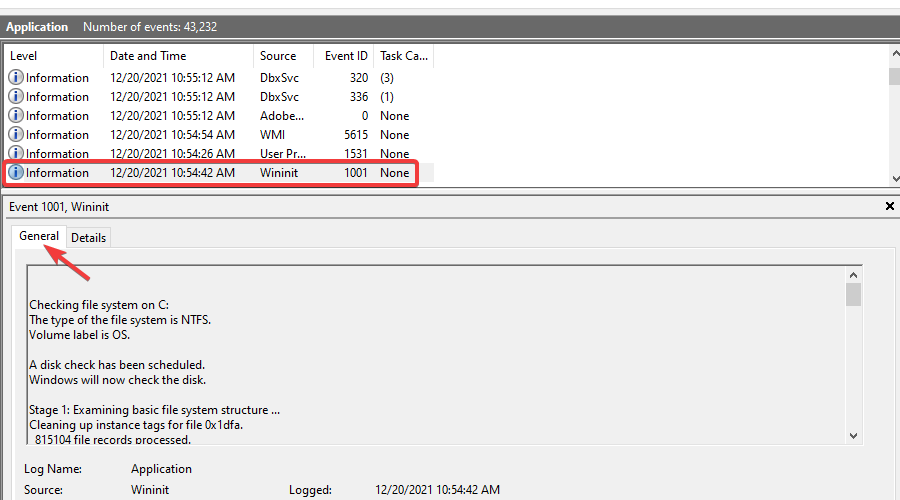
- In the text field, type Wininit and click on Find Next to look for the CHKDSK scan log.
- View the results of the CHKDSK scan in the General tab.
Click inside the text box in the General tab. Press Ctrl+A to select all of the text, copy, and paste it onto a new text file. This will make viewing the results quite convenient.
To learn more, we have a great guide on how to run chkdsk on Windows 11, so you might want to check it out.
 NOTE
NOTE
4. Run the Battery diagnostics command
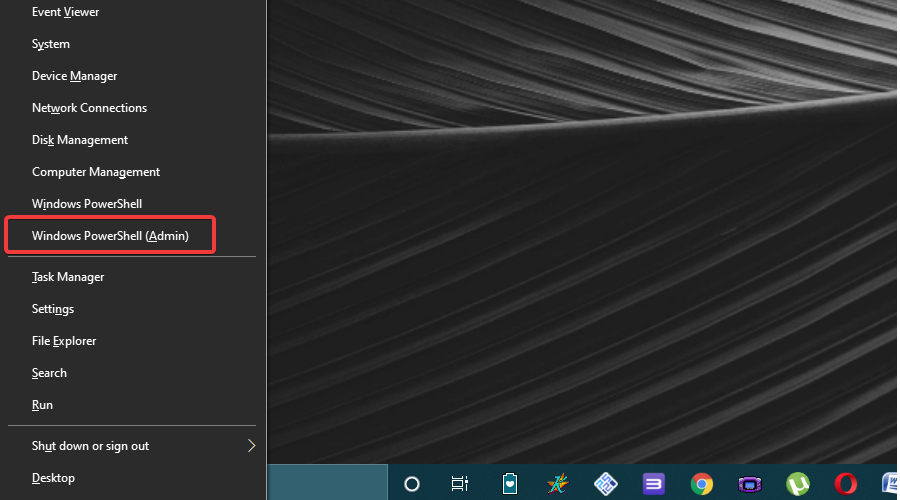
- Right-click the Start icon then select the Command Prompt or Windows PowerShell (Admin) option from the menu.
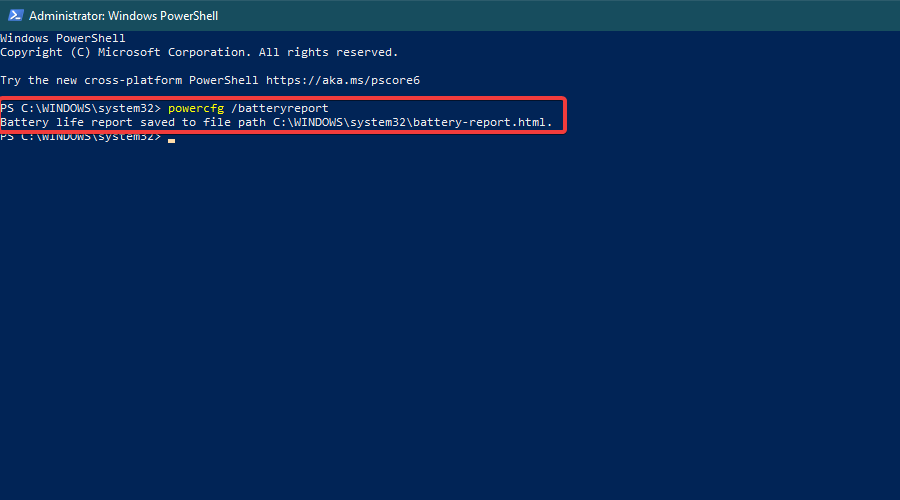
- Once the Command Prompt/ Windows PowerShell loads, type in the following command and run it by pressing Enter:
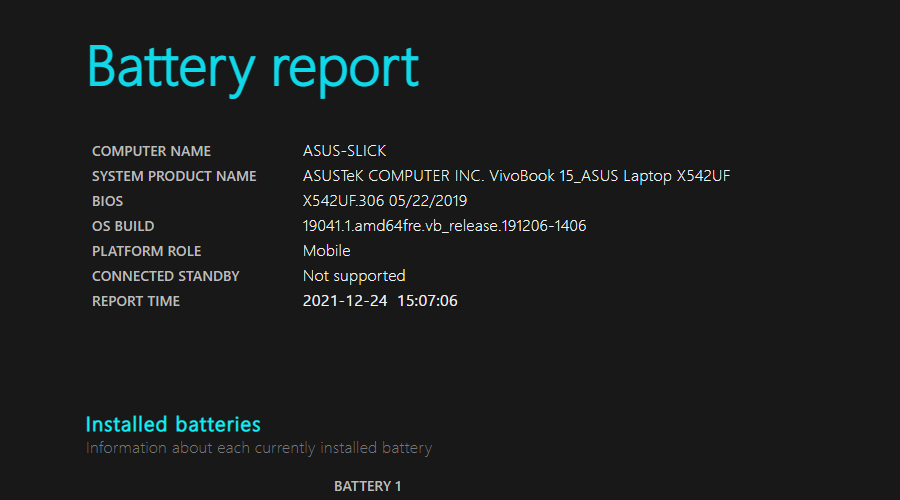
powercfg /batteryreport - An HTML file will be generated in a specified location. Open the file (in a browser) and view the results.
For an even deeper analysis, check out the 10 best tools for checking battery health on Windows 10.
5. Use a third-party diagnostics tool
If you’re looking for a more detailed look at your system, a third-party tool like AIDA64 Extreme can give you all the info you need.
It checks everything from temperature and voltage to performance, and even lets you stress test your PC to uncover hidden issues.

AIDA64 Extreme
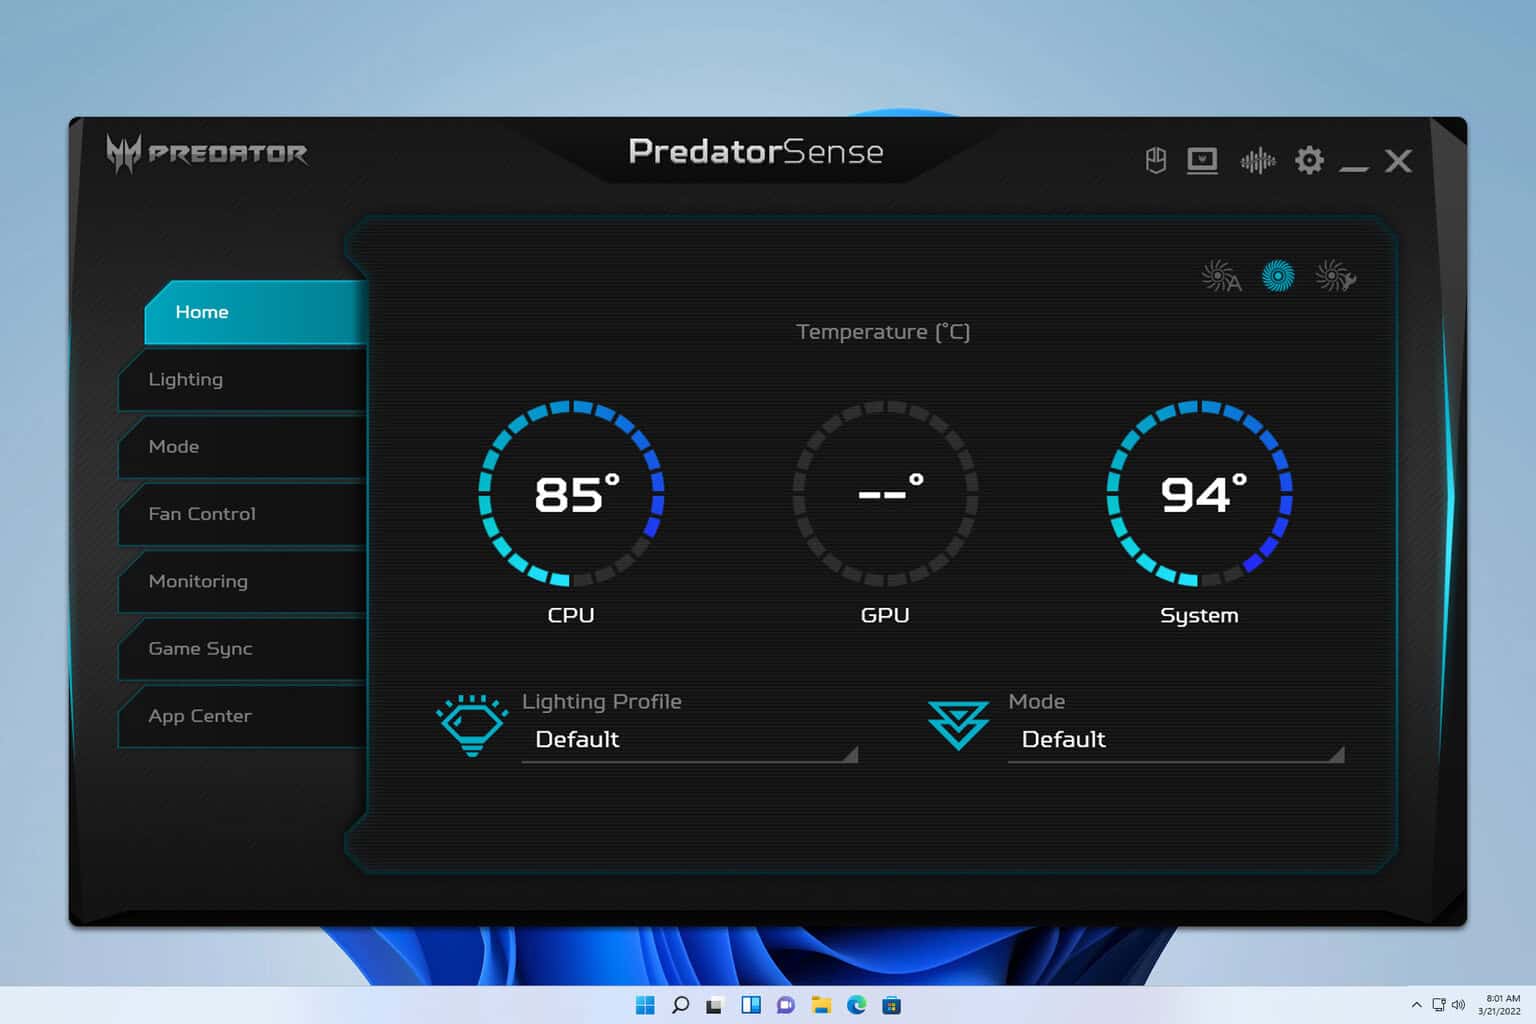
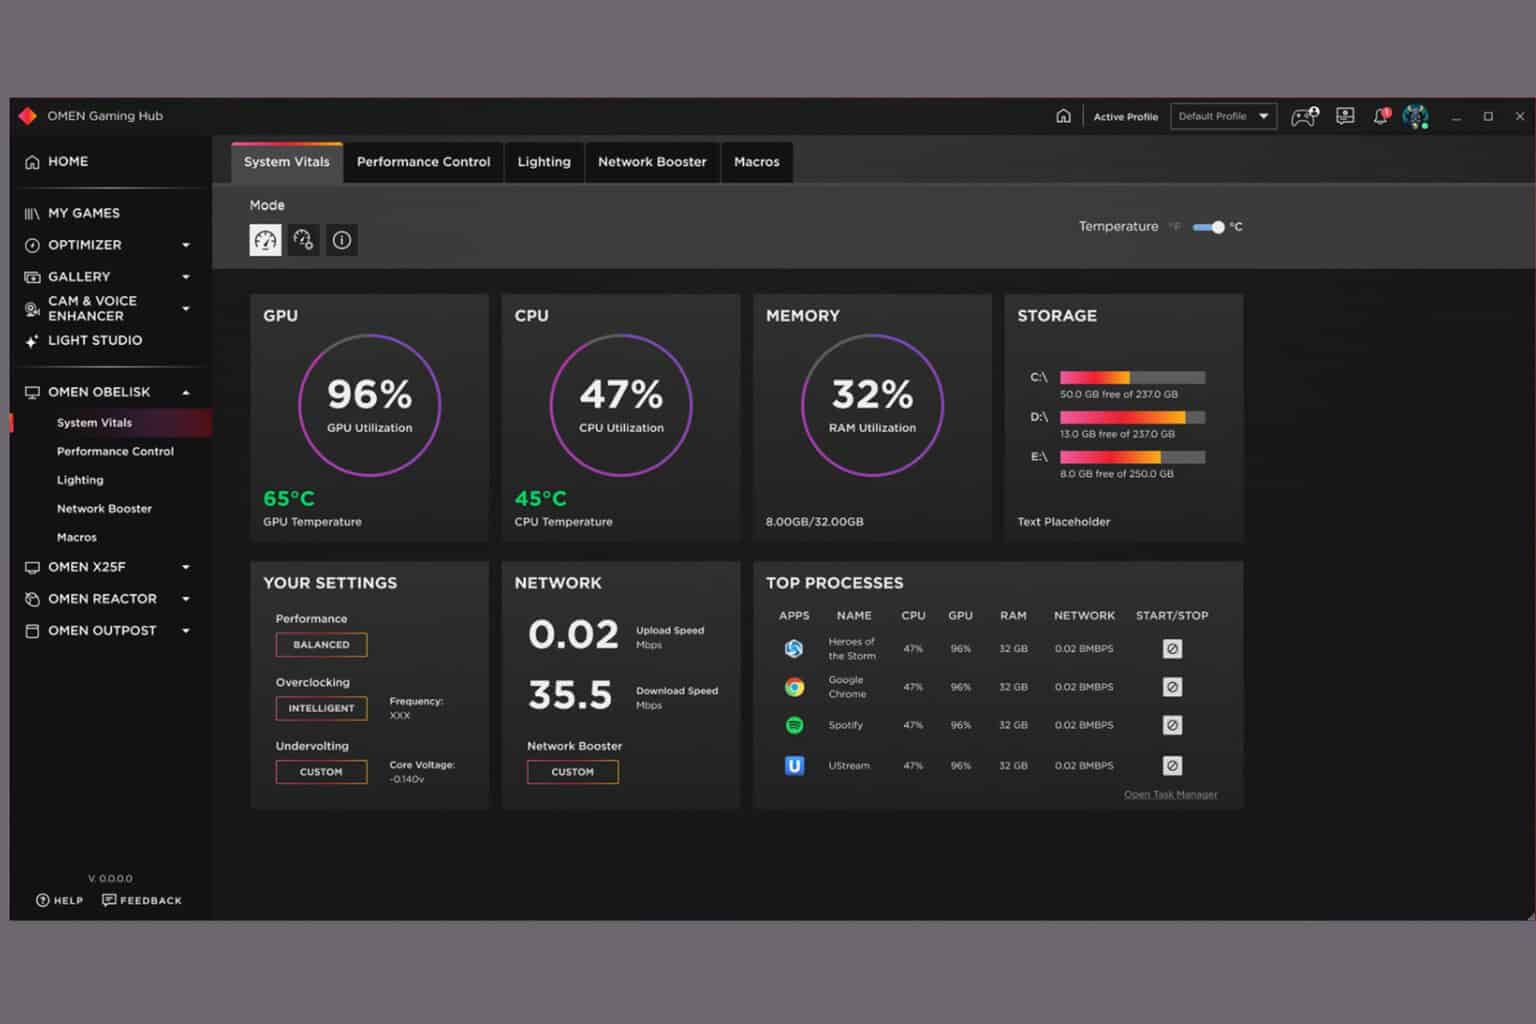
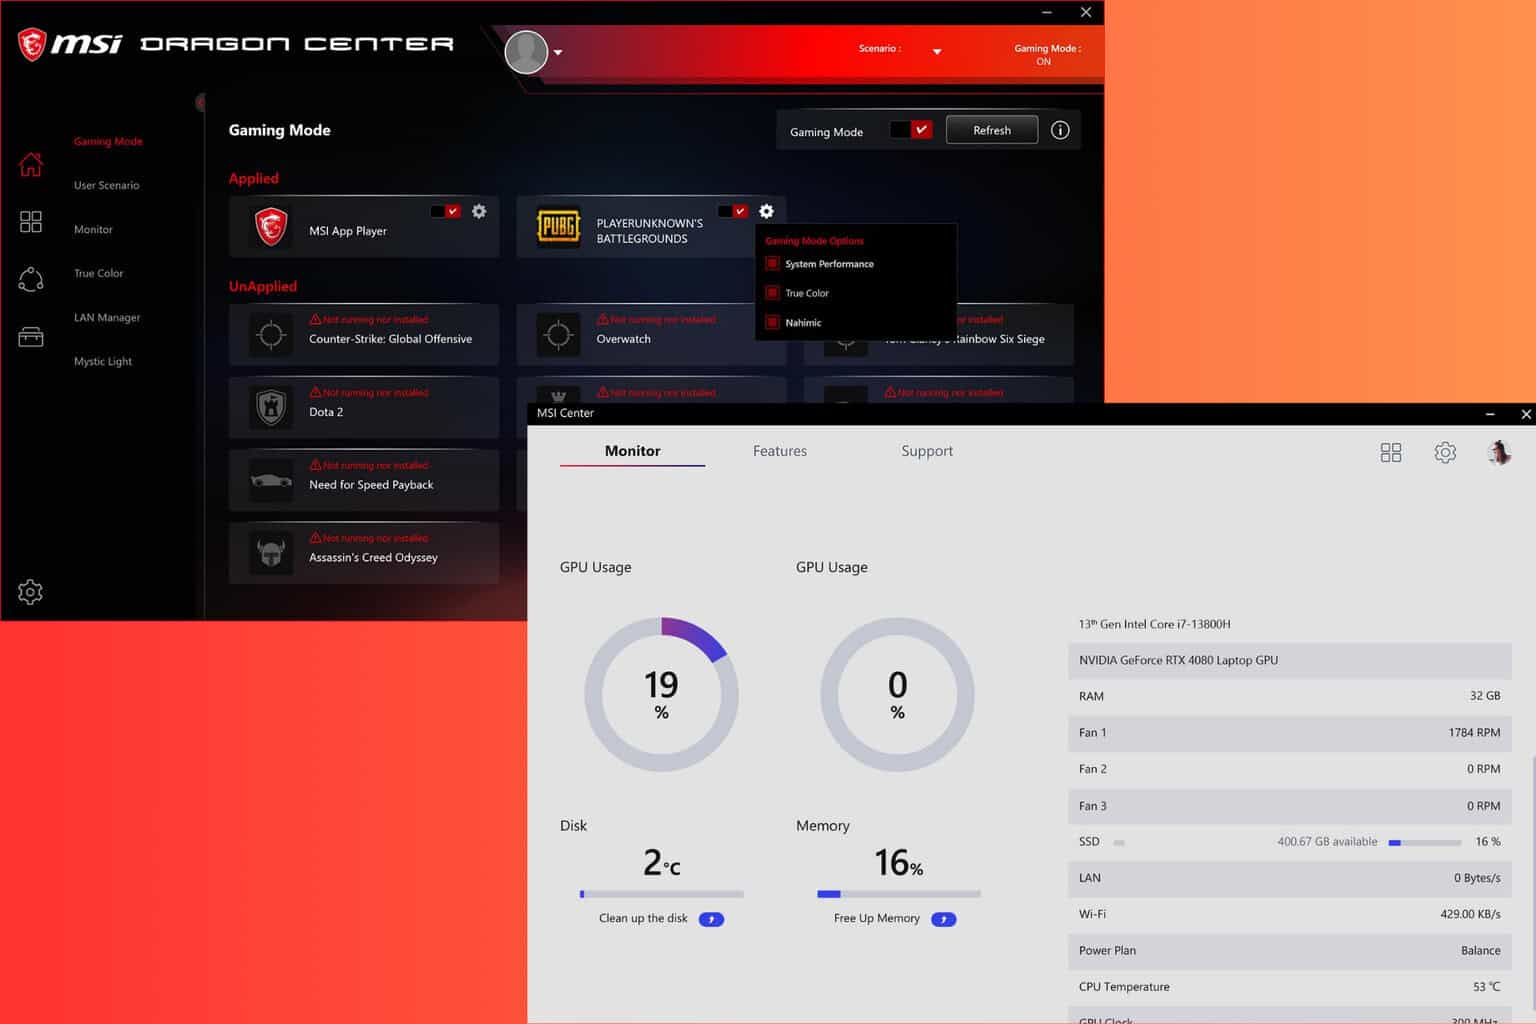
Troubleshoot your device with tests for temperature, performance, and hardware stability using AIDA64 Extreme.If you have a diagnostic tool from your manufacturer, then you can use it as well.
Moreover, you might want to use PC maintenance software in order to help your computer perform optimally all the time.
Feel free to ask us questions in the comments section below. Let us know which method you used to run a hardware diagnostic test.


User forum
0 messages