How to Run Hardware Diagnostics on Windows 10 [7 Easy Methods]

Find out all you need to know about Hardware Diagnostics

Reading time icon 8 min. read


Readers help support Windows Report. When you make a purchase using links on our site, we may earn an affiliate commission. Tooltip Icon

Read the affiliate disclosure page to find out how can you help Windows Report effortlessly and without spending any money. Read more

Key notes

  • Over time, a PC's hardware components undergo different changes that can affect a PC's performance.
  • In order to ensure that the hardware components are healthy and in working order, hardware diagnostics are necessary.
  • Windows 10 has an assortment of different hardware diagnostics tools that can be used to prevent, detect, and/or fix any hardware issues.
performance how to run hardware diagnostics on windows 10

Hardware Diagnostics is an application for diagnosing hardware issues that can provide a report covering a wide range of technical aspects and provide suggestions for resolving issues with both the hardware and the memory.

Hardware problems can typically show in the form of Blue Screen of Death (BSOD), system crashes, abnormal temperatures, or slow system response times. In a worst-case scenario, these unaddressed hardware problems can lead to total system failure.

Does Windows 10 have a hardware diagnostic tool?

Windows 10 hardware diagnostic tools can be quite a chore to use unless one has prior knowledge of the OS and these tools.

The OS has a few native hardware diagnostic tools that we will show you how to use. In addition, PC manufacturers also add their custom ones. Depending on the ease of use and access of these tools, the process can be simple or difficult.

This is where the hardware diagnostics come in. PCs come with pre-installed diagnostics tools to prevent, detect, and/ or fix any hardware problems that may occur over the PC’s lifespan.

These tools can be OS-exclusive, PC manufacturer-exclusive, or even BIOS-exclusive. In addition, depending on the scope of these tools, they may be directed towards a specific hardware component or even all of them.

How can I run hardware diagnostics on Windows 10?

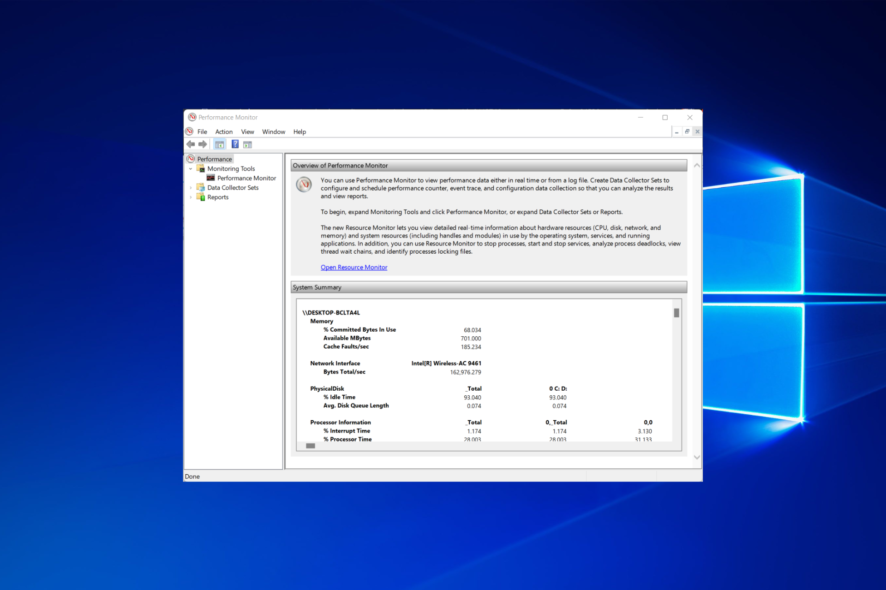
1. Use the Performance Monitor tool

The simplest and most handy way to diagnose your hardware status on your PC is the Performance Monitor tool that anyone can access. The instructions below shows you how to use it.

1. Access Performance Monitor

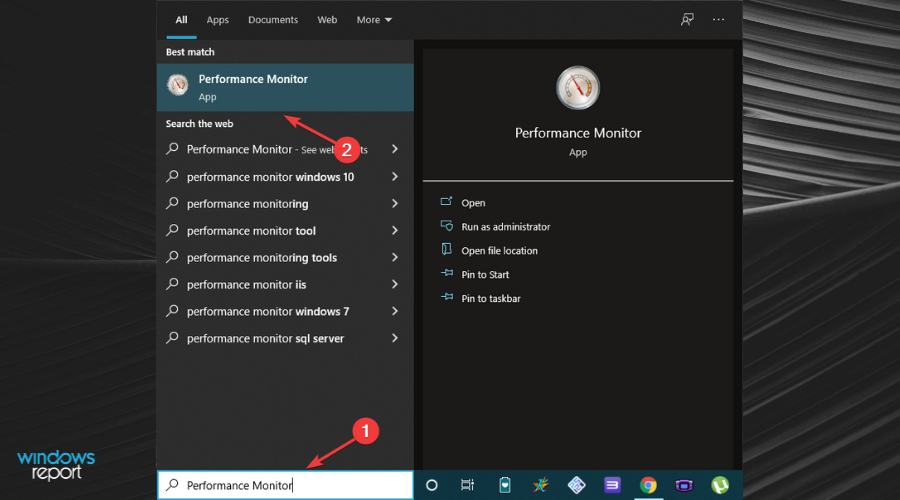
Press the Windows key and search for Performance Monitor. Open the top result.

Searching for Performance Monitor in Windows Search Bar

2. Expand the Data Collector Sets

From the left pane menu, expand the Data Collector Sets section. Click on the System option.

Navigating Performance Monitor Hardware Diagnostics App

3. Start the system diagnostics

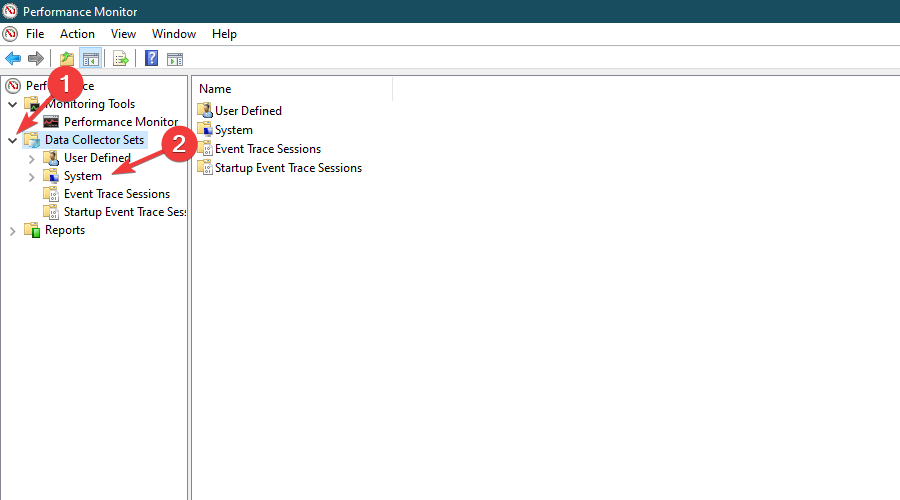
Right-click System Diagnostics and select Start to begin system diagnostics tests.

Starting System Diagnostics Test in Performance Monitor

4. Expand the Reports

Now, from the left pane menu, expand the Reports section, expand the System section, and open the System Diagnostics section.

Searching for System Diagnostics Test Results in Performance Monitor

5. Find the system diagnostics and checks

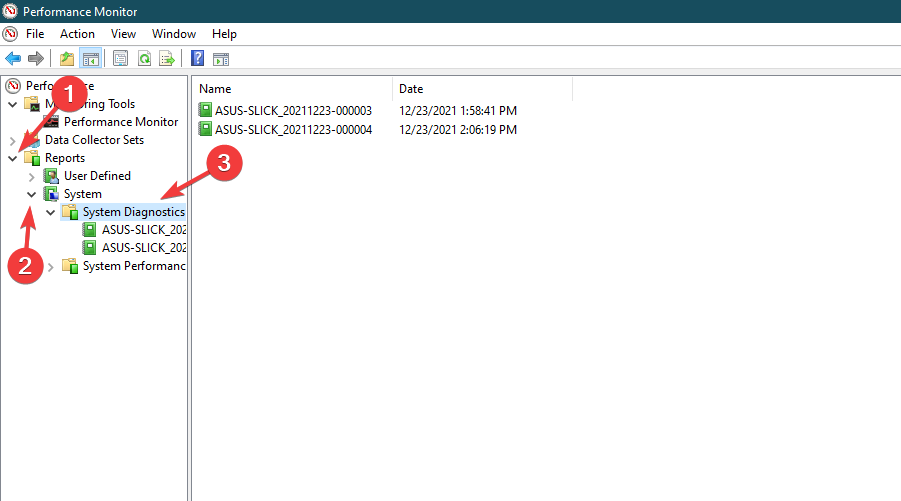
You will find the generated system diagnostics test report here. Simply double-click the report to view it. Check out your PC’s Diagnostic Results.
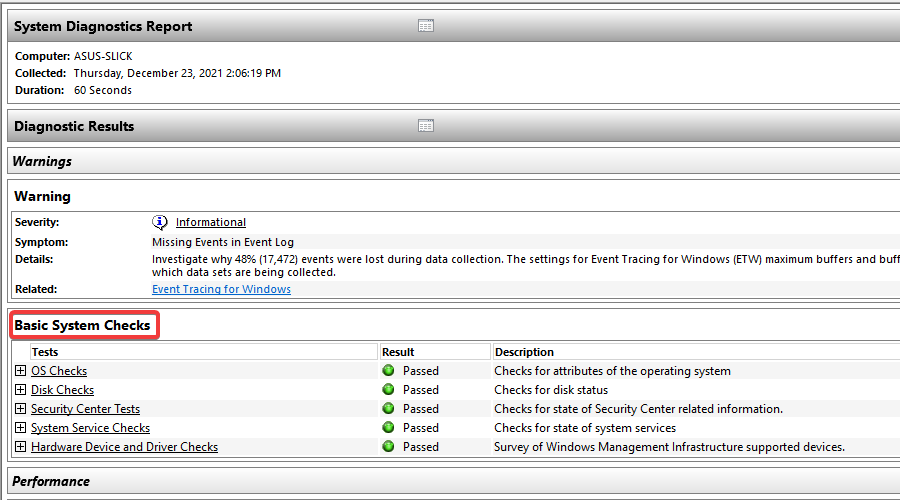
Viewing System Diagnostics Test Results in Performance Monitor

Look out for any failures in the Basic System Checks section. If no problems are detected by the Windows 10 hardware check, it’s more than likely that your PC is doing great.

2. Use the Windows Memory Diagnostic app

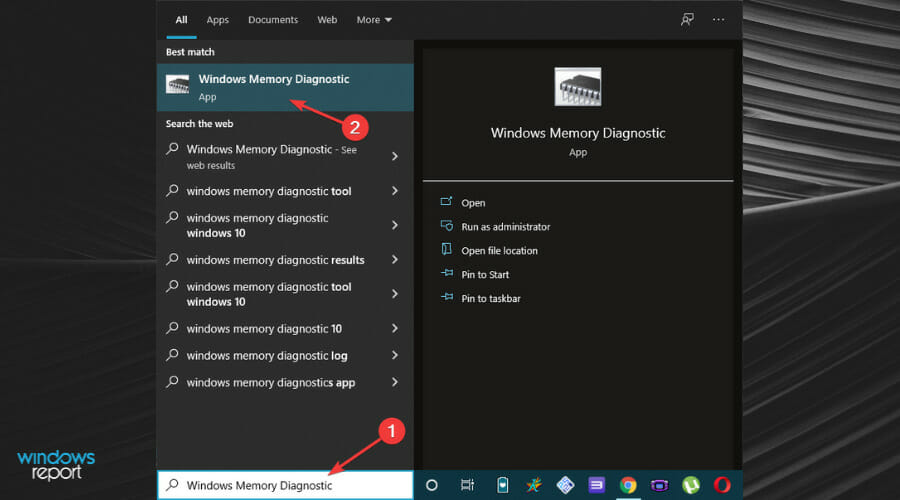
  1. Press Windows and search for Windows Memory Diagnostic. Click the first result to open it.Searching for Windows Memory Diagnostic in Windows Search Bar
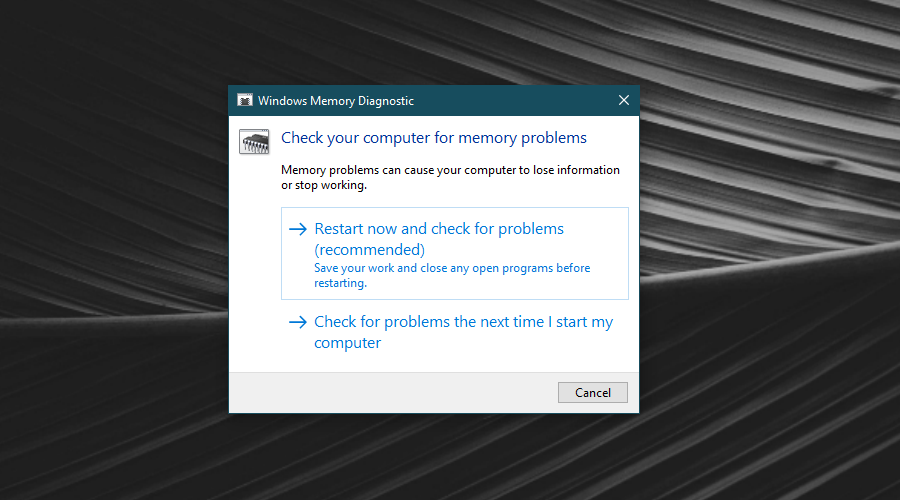
  2. Select the option Restart now and check for problems (recommended).Windows Memory Diagnostic Options
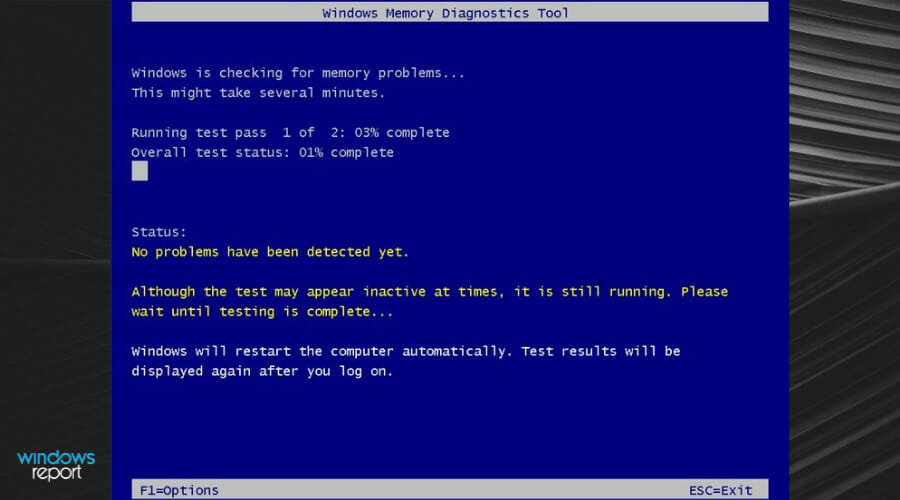
  3. Let the PC restart. Once the PC is restarted, the memory diagnostic scan will automatically begin. Wait for the process to finish. Your PC will reboot automatically afterward.Windows Memory Diagnostics Scan Window
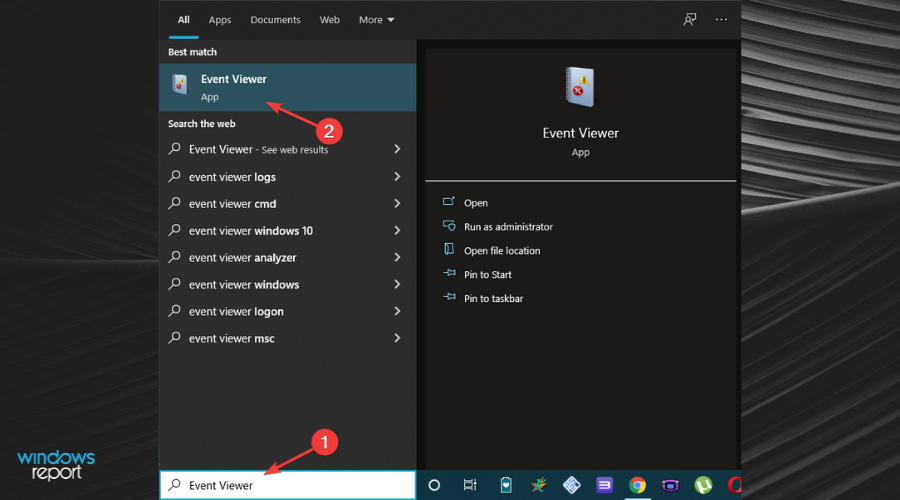
  4. After logging in, the results will be displayed on the desktop. In case the test results fail to show on the screen automatically, use the Event Viewer app to check the scan results. Thus, press Windows and search for Event Viewer in the Search bar. Open the first app.Searching for Event Viewer in Windows Search Bar
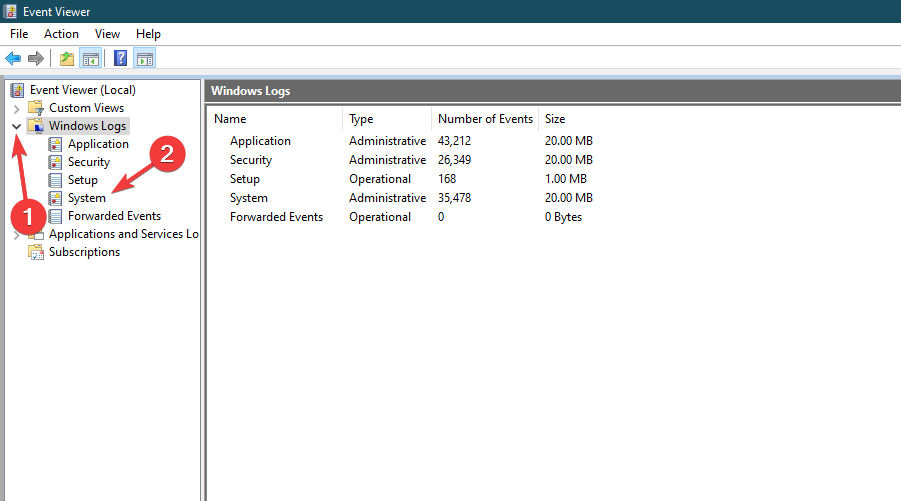
  5. From the left pane menu, expand the Windows Logs section and click on the System option.Navigating Windows Memory Diagnostic Menu
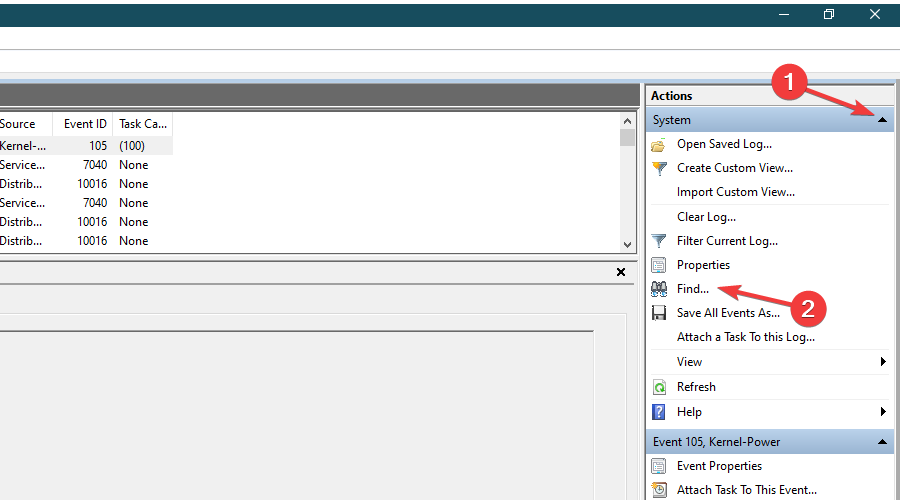
  6. In the right pane Actions menu, expand the System section. Click on the Find… option.Using the 'Find' option in Event Viewer
  7. In the text field, type MemoryDiagnostic and click on Find Next to look for the memory diagnostic scan log.Searching for the Windows Memory Diagnostic Scan Event in Event Viewer Log
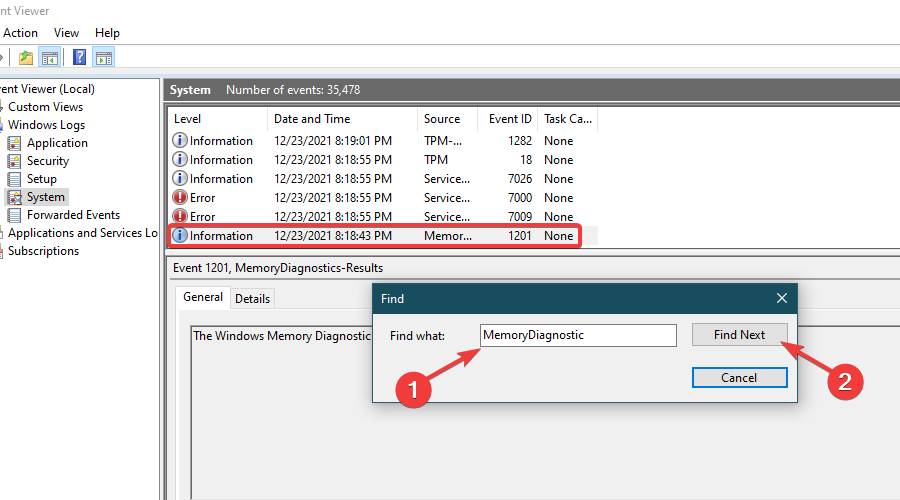
  8. View the results of the memory diagnostic scan in the General tab.Viewing the Windows Memory Diagnostic Scan Result in Event Viewer

Unless you find any errors, your PC’s RAM is not a cause for concern. However, if you do find any errors, see if they can be resolved without the need for replacing your RAM. If that’s not possible, replace the RAM.

Check out more details on the Windows Memory Diagnostic Tool and how it can help keep your PC’s memory in check.

3. Run a CHKDSK scan to check for bad sectors

Note icon NOTE
The CHKDSK scan can end up taking a lot of time. A good estimate is probably around 2-3 hours.
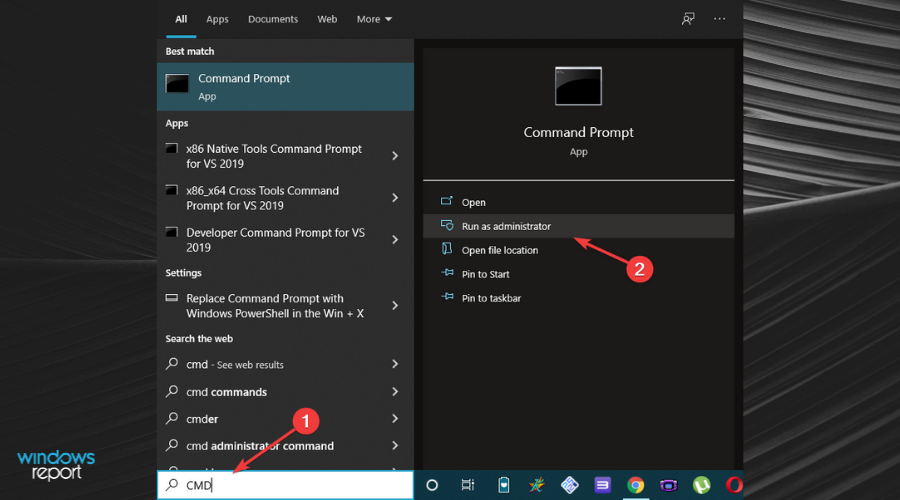
  1. Press the Windows key and search for CMD in the Search bar. Choose the Run as administrator option under the result.Opening Command Prompt for CHKDSK Scan
  2. Type the following command and run it by pressing Enter. A prompt will appear asking you to schedule the scan on the next restart. Type Y and then press Enter: CHKDSK /RRunning CHKDSK Scan on Command Prompt
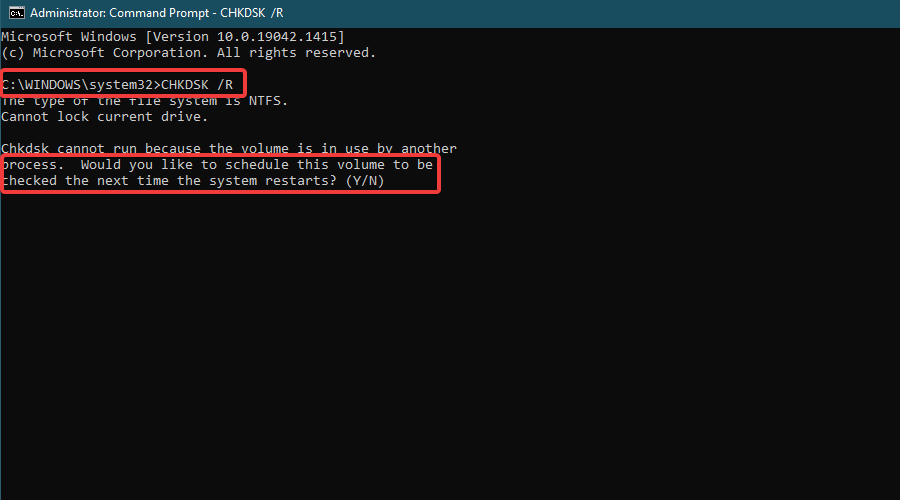
  3. Restart your PC. Once the PC restarts, the CHKDSK scan will begin automatically. Wait for the scan to complete.
  4. Once the scan is complete and you log in, press Windows and search for Event Viewer in the Search bar. Open the app.Opening Event Viewer to check CHKDSK Scan Results
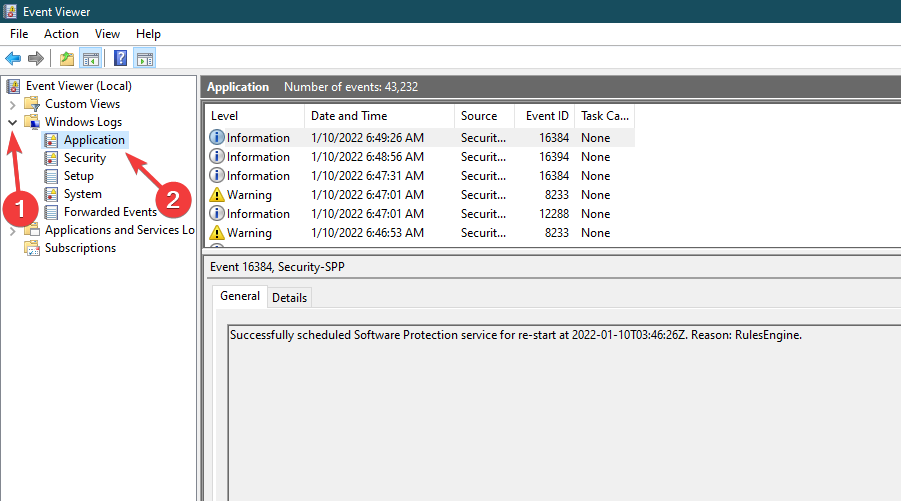
  5. From the left pane menu, expand the Windows Logs section and click on the Application option.Navigating the Event Viewer App
  6. In the right pane Actions menu, expand the Application section. Click on the Find… option.Using the Find Option in Event Viewer App
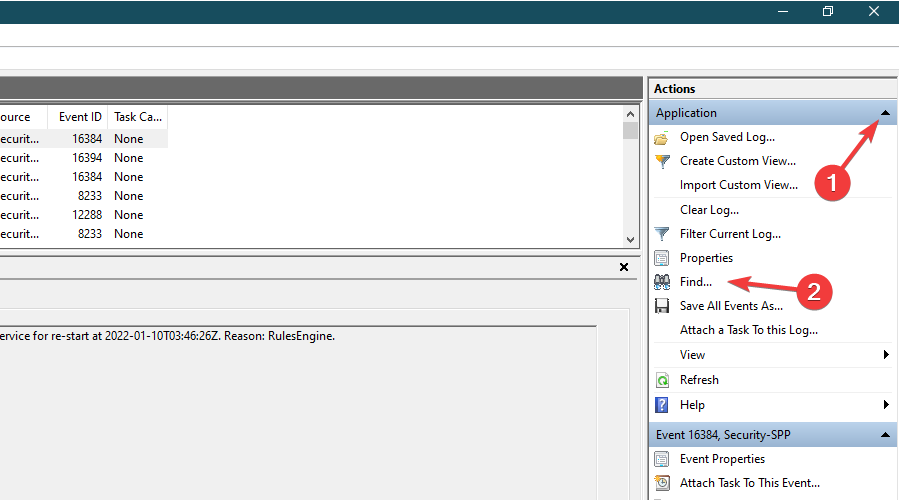
  7. In the text field, type Wininit and click on Find Next to look for the CHKDSK scan log.Searching for the CHKDSK Scan Results in Event Viewer Log
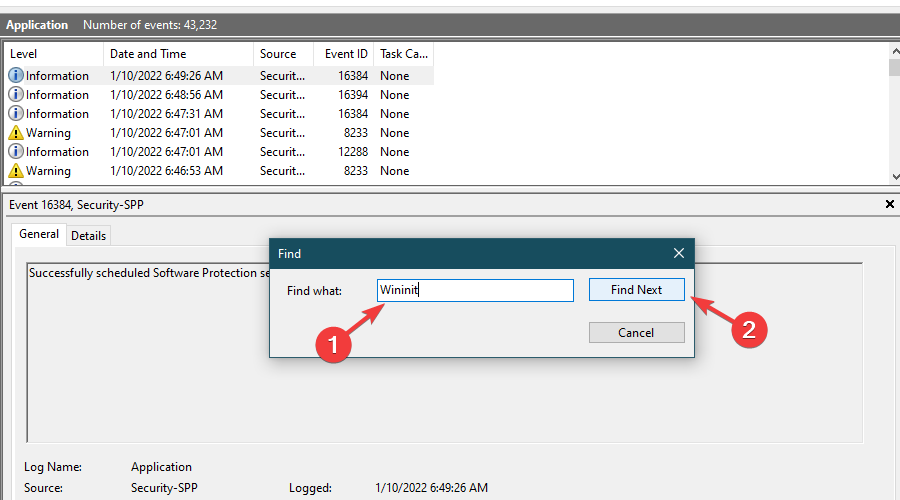
  8. View the results of the CHKDSK scan in the General tab.Viewing the CHKDSK Scan Results in the Event Viewer App

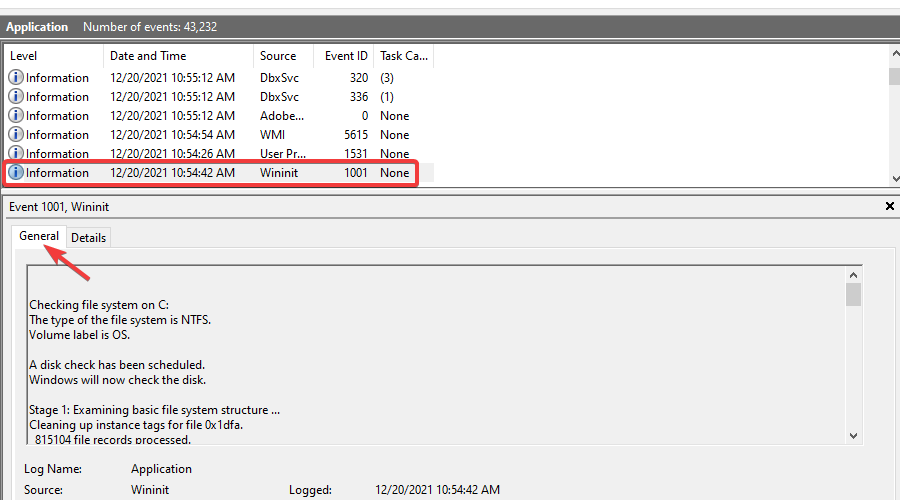
Click inside the text box in the General tab. Press Ctrl+A to select all of the text, copy, and paste it onto a new text file. This will make viewing the results quite convenient.

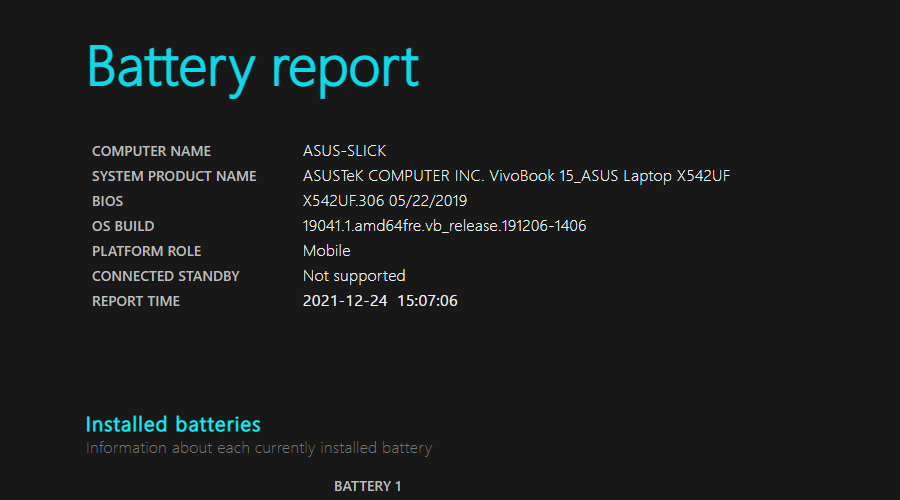
4. Run the Battery diagnostics command

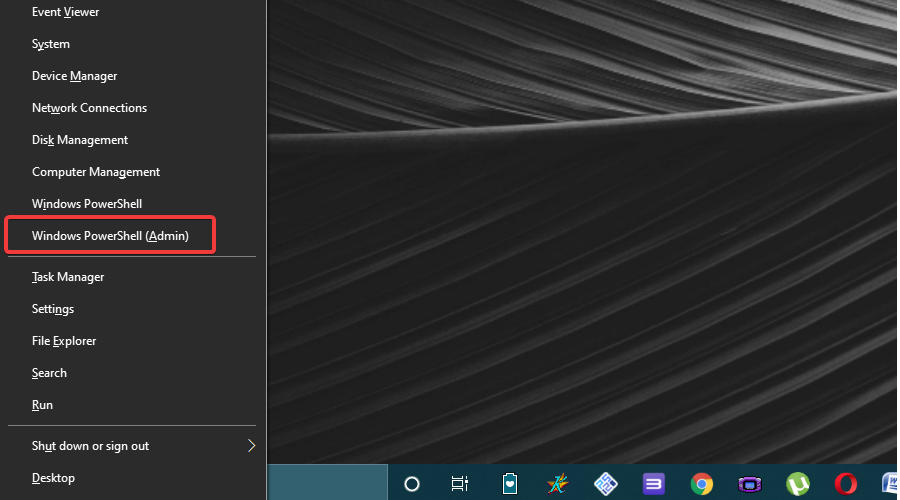
  1. Right-click the Start icon then select the Command Prompt or Windows PowerShell (Admin) option from the menu.Windows + X Command
  2. Once the Command Prompt/ Windows PowerShell loads, type in the following command and run it by pressing Enter: powercfg /batteryreportWindows PowerShell Running Battery Diagnostics
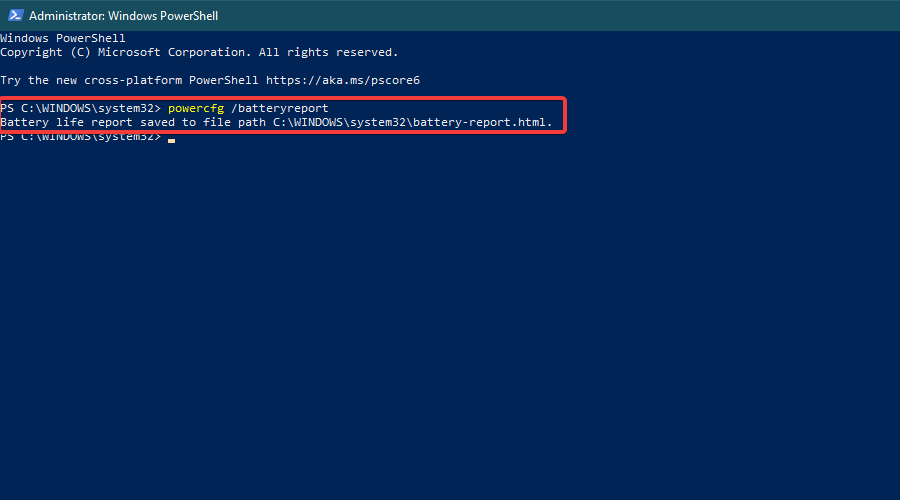
  3. An HTML file will be generated in a specified location. Open the file (in a browser) and view the results.Battery Diagnostics Battery Report

For an even deeper analysis, check out the 10 best tools for checking battery health on Windows 10.

5. Use third-party diagnostic tools

If you don’t want to get into the nitty-gritty of hardware diagnostics, then the simplest option is to use third-party PC hardware diagnostic tools. These tools not only make things a lot easier, but they also cover almost every aspect of hardware diagnostics.

There are a lot of options for the best hardware diagnostics tools on PC that will offer free computer diagnostic tests. You can choose whatever option suits you. If need be, you can even choose to use multiple third-party hardware diagnostics tools.

6. Use PC manufacturer custom diagnostics tools

How to run hardware diagnostics on a Windows 10 HP laptop?

If the HP PC Hardware Diagnostics app isn’t installed on your HP PC, you can download it from the HP support website.

  1. Press Windows and search for HP PC Hardware Diagnostics in the Search bar. Select Run as administrator under the result.Searching for HP PC Hardware Diagnostics
  2. Click on the System Tests section and select either the System Fast Test or System Extensive Test. Click Run once to start the test. Wait for the test to finish.Running System Tests in HP PC Hardware Diagnostics
Note icon NOTE
It is recommended that you go for the System Extensive Test as it is a complete assessment of the PC’s hardware. The System Extensive Test can take up to 2 hours or more depending on your PC’s configuration. Press the ESC key to cancel the test at any given time.
  1. If an issue is detected, click Troubleshoot and follow the on-screen instructions to resolve the issue. If the issue remains unresolved, you will be provided with the option to contact HP Customer Support.Using the Troubleshoot Option in HP PC Hardware Diagnostics
  2. Move on to the Component Tests if no problems are detected during the System Tests. Follow Step 3 if any problems are detected in the Component Tests.

How to run hardware diagnostics on a Windows 10 Dell PC?

  1. Visit the Dell support website and let the Dell PC auto-detect process finish. Alternatively, you can add your PC’s serial number or use the Browse all products feature to get the hardware diagnostics started.Auto-Detect Process on Dell Support Website
  2. Once your PC is detected, click on the Diagnostics tab.Dell SupportAssist Online Hardware Diagnostics
  3. Choose from either the Quick Test, Full Test, or Custom Component Test and proceed to start the test.Running the Full Scan in Dell SupportAssist Online Hardware Diagnostics
  4. Once the test is complete, view the results and see what issues have been detected. Click on the listed issues to see the possible solutions and apply them accordingly.Viewing Results and Fixing Issues

The Dell SupportAssist software can also be downloaded and used offline.

How to run hardware diagnostics on a Windows 10 Lenovo PC?

  1. Visit the Lenovo support website and click on the Detect Your Product option. Alternatively, you can add your PC’s serial number or use the Select Your Product feature to get the hardware diagnostics started.Navigating Lenovo Online Hardware Diagnostics
  2. Click on the Diagnostics tab and then click Customize in the Custom Scan section.Using the Custom Scan Option in Lenovo Online Hardware Diagnostics
  3. Select all the components, toggle the Full Scan option where applicable, and start the scan. Wait for the process to finish.Preparing the Custom Scan in Lenovo Online Hardware Diagnostics
  4. If any issues are detected, hover over the red caution icon and note down the Result Code of that particular issue.
  5. Contact a Lenovo support agent and provide the Result Code to solve the issues.Viewing Custom Scan Results in Lenovo Online Hardware Diagnostics

7. Run diagnostics from BIOS/ UEFI

You can find out more about BIOS/ UEFI and how to access them on Windows 10 to get started with the hardware diagnostics.

  1. Access the native or custom manufacturer BIOS/ UEFI on Windows 10. Accessing BIOS on Windows 10
  2. Locate the Diagnostics or any other similar option and start the hardware diagnostics tests.
  3. Follow any prompts that may show up accordingly.

BIOS/ UEFI is not as readily accessible as some of the other options on this list but is extremely useful in performing hardware diagnostics nonetheless. They are also the only option available for hardware diagnostics in case the PC fails to boot Windows.

BIOS/ UEFI layouts are not the same for everyone. Therefore, depending on the BIOS/ UEFI, you may have to explore a bit to find the Diagnostics section. It’s usually found in the Advanced section. If you don’t want to deal with BIOS/ UEFI, follow the next solution.

How often should I perform the hardware diagnostics process?

Hardware diagnostics is an essential part of maintaining your PC in general. However, given a PC’s performance, it may or may not be necessary.

If the PC is performing smoothly and you don’t find yourself running into errors, system crashes, or system freezing then you can safely perform a hardware diagnostics scan every 3-6 months.

But, if you do find yourself running into any or all of the above-mentioned issues, then you must perform a hardware diagnostics scan regularly.

A regular hardware diagnostics checkup will keep you updated on the performance of your hardware, automatically fix any issues if possible, and notify you about potential component replacements.

Moreover, you might want to use PC maintenance software in order to help your computer perform optimally all the time.

Feel free to ask us questions in the comments section below. Let us know what worked out for you and if there’s anything that we missed.

More about the topics: windows 10