Ctfmon.exe Not Starting Automatically: How to Enable It

The ctfmon.exe file needs to run automatically with Windows 11, but that’s not always the case, so let’s see how we can fix that.
Many want to remove ctfmon.exe, believing that it’s malware, but you can rest assured that this is an authentic file from Microsoft and perfectly safe to use.
So, here’s how to enable it:
How can I enable ctfmon.exe automatically on Windows 11?
1. Use the ctfmon.exe shortcut
- Press the Win + R keys to open the Run dialog.
- Now you need to enter Ctfmon.exe path in the input filed and press Enter. The path is:
C:\Windows\System32
- Search for the ctfmon.exe file and right-click on it.

- Choose Send to and then select Desktop (create shortcut).

- Open the Run dialog again.
- Execute the below command.
shell:common startup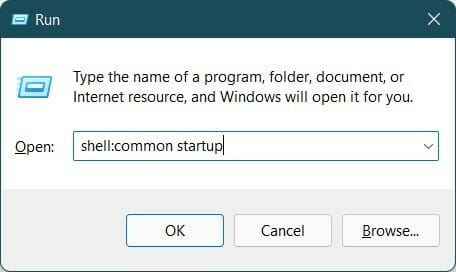
- You will be redirected to the location of the startup folder mentioned below.
C:\ProgramData\Microsoft\Windows\Start Menu\Programs\StartUp - Copy the ctfmon.exe file from the desktop and paste it into the startup folder opened in the above step.
- Restart your PC and check if the ctfmon.exe file is starting automatically in Windows 11 or not.
2. Use the Registry Editor
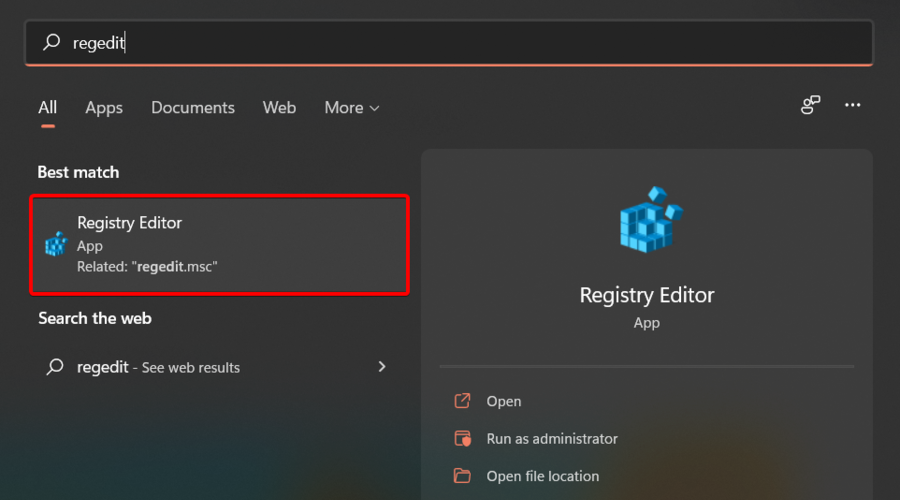
- Open the Start menu.
- Search for Registry Editor and open it.
- Navigate to the below-mentioned path:
HKEY_LOCAL_MACHINE\SOFTWARE\Microsoft\Windows\CurrentVersion\Run - On the right empty space, right-click and select New and then choose String value.
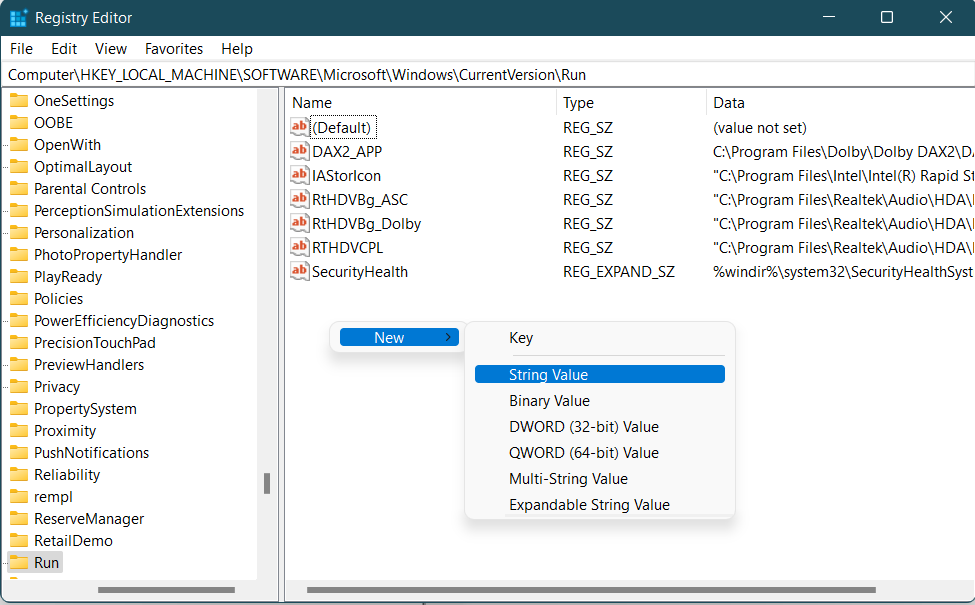
- Name the new string ctfmon.
- Double-click on it and set the Value to
C:\Windows\System32\ctfmon.exe - Restart your PC and it will resolve your problem.
3. Use the Task Scheduler
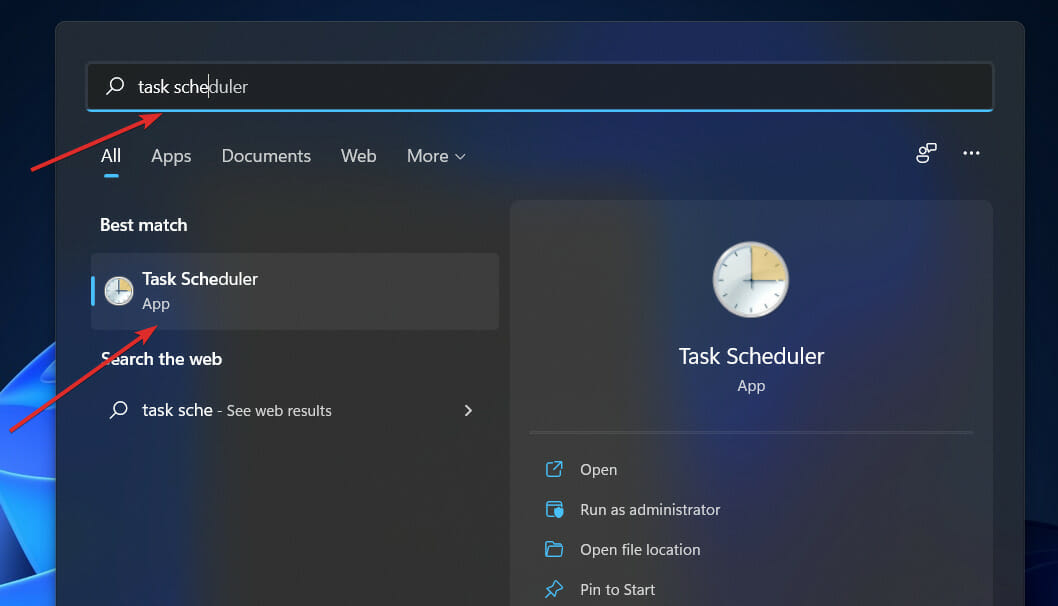
- Open the Start menu.
- Search Task Scheduler and open it.
- Expand Microsoft.
- Expand Windows.
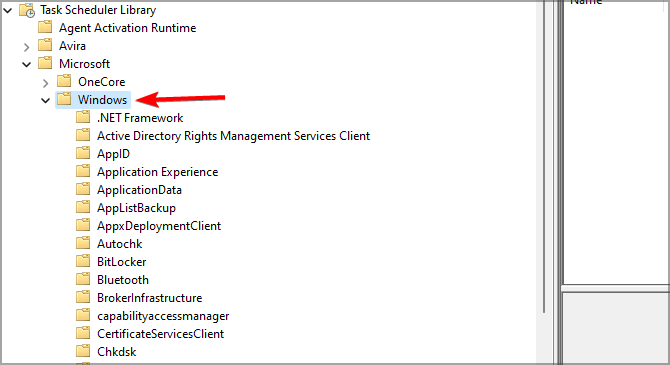
- Select on TextServicesFramework.
- On the right-side, right-click on MsCtfMonitor and select Enable.
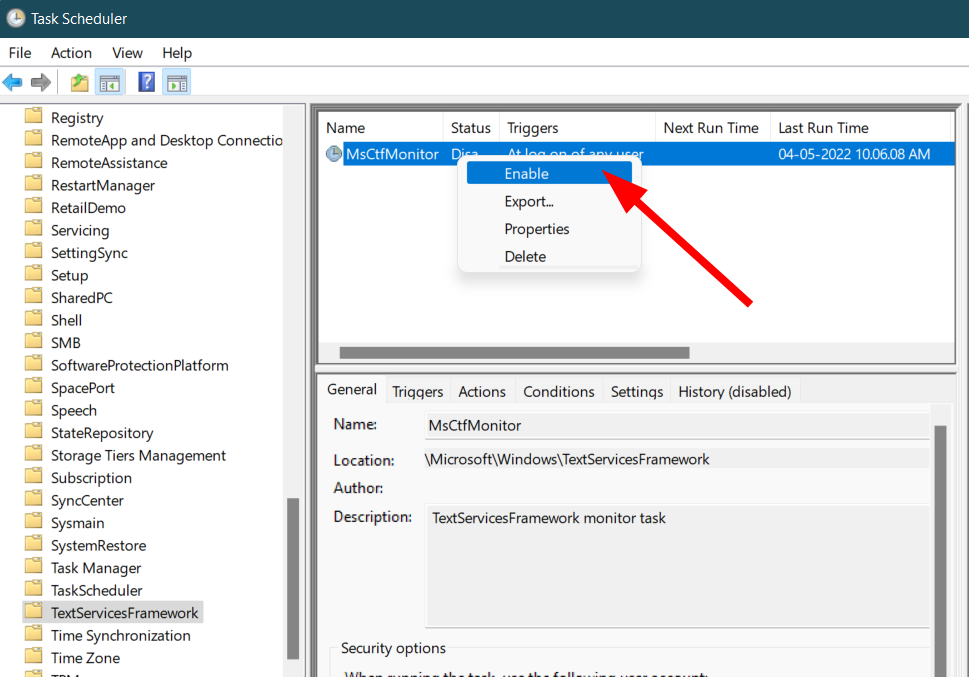
- Close the Task Scheduler.
- Restart your PC and check if ctfmon.exe runs automatically at startup or not.
How can I fix ctfmon.exe not starting automatically error?
1. Run SFC Scan
- Open the Start menu.
- Search for Command Prompt, right-click it and choose Run as administrator.

- Type the below command and press Enter:
sfc /scannow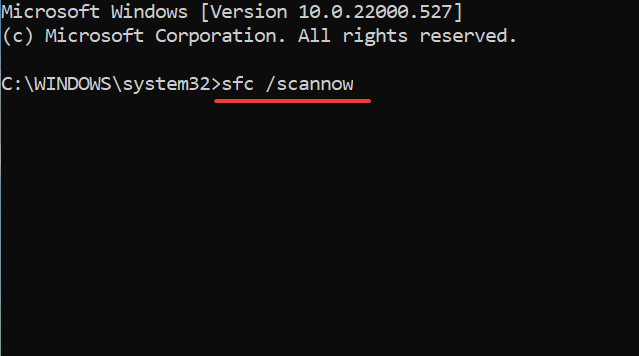
- Your PC will start scanning and possibly fix the issue as well.
- Reboot your PC.
As an alternative, you can always rely on specialized software to help you repair your system files in no time. Plus, this kind of software can be easily used as a maintenance tool in the future.
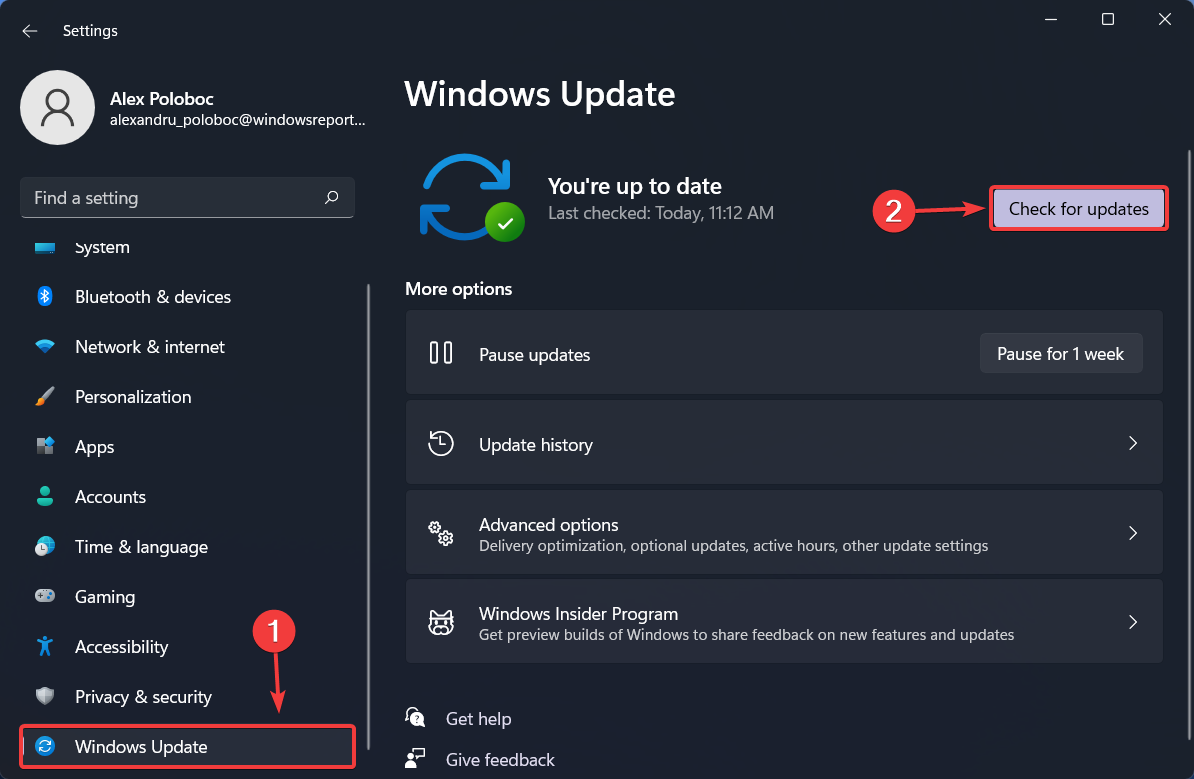
2. Check for Windows updates
- Press the Win + I buttons to open Settings.
- Select Windows Update from the left pane.
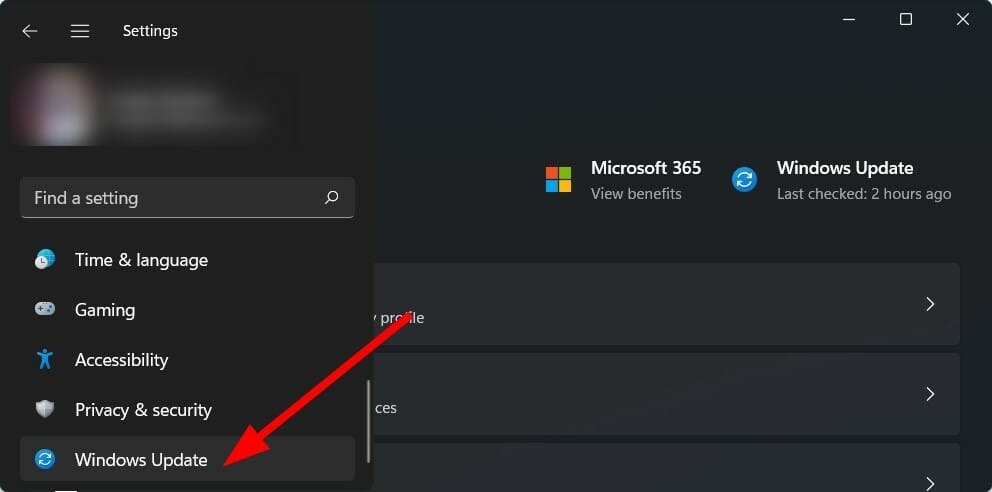
- Click on Check for updates button.

- Your system will now check for any latest update available, and if it detects one, it will install it automatically.
After doing that, check if the ctfmon.exe is still not working.
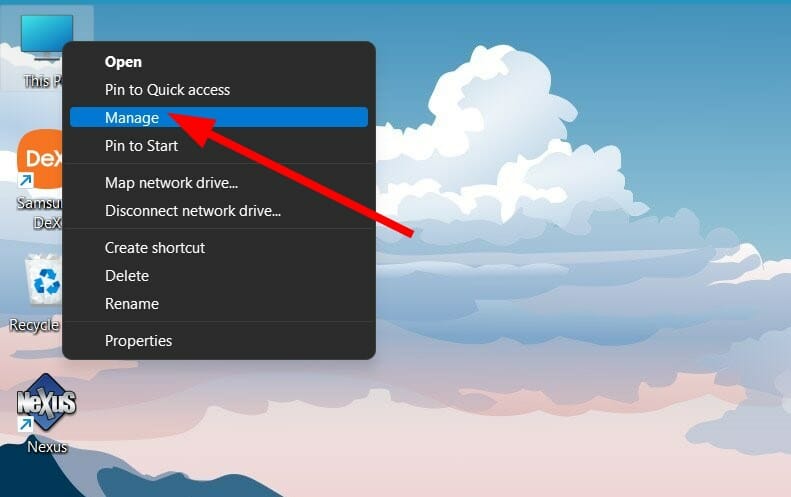
3. Re-enable CTF Loader Service
- Right-click on This PC and select Manage.
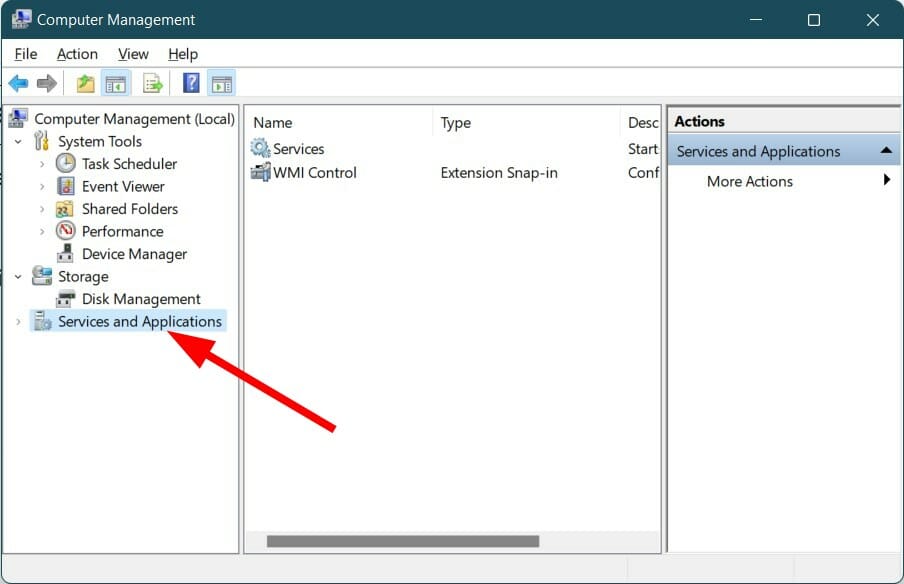
- Select Services and Applications.
- Double click on Services.
- Search for Touch Keyboard and Handwriting Panel Service.
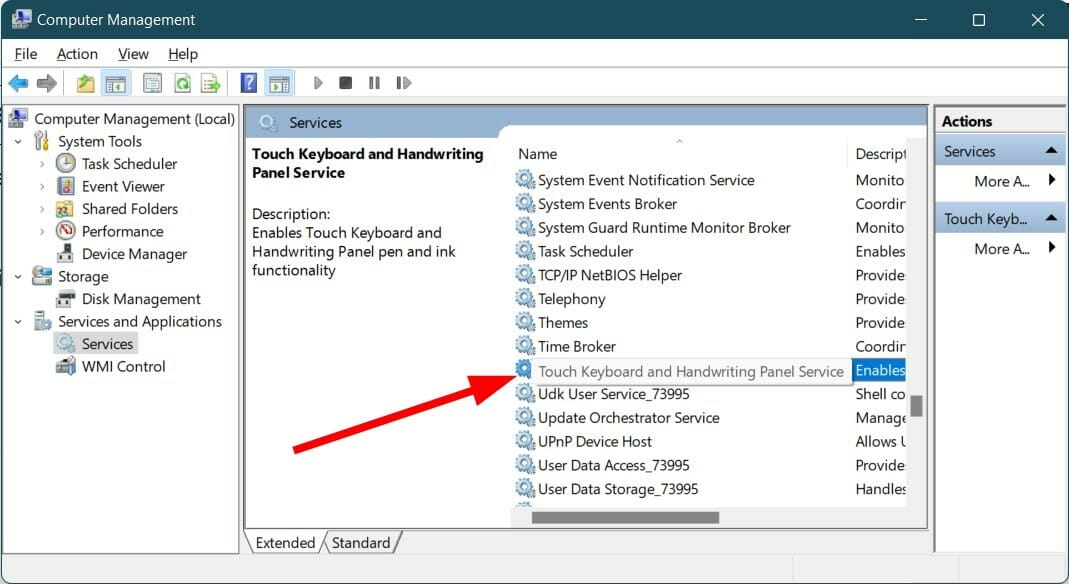
- Right-click on it and choose Properties.

- Select Startup Type as Disabled.
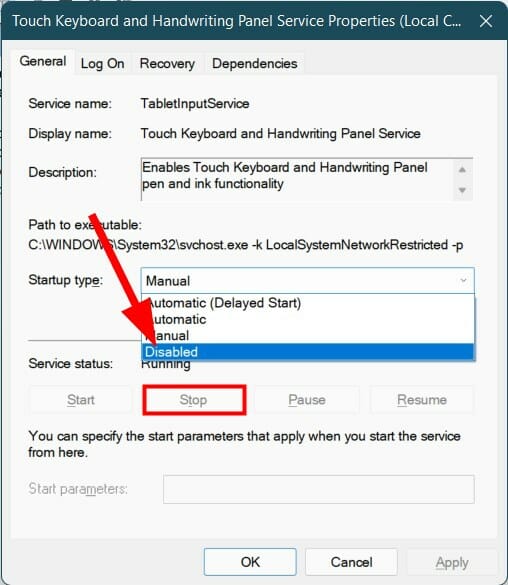
- Click Stop.
- Click Apply and OK.
- Restart your PC.
- Once the PC restarts, repeat the steps from above, but this time enable the service.
If none of the above solutions help you fix the problem at hand, then as a last resort you can opt for resetting your Windows 11 PC.
But before you do that, you need to take a complete backup of your data because resetting the PC can remove all of your data. You can follow our comprehensive guide on how you can always perform Windows 11 factory reset.
Let us know in the comments section below if this guide helped you fix the ctfmon.exe error on Windows 10 and 11.
Read our disclosure page to find out how can you help Windows Report sustain the editorial team. Read more


Improve this guide


User forum
0 messages