How to Install the Epson Scanner Driver for Windows 10
Drivers available on the official website are always up to date
2 min. read
Updated on
Read our disclosure page to find out how can you help Windows Report sustain the editorial team. Read more
Key notes
- There are a few ways you can try out to quickly install your Epson scanner driver and this article is going to show you some of the most useful.
- Accessing an official support website proved to be extremely popular and efficient.
- If you want to install your Epson scanner driver, you should consider the Windows internal options as important allies.
- The support of specialized third-party software is one of the most popular procedures that can help you.
Drivers represent the most important software components which allow our PCs and apps to run optimally. Thus, proper installation is the essential step you should consider.
There is a wide variety of options that can prove useful to install your scanner drivers. Fortunately, you don’t have to be trained to understand them.
In this guide, you will find a selection of the best-proven solutions dealing with the Epson scanner driver error.
How can I install the Epson scanner driver on Windows 10?
1. From the manufacturer’s website
1. Access the Epson official support website.
2. Select your current region from the list, if prompted.
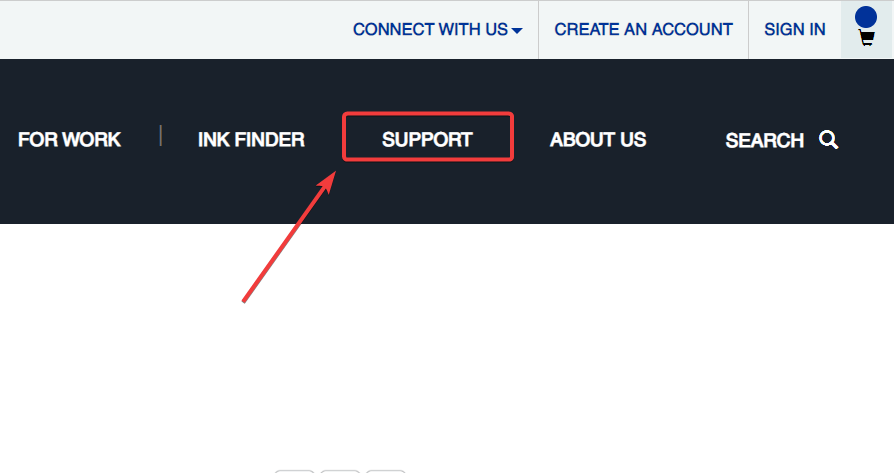
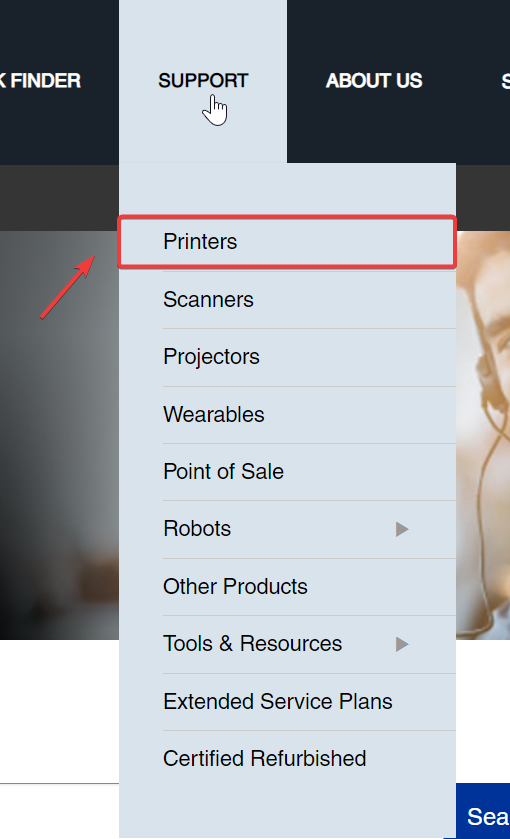
3. Hover your mouse over the Support section from the top menu.
4. Choose Printers from the drop-down menu that opened.
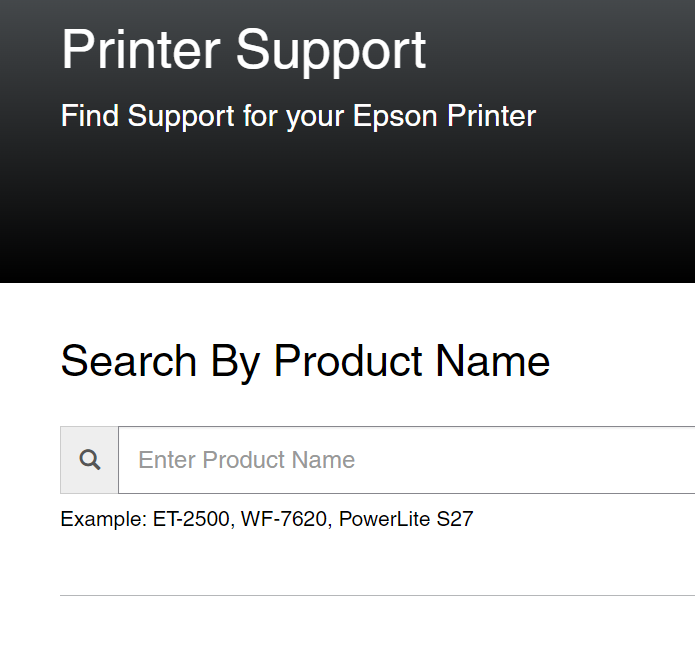
5. Search for your product name and select the exact model.
6. Click on the Download button.
7. Follow the on-screen steps to complete the installation.
The best place to download Epson Scanner Drivers from is the manufacturer’s website, which is the Epson official website. The drivers in there are always up to date and perfectly safe to use on your Windows 10 PC.
In order to install the Epson driver for your device, you need to download it and then follow the on-screen installation wizard. It will automatically install the driver for you.
2. Via Device Manager
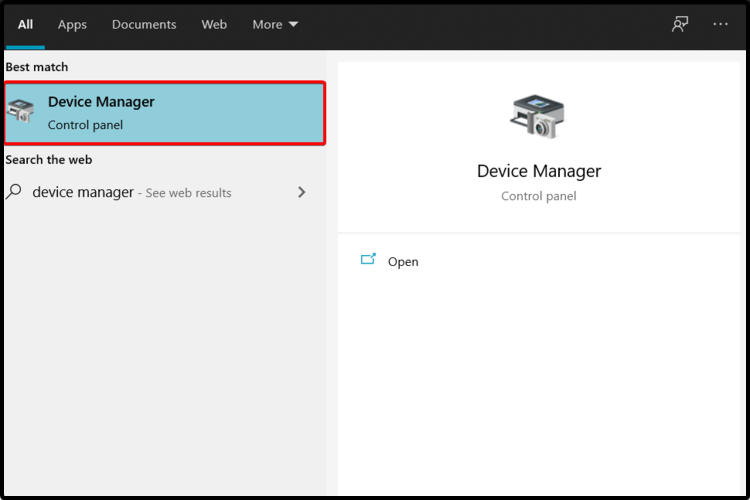
- Open Device Manager.
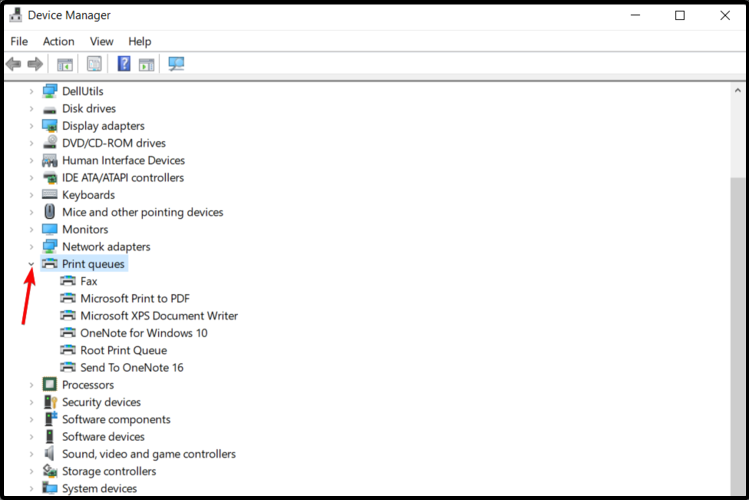
- Expand Print queues.
- Right-click on the one you need, and select Properties.
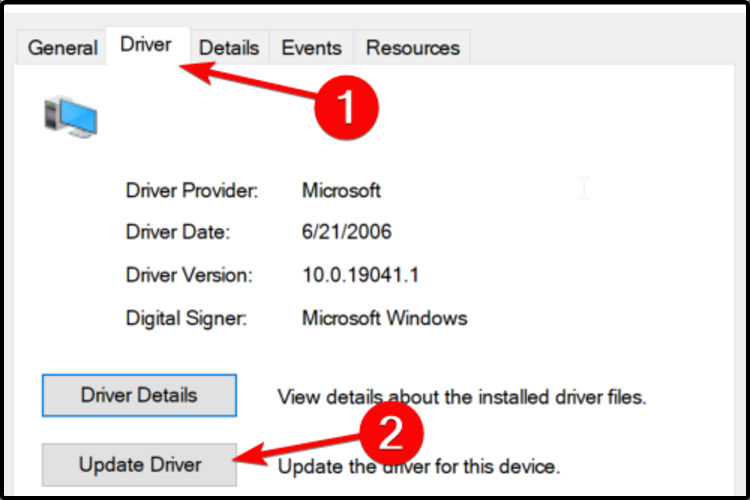
- Select the Driver tab and click on Update Driver.
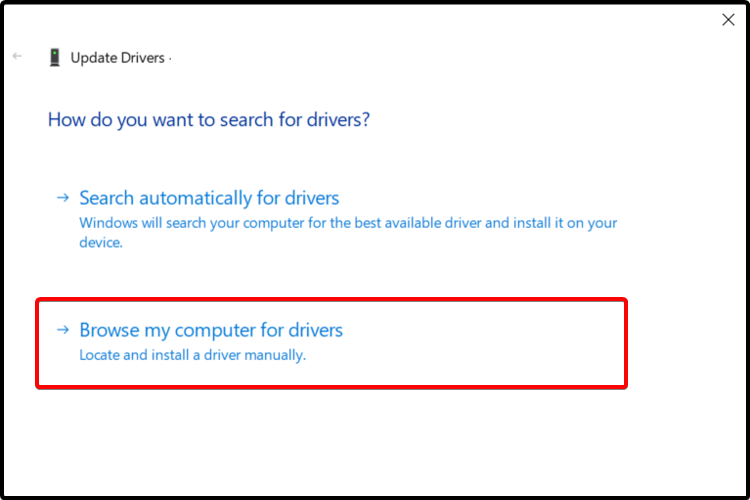
- Choose to Browse my computer for drivers.
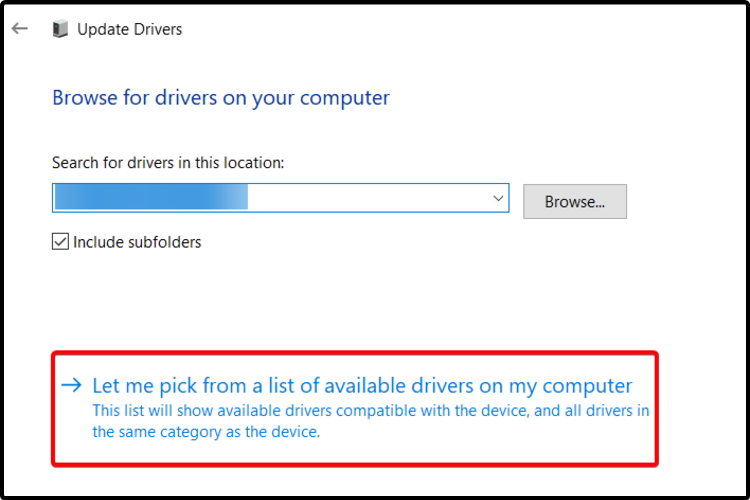
- Navigate to Let me pick from a list of available drivers on my computer.
- Click on Have Disk…, and locate your driver file.
- Select Next and wait until the installation is completed.
Alternatively, you can download the driver from the official website and manually install it via Device Manager.
This is recommended to do in case you encounter any problems using the traditional installing method.
3. Use third-party software
The methods presented above imply using manual steps in order to install the Epson scanner driver. We have one solution for you that will definitely save much more of your time.
Using dedicated third-party software will automatically install and update any driver you need.
Moreover, it will provide the latest compatible driver for your hardware components, straight from the manufacturer.
It is also important to mention that operating with specialized software is easy to use for everyone. Its friendly and intuitive interface allows you to understand anything you need to know.
You should know that with specialized tools you have all the support regarding problematic drivers, plus an extensive database with millions of driver versions.
To conclude, we advise you to employ an automated driver updater like this for maximum performance of your device.
These were our recommended suggestions that will help you to install the Epson scanner driver on Windows.
In order to keep your components safe, you can always check a full guide about how to update drivers in Windows 10.
Also, leave a comment in the section below and let us know which of the listed options suited you the most.





User forum
0 messages