Exit Status 5: Access Is Denied. What Is It & How to Fix It
Disabling your antivirus is one effective way to fix this issue
![]() 6 min. read
6 min. read
![]() Updated on
Updated on
Share this article
This article is translated in

Improve this guide
Read our disclosure page to find out how can you help Windows Report sustain the editorial team. Read more
Key notes
- Today we'll show you how to fix Error 5: Access is denied in Windows 10 and Windows 11.
- Error 5: Access is denied will prevent the installation of certain programs and apps.
- This is usually related to certain admin rights, so we'll show you how to adjust a few settings to fix Exit status 5 Access is denied via Powershell.
- Exit status 5: Access is denied can be fixed by using the CMD as well.

Error 5: Access is denied is primarily a software installation error message.
Consequently, when this error message pops up, users can’t install certain software. The cause is usually account permissions.
In this article, we explain how to change permissions and troubleshoot the mentioned error.
What is error code 5?
Error Code 5 is a Windows error code that shows whenever the user does not have adequate authority to access the requested file or location.
This could be because the user does not have administrative privileges.
Why do I keep getting error 5?
There are a series of reasons you get the access denied error on Windows 11. The major one is that your system is yet to grant permission to the user account you are currently using. Below are some of the variations of the error:
- Error 5 access is denied putty
- Error 5 access is denied Windows service
- Error 5 access is denied DISM
- Error 5 access is denied win32 disk imager
- Error 5 access is denied robocopy
- Error 5 access is denied dev c++
- Visual Studio Code error 5 access is denied
- System error 5 has occurred
- Error 5 access is denied Windows 11
- The authorization of the user failed with error 5
- Operating system error 5(access is denied.)
- Exit status 5 access is denied. stack overflow
- Exit status 5 access is denied vscode
- Exit status 5: access is denied. windows
- The process’ exit code is exited and its exit status is 255
- NVM use exit status 5: access is denied
Nonetheless, you can address these errors by following the solutions below.
How do I fix error 5 access denied?
- Switch off or change the antivirus software
- Run the installer as admin
- Switch your user account to an admin profile
- Enable the built-in admin account via Command Prompt
- Open the Program Install and Uninstall troubleshooter
- Move the installer to the C: Drive
- Adjust the UAC settings
- Restore Windows with System Restore
1. Switch off or change the antivirus software
Error 5: Access is denied could be due to third-party antivirus software. Some programs can mistake a genuine setup wizard to be something else, which is otherwise false positive detection.
The best solution would be to use an antivirus that detects few false positives or none at all. Up-to-date antivirus software should not faultily detect malicious software as they keep real-time records of all threats, old and new.
You can find plenty of Windows 10 compatible antivirus tools that can silently run in the background and protect you at all times without triggering false alerts or interfering with your system.
If you prefer using your current antivirus, switch it off temporarily to ensure that it doesn’t interfere with the installer.
You can temporarily switch off antivirus software by selecting a disable option on the context menus. For example, Avast includes an Avast shield control setting on its context menu.
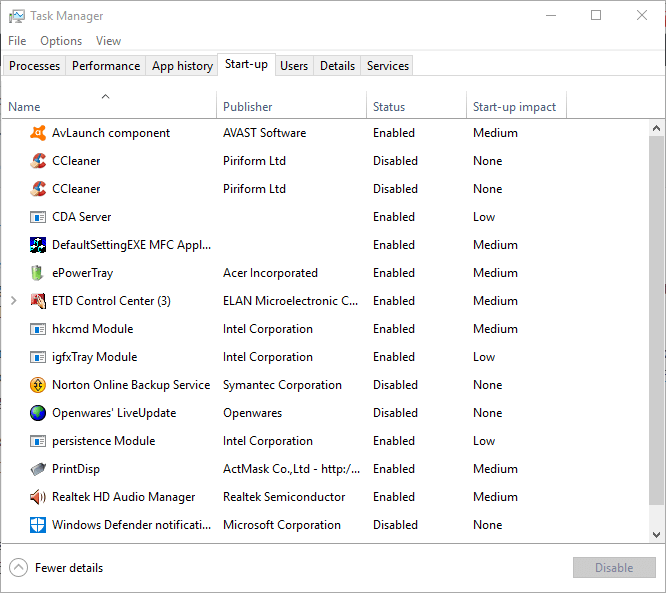
Alternatively, you can also leave anti-virus utilities out of the Windows startup via Task Manager as follows.
- Right-click the taskbar and select Task Manager.
- Select the Start-up tab shown in the snapshot directly below.

- Select anti-virus software included in the startup and press the Disable button.
- Then restart the desktop or laptop.

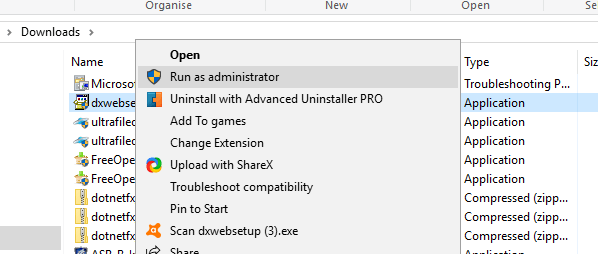
2. Run the installer as admin
Admin rights are required to install some programs. So a program might install if you right-click its installer and select Run as administrator.
This is a straightforward fix, but it often does the trick.
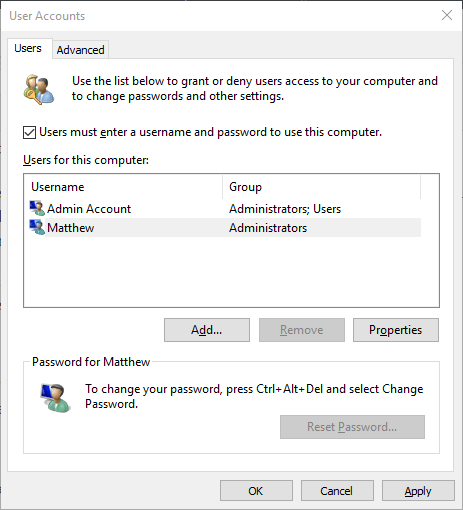
3. Switch your user account to an admin profile
If selecting the Run as administrator option doesn’t do the trick, you might need to install the software within an admin user account.
Thus, you might need to convert your standard account to an admin one. This is how you can switch your profile to an administrator one via the Control Panel:
- Open Run by pressing the Win key + R hotkey.
- Input netplwiz in the text box, and press its OK button.

- Select your user profile, and press the Properties button.
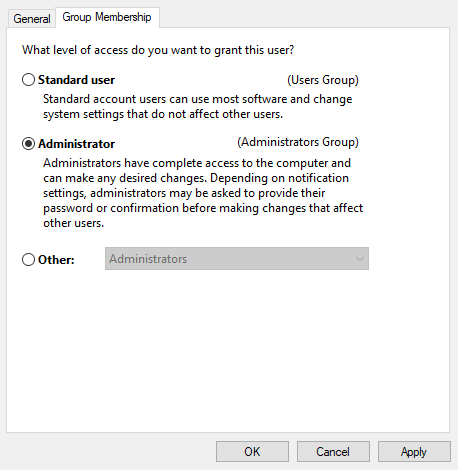
- Then select the Group Membership tab to open the options menu.

- Select the Administrator option, and press the Apply and OK buttons.
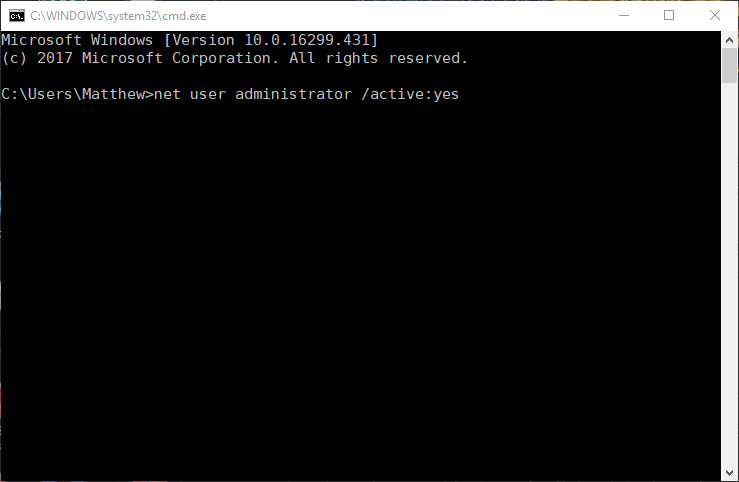
4. Enable the built-in admin account via Command Prompt
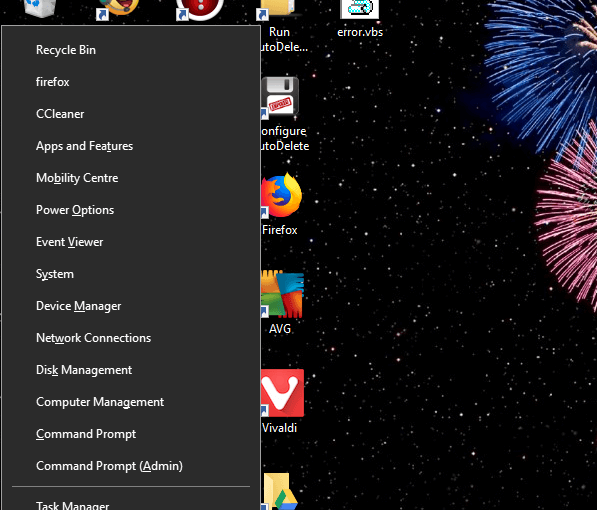
- Press the Windows key + X hotkey.

- Then select Command Prompt (Admin).
- Input the following command and press Enter:
net user administrator /active:yes
- Thereafter, close the Prompt and try to install the required software.
- You can disable the built-in admin profile by entering
net user administrator /active:no
5. Open the Program Install and Uninstall troubleshooter
Microsoft’s Program Install and Uninstall troubleshooter can fix installation errors. That’s especially the case if there are corrupt registry keys blocking software installation.
This tool is not included in Windows 1o, but you can save it by clicking the Download button on this webpage.
Then open the downloaded troubleshooter, and press the Next button to run it.

6. Move the installer to the C: Drive
If you’re opening the installer from an alternative drive to the one Windows is on (usually the C: drive), move the setup wizard to the C: drive.
You can do that by left-clicking the installer in File Explorer and dragging it onto the C: drive.
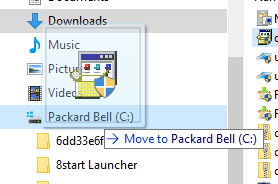
Then you’ll see a Move to the tooltip.
Let go of the left mouse button to move the installer. Thereafter, you can open the program’s setup wizard from the C: drive.
7. Adjust the UAC Settings
- First, press the Windows key + X hotkey.
- Select Run to open that accessory.
- Enter UserAccountControlSettings and click OK.

- Then drag the bar on that window to Never notify.
- Press the OK button, and restart your device.

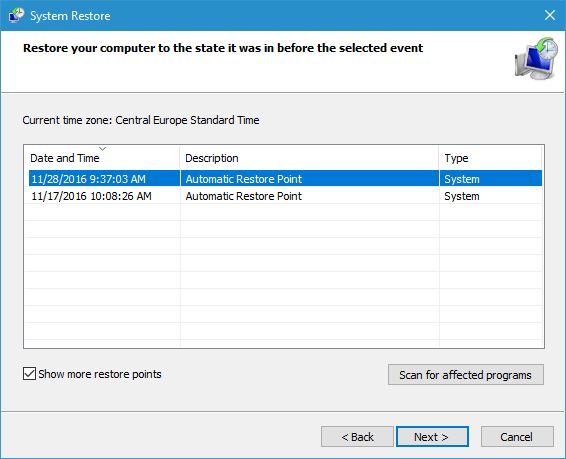
8. Restore Windows with System Restore
- To open System Restore, press the Windows key + R hotkey.
- Then input rstrui and click the OK button.

- Press the Next button on the System Restore window.
- Click the Show more restore points option to expand the list of restore points.

- Select a restore point that will restore Windows to a date when the Error 5: Access is denied wasn’t popping up.
- Restoring Windows removes software installed after the selected restore point. To see what software a restore point removes, press the Scan for affected programs button

- Click the Next and Finish buttons to confirm your selected restore point.
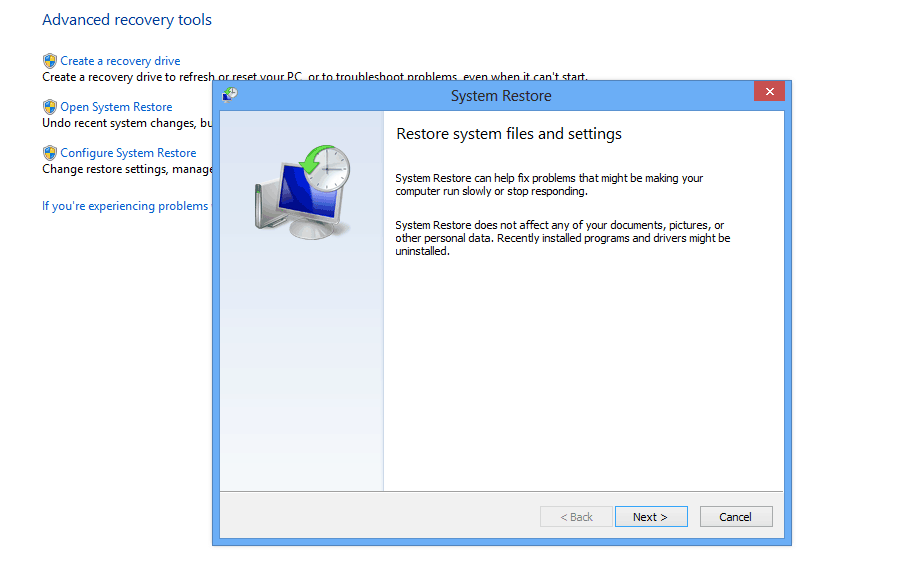

The Error 5: Access is denied message can pop up as a result of a corrupted system account or active directory, as well. Restoring Windows to an earlier date will fix such issues.
The solutions mentioned above will help you fix the Error 5: Access is denied error in Windows so that you can install the required software.
Aside from those resolutions, scanning the registry with a registry cleaner is never a bad idea.
Updating antiquated drivers might also fix the issue.
As always, if you have any other questions or suggestions, don’t hesitate to leave them in the comments section below and we’ll be sure to check them out.


User forum
0 messages