Ethernet Keeps Disconnecting Randomly [SOLVED]
Our effective solutions will stabilize your Ethernet connection

Ethernet cable connections are supposed to be more stable; however, some users have said on forums that their Ethernet connections keep disconnecting.
If you have many devices using a large bandwidth simultaneously, your overall performance may suffer and disconnect from the Ethernet.
The likelihood of this occurring increases when you live with a large group. Wireless devices can potentially become disconnected from the Wi-Fi network due to overload.
Table of contents
- How do I stop Ethernet from disconnecting?
- 1. Run the Network adapter troubleshooter
- 2. Update your Ethernet adapter driver
- 3. Adjust the power management setting for your Ethernet adapter
- 4. Make sure Ethernet is enabled
- 5. Try a different Ethernet cable
- 6. Disable the Windows firewall
- 7. Don’t use a proxy server
- 8. Reset your network
- 9. Disable VPN software
- What can I do if my Ethernet keeps disconnecting on Windows 11?
- Can I use Ethernet and Wi-Fi at the same time?
How do I stop Ethernet from disconnecting?
1. Run the Network adapter troubleshooter
1. Press the Start button and input the keyword troubleshoot within the search text box.
2. Next, click on Troubleshoot settings to open that tab within Settings.

3. Next, click on Additional troubleshooters to open the troubleshooter list in Settings.

4. Select Network Adapter in Settings, and press the Run the troubleshooter button.

5. Select the Ethernet option in the Network Adapter troubleshooter, and click Next to go through any suggested resolutions.
If your Ethernet keeps disconnecting, you have a built-in troubleshooter on your PC that you can use to fix the problem.
Windows has a Network Adapter troubleshooter that will scan your device for issues and recommend solutions to your specific problem within seconds.
2. Update your Ethernet adapter driver
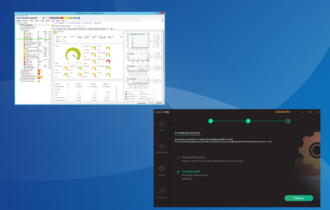
You might need to fix an outdated or faulty Ethernet driver to resolve the Ethernet cable that keeps disconnecting Windows 10 or Windows 11 issue. You can quickly and easily update drivers with driver updater software.
A driver updater utility will scan your PC and list devices you need to update drivers for. PC HelpSoft Driver Updater is excellent for this, plus, this tool will also help you keep your drivers up to date by regularly scanning and informing you of their status.
⇒ Get PC HelpSoft Driver Updater
3. Adjust the power management setting for your Ethernet adapter
- First, launch the Run accessory, which you can do by pressing Windows and R keyboard keys simultaneously.
- Type in this command and click OK:
devmgmt.msc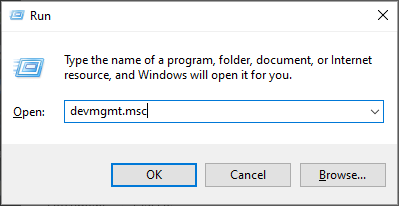
- Next, double-click the Network adapters category in Device Manager to expand it.
- Right-click your Ethernet adapter listed there to select its Properties option.

- Then you’ll need to select the Power Management tab and deselect the Allow the computer to turn off this device to save power checkbox.
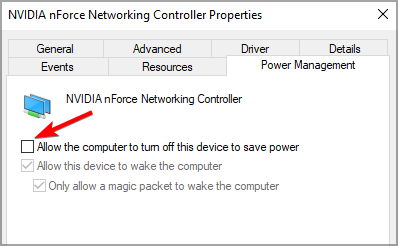
- Click the OK option to save your new setting. Unfortunately, the Ethernet keeps disconnecting, but the Wi-Fi works issue will be fixed.
In the case of some users, they are not able to find the Ethernet adapter in the Device Manager window. If that is the case for you, please read through our guide on the topic.
4. Make sure Ethernet is enabled
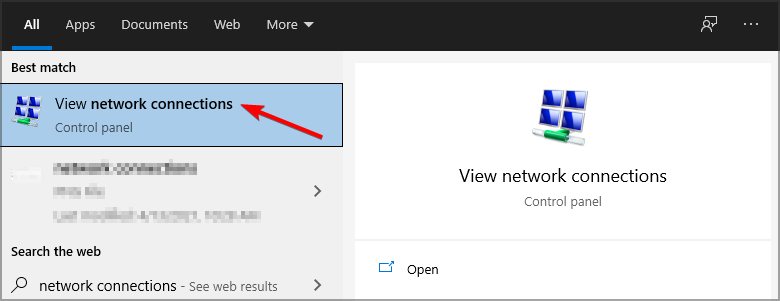
- Open the search tool by pressing Windows, then type the keyword network into the search tool’s text box. Finally, click View network connections to open it.
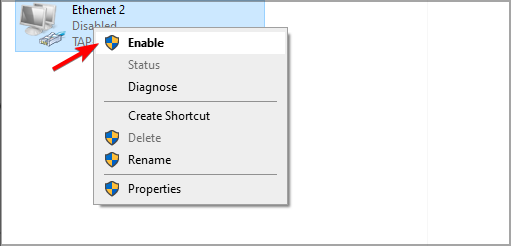
- Right-click your listed Ethernet connection there to open its context menu.
- Then select the Enable option if Ethernet is disabled.
5. Try a different Ethernet cable
If the Ethernet keeps disconnecting on Windows 10, check the condition of your Ethernet cable. If it’s not in OK shape, consider replacing your Ethernet cable with a new one.
In addition, try connecting your Ethernet cable to different ports on your router and check if that helps.
6. Disable the Windows firewall
- Press the Windows keyboard key and S simultaneously to open the search utility.
- Input firewall in the search box to find Windows Defender Firewall. Then, click the Windows Defender Firewall applet in the search results.
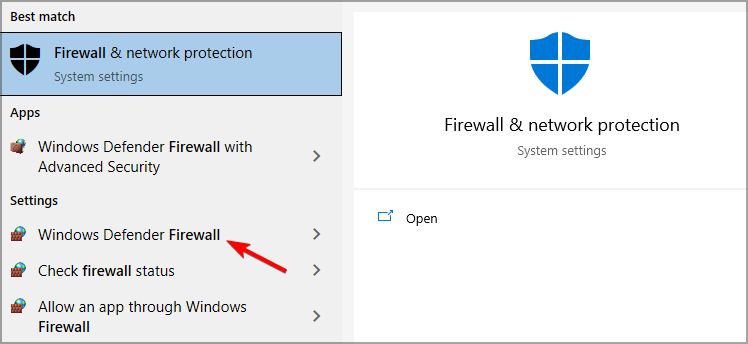
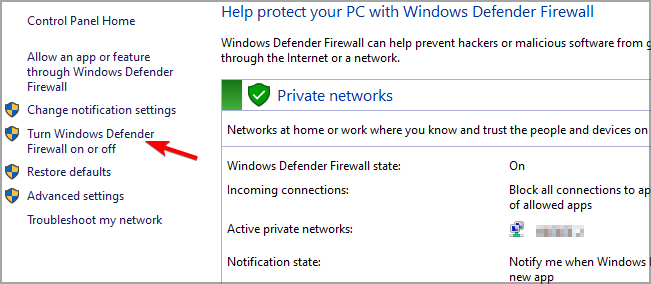
- Then click Turn Windows Defender Firewall on or off on the left of the open applet.
- Select both the Turn off Windows Defender Firewall options within Customize Settings.
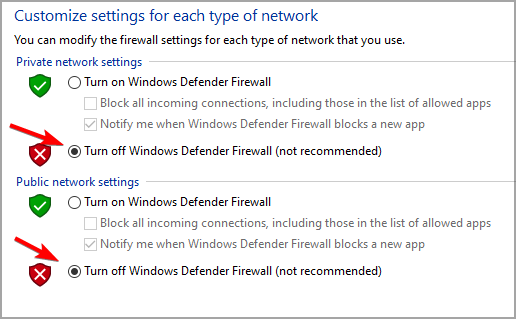
- Click OK to confirm the new settings.
If you also have a third-party antivirus utility installed, disable that software for at least a few hours.
You can usually disable a third-party antivirus utility by right-clicking its system tray icon and selecting a disable (turn off) shield setting of some description.
7. Don’t use a proxy server
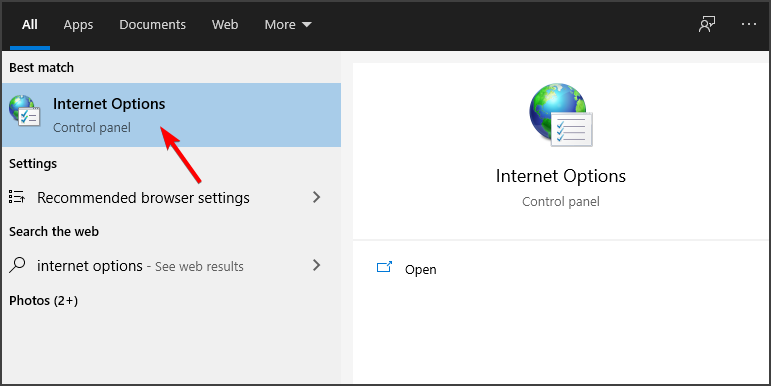
- Open Windows 10’s a search box, and type the keyword Internet Options in the search tool’s text box. Next, click Internet Options to open the Internet Properties window.
- Select the Connections tab. Now click the LAN settings button.
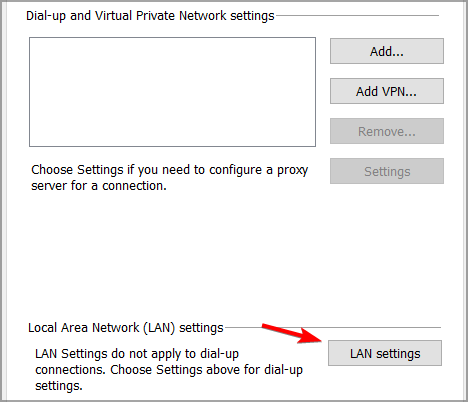
- Then click the LAN settings button to open a Local Area Network (LAN) Settings window.
- Deselect the Use a proxy server checkbox if that option is selected.

- Click OK to exit the Local Area Network window.
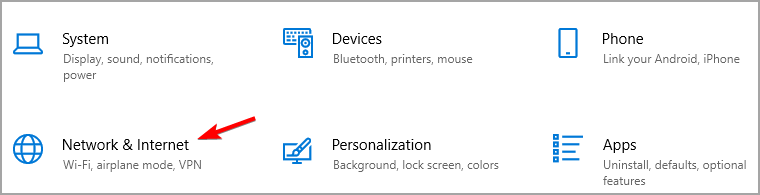
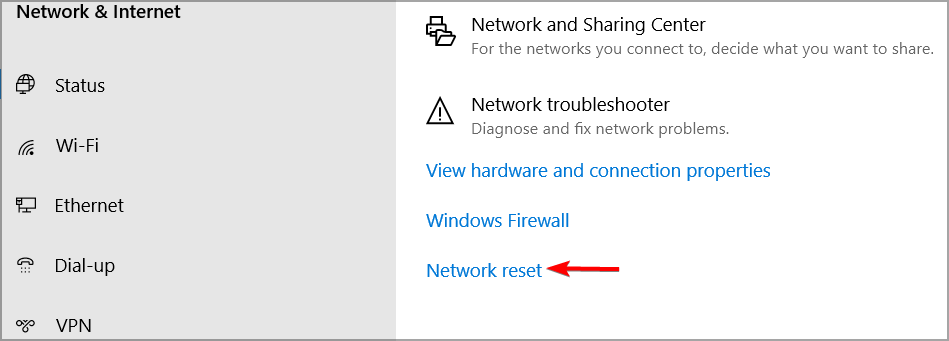
8. Reset your network
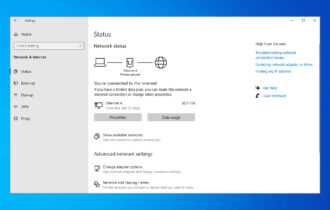
- Open Settings with the Windows key + I hotkey, then click Network & Internet to open a Status tab in Settings.
- Then click the Network reset option.
- Press the Reset now button to confirm and restart your PC.
9. Disable VPN software
It’s also recommended that users disable any VPN software installed on their desktops or laptops. Our guide on how to turn off VPN provides further details on how you can disable a VPN connection permanently or temporarily.
If you have a VPN browser extension enabled, make sure you also disable it. You can do that by opening the extensions tab in your browser and toggling the VPN extension off there. Alternatively, you can altogether remove the extension.
What can I do if my Ethernet keeps disconnecting on Windows 11?
Resolving this issue is not very different from the resolutions presented in this guide. The steps are mostly the same, with very slight changes when it comes to the things you need to click on.
Can I use Ethernet and Wi-Fi at the same time?
Yes, a personal computer can use both Wi-Fi and Ethernet simultaneously, provided that the computer’s network settings are adjusted to give equal weight to each connection.
And that they are programmed not to disconnect from either connection when the other reference is made. For more information, check out our post on how to combine Internet connections on Windows 10.
So, various potential resolutions can help you fix if Ethernet keeps disconnecting on Windows 10.
Now that we know what variations this error has been presented in, we can discuss another important topic -where does this issue occur?
- Ethernet keeps disconnecting on Windows 10
- Ethernet keeps disconnecting on Xbox
- Ethernet keeps disconnecting on Windows 7
- Ethernet keeps disconnecting on PS5
For more information on this topic and potential solutions, please look at our article on Ethernet not working in Windows 10/11 to learn what to do about it.
Also, find out what to do when you get the unidentified network error message from our dedicated article.
If none of the resolutions stabilize your Ethernet connection, consider contacting your ISP support line for further assistance.
Read our disclosure page to find out how can you help Windows Report sustain the editorial team. Read more


Improve this guide


User forum
0 messages