Event ID 15: How can I Fix This TPM BSOD Error?
Keep your computer’s BIOS TPM firmware updated
4 min. read
Updated on
Read our disclosure page to find out how can you help Windows Report sustain the editorial team. Read more

When your Trusted Platform Module hardware fails to execute a TPM command, you might see Event ID 15 in the Event Viewer app.
This guide will discuss all the available fixes for the problem right after examining the causes. Let’s begin!
What causes the Event ID 15 TPM error?
Generally, the error appears if you have a problem with the TPM device. Some of the reasons for the error are:
- TPM fails to respond: When Windows is trying to communicate or use the TPM device for functionalities that respond on TPM, including Bit Locker and Next Generation Credentials, and it fails to respond, it could cause the Event ID error.
- TPM performing self-test – When TPM resumes from sleep, it performs a self-test before processing any commands. During self-testing, if Windows tries to retrieve a random number, but the command fails, then Windows will receive this error. If the command fails three consecutive times, the OS logs the event. Hence we see the error.
How can I fix the Event ID 15 TPM module error on Windows 10?
Before diving into serious troubleshooting, let us try these simple fixes first:
- Check for BIOS updates.
- Check whether TPM is on or off.
- Make sure Latest Servicing Stack Update (SSU) and monthly Cumulative Update (CU) in Windows are installed.
- Update your security processor (TPM).
- Enable TPM in BIOS.
If nothing from the above worked for you, it is time to move on to these troubleshooting steps:
1. Uninstall and reinstall the TPM driver
1.1 Use Device Manager
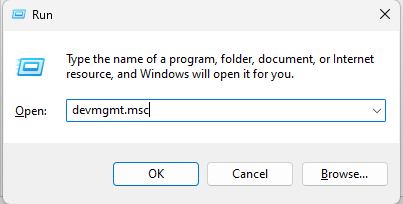
- Press Windows + R to get the Run window.
- Type devmgmt.msc and hit Enter.
- Now click on Security devices to expand, right-click on Trusted Platform Module, and select Uninstall driver.
- Reboot your computer. When your PC starts up, it will install the driver again.
1.2 Use a third-party tool
With driver updater utility like Outbyte Driver Updater, you can update drivers without hassles. It downloads the best compatible drivers for your device and installs them in a few clicks.
- Download and install Outbyte Driver Updater.
- Launch the app, and it will scan your computer for outdated drivers.
- Once the scan is complete, you will get a list of drivers.
- Select the drivers and click Update.
- The tool will download the latest and compatible drivers.
- Click Next, follow the on-screen prompts, then restart your computer.
Using automated tools has its advantages such as safely finding and updating outdated drivers and automatically installing new updates, saving time in all these processes.
2. Clear TPM
- Press the Windows key, type Windows Security, and click Open.
- Now navigate to Device Security. Click Security processor details.
- Click Security processor troubleshooting.
- Now click Clear TPM.
- Choose the positive response for the on-screen prompts to finish.
3. Disable Windows Credential Manager
- Press Windows + R to get the Run window.
- Type gpedit.msc and press Enter.
- Follow this path and double-click on Turn on Virtualization Based Security:
Computer Configuration\Administrative Templates\System\ Device Guard\Turn on Virtualization Based Security - Now under Credential Guard Configuration, select Disabled from the drop-down.
- Restart your PC.
4. Check if Core isolation is enabled
- Press the Windows key, type Windows Security and click Open.
- Now navigate to Device Security. Click Core isolation details.
- Make sure the toggle switch for Memory integrity is On.
5. In-place upgrade
- Go to Microsoft’s software download page, and choose the Windows version you want to install.
- Download Windows 11 ISO and select Windows 11 (multi-edition ISO).
- On Select, the product language option, choose English or your preferred language and click Confirm, and then Download.
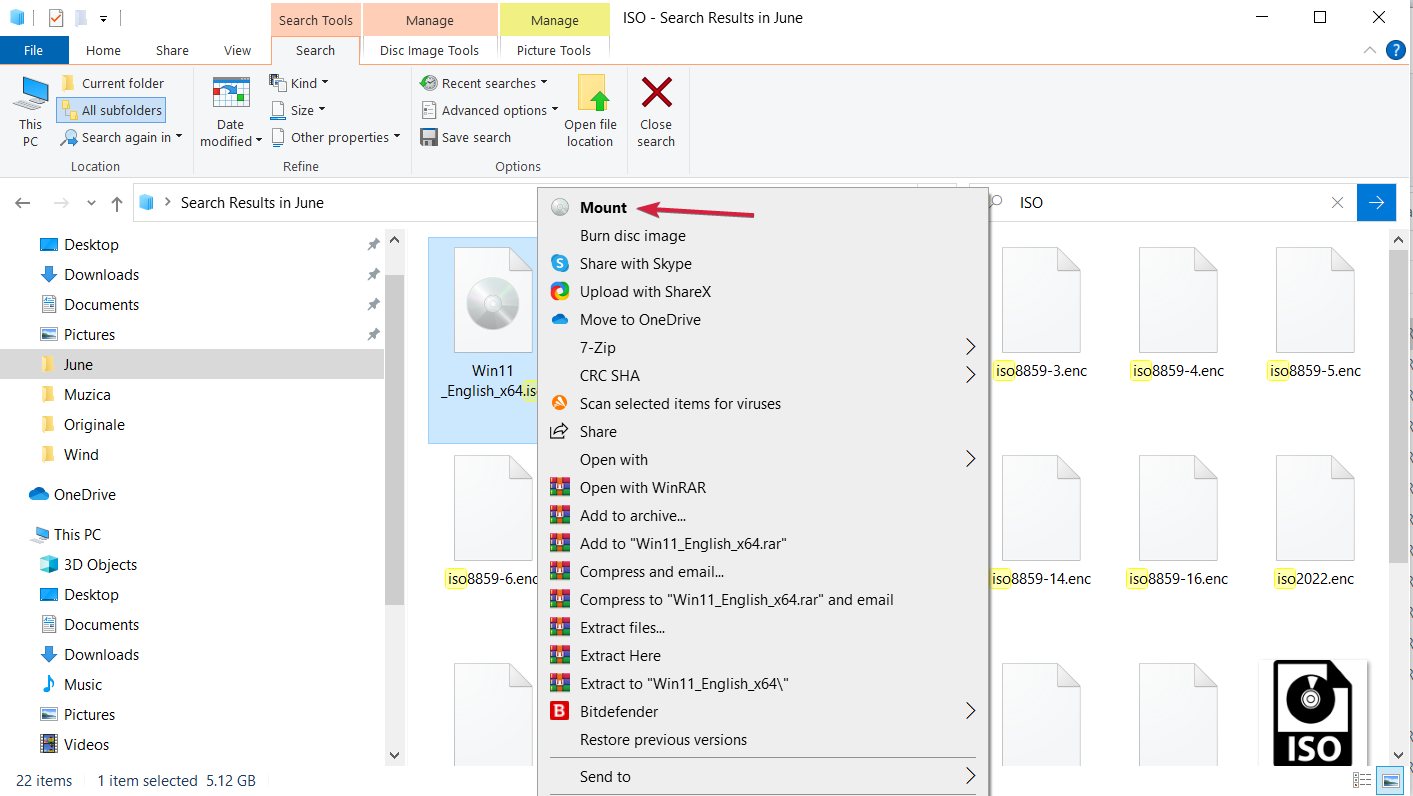
- Right-click on ISO and select Mount. Now click Setup.exe.
- On Install Windows 11 dialog box, select Next.
- On the next screen, click Accept to agree to the license terms.
- Follow the on-screen prompts to complete the process.
We covered a similar error in our TPM-WMI 1796 error guide, so don’t miss it.
So, these steps can be used to resolve the Event ID 15 source TPM error. If we have missed out on any method that worked for you, please let us know in the comments section below.


User forum
0 messages