Attempt to release mutex not owned by caller [Fix]
9 min. read
Updated on
Read our disclosure page to find out how can you help Windows Report sustain the editorial team Read more

Attempt to release mutex not owned by caller is a system error and it can occur on almost any PC. This error comes with ERROR_NOT_OWNER code, and today we’re going to show you how to fix this problem on your Windows 10 PC.
How to fix ERROR_NOT_OWNER error?
Fix – ERROR_NOT_OWNER
Solution 1 – Install the latest updates
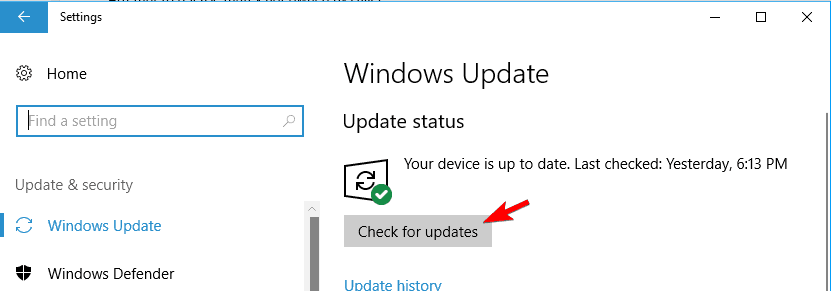
The simplest way to fix this problem is to install the latest Windows updates. Windows 10 usually installs important updates automatically, but sometimes you can miss an important update due to certain bugs. If that’s the case, it’s highly advised to check for updates manually. To do that, follow these steps:
- Press Windows Key + I to open the Settings app.
- Once you do that, navigate to Update & security section. Now click on Check for updates button. Windows 10 will now automatically search for updates and download them in the background.
After downloading and installing the latest updates, check if the problem is resolved. Windows 10 might have couple of bugs and compatibility issues, but Microsoft is working hard to fix them through Windows updates. To ensure that your PC is bug-free, we strongly recommend to keep your PC up to date.
Solution 2 – Use the correct IP address
Several users reported Attempt to release mutex not owned by caller message while trying to use a printer. According to users, they were unable to access the printer over the web. As a potential solution users are suggesting to use the printer’s IP address to access it instead of its name. After doing that, you should be able to access your printer without any problems.
Solution 3 – Install the latest drivers
This error can occur with various devices, and if you’re having this problem you might want to try updating your drivers. To do that, simply visit the manufacturer’s website and locate your model on the list. Download the latest drivers for your device and install them. After installing the latest drivers check if the problem still persists.
If you’re using an USB device, it’s also a good idea to update your motherboard drivers. Simply go to your motherboard manufacturer’s website and download the latest drivers. After installing the latest drivers, check if the problem still appears.
Solution 4 – Reinstall your drivers
As previously mentioned, sometimes drivers can cause this problem to appear. If that’s the case, you need to find and reinstall the problematic drivers. To do that, follow these steps:
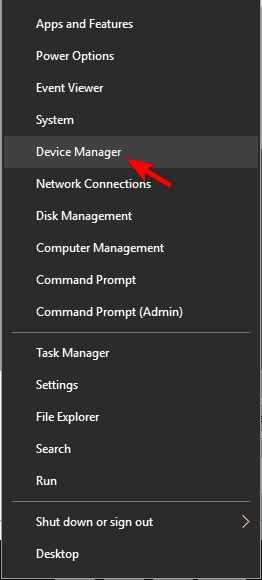
- Press Windows Key + X to open Win + X menu. Choose Device Manager from the list.
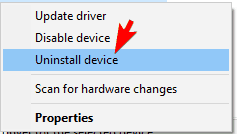
- Locate the problematic device on the list, right click it and choose Uninstall device.
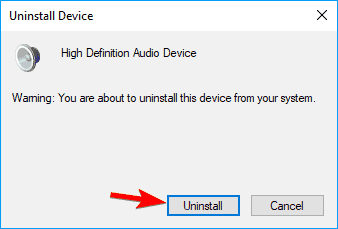
- Confirmation dialog will now appear. Click on Uninstall.
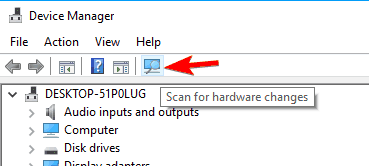
- After doing that, you need to install your drivers again. You can follow the instructions from previous solution and install the latest drivers from the manufacturer. Alternatively, you can click Scan for hardware changes button and let Windows install the missing drivers automatically.
After reinstalling the drivers, check if the issue still appears.
Solution 5 – Check your antivirus software
Even though antivirus software is necessary, sometimes it can cause this and other errors to appear. Many antivirus tools tend to enforce certain security policies, and that can prevent devices and applications from running properly. To fix this problem, you need to check your antivirus configuration and try disabling certain features. If you’re not familiar with antivirus and computer security you might have issues finding the problematic feature.
Alternatively, you can try disabling your antivirus entirely. Even if you choose to disable your antivirus your PC won’t be completely vulnerable. Windows 10 comes with Windows Defender that works as a default antivirus software, so even if you disable your antivirus you’ll remain protected. After disabling the antivirus check if the problem still persists. In most cases you can disable your antivirus as a temporary workaround.
Lastly, you can also try to uninstall your antivirus software. Keep in mind that antivirus tools can leave certain files and registry entries behind even after you uninstall them. Those files can also cause this problem, so we advise you to use a dedicated removal tool for your antivirus to remove it. Many antivirus companies offer these tools for their software, so be sure to download and use one for your antivirus.
After removing the antivirus software entirely, check if the problem still appears. If removing the antivirus fixes the issue, you need to switch to a different antivirus software or update your antivirus to the latest version.
Solution 6 – Enter Safe Mode
If this problem appears frequently, it might be caused by third-party applications. To check if that’s the problem, you can navigate to Safe Mode. Safe Mode is a special segment of Windows that runs with default drivers and apps, so it’s perfect for troubleshooting. To enter Safe Mode, do the following:
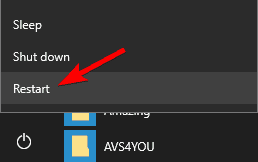
- Open the Start Menu and click on Power button. Press and hold the Shift key and choose Restart from the menu.
- Choose Troubleshoot > Advanced options > Startup Settings and click the Restart button.
- Once your PC restarts you’ll see a list of options. Select any version of Safe Mode by pressing the appropriate keyboard key.
- Once you enter Safe Mode, check if the problem appears.
If the problem doesn’t appear in Safe Mode it’s possible that one of your applications is causing this issue. In order to fix the problem you need to remove any recently installed or updated applications.
Solution 7 – Perform a Clean boot
Third-party applications can sometimes cause this error to appear, and in order to prevent it you need to find and disable the problematic application. Many applications and services start automatically with Windows causing this problem to appear. To find the problematic application, you need to disable all startup applications and services. This is relatively simple and you can do it by following these steps:
- Press Windows Key + R and enter msconfig. Click OK or press Enter.
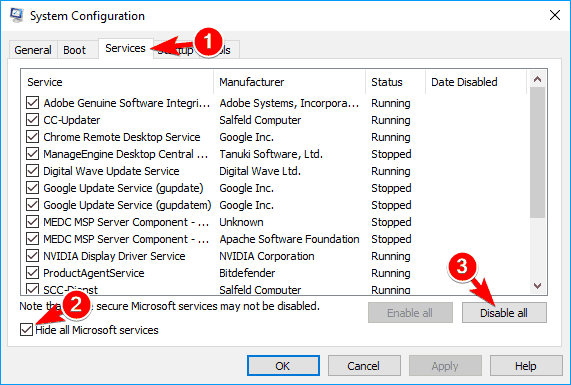
- Go to Services tab and check Hide all Microsoft services. Now click on Disable all button.
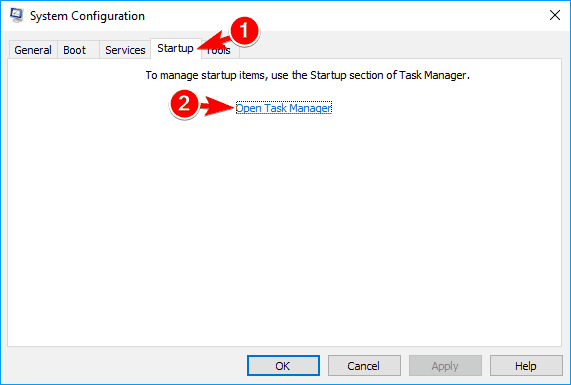
- Go to Startup tab and click on Open Task Manager.
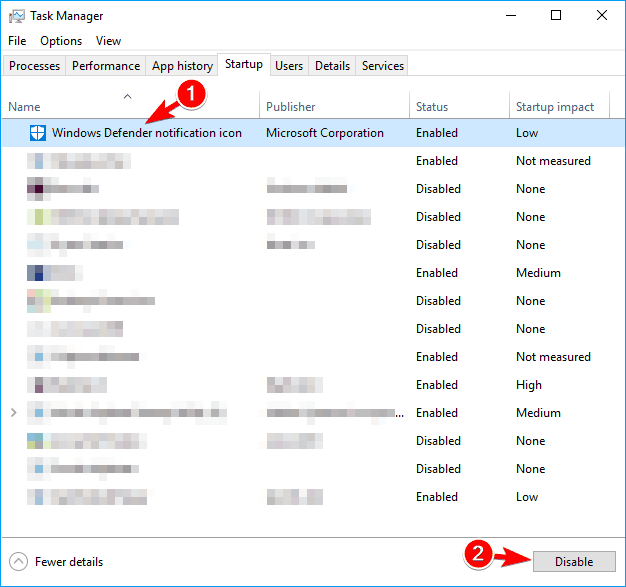
- Once Task Manager opens, you’ll see a list of all startup applications. Select any application on the list and choose Disable from the menu. Repeat this step for all entries on the list.
- After disabling all startup applications, close Task Manager and go to System Configuration window. Click Apply and OK to save changes.
After disabling all startup applications and services you need to restart your PC to apply changes. Once your PC restarts check if the problem still appears. If not, it means that one of the disabled applications or services was causing the problem. To find the problematic application you need to repeat the same steps and enable services and applications one by one or in groups. Keep in mind that you need to restart your PC for every set of services or applications that you enable.
After finding the problematic application, you can keep it disabled, uninstall it or update it to the latest version in order to fix the problem.
Solution 8 – Restore Windows
If this error started appearing recently, you might be able to fix it by restoring your system. To do that, you need to use System Restore feature. This is a useful tool and it allows you to restore your system to the previous state. To use this tool, you need to do the following:
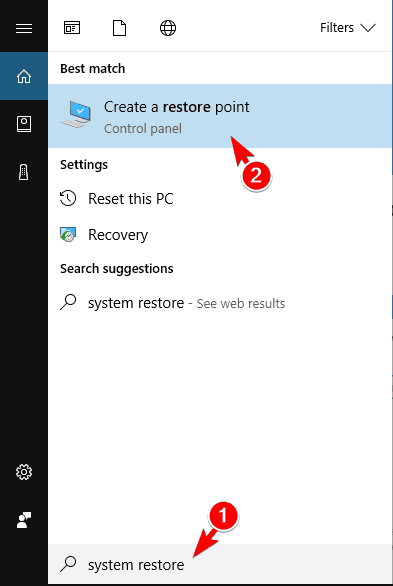
- Press Windows Key + S and enter system restore. Choose Create a restore point from the menu.
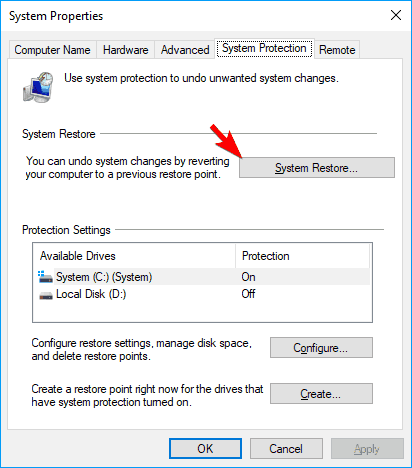
- System Properties window will now appear. Click on System Restore button.
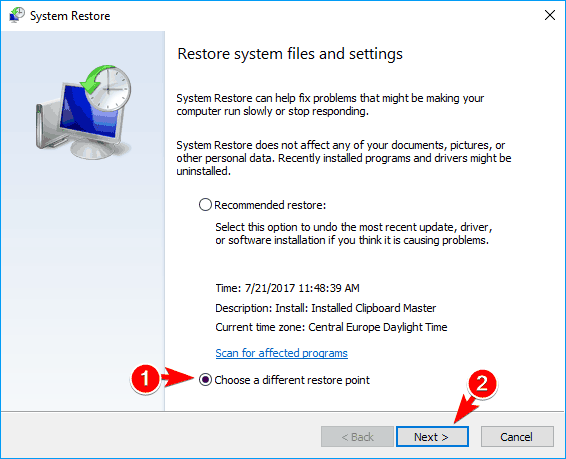
- When System Restore window opens, select Choose a different restore point and click on Next.
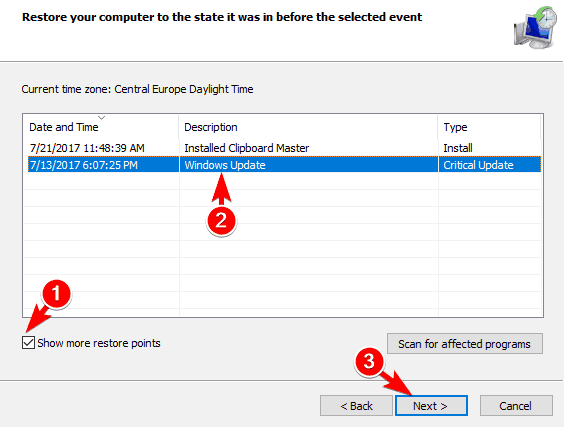
- Check Show more restore points option and select the desired restore point. Click Next to proceed.
- Follow the instructions on the screen to complete the restoration process.
Once the restore process is finished, the error should be resolved completely. Keep in mind that this method can cause you to lose any recently saved files, so you might want to back them up before restoring your system.
Solution 9 – Reset Windows 10
If the problem still appears, you might want to consider resetting Windows 10. We have to warn you that this process is similar to clean install, so it will remove all applications and files from your system drive. To avoid file loss we strongly advise you to create a backup before resetting Windows 10. In addition to backup, you might also have to create a Windows 10 installation media. You can do that with ease using Media Creation Tool. After backing up your files, you can reset Windows 10 by following these steps:
- Open Start Menu, click the Power button, press and hold the Shift key and choose Restart from the menu.
- Choose Troubleshoot > Reset this PC > Remove everything.
- If prompted to insert installation media, be sure to do so.
- Select your version of Windows and choose Only the drive where Windows is installed > Just remove my files.
- Review the changes that reset will make. Click on Reset button to start.
- Follow the instructions on the screen to complete the reset.
After resetting your PC, check if the problem still appears. If not, install all your applications again and move your files from the backup. This is a drastic solution since it will remove all your files from the system drive, so use it only if other solutions can’t fix the problem.
Attempt to release mutex not owned by caller message and ERROR_NOT_OWNER error are system errors and they can cause certain problems on your PC. Fortunately for you, these errors are relatively simple to fix and you should be able to fix them by using one of our solutions.
READ ALSO:
- Fix ‘Your OneDrive folder can’t be created in the location you selected’
- How to fix “This is not a valid action for footnotes” MS Word Error
- Fix: “This plug-in is not supported” error in Chrome
- How to fix ‘E: is not accessible, access denied’ error message
- Unable to download files from the internet in Windows 10 [Fix]

