Remote Desktop Can't Find The Computer? Fix It in 8 Steps
Make sure you have a stable internet connection
4 min. read
Updated on
Read our disclosure page to find out how can you help Windows Report sustain the editorial team. Read more
Key notes
- This error might come up due to a weak internet connection, pending Windows update, or antivirus blocking the connection.
- To fix it, allow RDP through the firewall, enable RDP service, or clear the DNS cache.
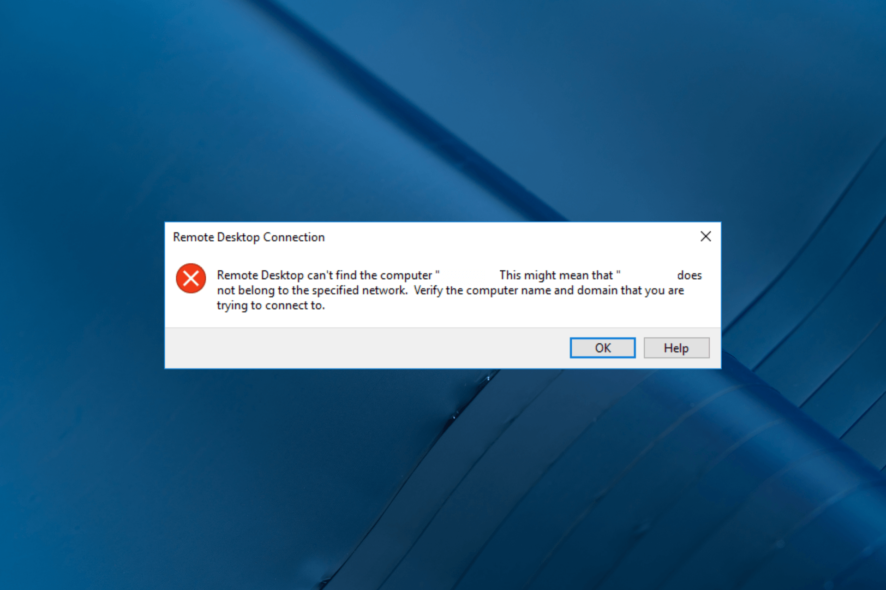
Remote Desktop is a powerful tool that enables you to access a computer from a remote location. However, sometimes you may encounter an error message stating that Remote Desktop can’t find the computer, which can be frustrating.
Why can’t Remote Desktop find the computer?
There could be various reasons why you are not able to connect to your computer remotely; some of the common ones are mentioned below:
- No Entry in the Hosts File – This error may occur if the system hosts’ files have no entry to your RDP server. Try adding it manually to fix the issue.
- Network connectivity issues – The weak internet connection could be why you cannot establish a connection with a remote PC. Try troubleshooting your network.
- DNS is not configured – If the DNS is not configured for the system, you might see this error. Configure DNS and try to access the remote device.
- Remote Desktop Connections Credentials cache – The credentials cache of RDP connections could also be the reason for the issue. Clear them to fix the problem.
Now that you know the reasons for the issue, let us move to the solutions.
How do I fix the Remote Desktop can’t find the computer error?
Before engaging in advanced troubleshooting steps, you should consider performing the following checks:
- Try restarting your computer and the router.
- Ensure no Windows update is pending.
- Check internet connectivity.
- Verify the host computer name.
If none of the above fixes worked for you, jump right into the detailed solutions to eliminate the error.
1. Allow the remote connections to the computer
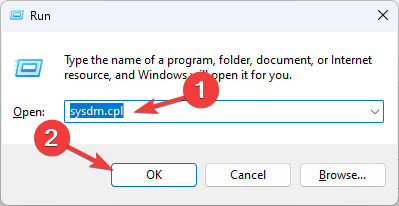
- Press Windows + R to open the Run dialog box.
- Type sysdm.cpl and click OK to open System Properties.
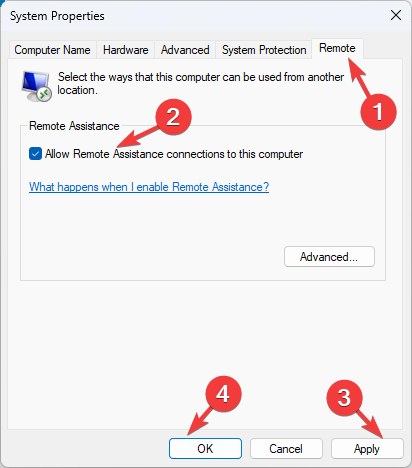
- Go to the Remote tab, under Remote Assistance, and select Allow Remote Assistance connections to this computer.
- Click Apply and OK.
2. Verify that Remote access is enabled
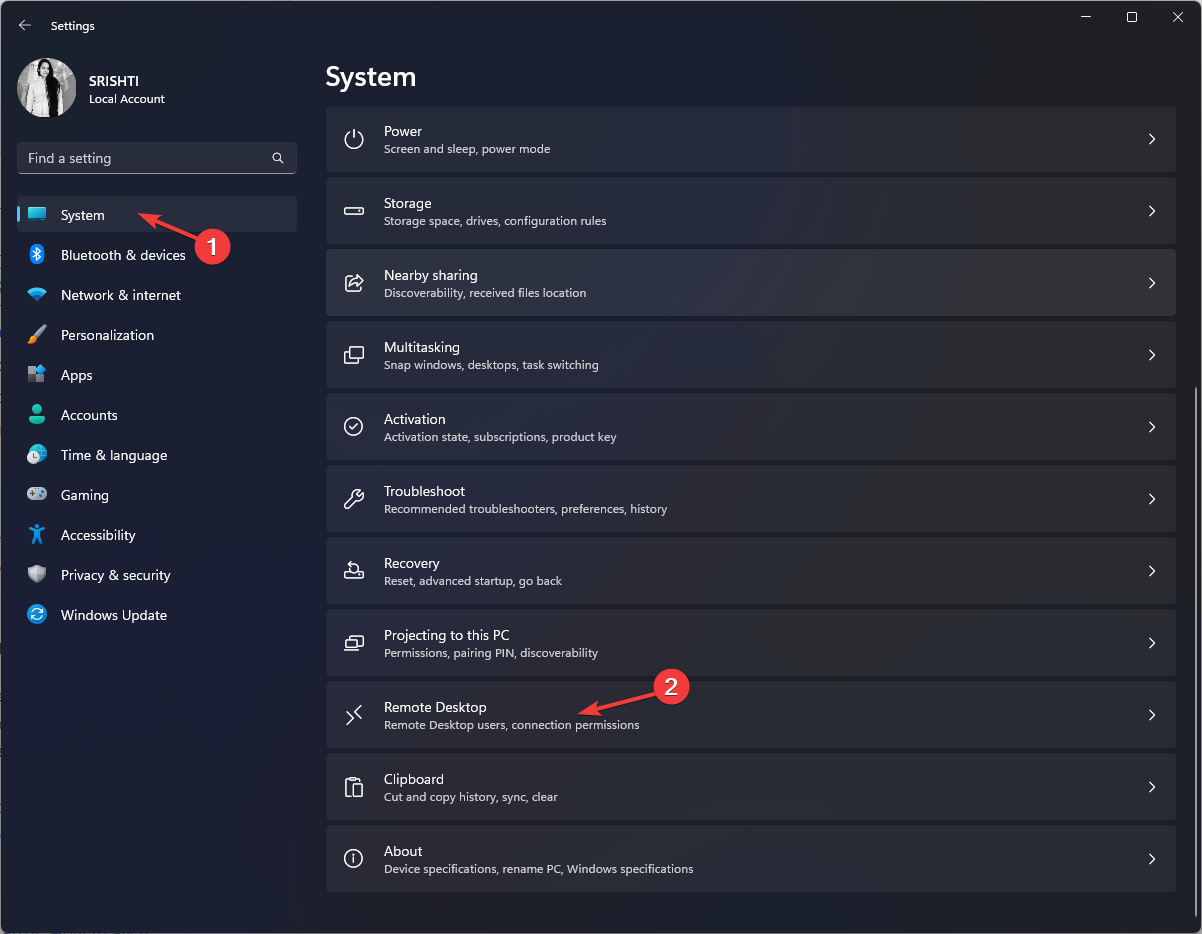
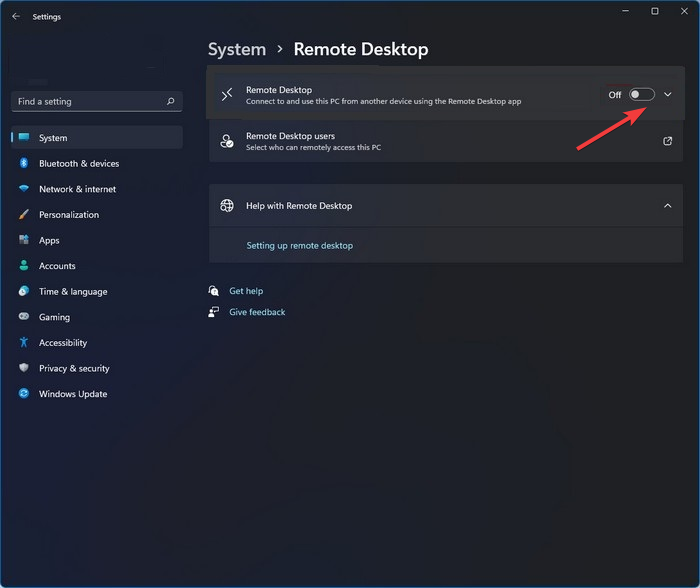
- Press Windows + I to open the Settings app.
- Go to System, then click Remote Desktop.
- Locate Remote Desktop and toggle on the switch to enable it.
- Click Confirm to save the changes.
Now check if you can access the remote computer.
3. Flush the DNS
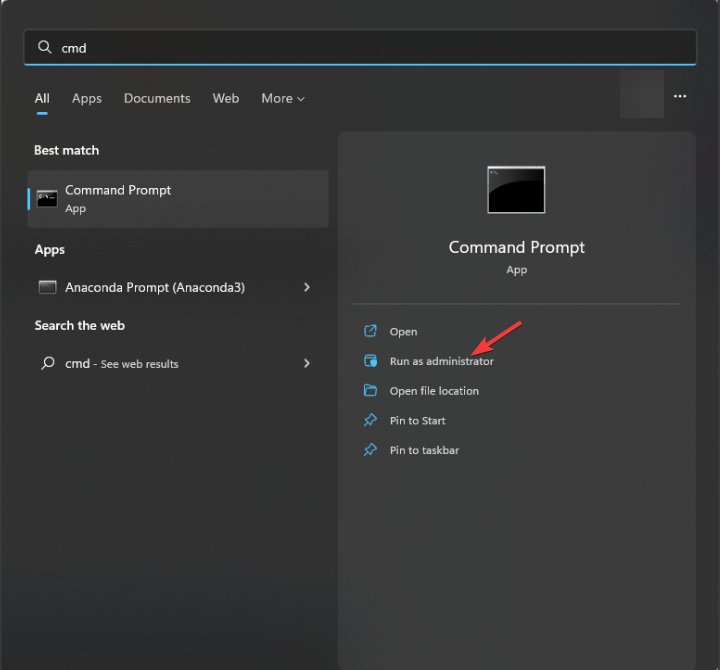
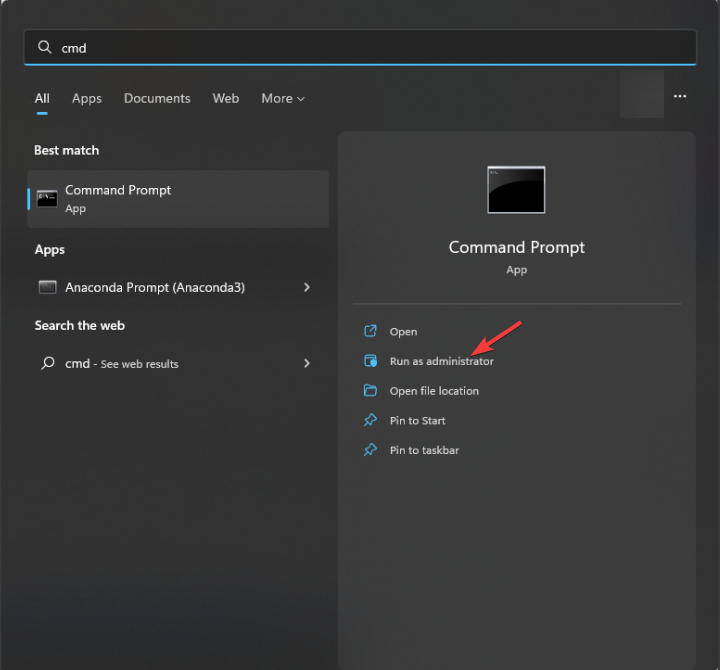
- Press the Windows key, type cmd, and click Run as administrator.
- Copy and paste the following command to flush DNS and hit Enter:
ipconfig/flushdns - Close the Command Prompt and restart your computer.
4. Delete the RDP connections history
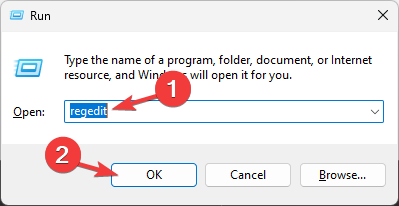
- Press Windows + R to open the Run dialog box.
- Type regedit and click OK to open the Registry Editor.
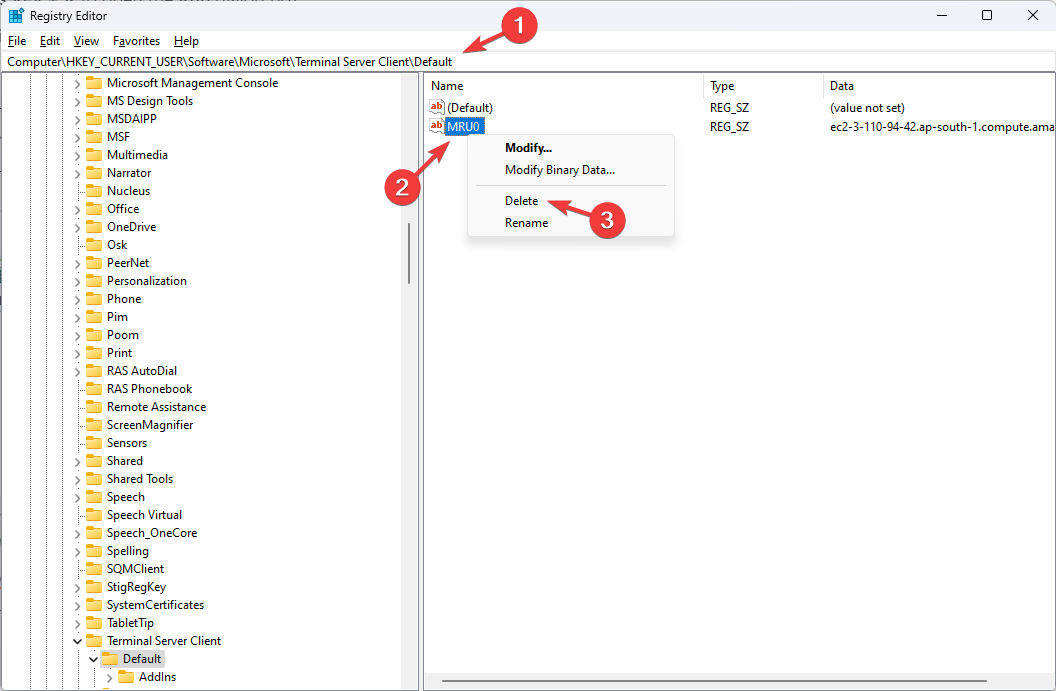
- Navigate to this path:
Computer\HKEY_CURRENT_USER\Software\Microsoft\Terminal Server Client\Default - Select MRU0, right-click it, and select Delete to remove all the entries.
- Close Registry Editor and reboot your PC.
5. Add Hostname to the Host file
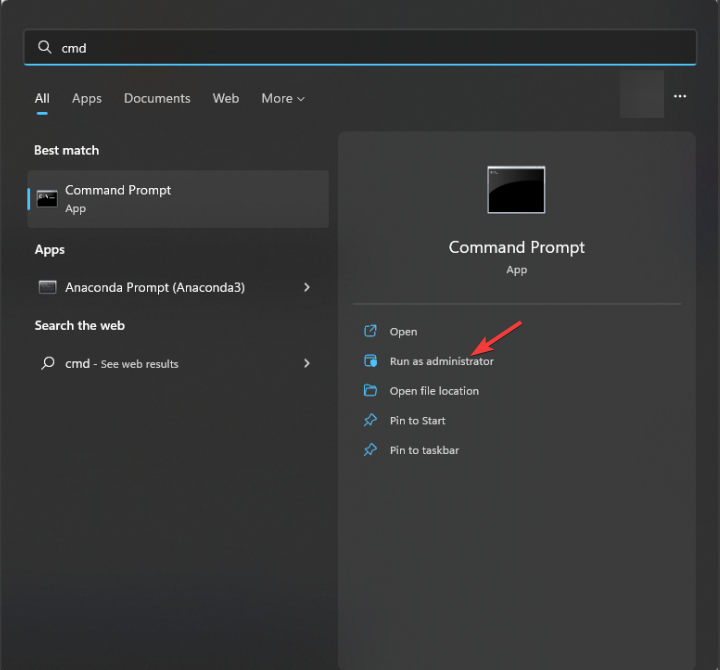
- Press the Windows key, type cmd, and click Run as administrator.
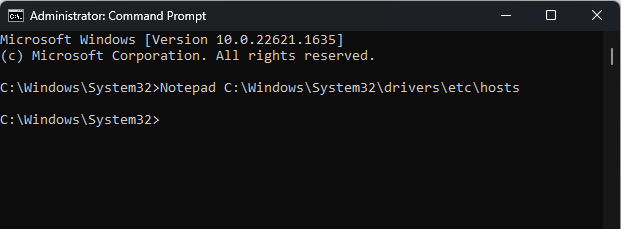
- Copy & paste the following command to open the hosts’ file in a notepad, and hit Enter:
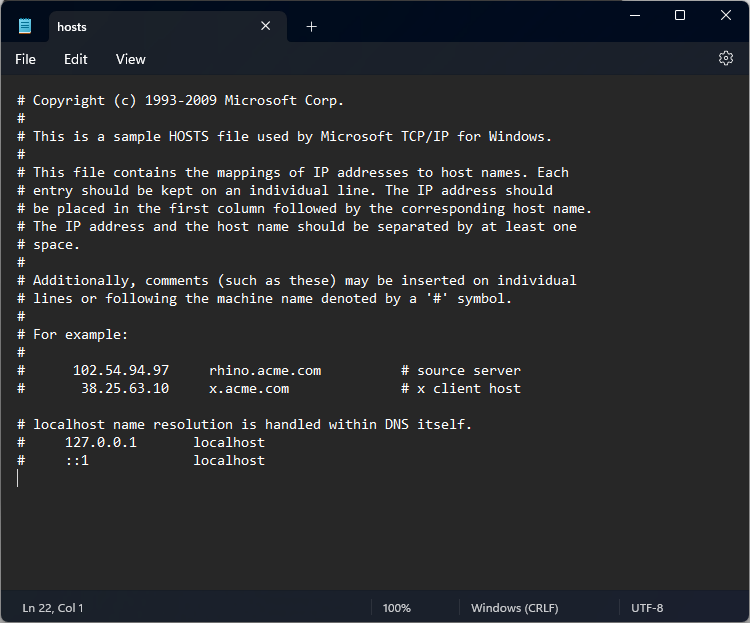
Notepad C:\Windows\System32\drivers\etc\hosts - You will have to add a string in the following format:
127.0.0.1 [hostname of the server] - Press Ctrl + S to save the changes. Close Notepad, and then Command Prompt.
6. Allow Remote connection through the firewall
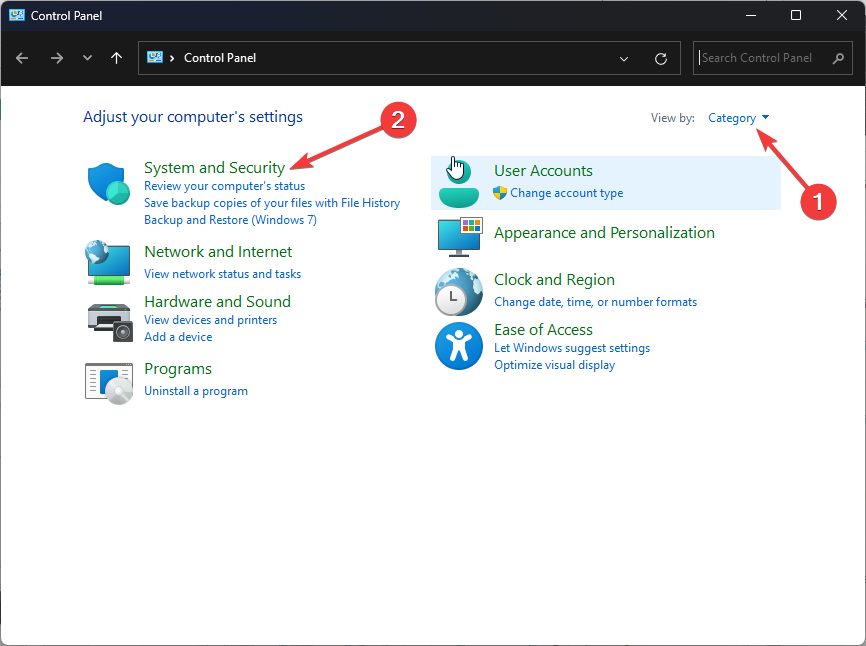
- Press the Windows key, type control panel, and click Open.
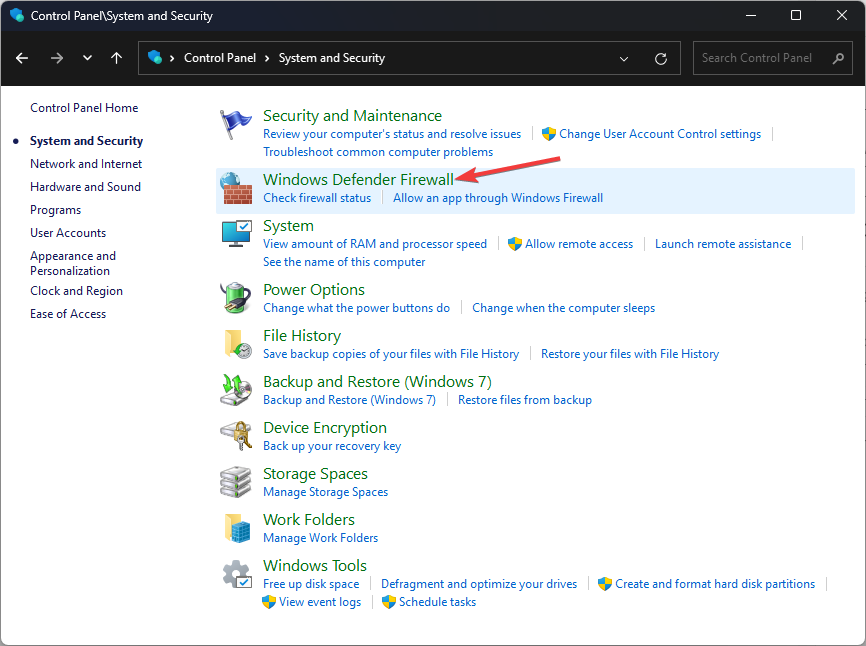
- Select View by as Category and click System & Security.
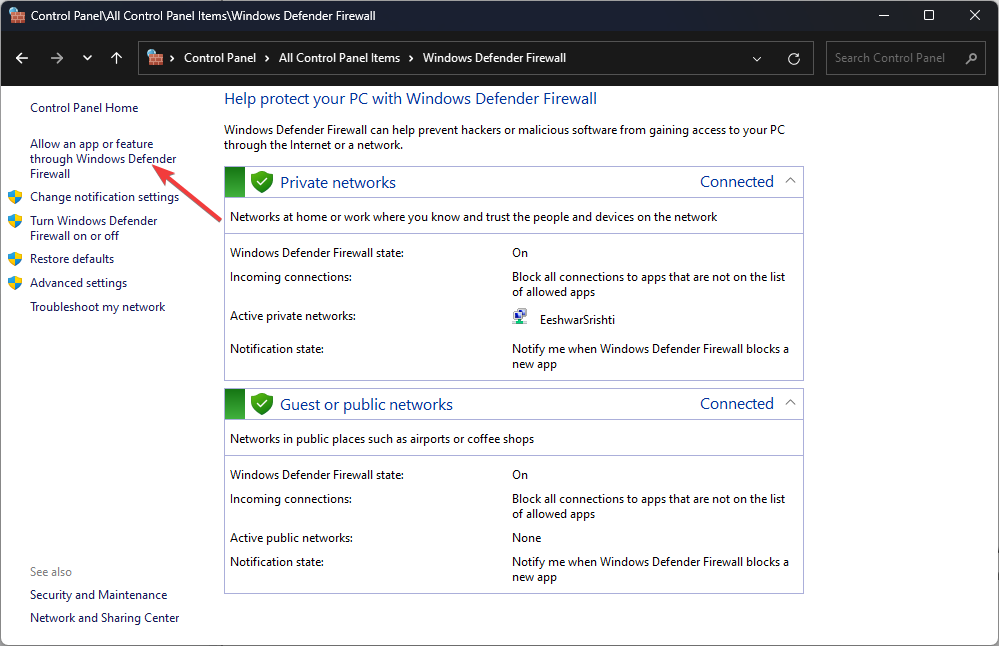
- Click Windows Defender Firewall.
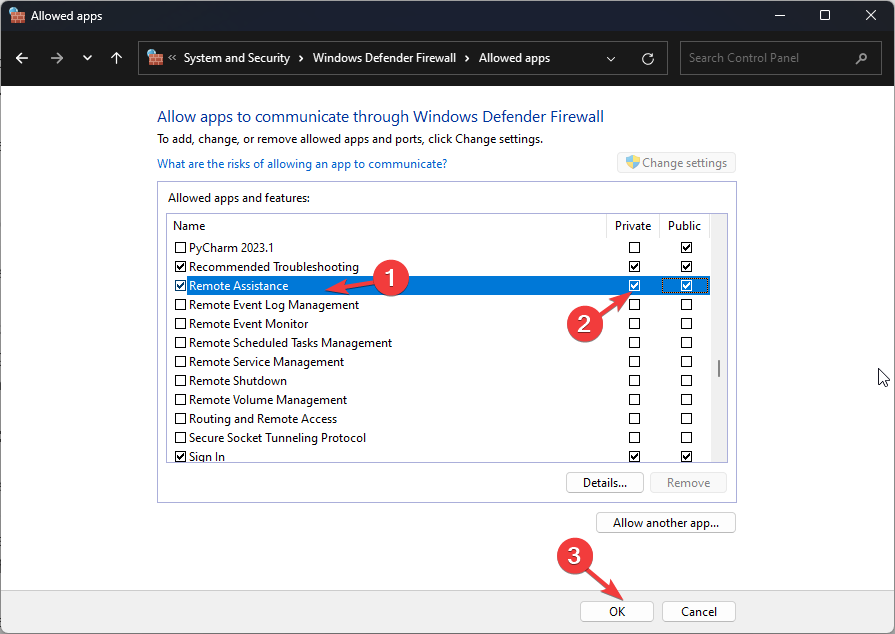
- Now click Allow an app or feature through Windows Defender Firewall.
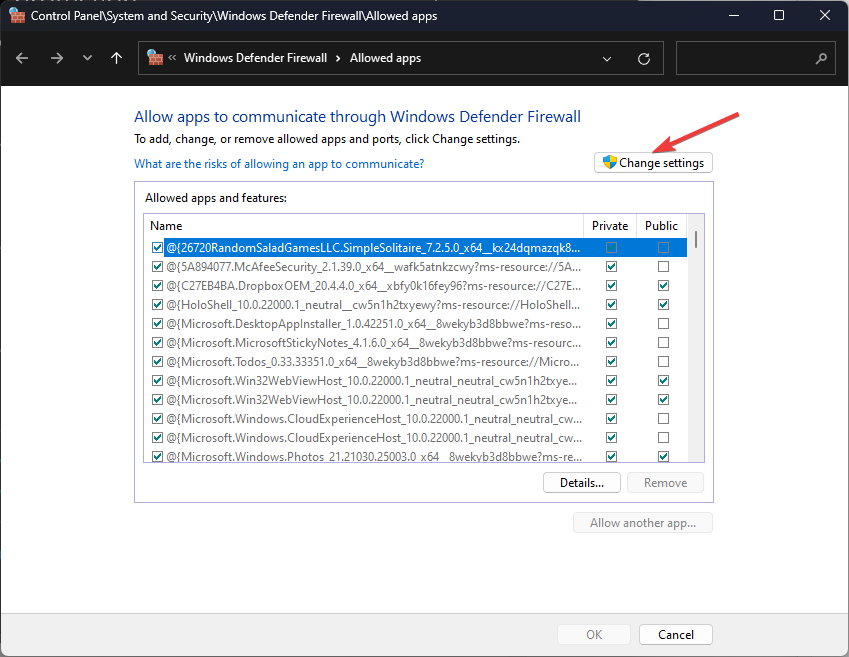
- Click Change settings.
- Locate Remote Assistance and Remote Desktop, select them, and make sure the Private & Public option for both is selected.
- Click OK to close the window.
7. Change the Port number
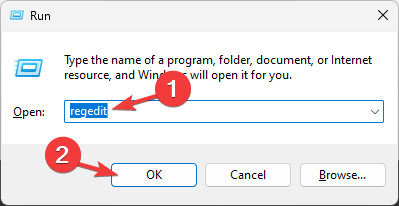
- Press Windows + R to open the Run window.
- Type regedit and click OK to open the Registry Editor.
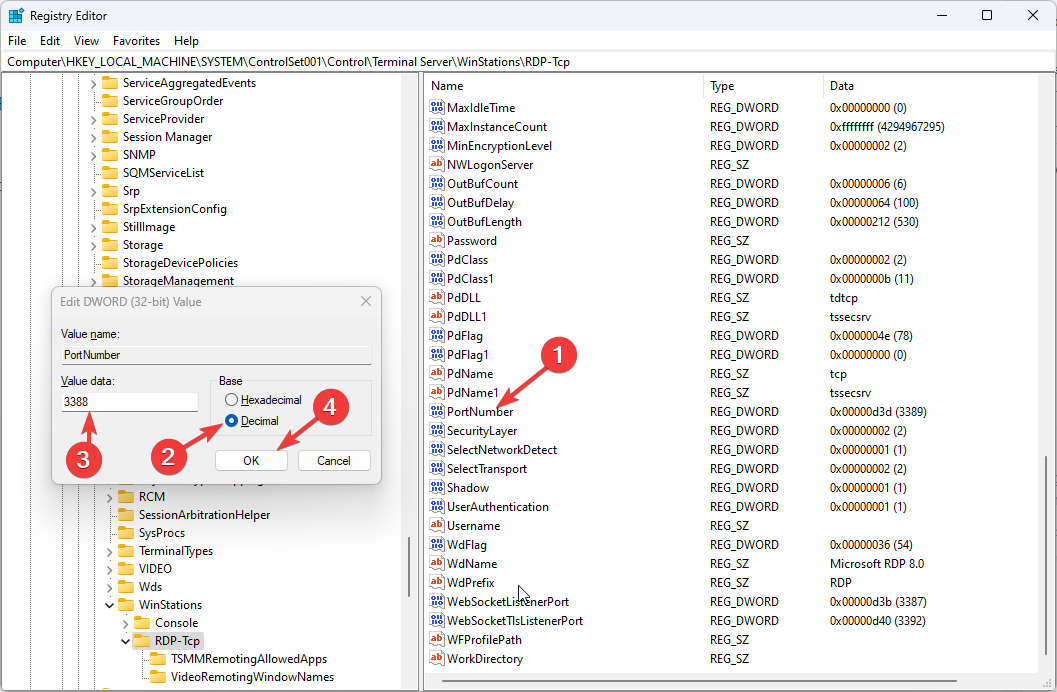
- Navigate to this path:
Computer\HKEY_LOCAL_MACHINE\SYSTEM\ControlSet001\Control\Terminal Server\WinStations\RDP-Tcp - Locate and double-click PortNumber.
- Change the Base to Decimal and the Value data from 3389 to 3388.
- Click OK and reboot your computer.
8. Enable the Remote Desktop Services
- Press the Windows + R to open the Run dialog box.
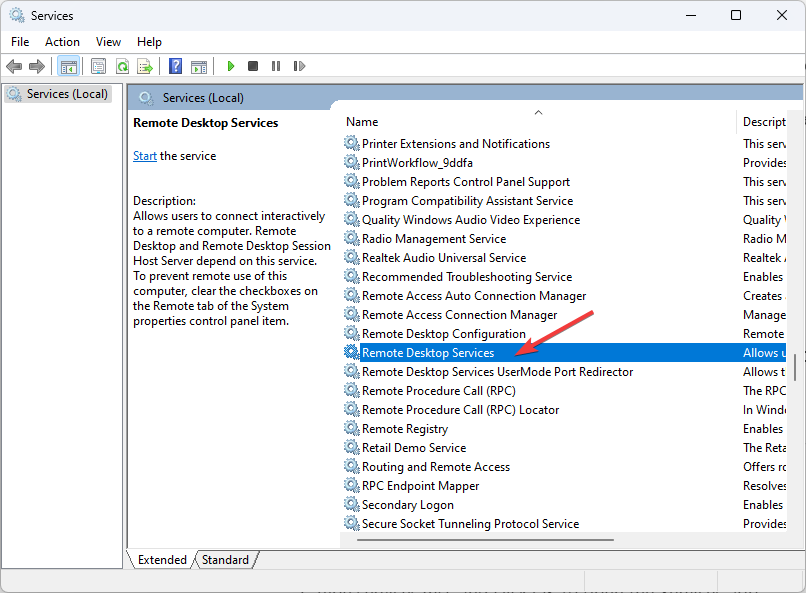
- Type services.msc and click OK to open the Services app.
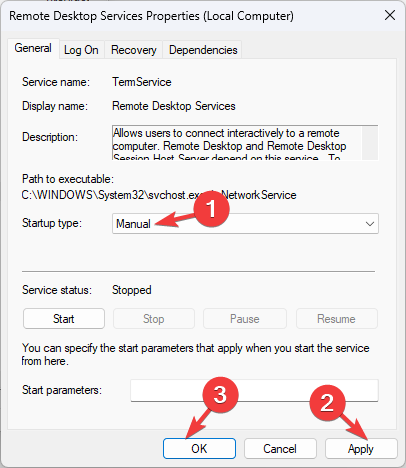
- Locate and double-click Remote Desktop Services to open Properties.
- Select Startup type as Manual and click Apply, then OK.
- Restart your PC to confirm the changes.
So, these are methods you can use to get rid of the Remote Desktop can’t find the computer error. If you have any questions or suggestions, please let us know in the comments section below.





User forum
0 messages