SMART Status Bad Error: Main Causes & How to Fix it
Disable the SMART status bad error from BIOS to troubleshoot
Key notes
- The SMART status provides information about the drive's overall health and can detect potential issues before they lead to data loss or drive failure.
- The error is mainly triggered due to hardware failures, bad sectors on a drive, power supply issues, and so forth.
- Creating a backup of essential files is of great essence because the drive may fail at any time.
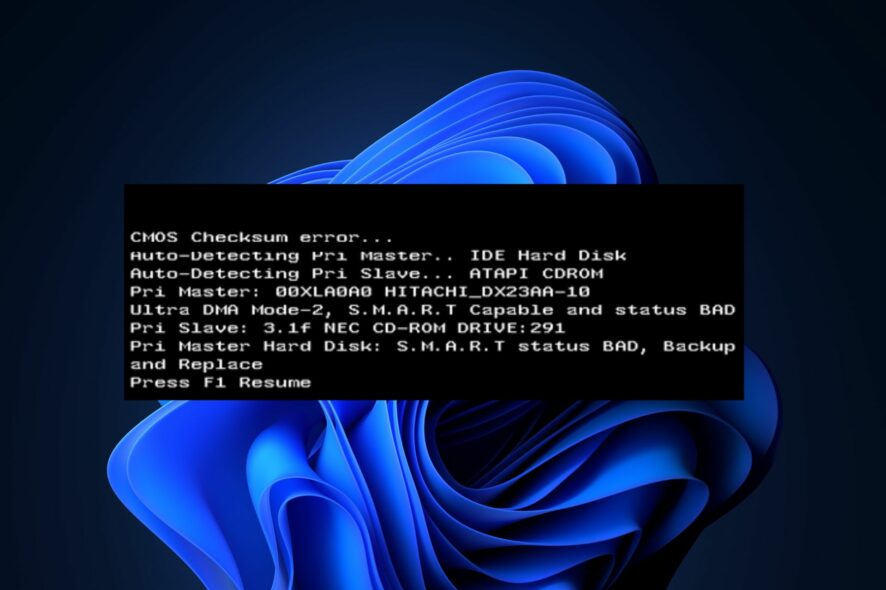
Some of our readers have recently reported that they are stuck with the SMART status bad error but don’t know what triggered the error in their HDD and SSD or how to fix it.
In this article, we will take you through the leading causes of the error and how to resolve the issue to prevent potential data loss or drive failure.
What causes the SMART status bad error?
A variety of factors can cause the SMART status bad error. Below are some of the common reasons as reported by users:
- Hardware failure – The SMART status bad error can occur due to physical issues with the hard drive or SSD.
- Power supply issues – Some readers claim that they started getting the SMART status bad error due to an unstable power supply.
- Bad sectors – When the SMART system detects many bad sectors, it may trigger the SMART status bad error.
- Overheating issues – High temperatures can damage the components of a hard drive or SSD, leading to increased error rates and potential drive failure.
It is important to note that the specific cause of the SMART status bad error may vary depending on the individual situation. Sometimes, a drive can fail even if SMART does not report any errors.
How can I fix the SMART status bad error?
Consider performing the following checks to salvage what’s left of your drive:
- Immediately back up any critical files and data stored on the drive. You can check our detailed guide for the best backup software for Windows 11.
- Run drive diagnostic tools to analyze the SMART data and provide more detailed information about the specific issue.
- Get the drive replaced if the warranty period expired.
Having confirmed the above checks, if you require further assistance, below are detailed instructions on how to fix the SMART status bad error. You will also need a bootable drive nearby to help you.
1. Disable the SMART system from BIOS
- Restart your PC and press F2, Del, Esc, or F10 (depending on the model of your PC) to access the BIOS/UEFI settings.
- Navigate to the Advanced Settings section and select SMART settings.

- Then, click on SMART self-test.

- The setting is enabled by default. Now, select the Disable option to turn off the SMART setting.
It’s important to note that disabling the SMART status bad error from the BIOS is not recommended by manufacturers and does not hinder drive failure.
However, you can disable this setting if you have your data backed up already or are not worried about the data on the drive.
2. Run the CHKDSK Utility
- Press the Start button, type cmd in the Search box, and choose Run as administrator.
- Next, type the following command (replace D with your drive letter) and press Enter to run it:
chkdsk d: /r
- Follow the on-screen prompts to restart your PC.
However, if your Windows OS can no longer launch the desktop, you can use an installation disc or drive to boot it:
- Insert the installation DVD or USB, then click on Repair your computer.
- Now, click on Command Prompt.

- Next, type in the command and press Enter:
chkdsk d: /r
The Check Disk Utility (CHKDSK) can be used to check and fix any bad sectors on your hard drive.
And that’s it on how to fix the SMART status bad error. However, if you receive a SMART status bad error, it is crucial to take it seriously and take appropriate action to safeguard your data.
Additionally, you can explore our detailed guide for tips to apply if Windows 10/11 cannot be installed on your Disk.
Finally, some readers have found our article on Windows 11 not recognizing SSD helpful. It might be worth a check for you too.
If you have any questions or suggestions, do not hesitate to use the comments section below.
Read our disclosure page to find out how can you help Windows Report sustain the editorial team. Read more


Improve this guide


User forum
0 messages