SSD Not Showing up in Windows 11: How to Get it Detected
An effective fix for this is to make some quick changes in BIOS

Several users have reported that SSD is not showing up in Windows 11 or it’s not recognized. If you connect the SSD for the first time, probably the disk is either not yet initialized or formatted. But for SSDs already in use, the problem lies elsewhere.
Before trying anything else, connect the SSD to another port, or try connecting it to another PC or port.
What can I do if SSD is not showing up on Windows 11?
1. Initialize the SSD
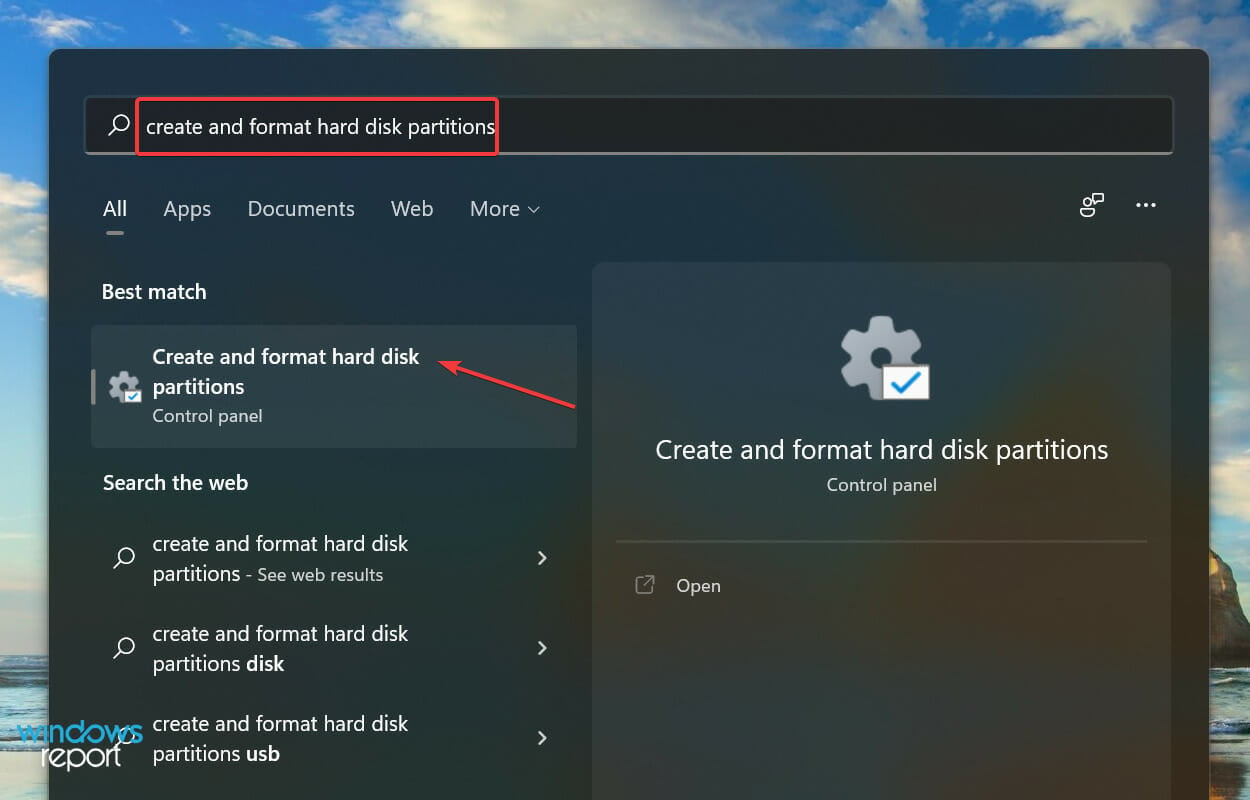
- Press Windows + S to launch the Search menu, enter Create and format hard disk partitions in the text field at the top, and click on the relevant search result that appears.

- Check if the problematic SSD has a black bar at the top and says Not Initialized. If that’s the case, right-click on it and select Initialize Disk from the context menu.

- Select the desired partition style, i.e., either MBR or GPT. We recommend selecting GPT since it allows you to create more partitions, but there’s a drawback, too; it’s not recognized by Windows 8 and earlier versions.

- Once the SSD is initialized, right-click and select New simple volume from the context menu.

- Click on Next to proceed.

- Enter the volume size in MB. We recommend you leave the default entry as is since it’s the maximum volume size and click Next.

- Choose a drive letter from the dropdown menu, and click Next.

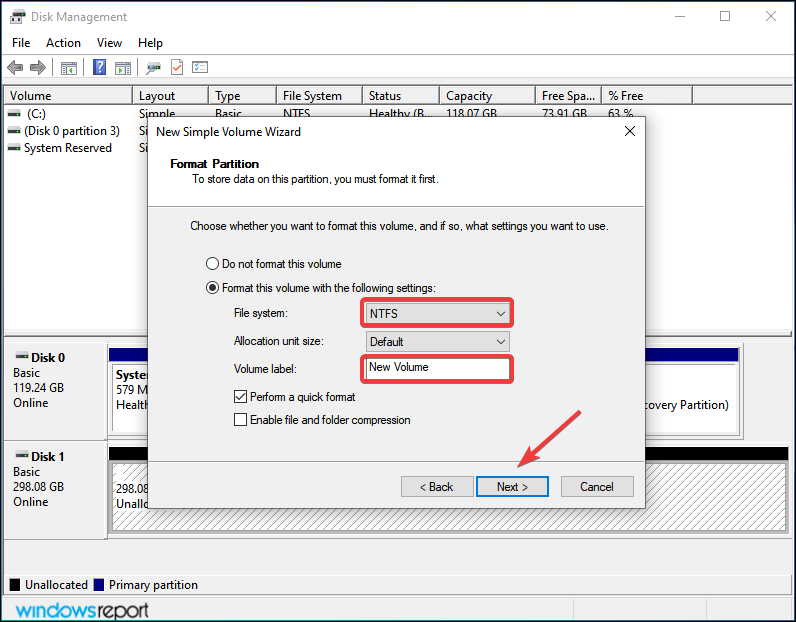
- Next, select a file system and volume label for the SSD, and click Next. If you are creating a volume for the first time, we recommend using the default entries on every step.

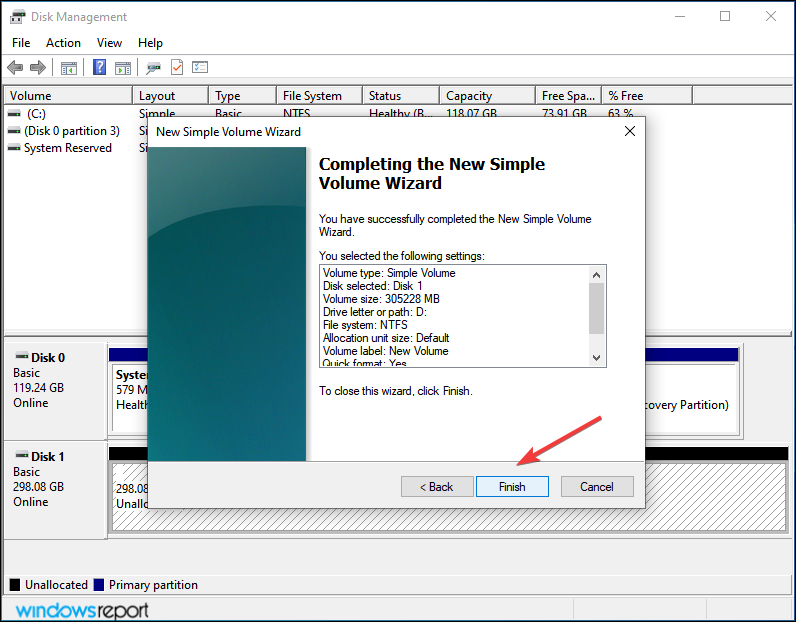
- Finally, verify the details and click Finish.

If an SSD has not been initialized or the data on it has corrupted for some reason, Windows 11 won’t recognize the drive. In this case, initializing the drive and creating a new volume would help fix the issue.
2. Assign/change the drive letter
- Press Windows + S to launch the Search menu, enter Create and format hard disk partitions in the text field, and click on the relevant search result.
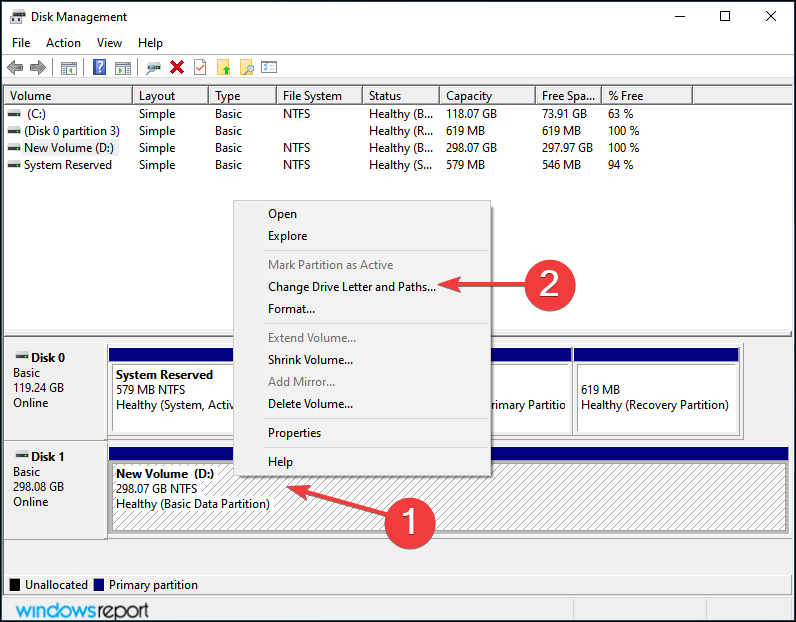
- Right-click on the SSD volume, and select Change Drive Letter and Paths from the context menu.

- Next, click on the Add button. Finally, click on Change if the drive already has a letter assigned.

- With the Assign the following drive letter option ticked, select the desired Drive letter from the dropdown menu and click on OK to assign it.

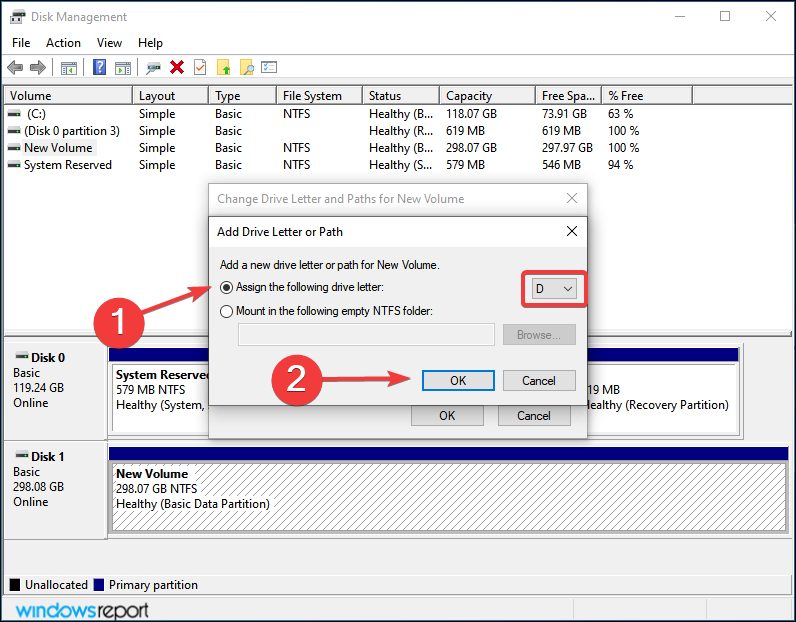
If the volume on the SSD has not been assigned a letter yet, it wouldn’t be listed in the File Explorer. In this case, assign a drive letter using the above steps, and Windows 11 will now recognize the SSD.
Even if it has been assigned one but has some issues, changing it should help.
3. Check BIOS settings
 NOTE
NOTE
- Shut down your computer, and then turn in back on. When the display lights up, hit Del or F12 key or the relevant key for your system manufacturer to enter the BIOS settings.
- Locate and click on Storage and then select the Storage Option entry.

- Now, set the SATA Emulation to AHCI Mode and save the changes.

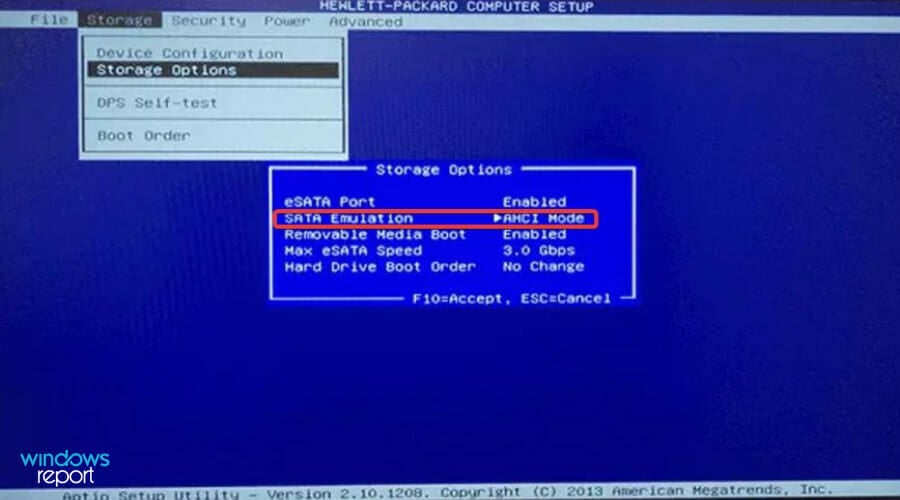
Once done, boot Windows 11, and the SSD should now be recognized. In case it’s still not listed, head to the following method.
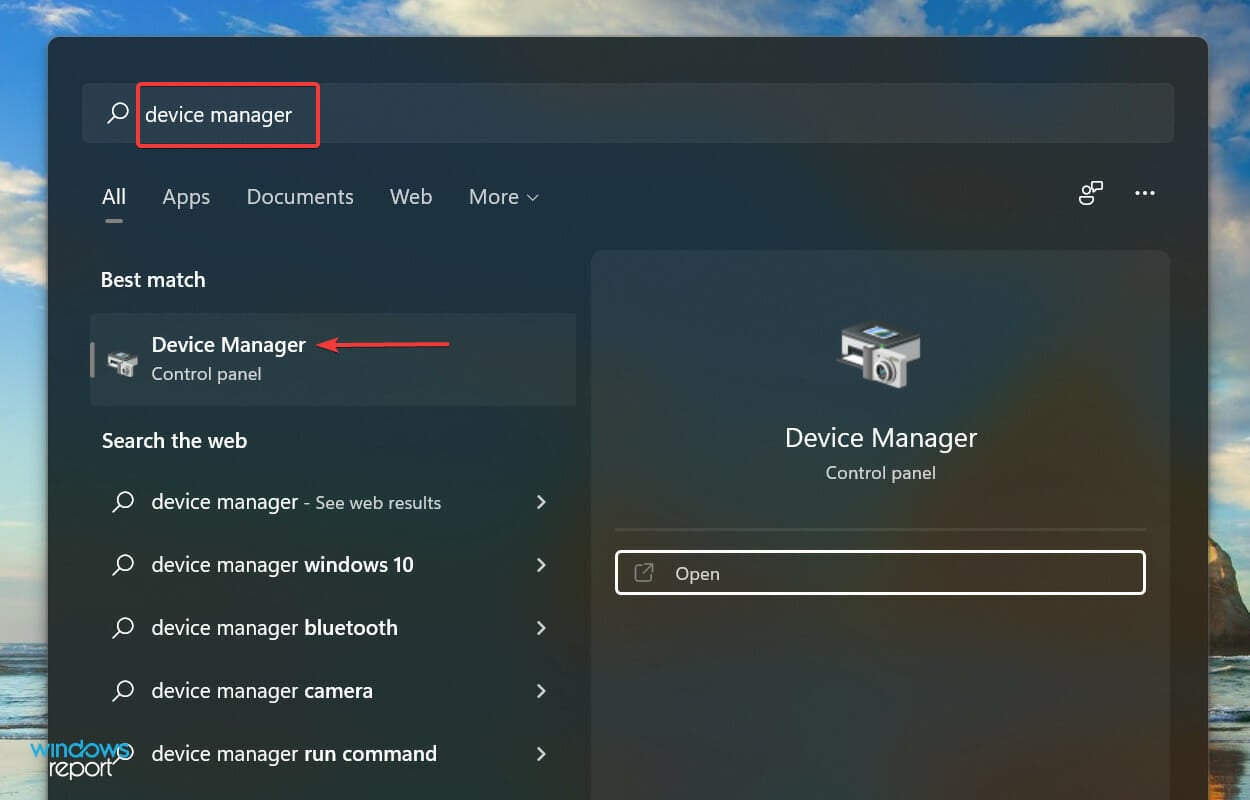
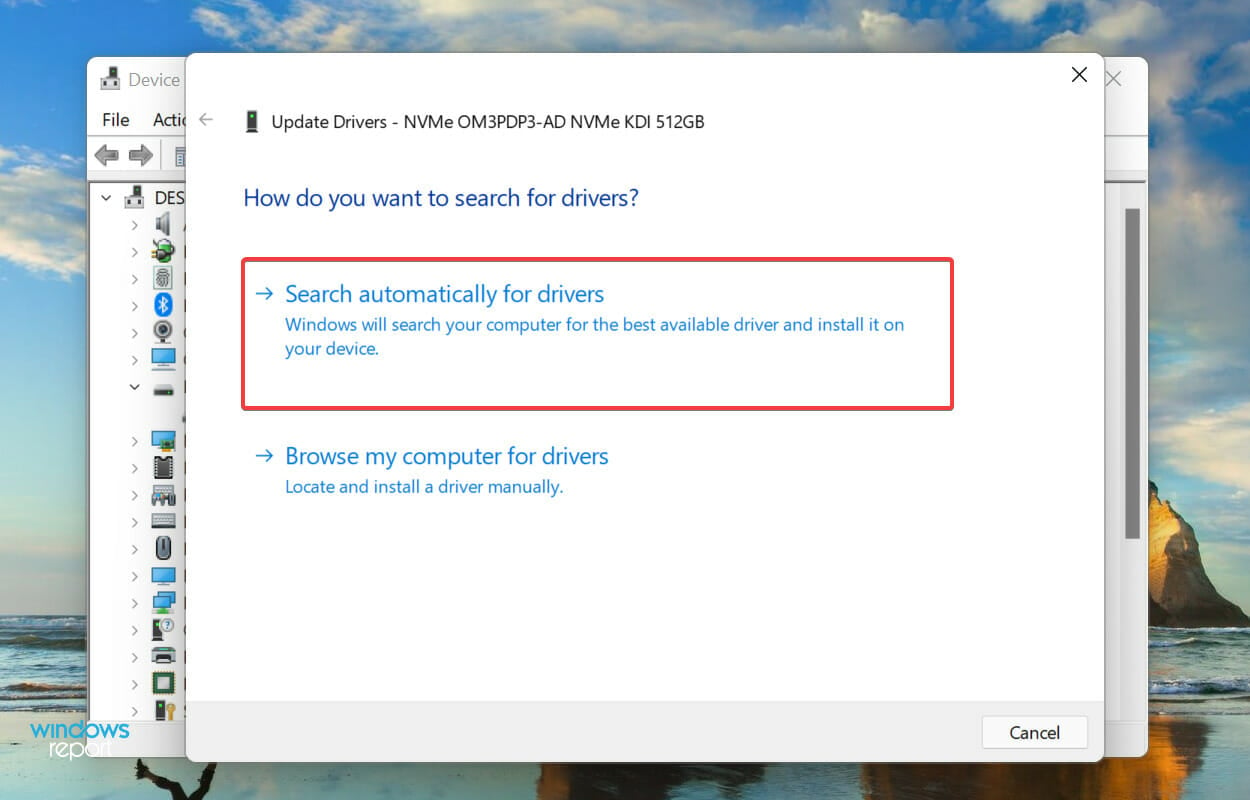
4. Update the SSD driver
- Press Windows + S to launch the Search menu, enter Device Manager in the text field at the top, and click on the relevant search result.
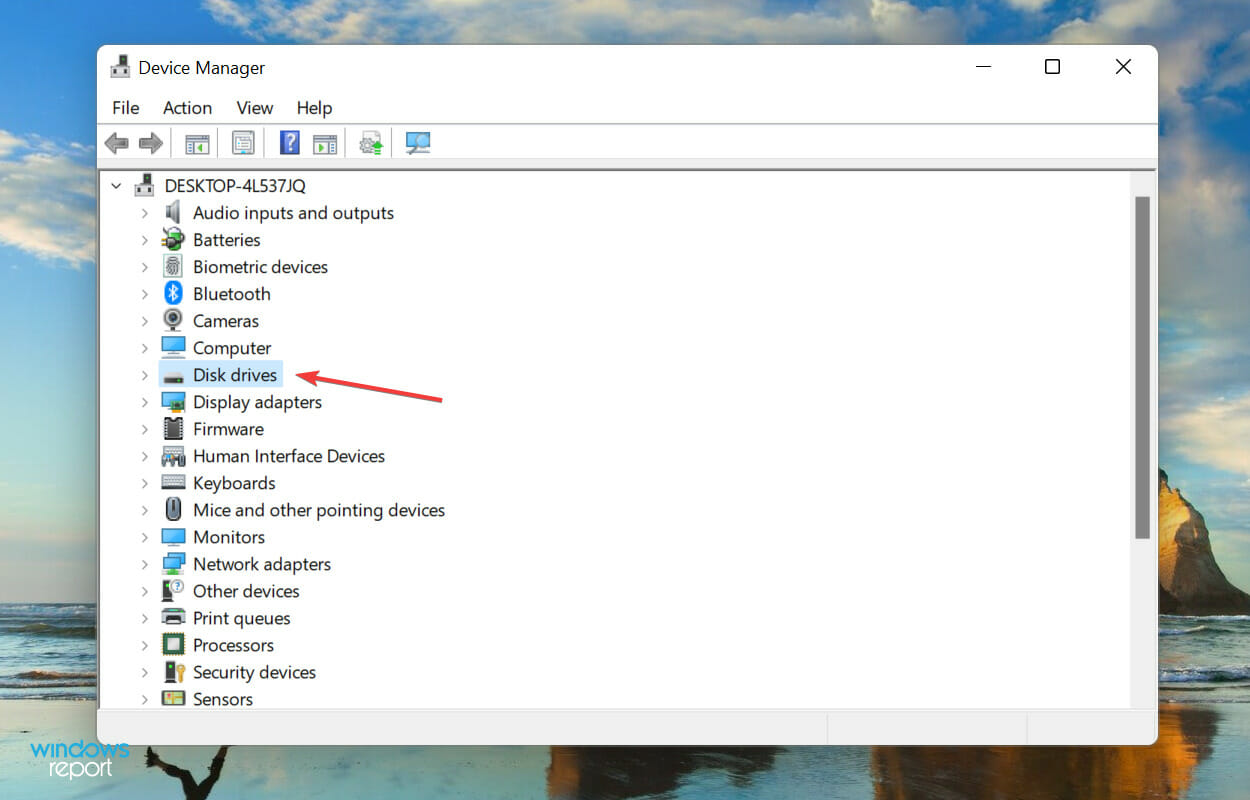
- Double-click on the Disk drives entry to expand and view the problematic SSD.

- Right-click on the SSD not being recognized and select Update driver from the context menu.

- Next, select Search automatically for drivers from the two options in the Update Drivers window.

- Your computer will now scan for the best available driver on the system and install it for the SSD.

Outdated drivers are known to cause several issues with the device, the SSD. Updating the driver enhances the device’s performance apart from introducing new features and eliminating previously known errors.
But, one of the drawbacks of using the Device Manager to install the driver manually is that it only scans the drivers stored on the system. So, the update process might not go through if you haven’t downloaded a newer version.
You can always use a reliable third-party app if the whole process sounds like too much trouble. We recommend using Outbyte Driver Updater, a dedicated tool that automatically scans the available sources for the latest version and keeps the installed drivers up-to-date.

Outbyte Driver Updater
Avoid serious PC issues and keep all your device drivers up to date with Outbyte Driver Updater.The above methods will eliminate any issues leading to Windows 11 not recognizing the SSD. By reaching this part of the article, either the error will be destroyed, or you will have discovered that the SSD is faulty.
Why is Windows 11 not recognizing the SSD?
We went through several forums where users shared the problem and their valuable input. And based on that, we identified several issues as to why the SSD is not recognized in Windows 11. They are listed below:
- Improper connections: The first thing to check if your SSD is not recognized on Windows 11 is the connection. If the SSD or the USB, in the case of an external drive is not connected correctly, you will encounter this issue.
- Disk space unallocated: Another reason for SSD not being detected on Windows 11 issue is unallocated disk space. This denotes that your programs cannot write on the drive. You can fix this by creating a new partition on the drive.
- No drive letter assigned: The drive letter is essential for your OS to communicate with your hard drive. So if Windows 11 setup doesn’t detect your SSD, you might need to assign or change its drive letter.
- Misconfigured BIOS settings: Sometimes, your BIOS settings might be set to the old IDE compatibility mode. This can cause the new SSD to not show up in Disk Management on Windows 11. The solution here is to change the SATA mode to AHCI.
- Outdated SSD drivers: Outdated drivers are the chief cause of many issues. So, it is not surprising that you can face this issue if your SSD drivers are not up-to-date; you need to update your drivers to get past the problem here.
Suppose you are, by any chance, able to identify the problem from the list, head to the appropriate method, and execute it. Otherwise, follow the steps in the sequence listed for quick troubleshooting.
Also, if you notice the hard drive missing after updating Windows 11, learn how to fix the problem.
Do not hesitate to tell us which fix worked or was the SSD was faulty in the comments section below.
Read our disclosure page to find out how can you help Windows Report sustain the editorial team. Read more


Improve this guide


User forum
2 messages