How to Update BIOS Without USB [Easy Steps]
Key notes
- Windows users need to update their system’s motherboard’s BIOS to function better and identify new hardware.
- You don’t have to update your system’s BIOS with a USB flash drive only, it is possible to do this using BIOS itself or BIOS updater utility.
- Updating BIOS is safer than installing or flashing a new BIOS because an incomplete installation can damage your motherboard.

If you don’t have a USB or a flash drive and you want to update your computer or system’s BIOS, don’t worry, because you don’t need a USB flash drive to complete this process.
All you have to do is download the BIOS Updater utility from the manufacturer’s website or go to the EZ Flash Utility in BIOS and select Internet.
After that, your computer will reboot, and the BIOS will be updated. Be careful! A botched update can damage the motherboard, especially if you choose the wrong version.
How can I update BIOS without a USB?
Use the Update utility
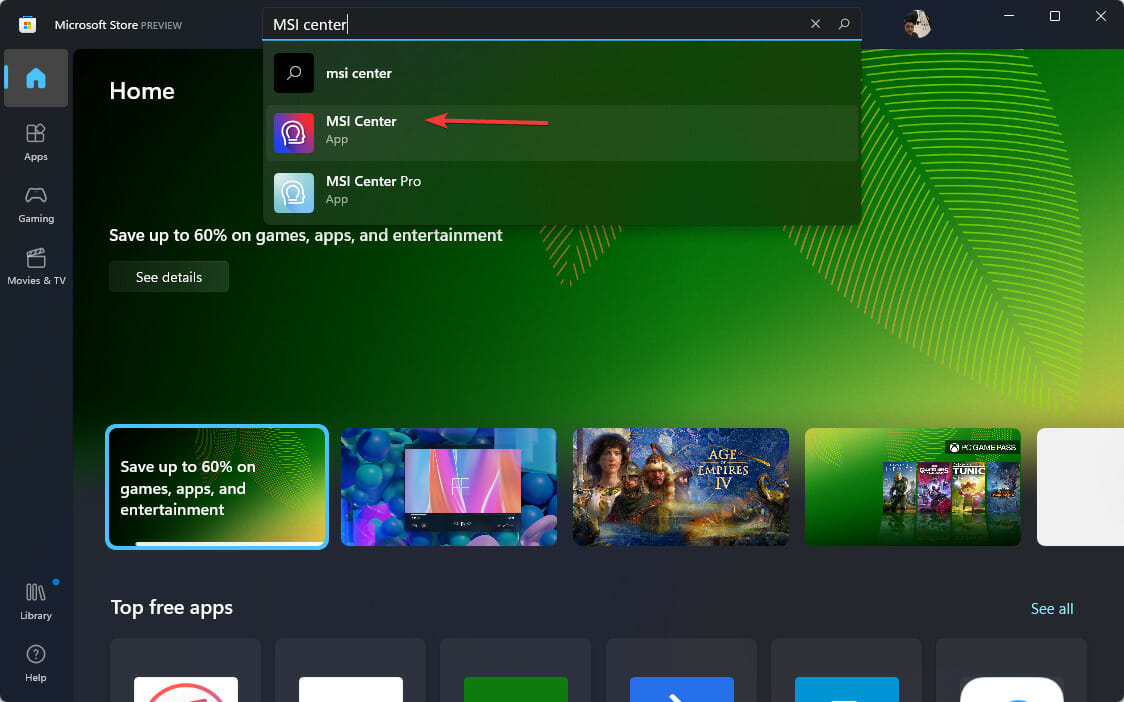
- Open Microsoft Store, type MSI center in the search bar then select it.
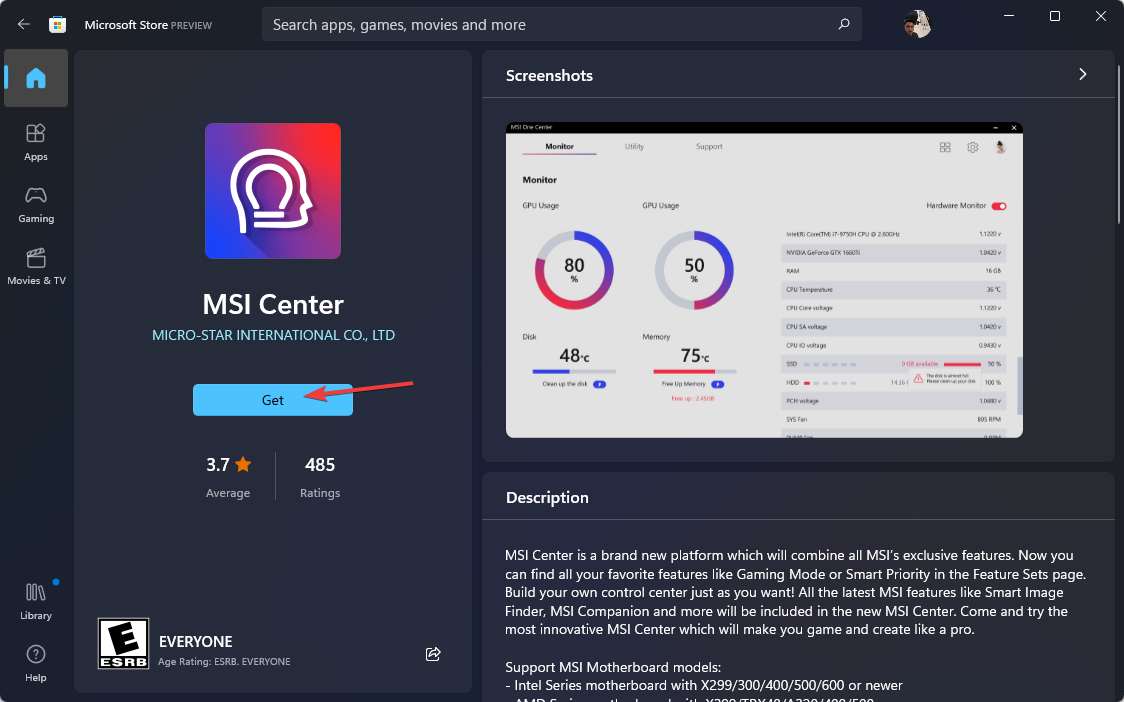
- Click on Get to download it.
- Now open the app, navigate to the Support tab, and select the Advanced option.
- Finally, select the BIOS update and wait for the process to complete.
There are several ways to update BIOS, but you only have two options if you don’t have a USB flash drive.
One is to use the motherboard manufacturer’s BIOS updater utility, and the other is to use the Internet, which we shall explain in the next method.
 NOTE
NOTE
2. Using UEFI firmware settings
- To begin, use the Windows + I keys to bring up the Settings menu.
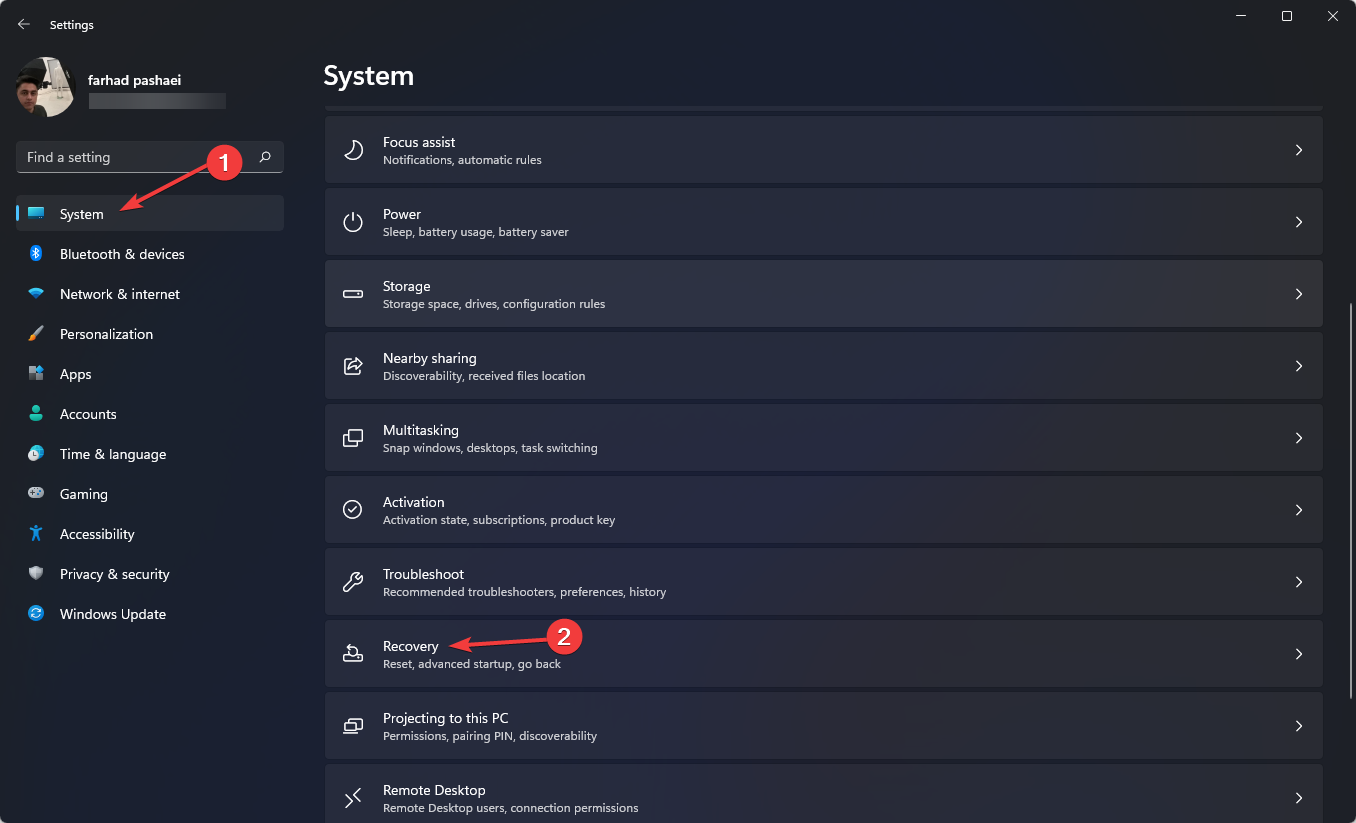
- On the left menu, pick System, then Recovery.
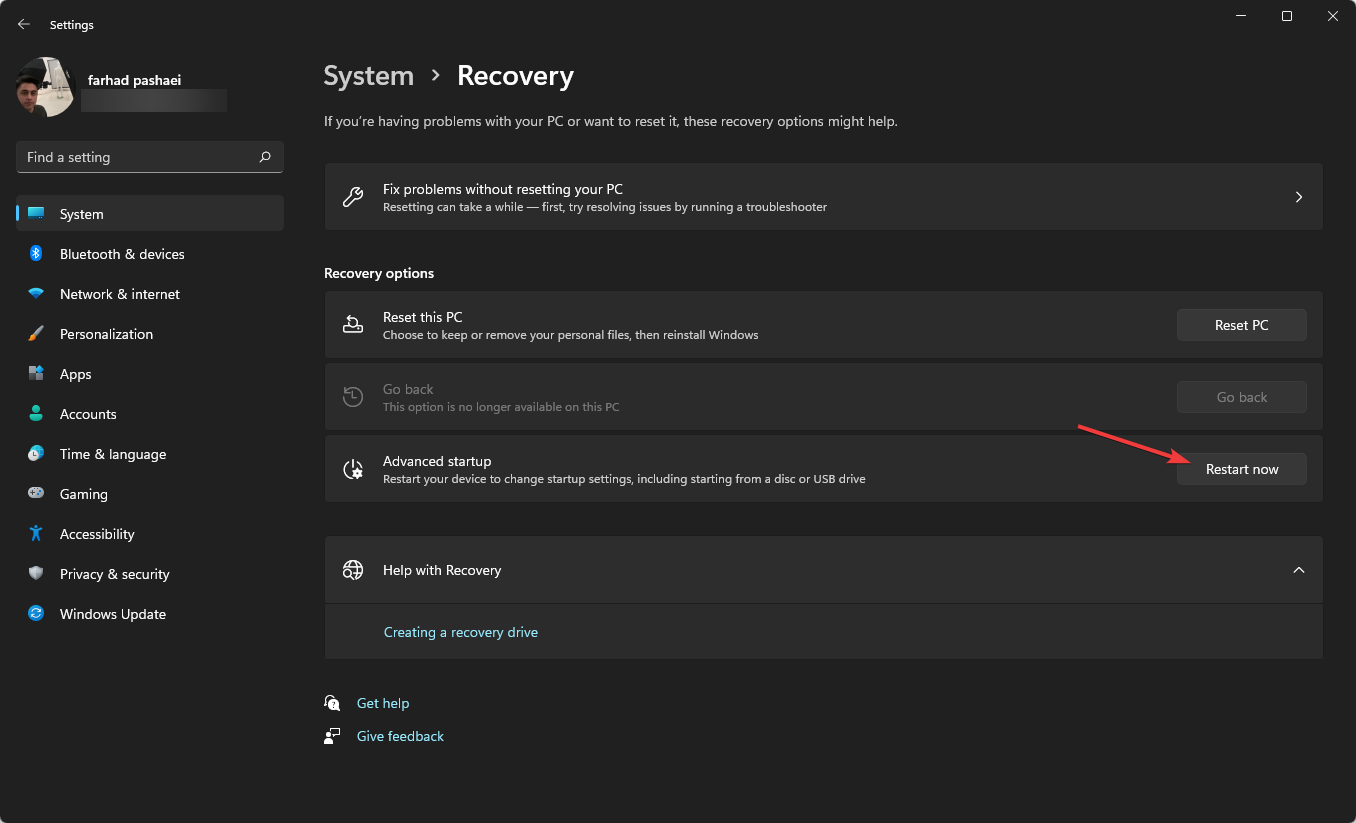
- After that, click on Restart now.
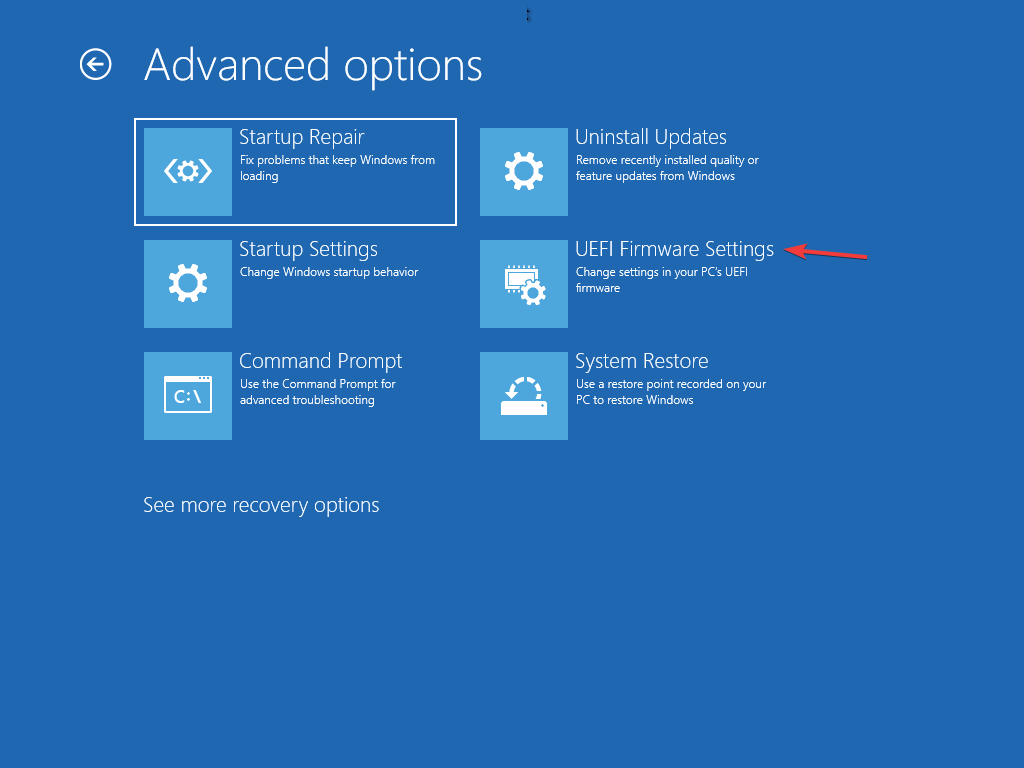
- Select the Troubleshoot option in the Advanced startup menu. After that, click on Advanced options then UEFI Firmware Settings.
- Enter Advanced Mode then, go to the Tool menu. after that, select Asus EZ Flash Utility, then press Enter.
- Select by Internet.
- Now, press the Left / Right arrow key to select your desired internet connection, then hit Enter.
- Follow on-screen instructions and let the update be completed.
Most UEFI BIOS motherboards can be updated using this method.
Is it dangerous to update BIOS?
Generally, Windows users don’t need to update their BIOS that often. Installing or flashing a whole new BIOS can be dangerous sometimes, and updating it is safer.
If anything goes wrong during updating or flashing your BIOS, it can end up damaging your motherboard completely.
You won’t see a huge change or improvement after updating your BIOS because the update doesn’t introduce any new features or a noticeable speed boost in your system.
What is the difference between UEFI and traditional BIOS?
UEFI stands for Unified Extensible Firmware Interface. It works exactly the same as a BIOS and both work as an interpreter between the computer hardware and the operating system.
Both are used at the computer startup and they initialize the hardware parts and the operating system. UEFI has one fundamental and basic difference.
UEFI stores all your data in an .efi file instead of the firmware. The data file is stored on the hard drive in a special partition named EFI System Partition (ESP), and it contains the boot loader.
It is recommended to update your BIOS once in a while to help the motherboard function better and identify new hardware parts such as RAM, CPU, etc.
💡 Read this article if your computer automatically enters BIOS mode.
And if you want tailored guides for your specific hardware, check this guide on how to update BIOS on Acer Swift 3 and these steps for updating the BIOS on ASUS laptops.
Summary
You can update your BIOS without a USB flash drive. Some motherboard manufacturers offer you up to three options to update your BIOS: BIOS/UEFI, DOS, and Windows.
Also, you may update your BIOS using DOS with a thumb drive, but it may be installed on a different and separate hard drive.
BIOS can be updated by Windows itself but it is not recommended because it’s dangerous and may ruin your system. This is also not supported by all motherboard manufacturers.
Read our disclosure page to find out how can you help Windows Report sustain the editorial team. Read more


User forum
0 messages