How to Upgrade From 32-Bit to 64-Bit Version on Windows 10
Do you know you can use the same license to upgrade
4 min. read
Updated on
Read our disclosure page to find out how can you help Windows Report sustain the editorial team. Read more
Upgrading from a 32-bit to a 64-bit version of Windows can provide significant performance improvements and enable you to utilize more RAM, which can be helpful if you often use modern applications or handle large files.
However, it is not a simple process, as it is not like installing a regular update; you need to clean install the 64-bit version of Windows 10 to upgrade it from 32-bit. Read on to learn the detailed steps!
How can I upgrade from a 32-bit to a 64-bit version of Windows 10?
 NOTE
NOTE
1. Check your PC’s compatibility
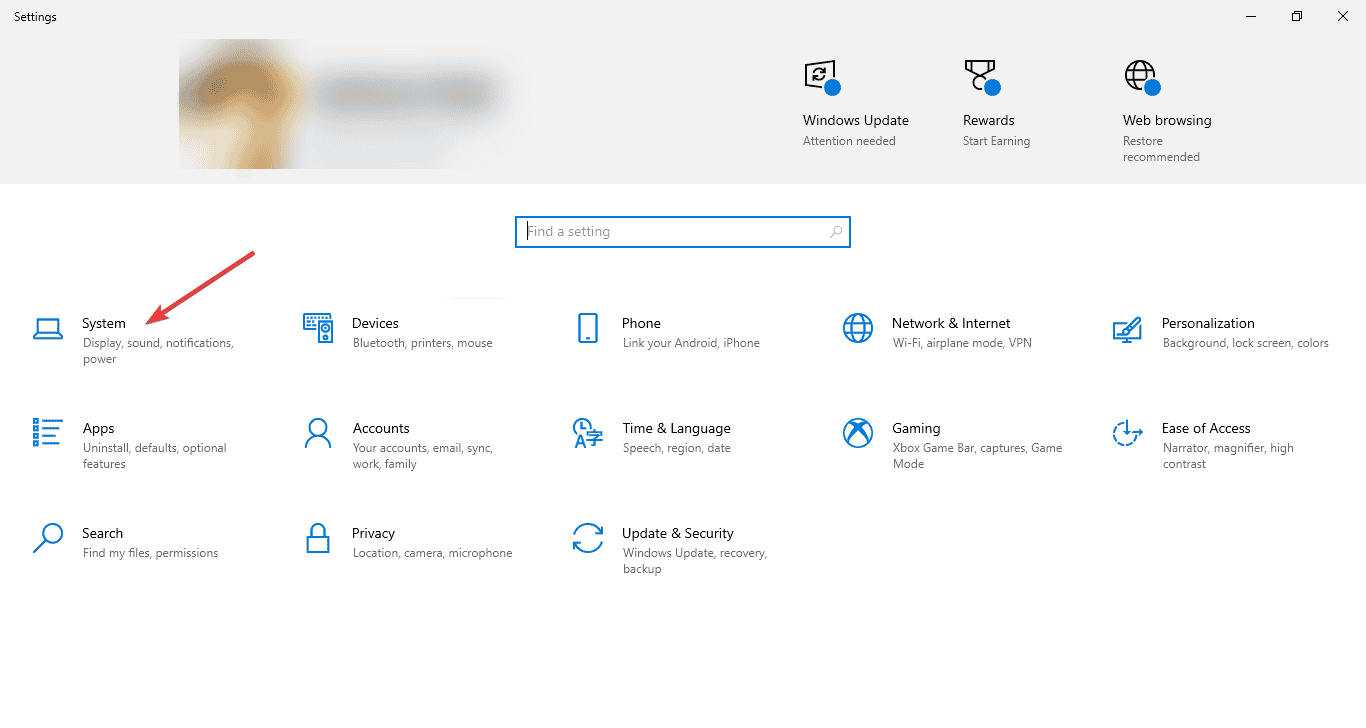
- Press Windows + I to open the Settings app.
- Go to System.
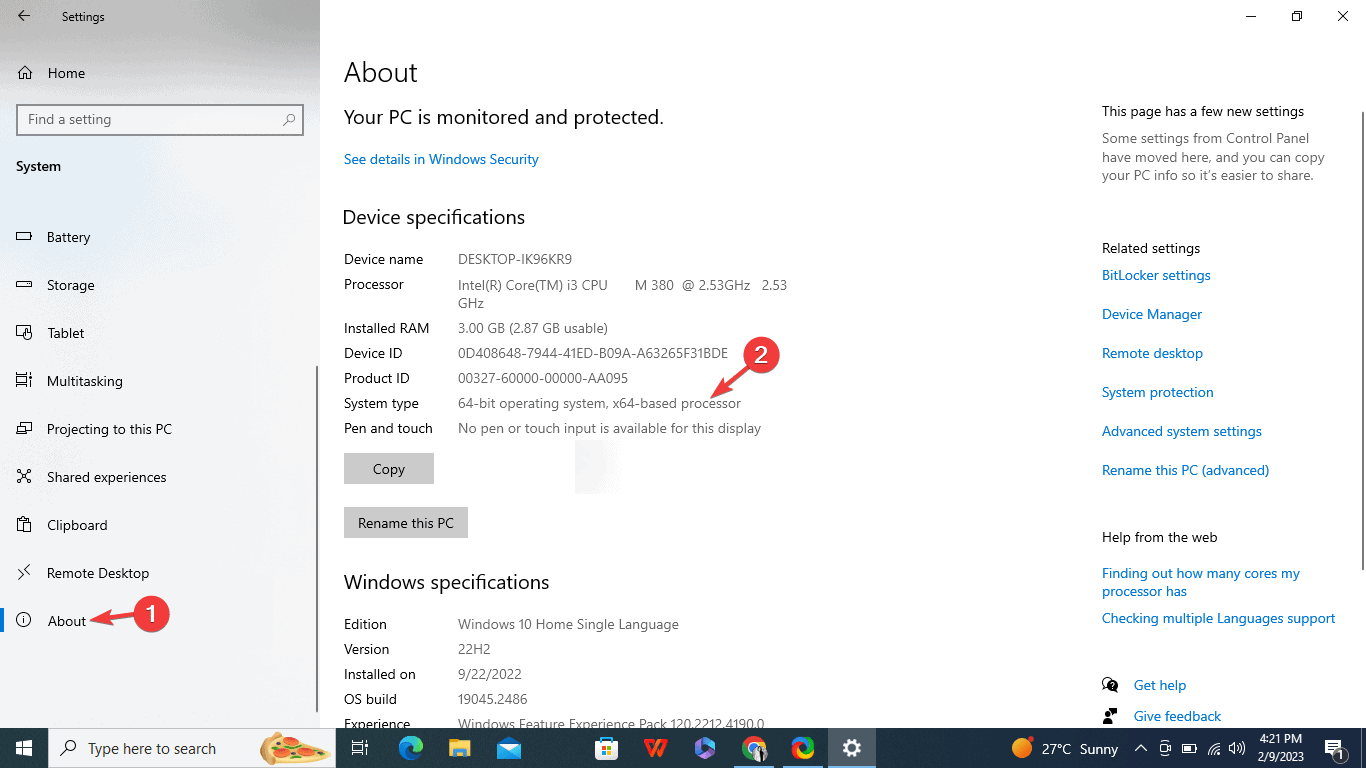
- From the left pane, select About.
- Under Device specifications, check System type. You might see one of these options:
- 32-bit operating system, x86-based processor – Your computer has a 32-bit processor and can’t be upgraded to a 64-bit operating system on Windows 10.
- 32-bit operating system, x64-based processor – Your computer has a 32-bit processor but can be upgraded to a 64-bit operating system on Windows 10.
- 64-bit operating system, x64-based processor – You already have the 64-bit version of Windows 10.
If you find that you have a 32-bit operating system, x86-based processor and can’t upgrade to 64-bit but want to run a 64-bit program on 32-bit Windows, we have a detailed guide to help you.
2. Backup your data
The upgrading process includes a clean installation, which will delete the primary storage; therefore, you must back up all your important data.
You can use an external drive or an online cloud service like OneDrive to carefully transfer your important data, including files, documents, photos, and videos. You can use free backup tools to save your data if you prefer not to do so.
3. Create an installation media
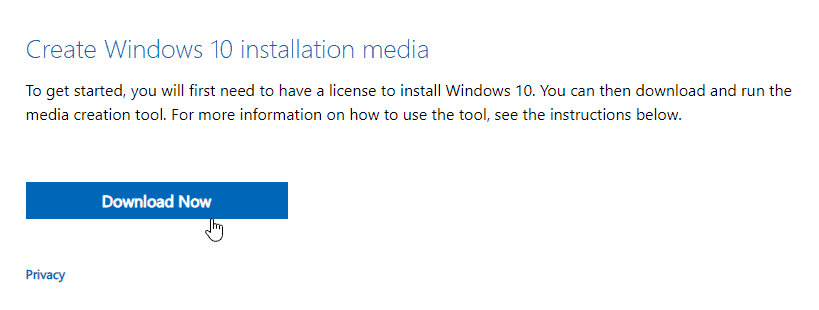
- Go to the official Windows 10 download site.
- Click the Download Now button.
- Choose the download location and click Save.
- Once the file is downloaded, double-click the MediaCreationTool.exe file.
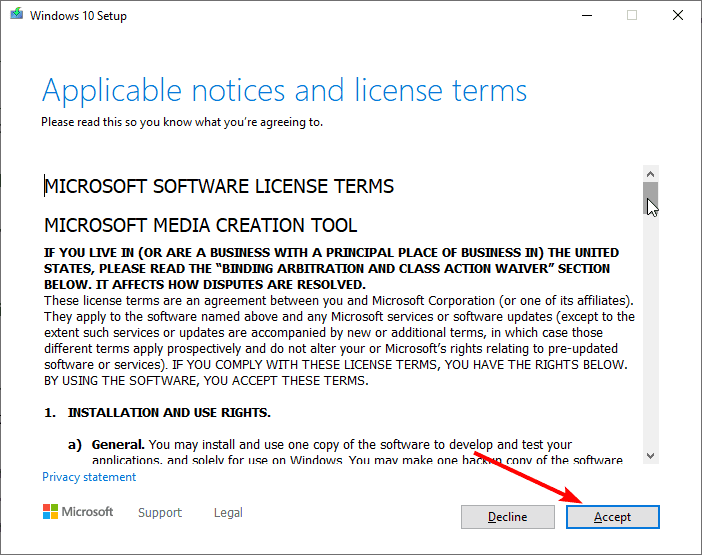
- Click Accept to agree to license terms.
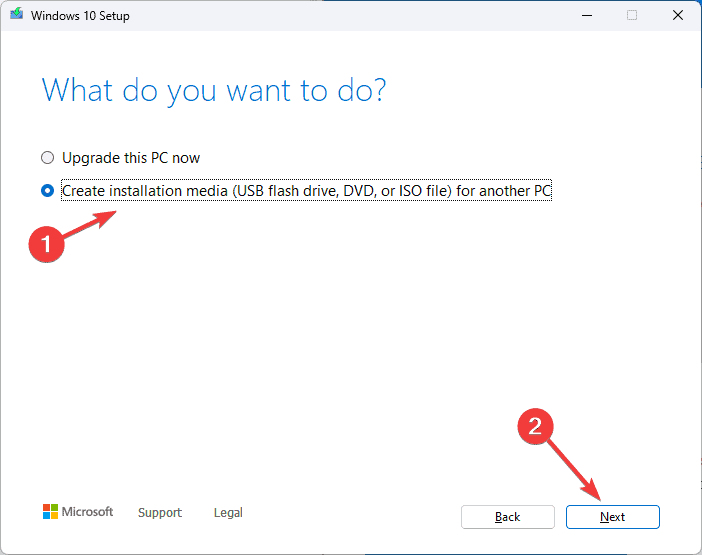
- Select Create installation media (USB flash drive, DVD, or ISO file) and click Next.
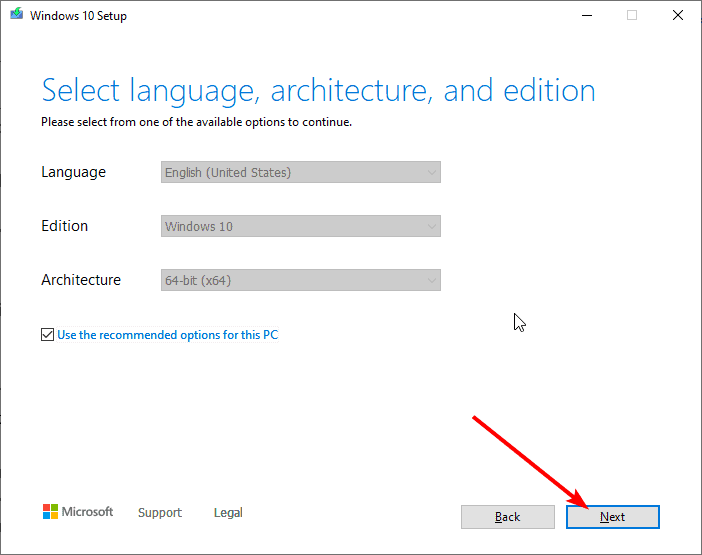
- On the next screen, remove the checkmark next to Use the recommended options for this PC.
- Select the following and click Next:
- Language – The language you want to use on the PC
- Edition – Choose the same edition of Windows
- Architecture – 64-bit (x64)
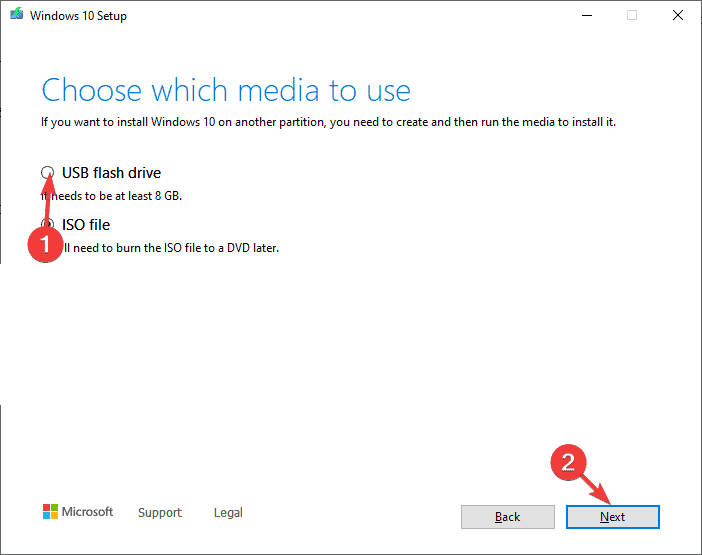
- Select USB flash drive and click Next.
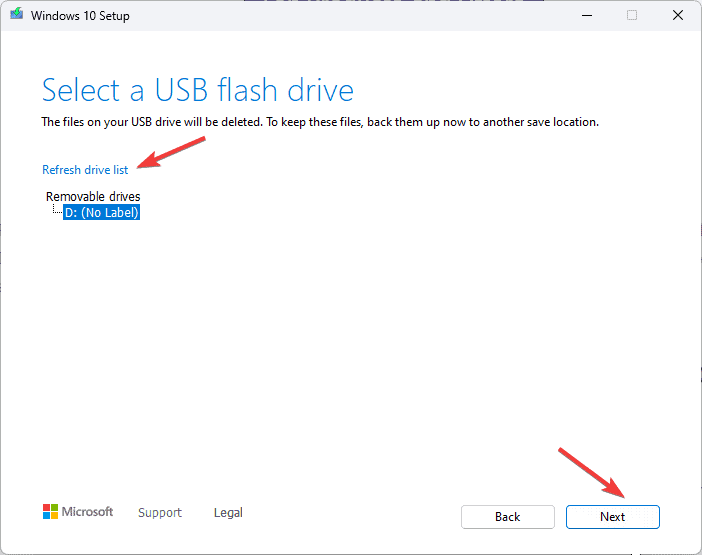
- Choose the USB drive connected to your device, and click Next to let Windows 10 prepare the flash drive.
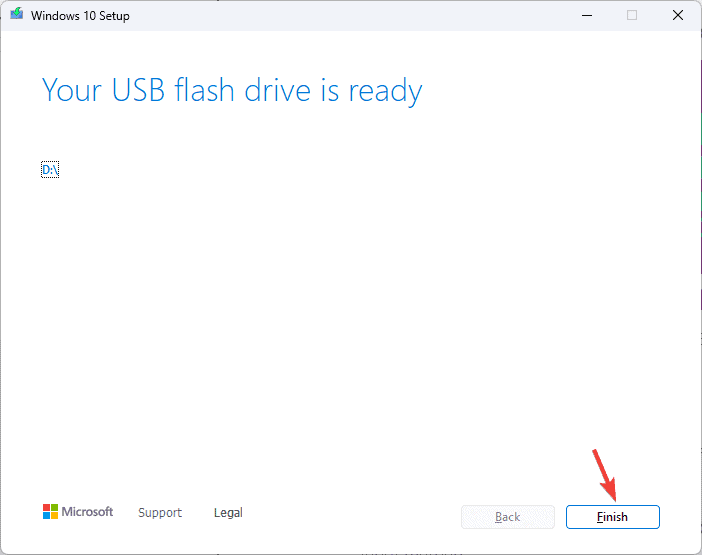
- Once it is done, you will be notified, and you can click Finish to complete it.
4. Change the boot order
- Press Alt + F4 and select Shut down to turn off your computer.
- Plug in the USB flash drive and turn on your computer.
- If your computer boots into Windows, you must change the boot order in your BIOS or UEFI.
- Press Windows + I to open the Settings app.
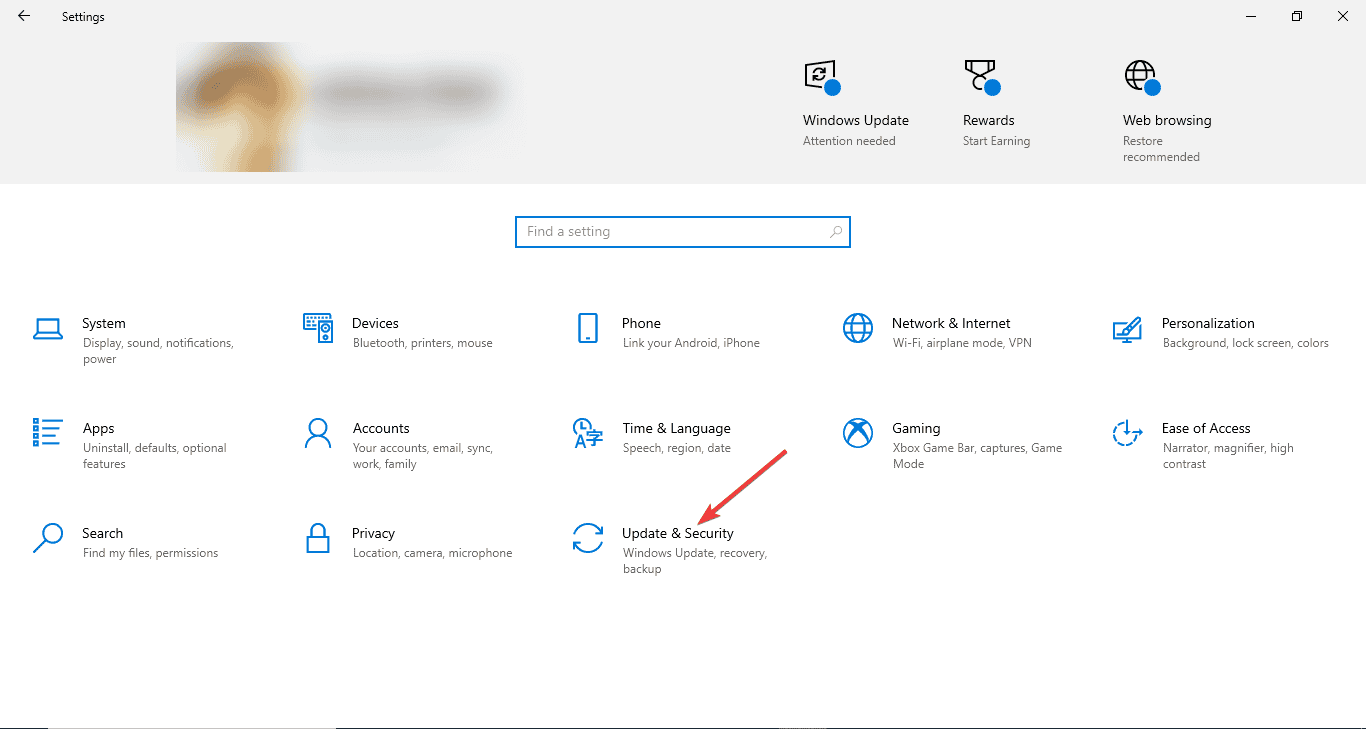
- Click Update & Security.
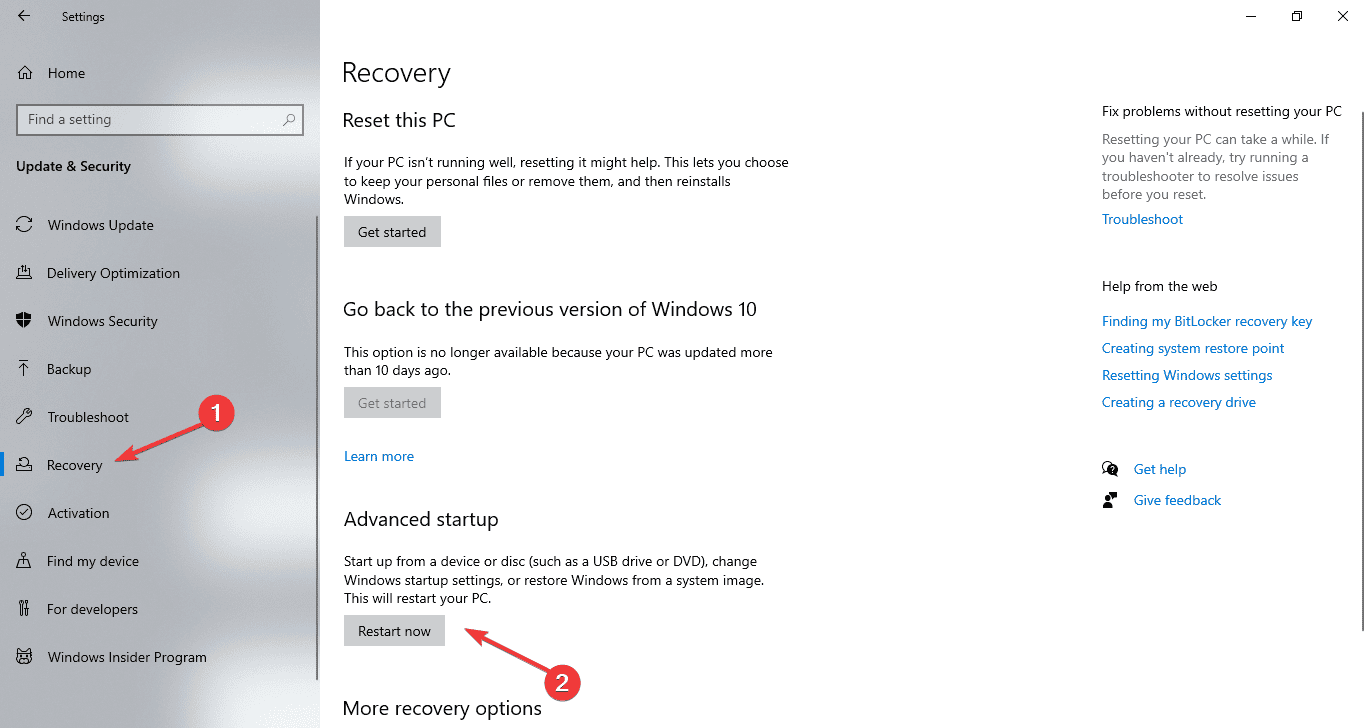
- From the left pane, select Recovery.
- Locate Advanced Startup, and click Restart now.
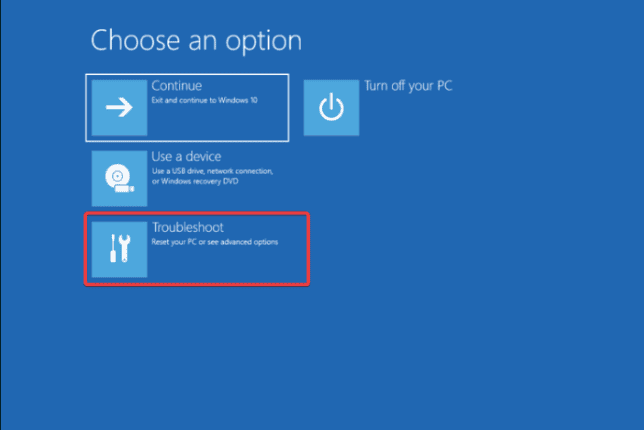
- On the Choose an Option screen, select Troubleshoot.
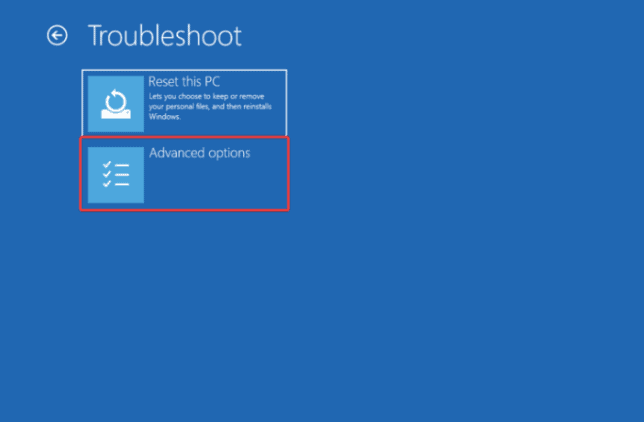
- Click Advanced options.
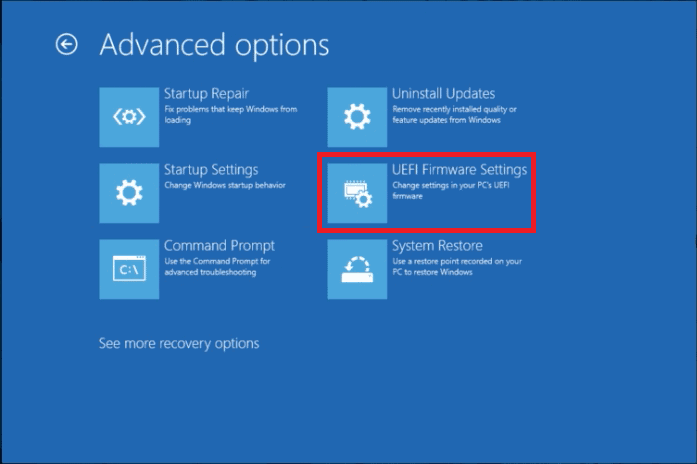
- Select UEFI Firmware Settings.
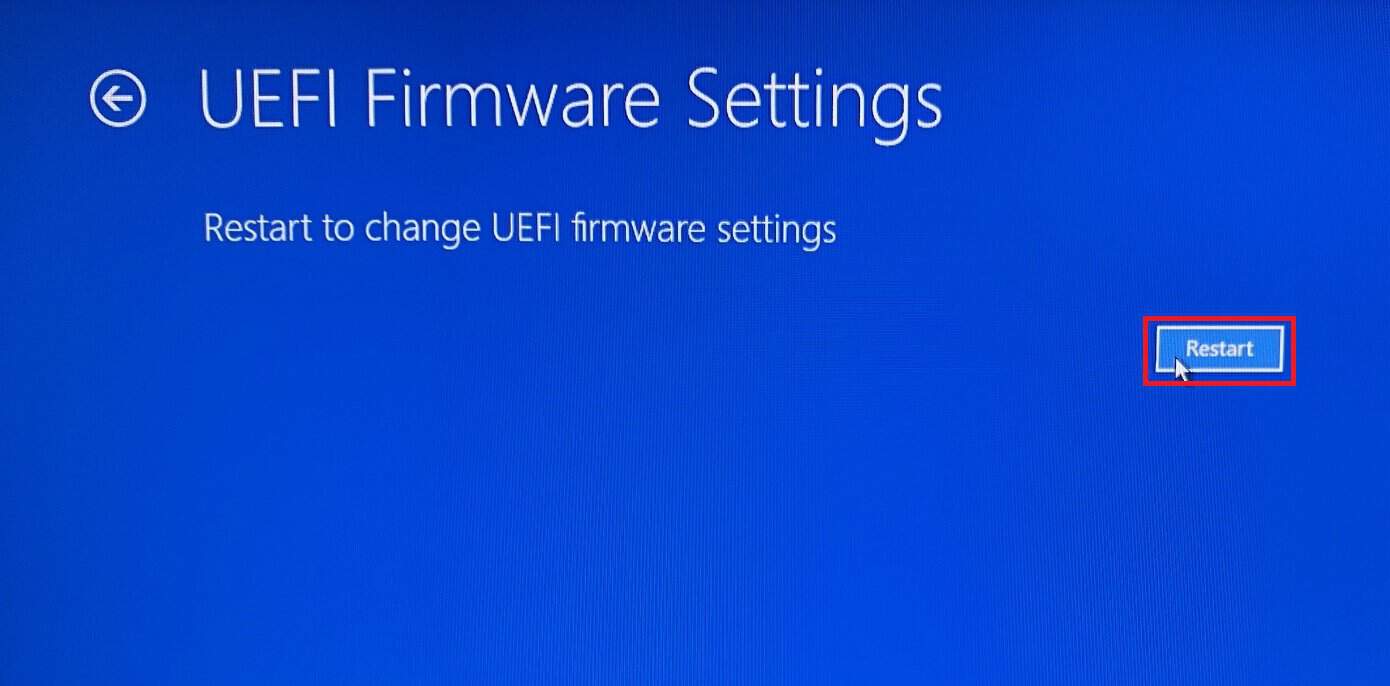
- Click Restart.
- In the BIOS menu, go to Boot, then select the USB drive to change the boot order.
- Press F10 to save and exit.
5. Perform a clean installation
- Once your computer boots up, you will see the Windows Setup screen; click Next.
- Click Install Now.
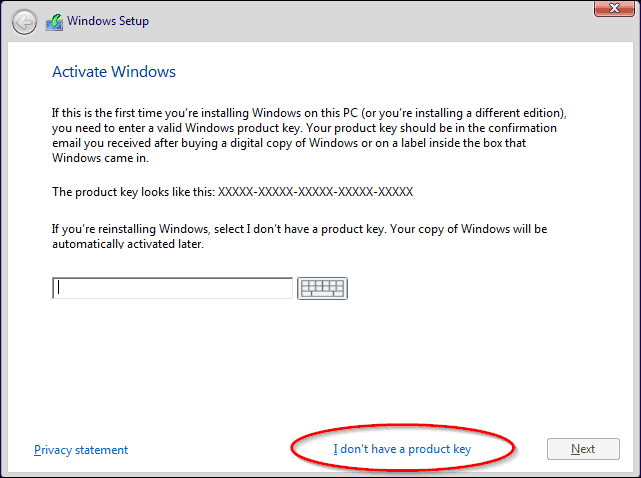
- Select I don’t have a product key or Skip for now.
- If prompted, choose the Windows 10 edition to install and click Next.
- Click I accept the license terms, then click Next.
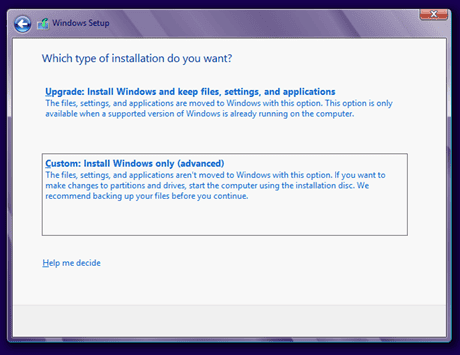
- Select Custom: Install Windows only (advanced).
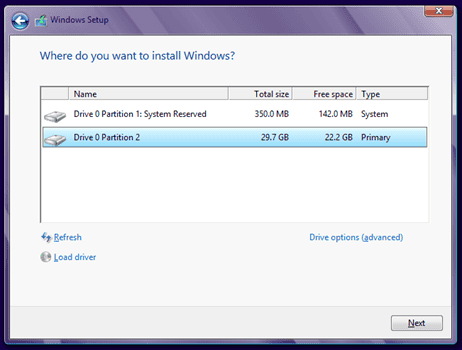
- Choose the drive and partition where the Windows 10 operating system is currently installed, then click Next.
- Follow the on-screen instructions to complete the process.
6. Install the Windows updates
- Press Windows + I to open the Settings app.
- Go to Update & Security.
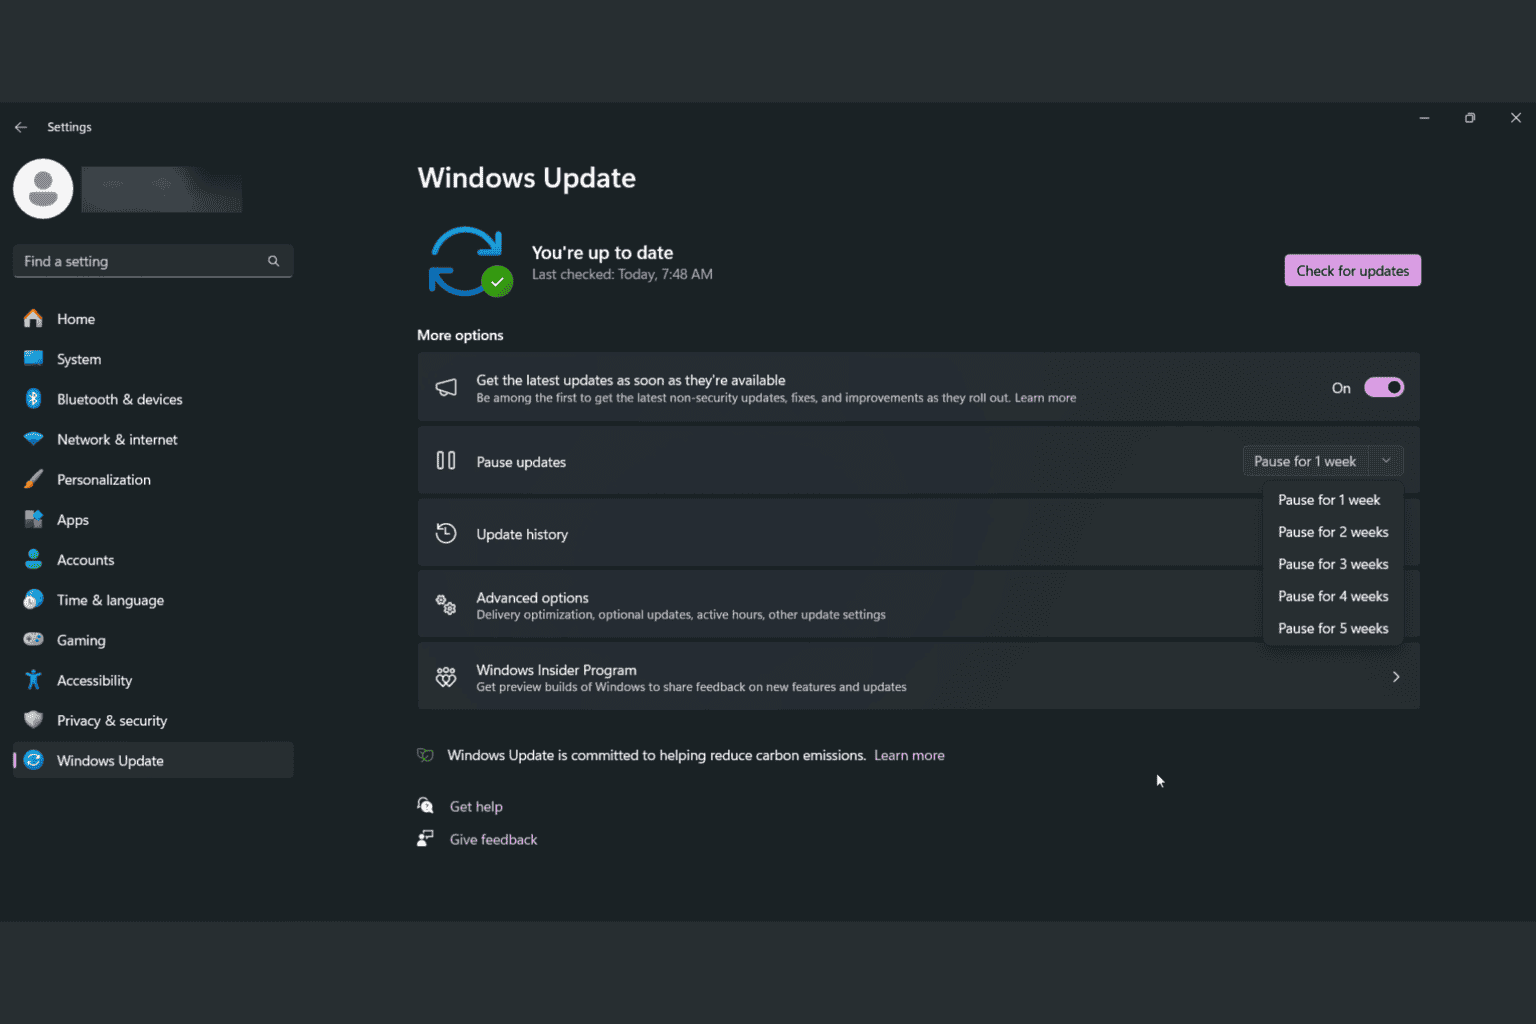
- Select Windows Update, then click Check for updates.
- Once installed, click Restart to complete the process.
To ensure the drivers are updated, you can either try using a third-party driver updater and fixer, as it is a quick solution to easily update the drivers on your computer, or head to the manufacturer’s official website and manually install the driver!
Once all the drivers and Windows updates are installed, you can move the files from your external storage or cloud to your PC. You can also open the Microsoft Store to install the 64-bit versions of the applications on your computer.
In case you want to upgrade from the 32-bit version of Windows 7 and 8 to 64-bit Windows without formatting, we have a detailed guide.
If you have any suggestions or concerns about the subject, feel free to mention them in the comments section below.



User forum
0 messages