Auto Login on Windows 11: How to Enable it [3 Ways]
You'll never have to enter your password after enabling this feature
3 min. read
Updated on
Read our disclosure page to find out how can you help Windows Report sustain the editorial team. Read more
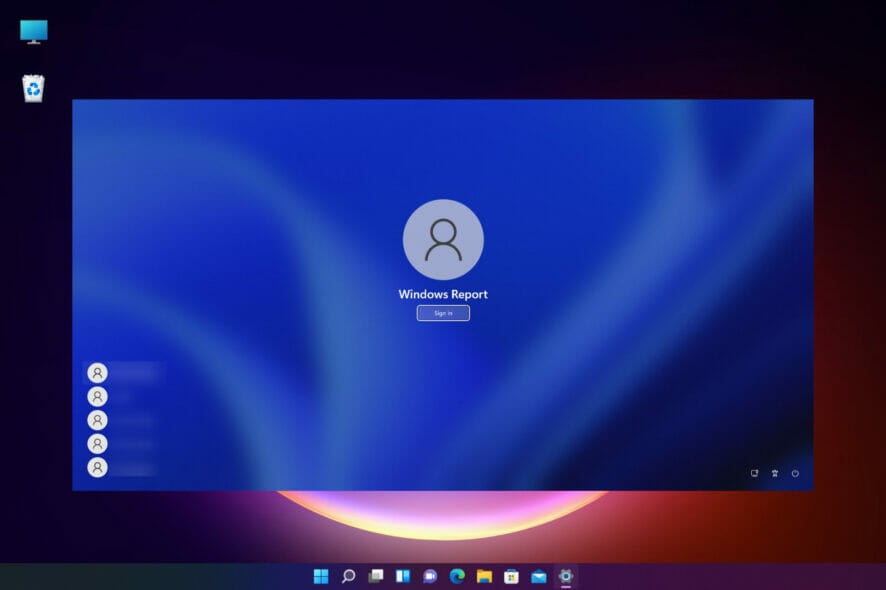
The auto-login feature on Windows 11 enables users to access a computer without the need to input any login credentials, passwords, or pins. It saves users time and allows them to access Windows quickly.
In this piece, we’ll show you a few different ways to do that:
How do I enable auto login in Windows 11?
1. Use the system’s Settings
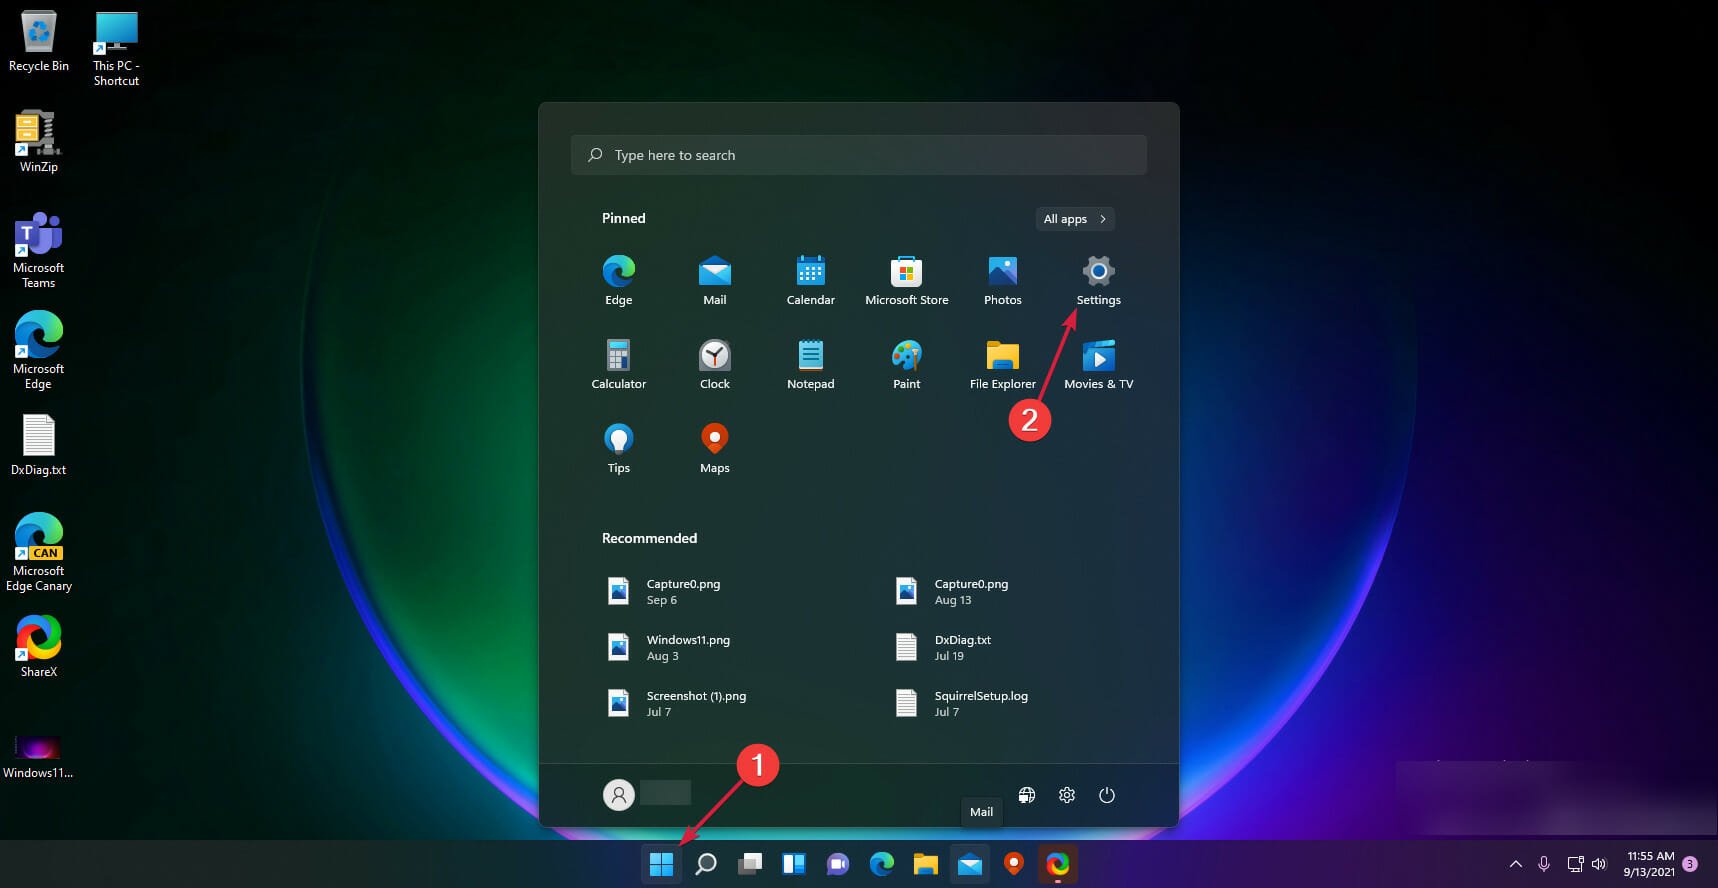
- Click the Start button and select Settings.
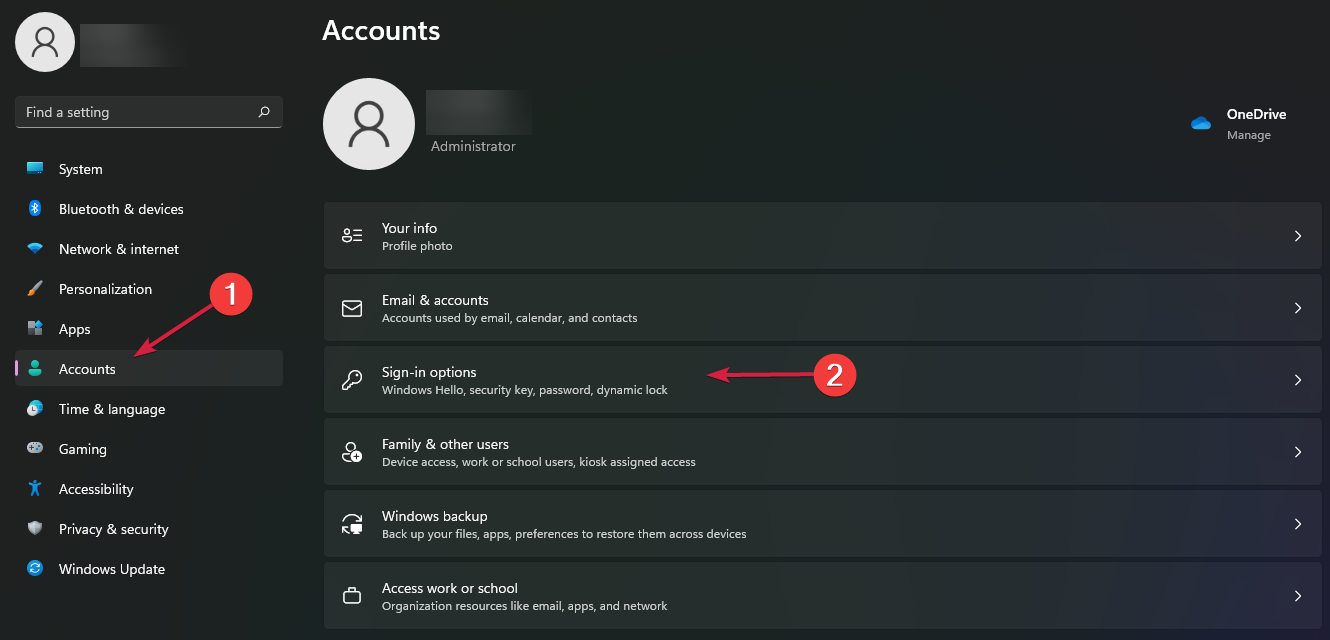
- Select Accounts from the left pane and click on Sign-in options from the right.
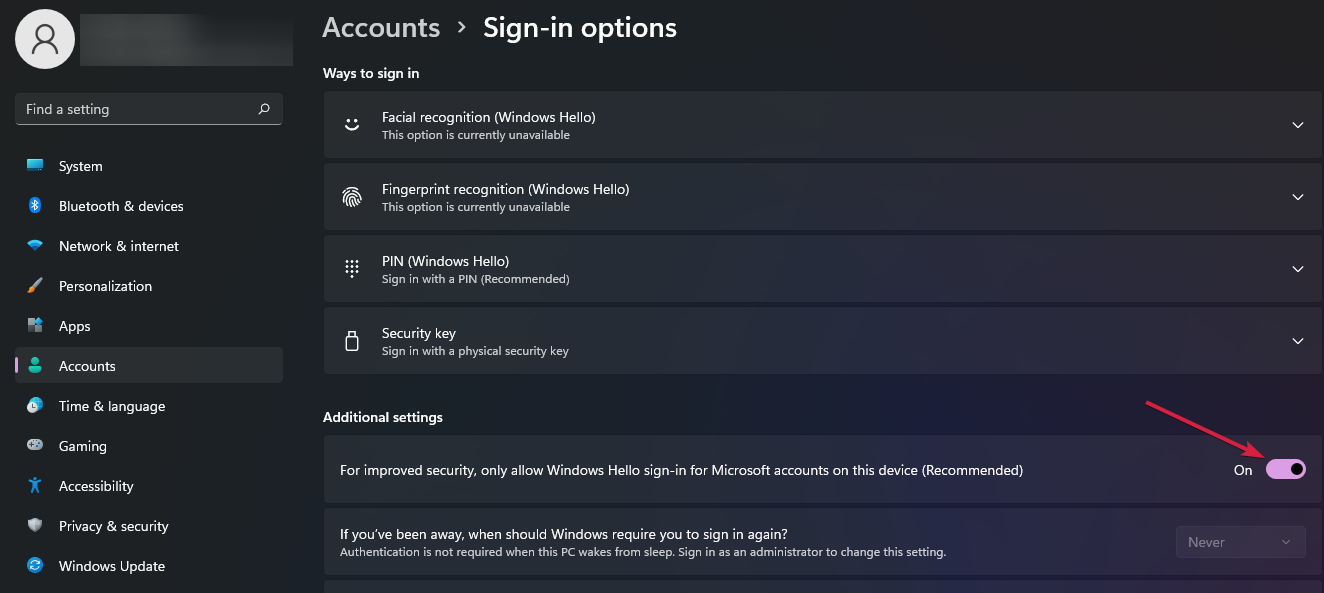
- Now look down, right under Additional settings, to turn off the Windows Hello sign-in for Microsoft accounts. If the option is greyed out, log out and log back into your account.
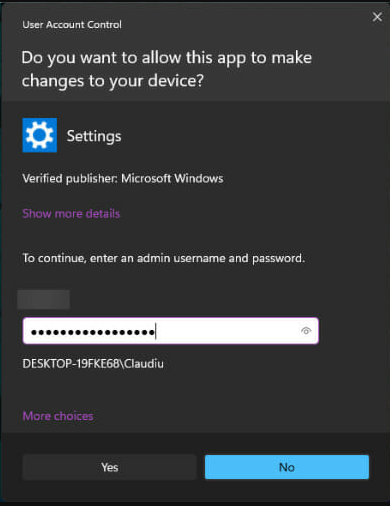
- You will be prompted to enter the password, then hit the Yes button.
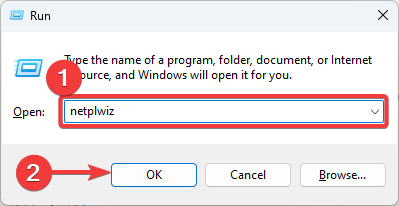
- Press the Windows key + R to start Run, type netplwiz, and press Enter or click OK.
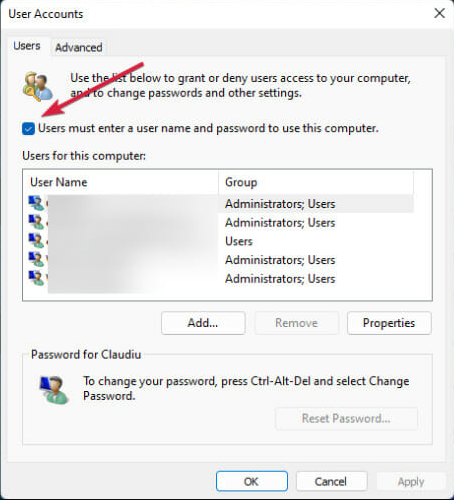
- Now uncheck the box writing Users must enter a username and password to use this computer.
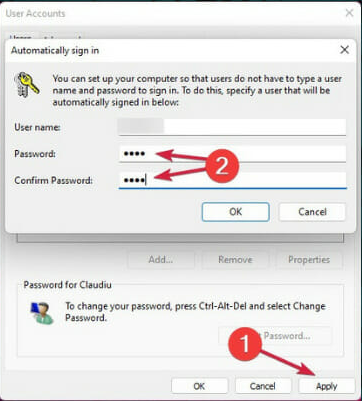
- After you click Apply.
- Next time you restart the PC, you will automatically log in without entering a password.
If you couldn’t follow these steps because there was no checkbox in netplwiz, we have a special guide that addresses that.
2. Use a dedicated tool
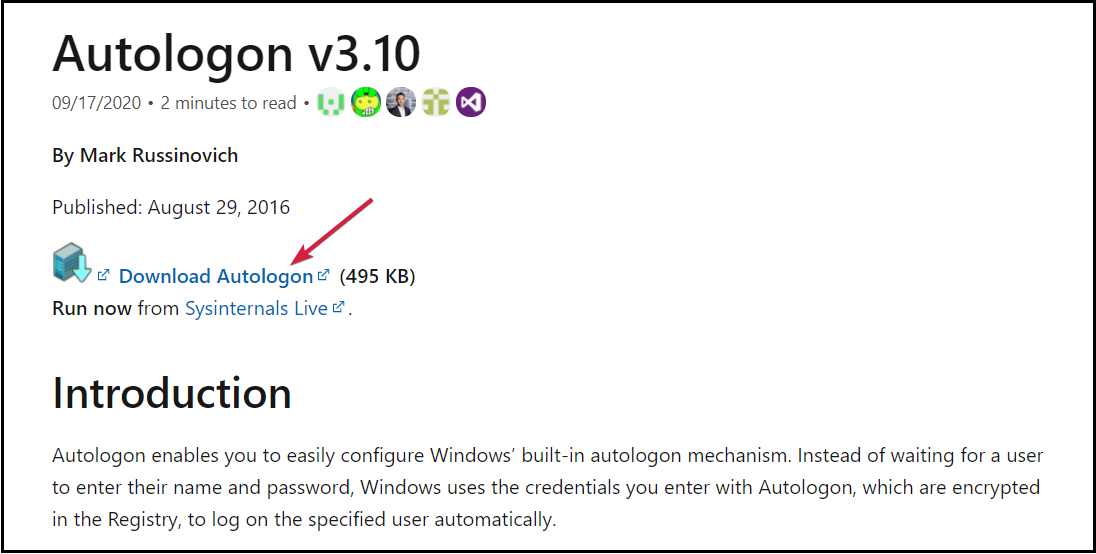
- Download the AutoLogon tool.
- You will get a zip archive with the files, so extract them in a known location and double-click the one suited for your system.
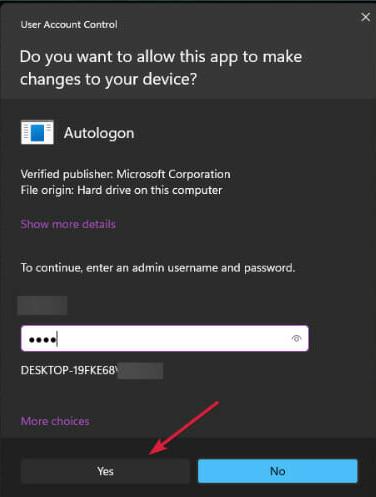
- You will be prompted to enter your account password, so fill it in and select Yes.
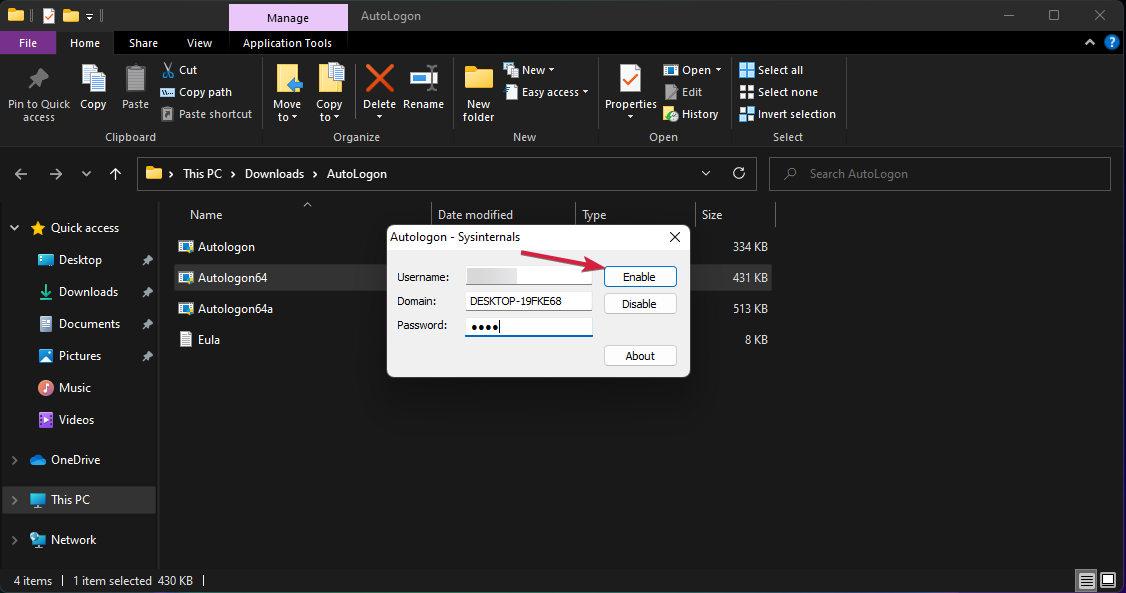
- In the next window, enter the password again and click Enable.
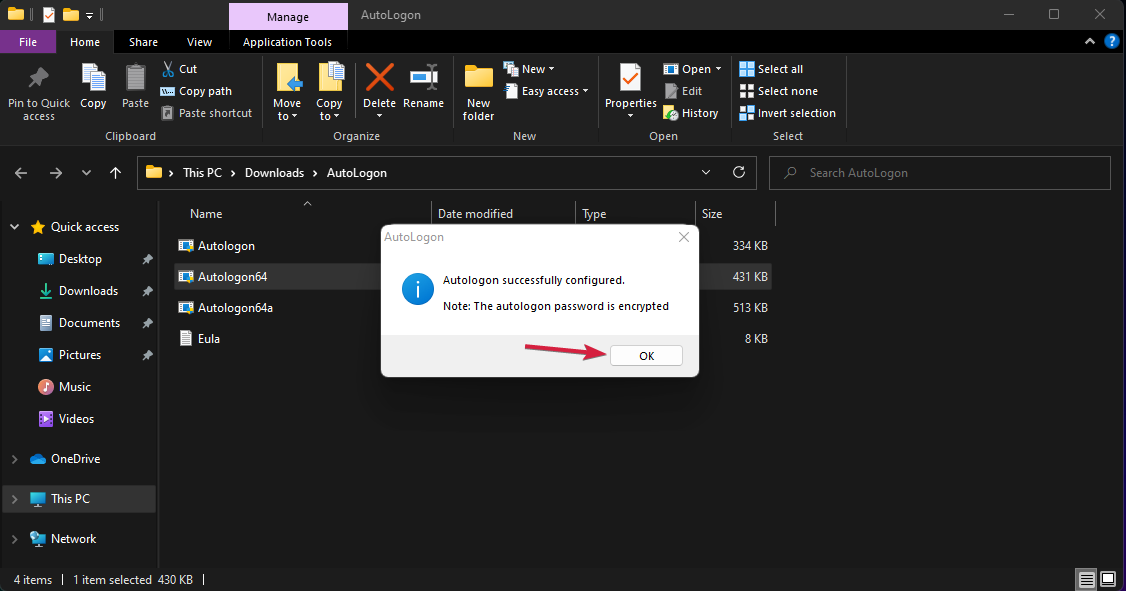
- You will receive a message that AutoLogon was successfully configured, click OK.
- After a restart, you will no longer need to use a password for your account to log in.
3. Use Windows Registry
- Press the Windows key + R to start Run, type regedit, and press Enter or click OK.
- Got to the following path in the Registry:
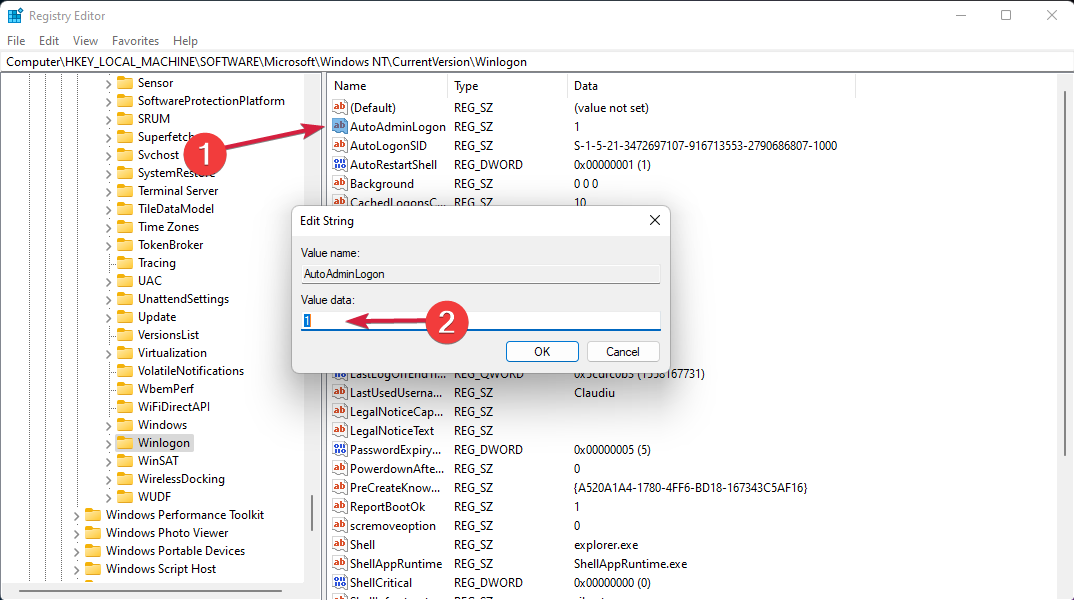
HKEY_LOCAL_MACHINE\SOFTWARE\Microsoft\Windows NT\CurrentVersion\Winlogon - Click on Edit on the top menu, select New, choose DWORD (32-bit) Value and name it AutoAdminLogon.
- Double-click the key to edit it and give it the value 1.
- Now click again on Edit, select New, choose String Value and name it DefaultUserName.
- Double-click the value and change the Value data with your user name.
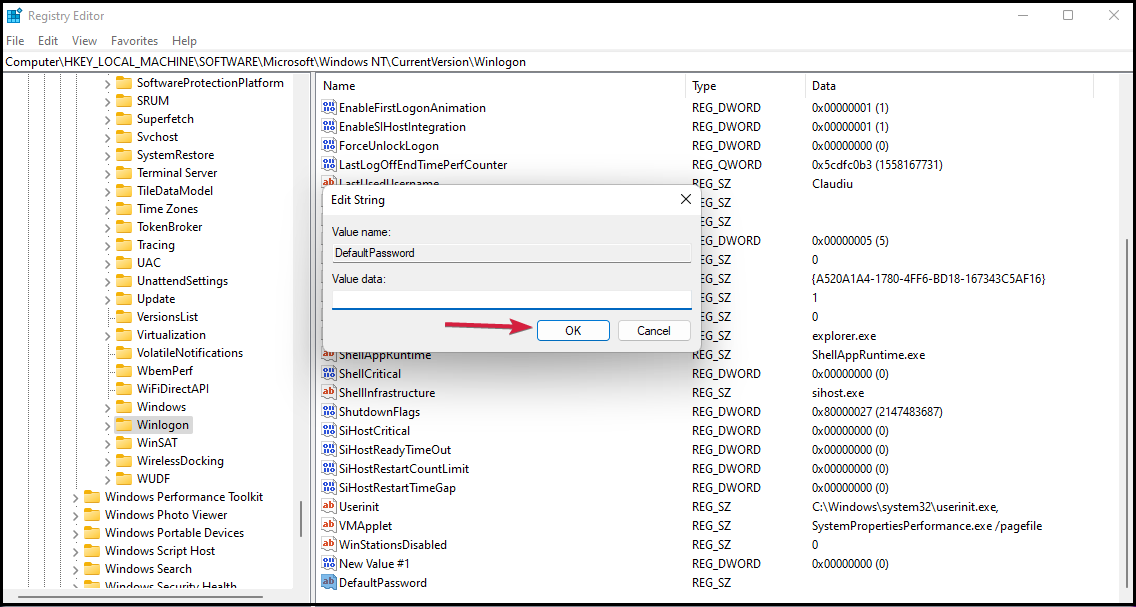
- Next, click on Edit, select New, then String Value and name it DefaultPassword.
- Fill in your password, then click OK.
Of course, if you change your mind and want Windows 11 to ask for the password again, repeat the first two steps and delete the AutoAdminLogon, DefaultUserName, and DefaultPassword keys.
Summary
With the auto login feature enabled, you drastically reduce the security of your PC. This means that anyone who has physical or remote access to your PC can access it without restrictions. If you’re not sure which authentication method to use, check out our password vs PIN comparison to get you started.
It’s worth mentioning that this feature is available on older versions, and we wrote about enabling auto login on Windows 10 in our previous guides.
Do keep in mind that there might be issues with this feature, and many reported that auto login is not working in Windows 10 because the username or password is incorrect on autologon.
If you have any questions or suggestions, we have a comments section below that awaits your input.







User forum
0 messages