Windows 11 Refresh Rate Bug: Fix Dynamic Rate Not Showing
Try these quick solutions right away
7 min. read
Updated on
Read our disclosure page to find out how can you help Windows Report sustain the editorial team. Read more
Key notes
- In order to conserve some of your battery’s life, you will definitely want to fix Windows 11’s dynamic refresh rate not working error.
- First of all, make sure the feature is enabled from your Settings by going to Advanced display.
- Alternatively, try updating the operating system to its latest version.

You may measure your screen’s refresh rate by counting the number of times per second that an image is updated. DRR is a new feature included in Windows 11 that helps you conserve battery life while giving a more fluid display, but it is no surprise when it is not working as it should.
Screens with higher refresh rates are expected to become more common as more manufacturers announce plans to discontinue the production of 60Hz displays. This would result in smoother scrolling and better gaming, but it would come at the expense of reducing the battery life.
However, the Dynamic Refresh Rate feature in this iteration of OS is a beautiful addition that can have a major impact on your overall experience. Continue reading as we will go over what you can do if Windows 11’s dynamic refresh rate is not showing or not working properly. Follow along!
What does dynamic refresh rate do?
DRR dynamically adjusts the refresh rate of your device in response to what you’re doing. It will automatically vary between a 60Hz and a 120Hz refresh rate on a compatible system to balance power and performance.
If you perform ordinary chores such as word processing or streaming video material, your PC will use a 60Hz refresh rate to conserve battery power.
When you use suitable apps that require inking and scrolling, Windows 11 will increase the display rate to 120Hz, providing you with a more responsive and fluid display experience.
Users with a compatible display can run either the performance-enhancing 120Hz (or higher) refresh rate or the battery-saving 60Hz refresh rate. With DRR, though, you may have the best of both worlds.
DRR is supported by Adobe Acrobat, Adobe Illustrator, and a few Microsoft applications, including Office, Edge, Whiteboard, and Snip & Sketch. It is anticipated that the number of supported applications will grow over time.
With most contemporary mid-range laptops featuring high refresh rate displays, it’s only logical to want to take advantage of the extra power. The faster the refresh rate, on the other hand, the greater the proportion of battery it consumes.
It is also used by systems with greater refresh rates, which always run on it. When necessary, you must manually reduce the frequency to 60Hz. It is just not viable to perform this every five minutes for apps.
What can I do if Windows 11’s dynamic refresh rate is not working?
1. Check compatibility
- Press the Windows + S key to open the Search bar, then type in dxdiag, and open the top result.
- In the DirectX Diagnostic Tool, navigate to the Display tab, then check the Driver Model plus Version.
2. Make sure it is enabled
- Start by going to the Start menu and searching for Settings, then selecting the top match.
- From the left panel, click on System and then navigate to Display followed by the Advanced display option.
- In the Choose a refresh rate dropdown box, select the Dynamic refresh rate option. Some computers will require an aditional reboot.
For further information on the topic, do not hesitate to check out our article on specifically enabling the DRR feature.
3. Update your OS
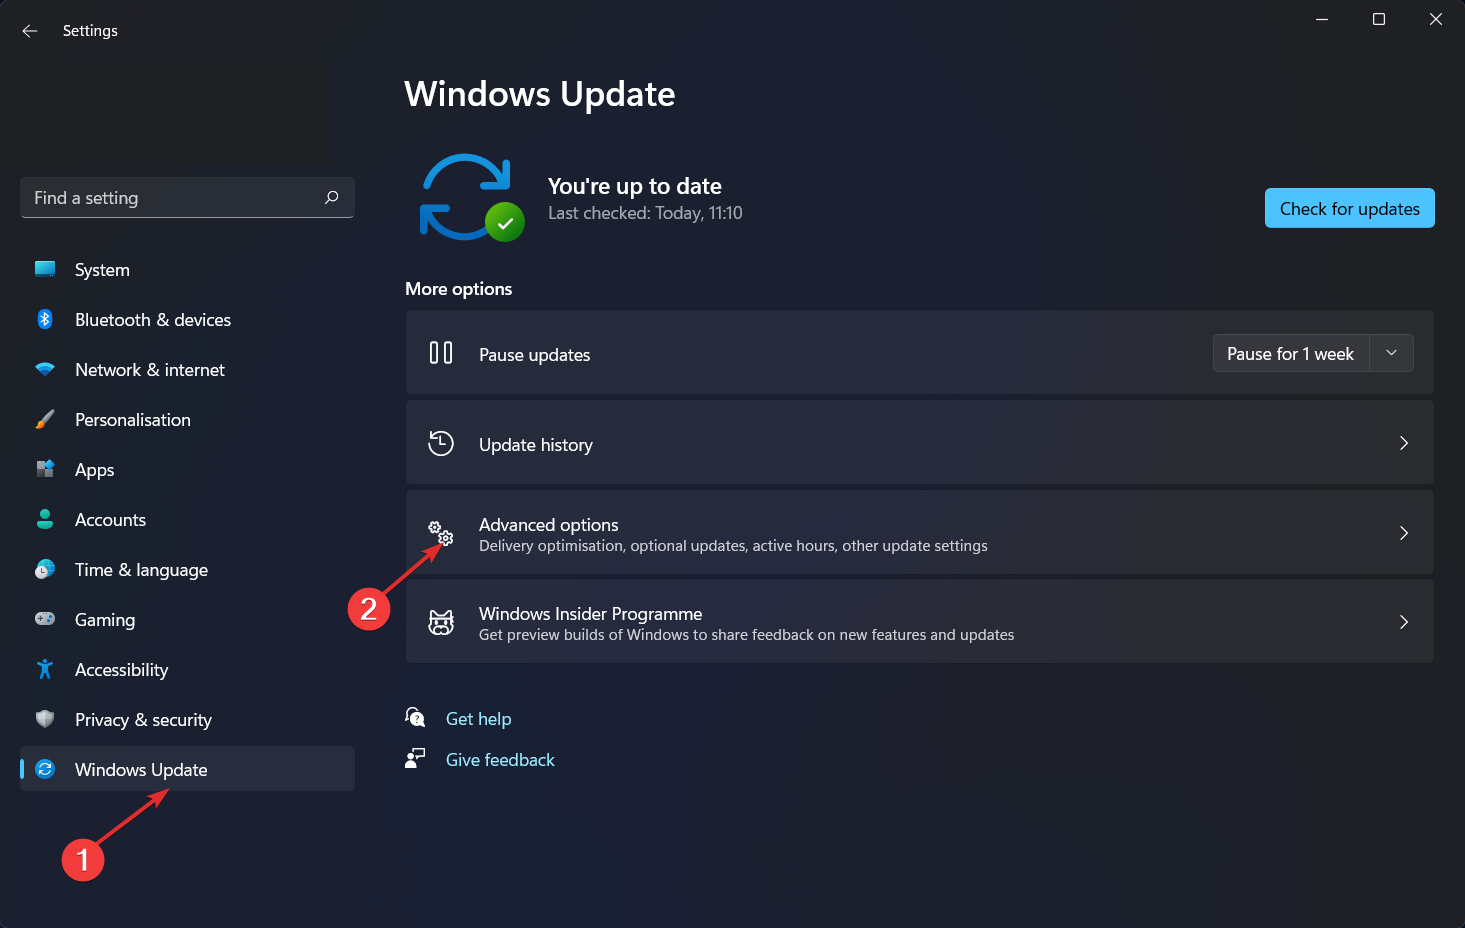
- Press the Windows key + I to open the Settings program, then select Windows Update from the left-hand navigation bar.
- In order to determine whether any new updates are required to be downloaded, select the Install now option; otherwise, use the Check for updates button to determine whether any new updates have been issued.
It is likely that you are using an older version of Windows, and that this is what is creating the problem, which may be fixed by upgrading to the most recent version. It is guaranteed that the problem will be rectified in a subsequent upgrade to the software package.
4. Update your drivers
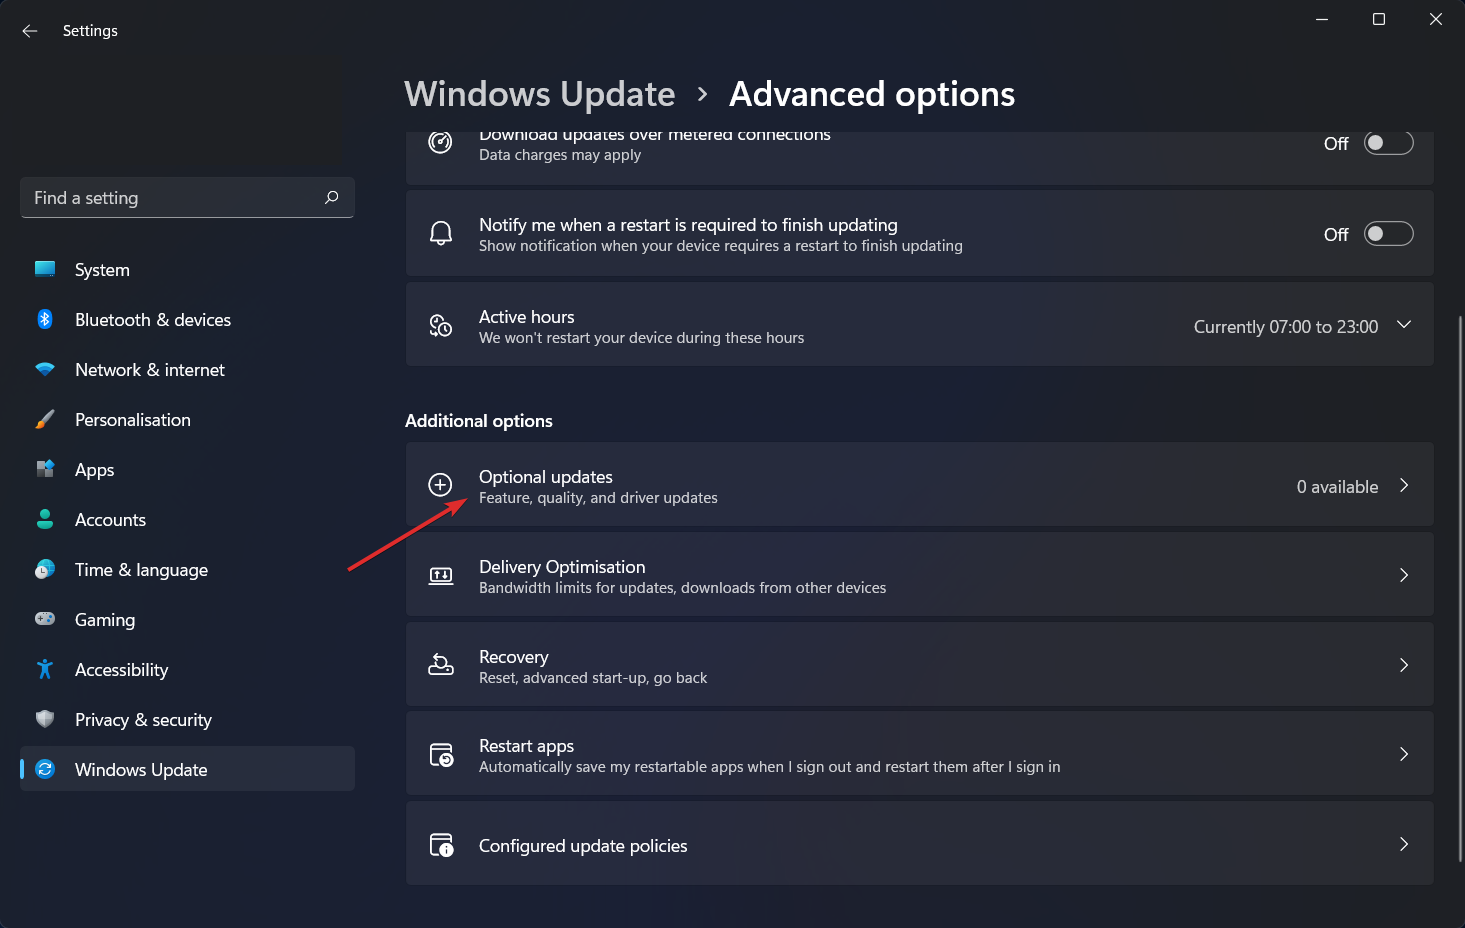
- Press the Windows key + I to launch the Settings program, go to the left panel, and select Windows Update, then Advanced options on the right.
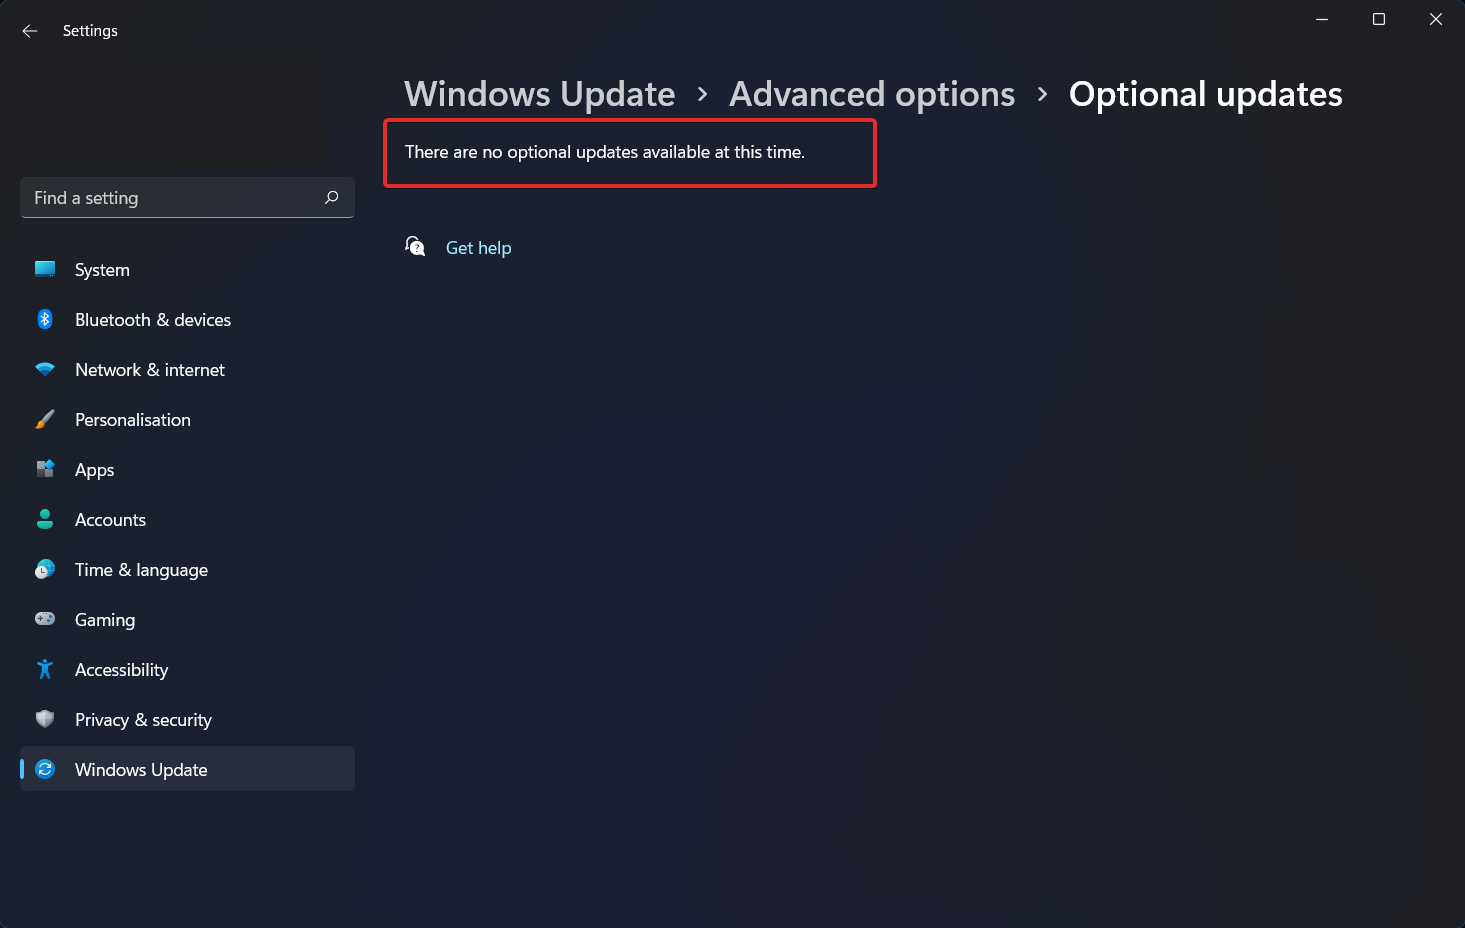
- Click on Optional updates after scrolling down to the Additional options section.
- Now pick Driver Updates from the drop-down menu, then select all of the driver updates that are shown to you, and finally click on the Download and install button. In our case, we don’t have any more updates to install.
Even though Windows is generally in charge of driver updates if you are experiencing an issue, you can perform a manual search for updates.
We strongly advocate using a specialist program such as PC HelpSoft Driver Updater to do an automatic replacement for outdated drivers.
How can I increase my laptop’s battery life?
If you spend a significant amount of time working away from a power outlet, it’s a good idea to get into the habit of adjusting your laptop usage in more battery-saving ways, such as by keeping to one program at a time and shutting everything else when you’re not using it.
It’s similar to shutting off the lights in a room when no one is present. If you’re constantly switching between the kitchen and the pantry, or between Firefox and Microsoft Word, by all means, keep both sets of lights (and programs) on at the same time (and open).
However, if you’re just cooking or viewing a YouTube video, it’s best to turn everything else off and close the door behind you.
Additionally, if you know you’ll be working on a document that doesn’t require web access, consider setting Airplane mode in Windows or turning off Wi-Fi and Bluetooth while shutting down other programs while you single-task.

Not only does the Airplane mode reduce distractions, but it also removes one of the most major sources of battery depletion: not only the wireless radios themselves but also the background apps and processes that are continuously using them, such as updaters and push notifications.
It will take longer for your system to recharge its battery if you have numerous apps and processes running at the same time, and the chances are that you will not be actively using everything. The Settings app in Windows is the first place to look for programs that consume a lot of energy.
As long as your laptop is equipped with a powerful graphics processor, you may limit its use to only games and other graphics-intensive applications. At the same time, everything else can take advantage of the more efficient graphics processing hardware built into the processor itself.
The Program Settings tab in the GeForce control panel (which is normally placed in the Windows notification area on the right side of the taskbar) is where you may allocate each application to a specific graphics-processing chip if your system is equipped with Nvidia GeForce graphics.
Allocate the GeForce separate graphics processor to games and photo- and video-editing applications like Adobe Photoshop and Premiere while assigning the integrated graphics chip to everything else on the computer.
Since you are interested in optimizing your PC’s performance, take a look at the best FPS counter software for Windows 10/11. DRR is not the only new special feature, instead, here are some amazing new features in Windows 11 you need to know.
Just keep in mind that refresh rate features can make your monitor stuck at 60Hz on Windows 11, but this issue can be easily resolved. And rest assured that our detailed guide will also help you decide whether to keep the variable refresh rate on or off.
Let us know in the comments section below whether the article proved helpful for you or not. Thanks for reading!


User forum
0 messages