DWMAPI.DLL Missing/Loading Errors - Fix-it Guide
8 min. read
Updated on

Are you getting the Dwmapi.dll missing or loading errors when launching a game or software?
Third-party Windows software and games may fail to load when they can’t interact with the Microsoft Desktop Window Manager API or the Dwmapi.dll file.
Luckily, I’ve tested various troubleshooting techniques to help you fix and restore the missing DLL files. Let’s check them out!
What Is Dwmapi.dll?
Dwmapi.dll is a system file that controls Windows Aero and other modern Microsoft Store Themes. It’s the API file for the Desktop Window Manager. Third-party apps and games use it to interact with the Windows default themes and other visual features.
When you see the missing or can’t load aler, it means any of the following:
- Some malware or apps might have deleted the file.
- A malicious app keeps the DLL file busy so others can’t access it.
- 15 other DLL files are statically linked to Dwmapi.dll, so one of those must be missing too.
- The DLL file isn’t for anything earlier than Windows Vista. So, the app that’s not running isn’t compatible with your system if you try to run it on Windows XP or older PCs.
How To Fix Dwmapi.dll Missing or Loading Errors
Now, let me show you how to resolve this issue:
Download Dwmapi.dll From a Third-Party Source
The best and quickest way is to download a fresh copy and place it into the appropriate directory so the app looking for this file can access it.
- Visit the DLLme portal.
- Download the Dwmapi.dll file.
- Extract it into a directory.
- Now copy the file and paste it into the following Windows system directories:
- C:\Windows\System32
- C:\Windows\SysWOW64
- For third-party apps that keep the DLL file in their own directories, look up any of these folders and paste it:
- bin
- lib
- plugins
- dll
- modules
- extensions
- shared
- components
- external
- resources
- If you can’t locate the exact folder, contact the game app developer and ask for the correct location for the Dwmapi.dll file.
The app or game isn’t fully compatible if the error is on a Windows XP PC. Still, you can try copying the DLL file in the System32 directory and see if there’s any improvement.
Register the DLL File Using REGSVR32.EXE
You can register the newly copied DLL file manually or force a registration if it’s already available in System32 or SysWOW64.
- Press Windows + X to launch the Power User menu.
- Select Windows PowerShell (Admin).
- In the terminal, type regsvr32 dwmapi.dll.
- Hit Enter.
- You should see the “The module was loaded…” message.
Perform a Clean Boot
This method will help you find if any third-party app keeps the DLL file busy so others can’t access it. Here’s how to clean boot your Windows PC:
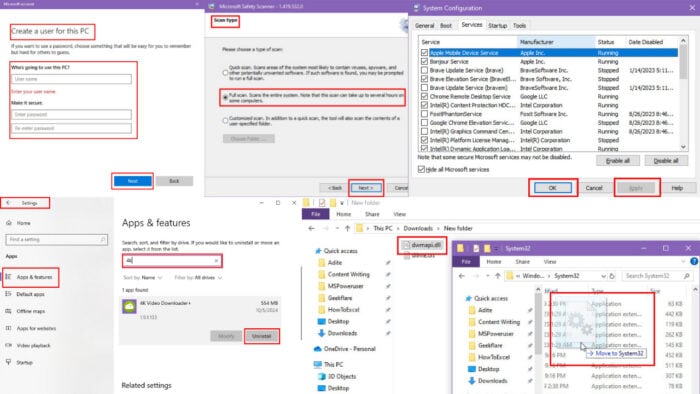
- Call the System Configuration dialog box by pressing Windows + R and running the msconfig command.
- Go to the Services tab.
- Select the Hide all Microsoft services option.
- Click Disable all.
- Now, navigate to the Startup tab of the same dialog box.
- Click on the Task Manager hyperlink.
- Windows will take you straight to the Startup tab.
- Right-click on a startup item and select Disable.
- Now, repeat the step for all the items except for the system utilities, like audio, video driver console, Bluetooth, etc.
- Close Task Manager.
- Go back to the Services tab on the System Configuration dialog box.
- Click Apply and OK.
- Now, restart the PC.
If this method resolves the Dwmapi.dll file missing error, it means a third-party app, service, or background process is the root cause.
Press Windows + I and go to the Apps menu in the Windows Settings. Uninstall any recently installed third-party program from the Apps & features column on the right side of the window.
To reenable all genuine services, reverse the steps mentioned for a clean boot process and reboot the PC.
Scan the System to Find and Remove Malware
Run the Microsoft Safety Scanner to detect and delete malware that interferes with the DLL files. Here are the simple steps:
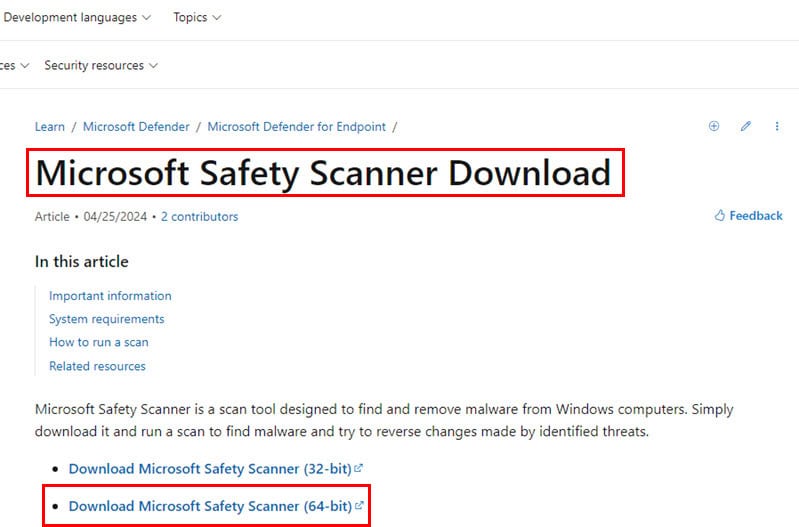
- Visit the Microsoft Safety Scanner Download portal.
- Download the appropriate edition by choosing between the 32-bit and 64-bit options.

- Press Windows + R and enter the msinfo32 command. Hit Enter. Now, look at the System Type line. If it says x64, then download the 64-bit app or vice versa.
- Go to the Downloads directory and double-click on the msert.exe file.
- The Microsoft Safety Scanner will open.
- Accept the terms on the first window and click Next.
- Click Next again to access the Scan type dialog.
- Select Full scan and hit Next.
- Restart the PC once done.
Run System File Checker (SFC) Scan
An SFC scan can help you fix the system files automatically when the PC is online. Here’s how:
- Access the Power User menu by pressing the Windows + X keys together.
- Select the Windows PowerShell (Admin) item.
- Inside the command line interface, copy and paste this command:
sfc /scannow- Hit Enter to execute.
- Wait for the SFC scan to run completely.
Here are the possible results:
- No integrity violations found: No actions are needed further. You can ignore the DISM scan method.
- Integrity violations found: The SFC command itself tries to fix as many corrupted system files as it can. It’ll also show the total number of files it repaired. If it shows all files have been repaired, you don’t need to run a DISM scan. However, if you see some files weren’t restored, go to the next section.
- Scan could not be completed: Try running a DISM scan.
Run Deployment Image Service and Management Tool (DISM) Scan
- In the same terminal window, enter this command:
DISM.exe /Online /Cleanup-image /Restorehealth- Press Enter.
- Wait for the DISM command to look for system file issues and repair them.
Here are the possible outcomes:
- No integrity violations found: All systems files are in good condition.
- Integrity violations found: The command will use an online image to fix the system files.
- Scan could not be completed: You must again run the DISM scan.
Create a New User Account
Specifically for certain game apps, you should create a new Windows User Account:
- Open the Windows Settings app.
- Click on the Accounts option.
- Navigate to the Family & other users menu.
- Click on the Add someone else to this PC option on the right side.
- Select the I don’t have… hyperlink on the Microsoft dialog box.
- On the Create account page, select Add a user without a Microsoft account option.
- Enter the relevant details into the fields.
- Click Next.
- Follow the on-screen instructions to set up a new account.
- Restart the PC.
- Log in using your new account.
Now, try to run the game app using its EXE file from the installation directory or the Steam app.
Perform a System Restore
Windows OS automatically creates restore points when you make substantial changes in the device. If you didn’t disable this feature manually, you might be able to restore the PC to the last known good configuration. This should also fix the issue. Follow these steps:
- Click the Start menu and type in Restore.
- Select the Create a restore point option below the Best match section.
- The System Properties dialog box will open.
- Click on the System Restore button.
- Select Next on the System Restore dialog box.
- Choose a restore point from the table. Click Next.
- Hit the Finish button.
Wait for the system restore process to complete automatically. Your PC might restart a few times.
Reinstall Game App
As a last resort, you might need to uninstall a game app that’s not launching due to the Dwmapi.dll missing or loading errors.
If you’ve installed it using a DVD or digitally delivered package installer, go to Apps, find the game title in the Apps & features section, click on it, and hit Uninstall.
Alternatively, if you’ve used Steam, follow these steps:
- Open Steam.
- Select the Library menu at the top.
- Look up the game you want to remove below the Games and Software navigation panel on the left side.
- Right-click on the game title and select Uninstall from the context menu.
- Click Uninstall again on the confirmation dialog box.
Steam will start removing the local files, which might take a few minutes.
Once you see the uninstallation confirmation, again go to the Library tab. You should still see the game in the left-side navigation panel.
However, if you right-click now, it should show Install.
Transferring Game App Data
Before uninstalling the game, you can copy your progress from the game save data directory.
You should be able to find it in the following locations on your PC:
- Documents Folder:
C:\Users\JohnDoe\Documents\My Games- AppData Folder:
Local: C:\Users\JohnDoe\AppData\Local\GameName
Roaming: C:\Users\JohnDoe\AppData\Roaming\GameName- ProgramData Folder:
C:\ProgramData\GameName- Steam Games:
C:\Program Files (x86)\Steam\userdata\123456789\12345- Epic Games:
C:\Users\JohnDoe\AppData\Local\GameName\Saved\SaveGamesSummary
Now you know how to handle the Dwmapi.dll loading or missing error in Windows Vista and newer operating systems. To learn more about DLL files, don’t miss our latest cncs32.dll is missing article.
If the article helped you, feel free to comment below which method worked for you. Also, if you know of a better troubleshooting idea, mention that in your reply.
Moreover, you can learn how to fix a similar issue, HTMLayout.dll cannot be loaded.


User forum
0 messages