Headset Microphone Level Stuck at 0: 7 Solutions to Fix It
Adjusting your settings can usually fix microphone issues
Key notes
- A reason for the microphone levels to keep changing may be a problematic driver.
- You can also try tweaking your system to stop apps from controlling your mic.
A lot of audio recording problems could occur in Windows 10, and they are very annoying. Many reported that the headset microphone level was stuck at 0.
This will cause your microphone level to be too low, and other person won’t hear you properly.
Speaking of microphone issues, users reported the following problems:
- Microphone level keeps going to 0 Windows 10 – According to users, their microphone level keeps going to 0. This is an annoying problem that might be caused by malware.
- Microphone level resets to zero – This is a similar problem that can appear on your PC. To fix it, be sure to check your microphone settings.
- Microphone level keeps muting – This is another variation of this problem, but you should be able to fix it by using one of our solutions.
- Microphone volume won’t stay up – Several users reported that their microphone volume won’t stay up. This can be an annoying problem, but you can fix it by checking your microphone settings.
- Microphone volume reduces automatically – This problem can occur due to your audio control software. To fix the issue, find and remove the audio control software from your PC.
Why is my headphone/mic volume so low?
There are several causes for this problem, with the following ones being the most common:
- Audio glitches – Sometimes issues and bugs can occur, and they are usually fixed by using an audio troubleshooter.
- Other apps – Other apps can take over your microphone and cause the volume level to change.
- Drivers – Audio drivers can have issues, and those issues can prevent you from changing the microphone level.
What can I do if my headset microphone level is stuck at 0?
Here’s what you should do first:
- If your headset microphone level is stuck at 0, the problem might be malware on your PC. Sometimes certain malware can interfere with your microphone and reduce the volume levels on your PC. There are many great antivirus applications, but if your antivirus can’t fix this problem, you might consider switching to the best antivirus solution on the market.
- The problem might be your port. Many users reported similar problems with their USB microphone, and according to them, the issue was their port. To fix the problem, you need to disconnect your microphone and connect it to a different port. If you’re having issues with USB 3.0 port, visit our USB 3.0 port not recognized guide.
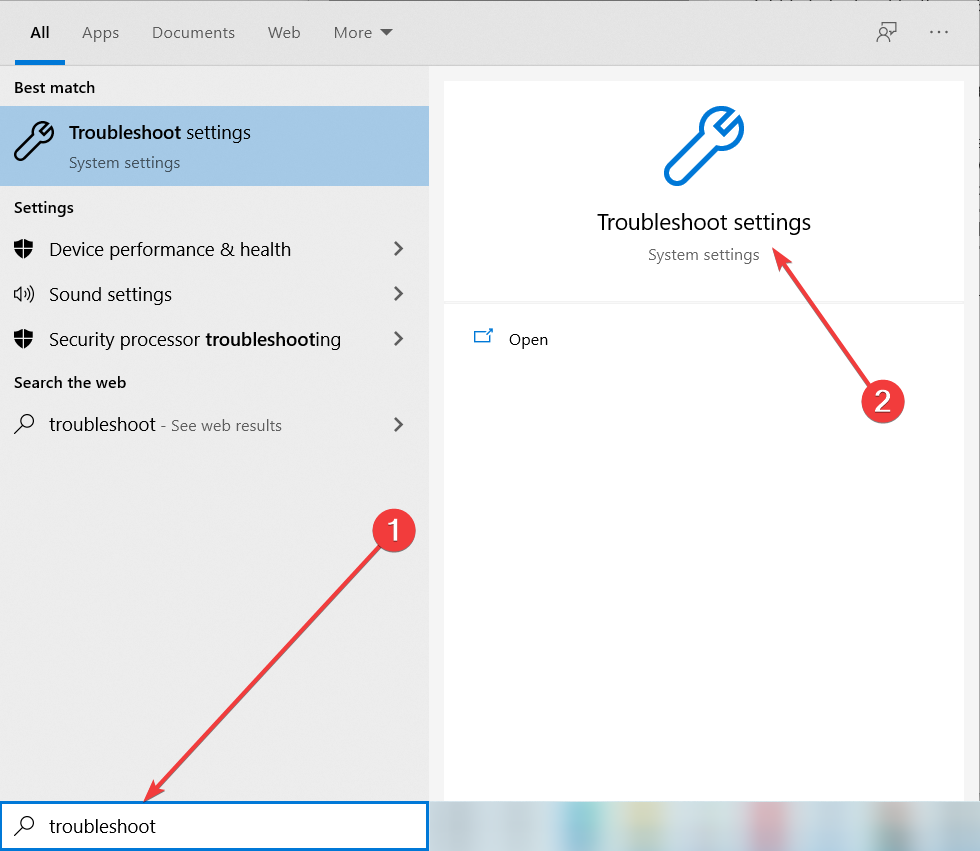
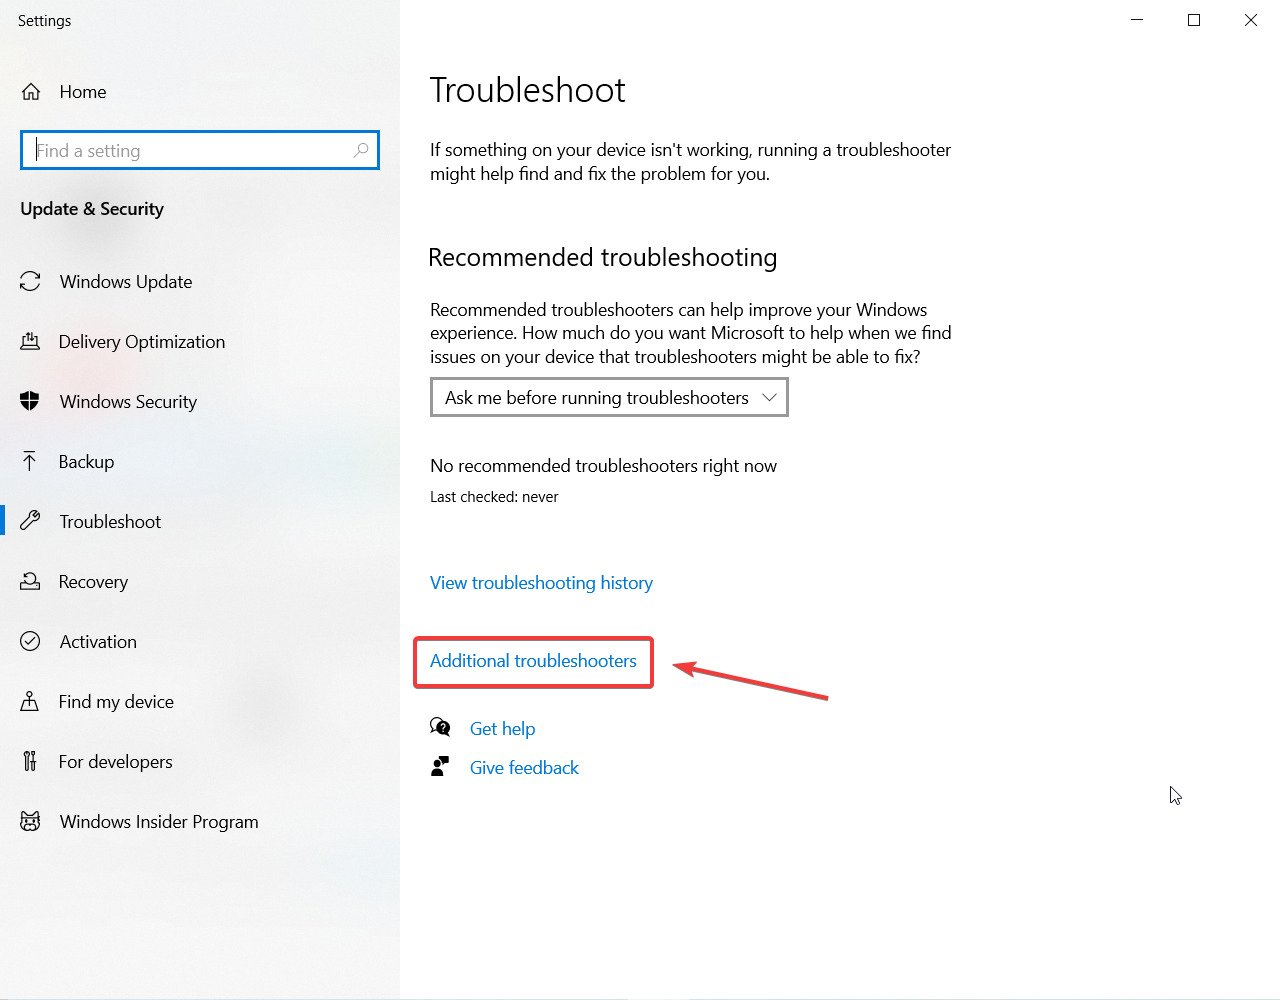
1. Run the Audio troubleshooter
- Go to Search, type troubleshoot, and open Troubleshoot settings.
- In Troubleshooting window, go to Aditional troubleshooters.
- Click on the Recording Audio and then on the Run the troubleshooter button. After running the troubleshooter see if the problem has been resolved. If not, run the Speech troubleshooter from the same window.
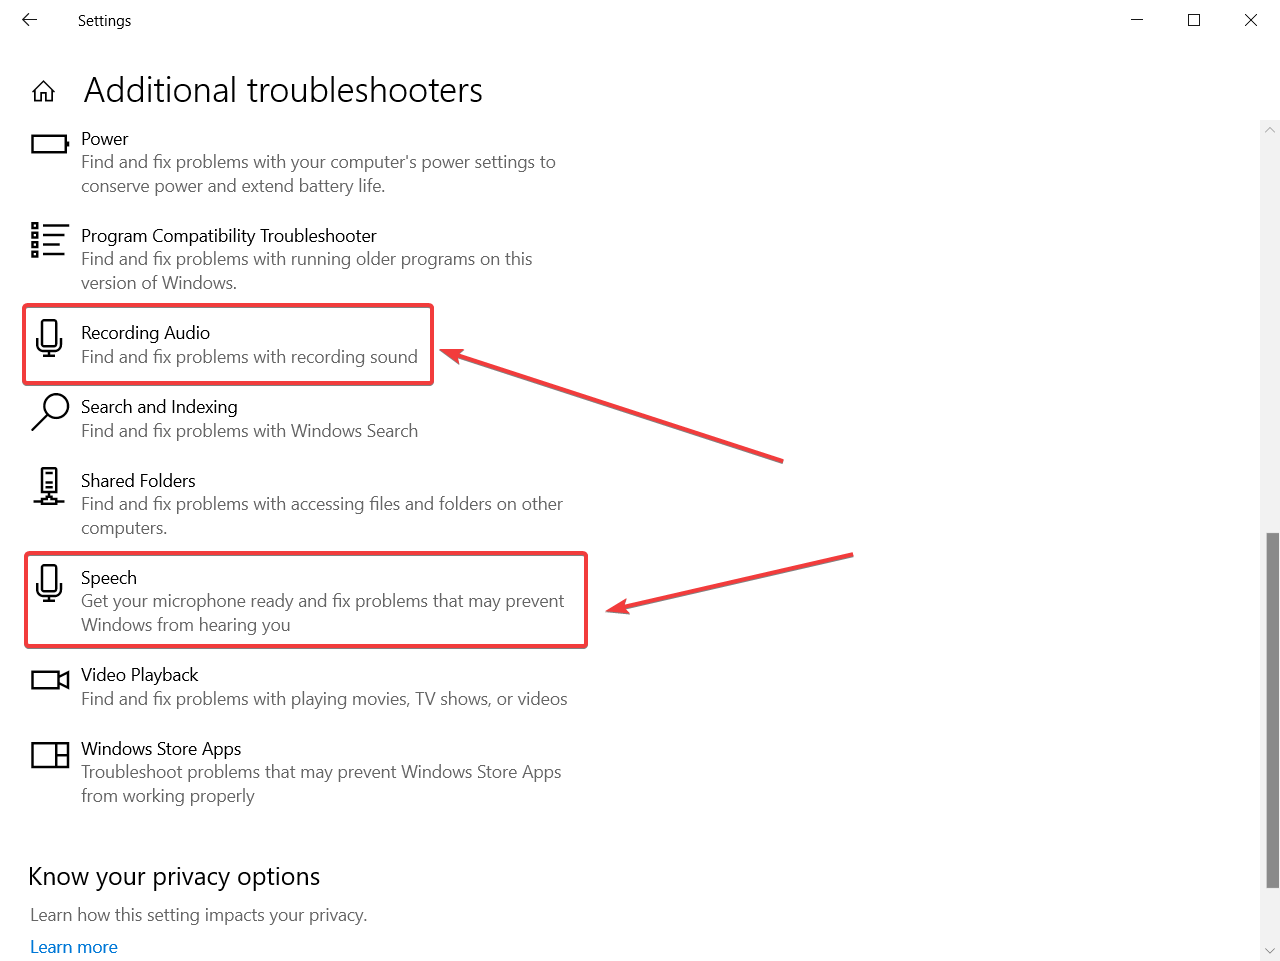
- You will ask about what device you want to troubleshoot so make sure you select the correct microphone.
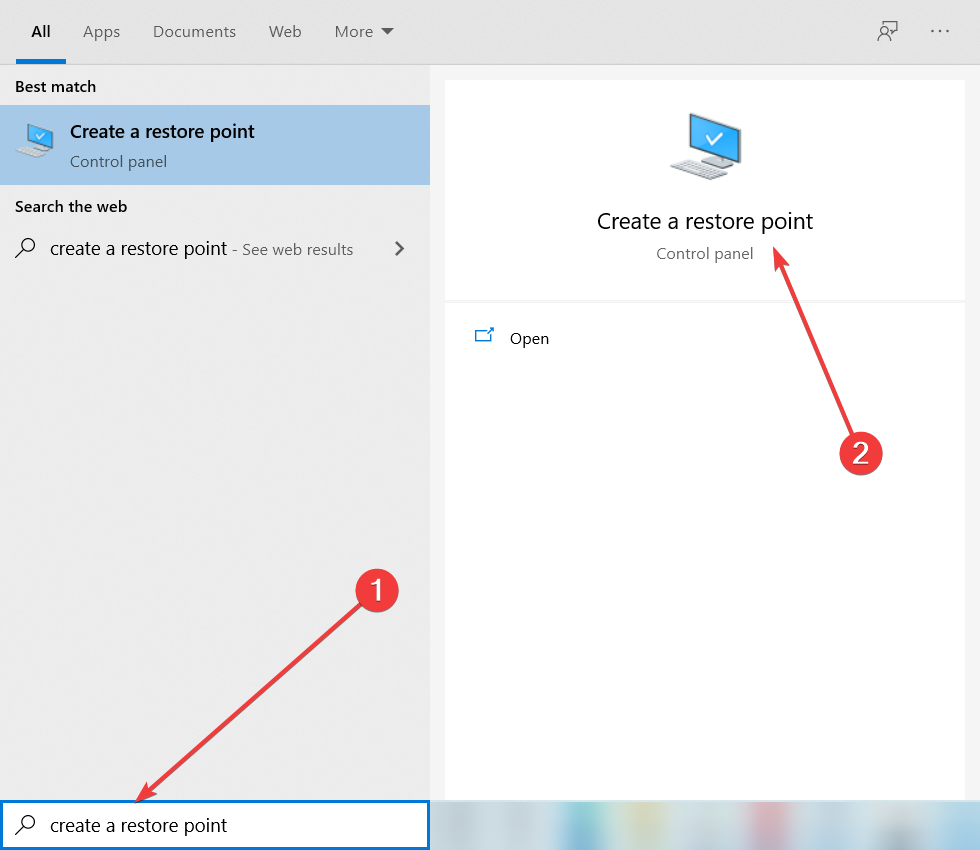
2. Perform a System Restore
- Press Windows key + S and enter system restore. Choose Create a restore point from the menu.
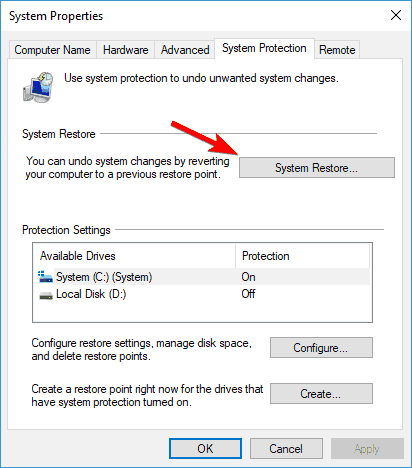
- System Properties window will now appear. Click the System Restore button to proceed.
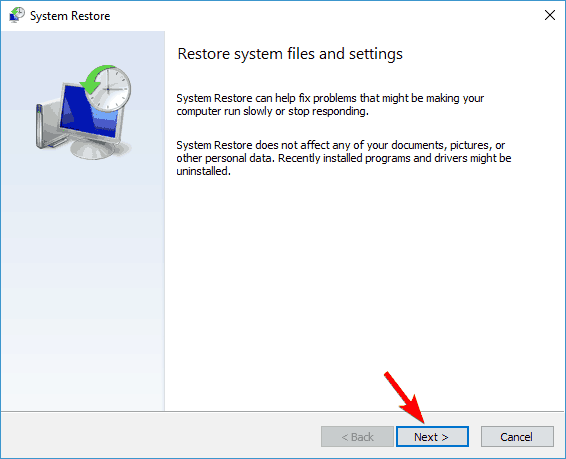
- System Restore window will now appear. Click Next to continue.
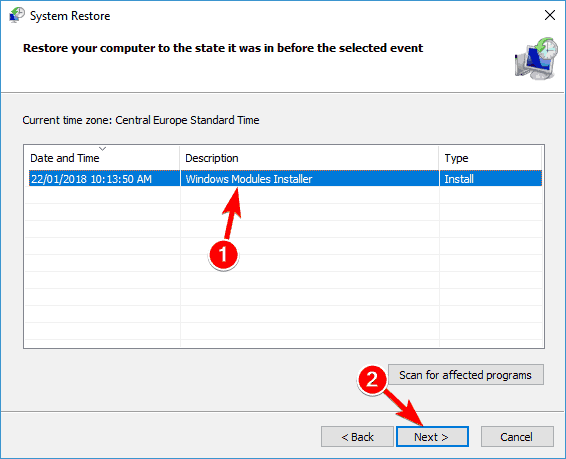
- If available, check Show more restore points option. Now select the desired restore point and click Next.
- Follow the instructions on the screen to complete the restoration process.

All these solutions are great, and they are working for so many users, but some of them may seem complicated for many, and they are time-consuming.
But you can get rid of this issue easily and without technical skills by using a dedicated third-party tool.
3. Forbid apps to control the microphone
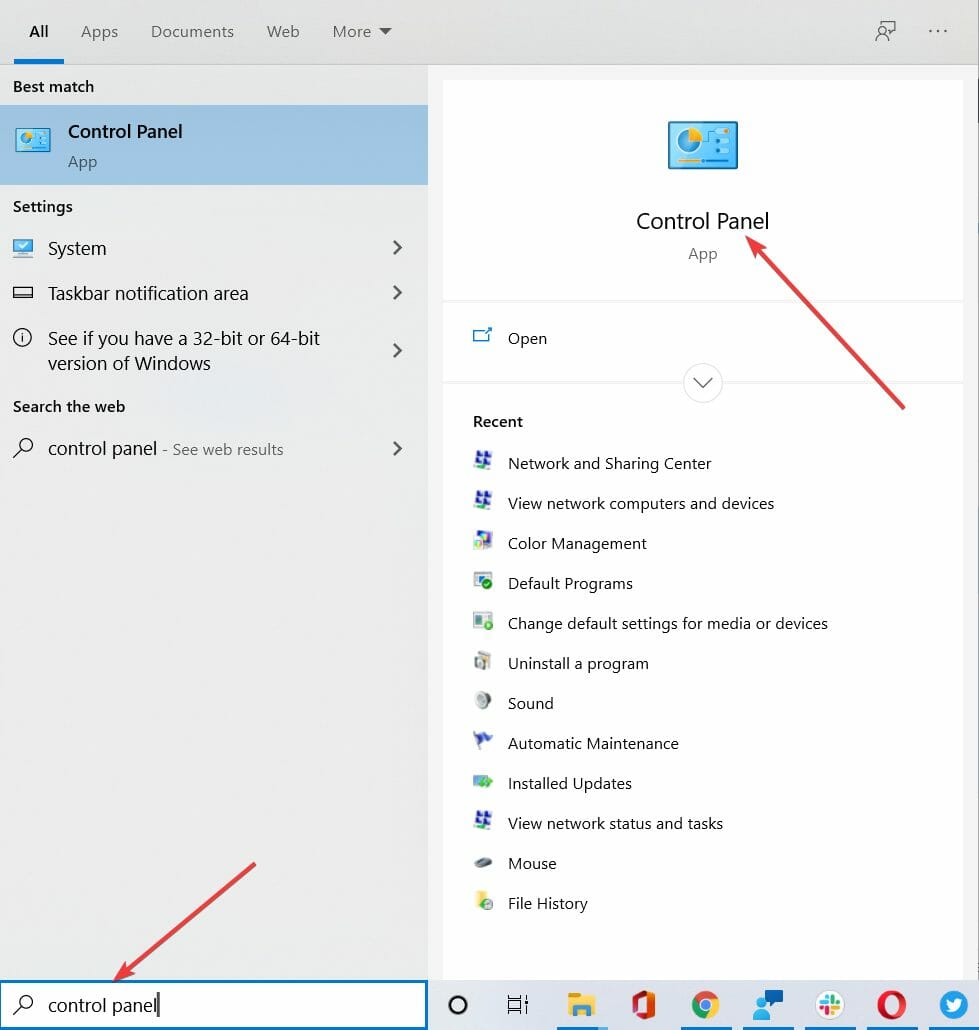
- Go to Search, type control panel, and open Control Panel from the results.
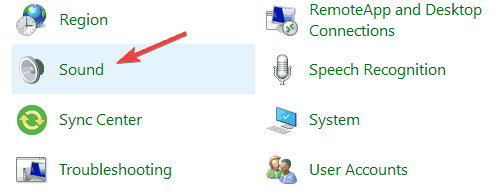
- When Control Panel opens, select Sound.
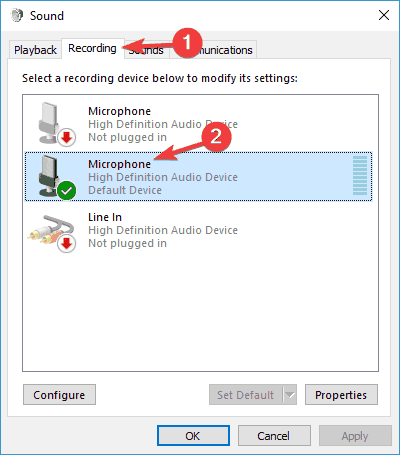
- Go to Recording tab and double-click your microphone.
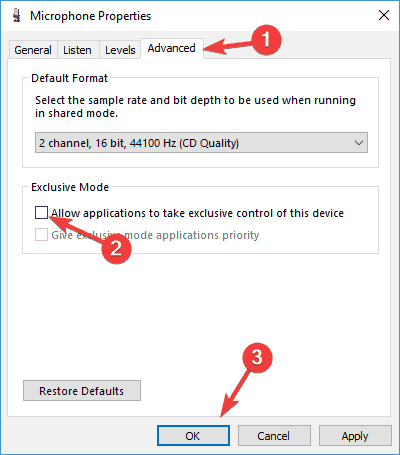
- Under Advanced tab uncheck Allow applications to take exclusive control of this device. Click Apply and OK to save the changes.
Sometimes third-party apps could make your microphone go berserk, so to prevent it, you’ll have to prevent them from controlling the microphone, which is enabled by default.
Now that you know how to lock the microphone volume, be sure to do that on your PC.
4. Reinstall your microphone driver
- Press Windows key + X to open Win + X menu. Now select Device Manager from the list.
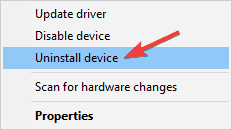
- When Device Manager opens, locate the problematic device, right-click it and choose Uninstall device.
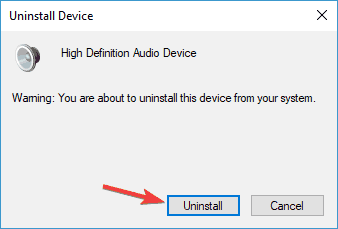
- When the confirmation menu appears, click Uninstall.
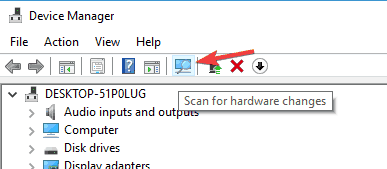
- Once the driver is removed, click on Scan for hardware changes icon.
Windows will now install the default driver, and the issue should be resolved. If the problem persists with the default driver, you should try updating your driver and check if that helps.
To keep your system working properly, you need to have all drivers updated. We recommend a third-party tool to automatically update your drivers.
A professional driver updater tool will safely update and fix all your drivers in a fraction of the time needed for you to do it manually.
5. Set your microphone as the default recording device
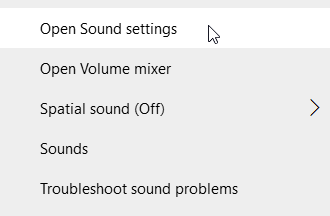
- Right click the volume control icon in the bottom right corner and choose Open Sound settings from the menu.
- Now click on Manage sound devices.
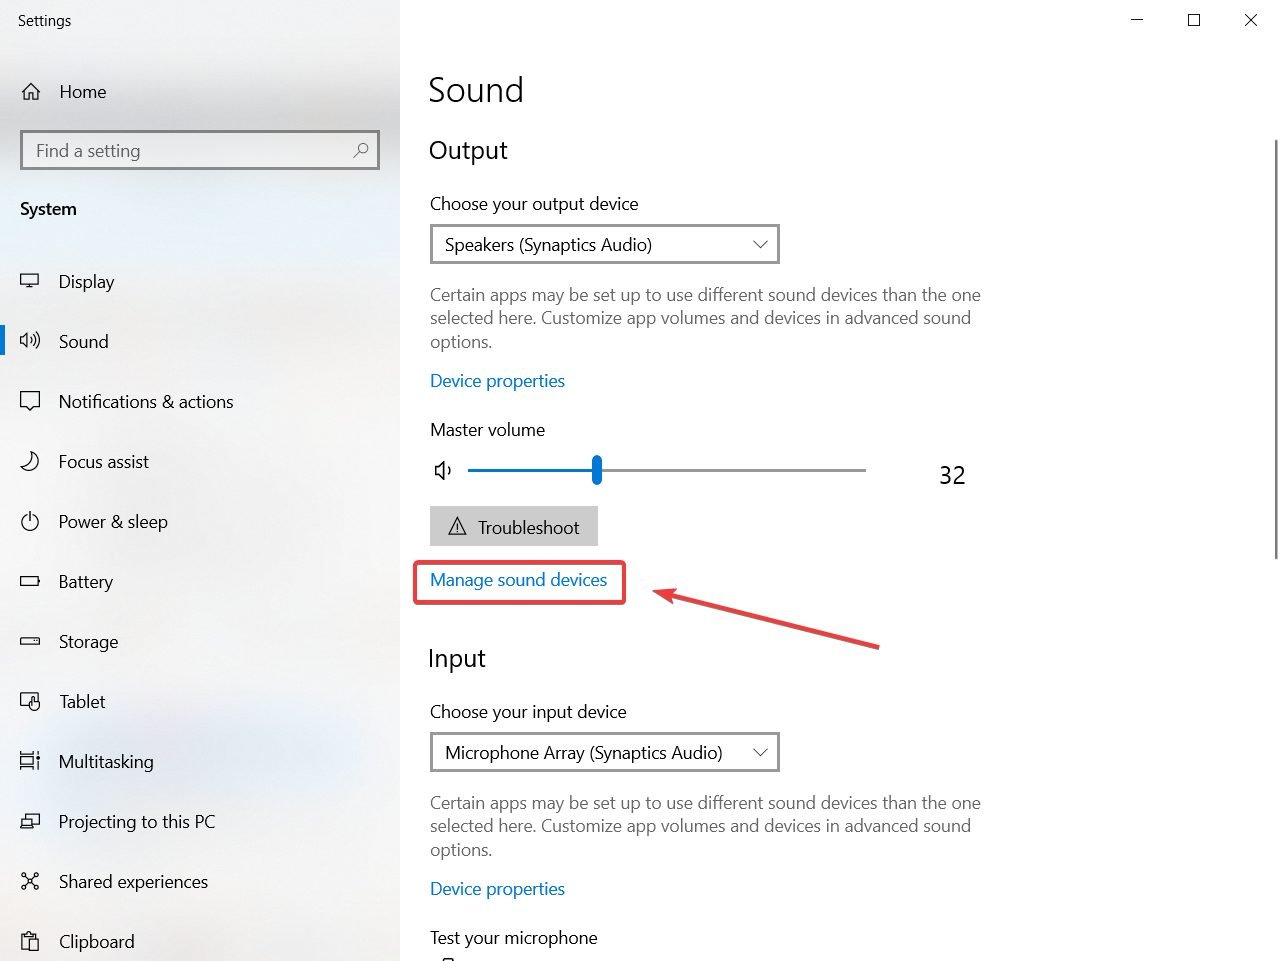
- Look at the Input devices category and find any other devices besides your microphone, click on them and select the Disable button under them.
Many webcams come with a built-in microphone, but sometimes the microphone on your webcam can be the problem.
If you have both your webcam and external microphone connected, you might encounter this issue.
6. Uninstall audio control software
- Press Windows key + X and choose Apps and features.
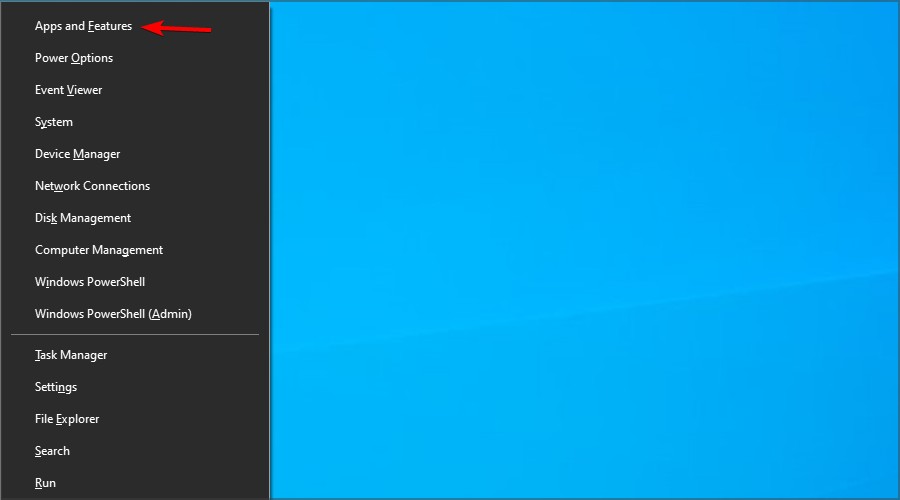
- Now select your audio control software and click on Uninstall.

- Follow the instructions on the screen to complete the process.
Many applications tend to leave leftover files and registry entries on the PC even after you remove them. These files can cause the same problem to reappear, so it’s always a good idea to use an uninstaller application.
For this, we recommend CCleaner because it has a capable uninstaller feature as well as other very useful PC cleaning and optimization tools.
You can find the Uninstaller in the Tools submenu. It will display a full list of all apps on your PC. Select which ones you want to be removed and wait for the process to complete. CCleaner will leave no trace of your uninstalled apps.
7. Try using Safe Mode
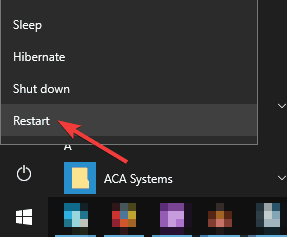
- Open the Start Menu and click the Power button.
- Now press and hold the Shift key and choose Restart from the menu.
- Choose Troubleshoot, select Advanced options and click on Startup Settings.
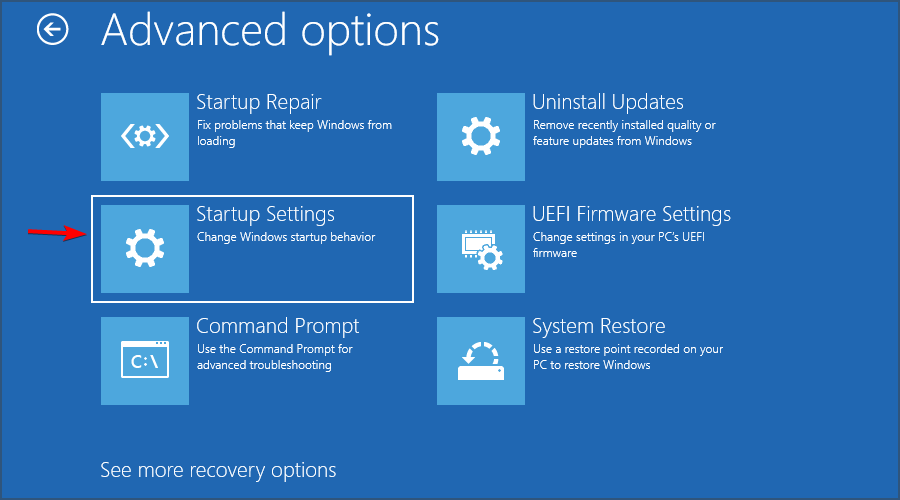
- Now click the Restart button.
- Once your PC restarts, you’ll be presented with options. Choose any version of Safe Mode by pressing the corresponding key on the key.
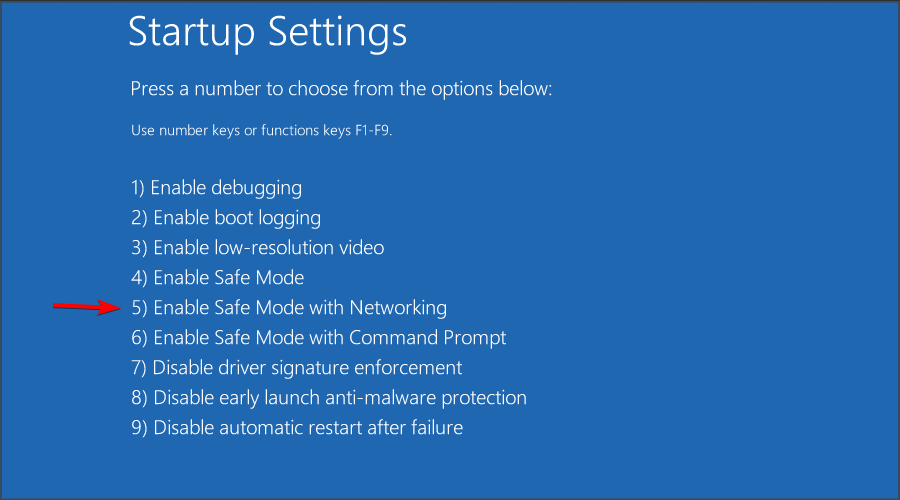
Safe Mode is a special segment of Windows that runs with default drivers and software. If you’re having an issue with your microphone volume, try using the microphone in Safe Mode and check if the issue reappears.
Once the Safe Mode starts, check if the problem appears. If not, it might be that your user profile is corrupted. If that’s the case, you must create a new user profile and check if the problem still appears.
Our solutions above should help if your mic volume keeps changing, and things should return to normal.
If you have other problems with the sound volume, we have a great article that will help you fix the problem of the volume being too low in Windows 10.
If you have any comments or suggestions, write them down in the comments section below, and we’ll surely check them out.
Read our disclosure page to find out how can you help Windows Report sustain the editorial team. Read more


Improve this guide


User forum
6 messages