The Sims 2 Not Working on Windows 11 [Solved]
An easy fix is to run the game in compatibility mode
Key notes
- If The Sims 2 is not working in Windows 11, clear the game cache, download the latest Visual C++ Redistributables, or update the graphics driver.
- Keep reading to find out how Windows Report experts fixed things in no time!
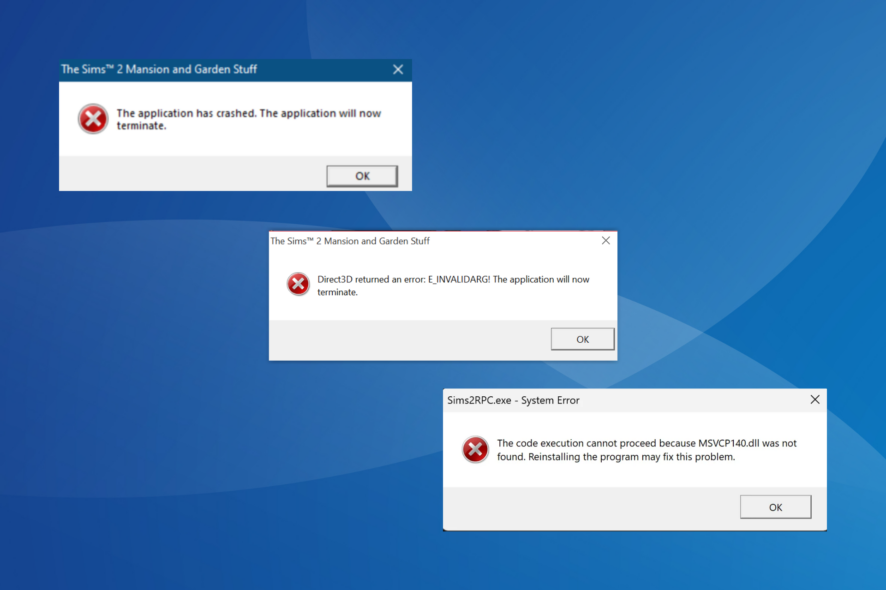
Reports of The Sims 2 not working on Windows 11 are common. For users who managed to get the game running, the process consisted of a series of tweaks, including the Graphics Rule Maker.
Though it doesn’t have to be that complex! When The Sims 2 is not opening or crashes at launch, it’s usually an outdated graphics driver, missing Visual C++ Redistributables or DLL files, or third-party apps triggering conflicts to blame.
What can I do if The Sims 2 is not working on Windows 11?
 Tip
Tip
Before we start with the slightly complex solutions, try these quick ones:
- Make sure you have the 4GB patch and all the game components installed.
- Download any available Windows updates. This also helps with The Sims 2 DirectX error.
- Disable any third-party antivirus installed on the PC.
1. Run Sims 2 in compatibility mode
- Right-click on the The Sims 2 launcher (.exe file), and select Properties.
- Go to the Compatibility tab, tick the checkbox for Run this program in compatibility mode for, and select Windows 7 from the dropdown menu.
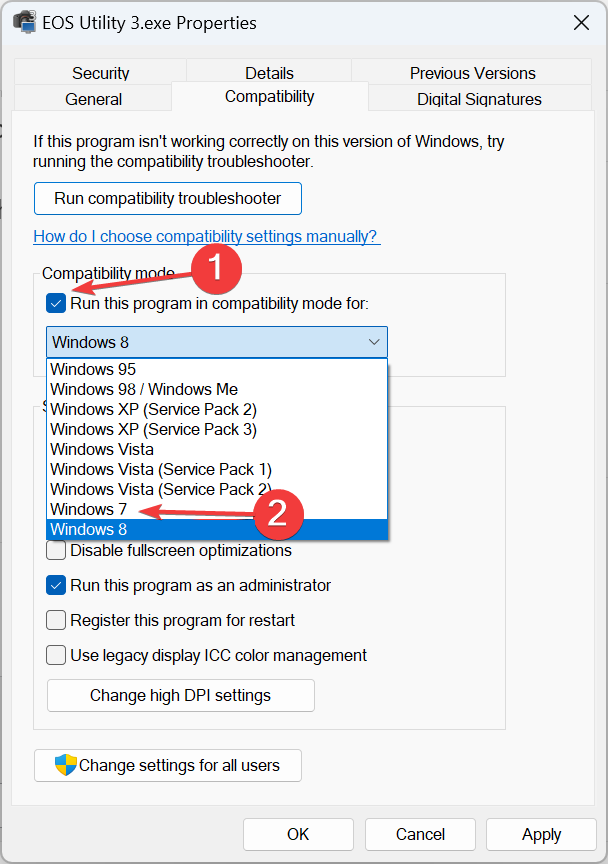
- Click on Apply and OK to save the changes.
If this doesn’t work, try out the other iterations listed in the dropdown menu.
2. Update the graphics driver
- Press Windows + X to open the Power User menu, and select Device Manager from the list.
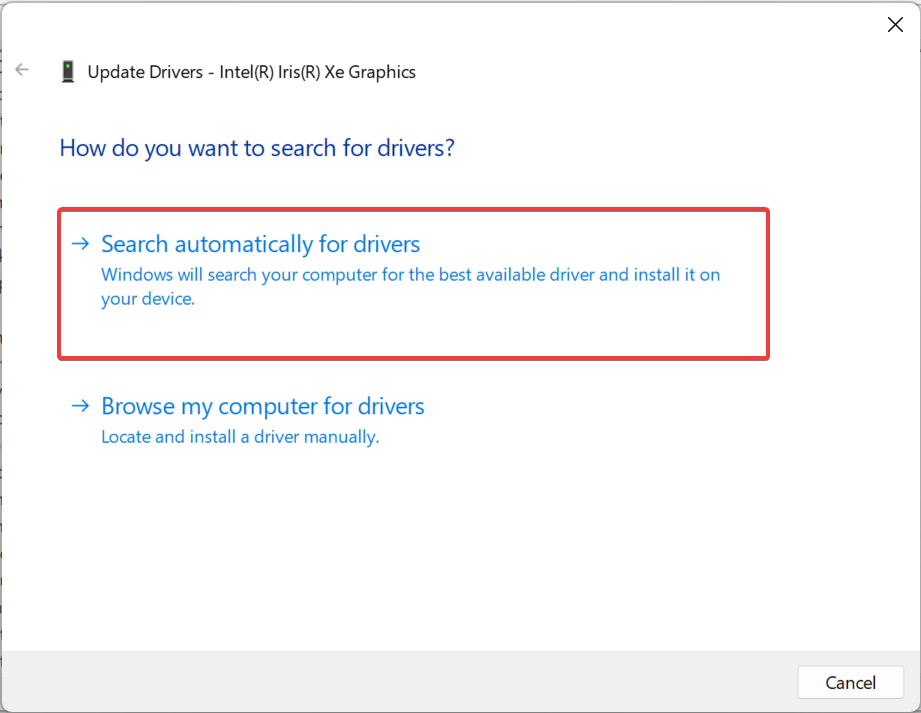
- Expand the Display adapters entry, right-click on the active graphics adapter, and select Update driver.
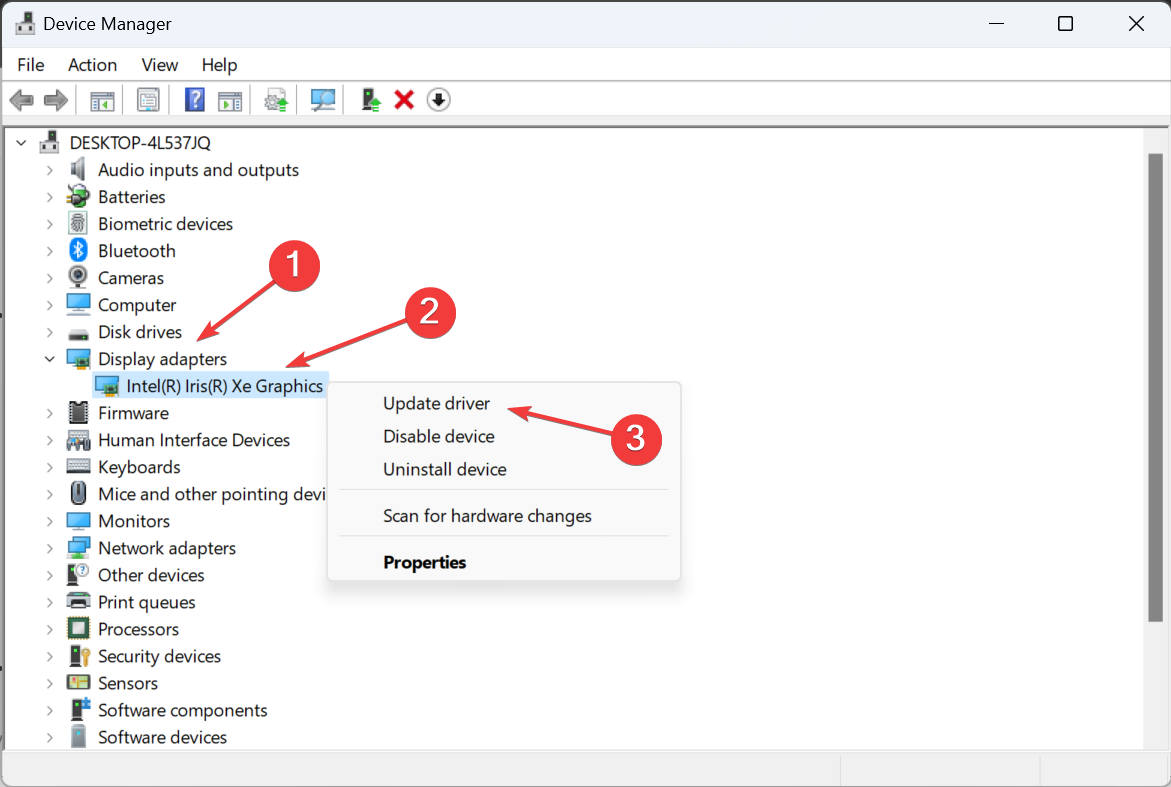
- Click on Search automatically for drivers and wait for Windows to install the best available driver on the PC.
- Once done, reboot the Windows 11 PC.
When The Sims 2 won’t launch on Windows 11, update the graphics driver. And if Windows can’t find a newer version, search for it on the manufacturer’s website and manually install the latest driver.
This also helps when The Sims 2 crashes on Windows 10.
3. Disable the integrated GPU
 NOTE
NOTE
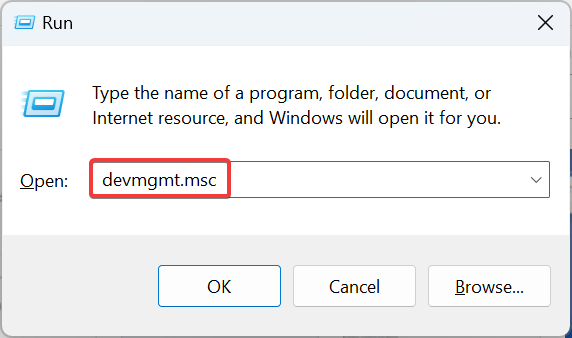
- Press Windows + R to open Run, type devmgmt.msc in the text field, and hit Enter.
- Double-click the Display adapters entry.
- Now, right-click on the integrated graphics, and select Disable device.
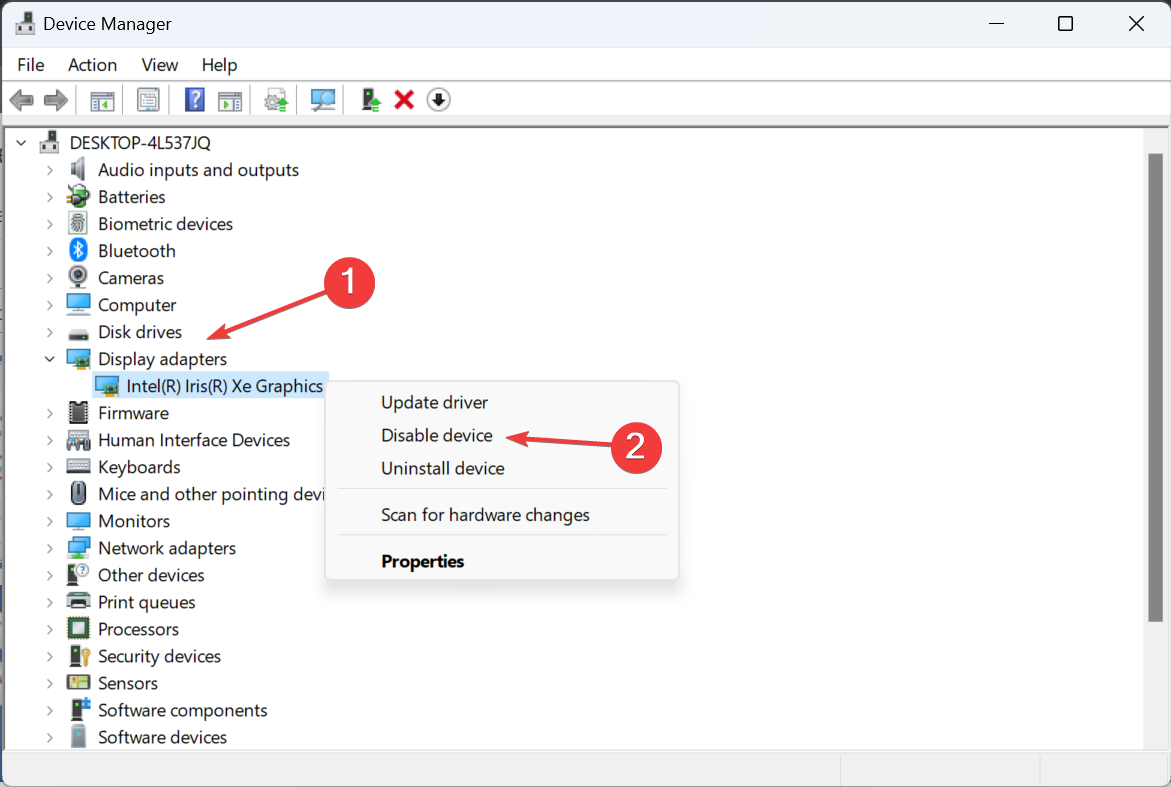
- Click Yes in the confirmation prompt.
4. Clear the game cache
- Terminate any instances of The Sims 2 in the Task Manager or restart the computer.
- Now, press Windows + E to open File Explorer, paste the following path in the address bar and hit Enter:
Documents\EA Games\The Sims 2 Ultimate Collection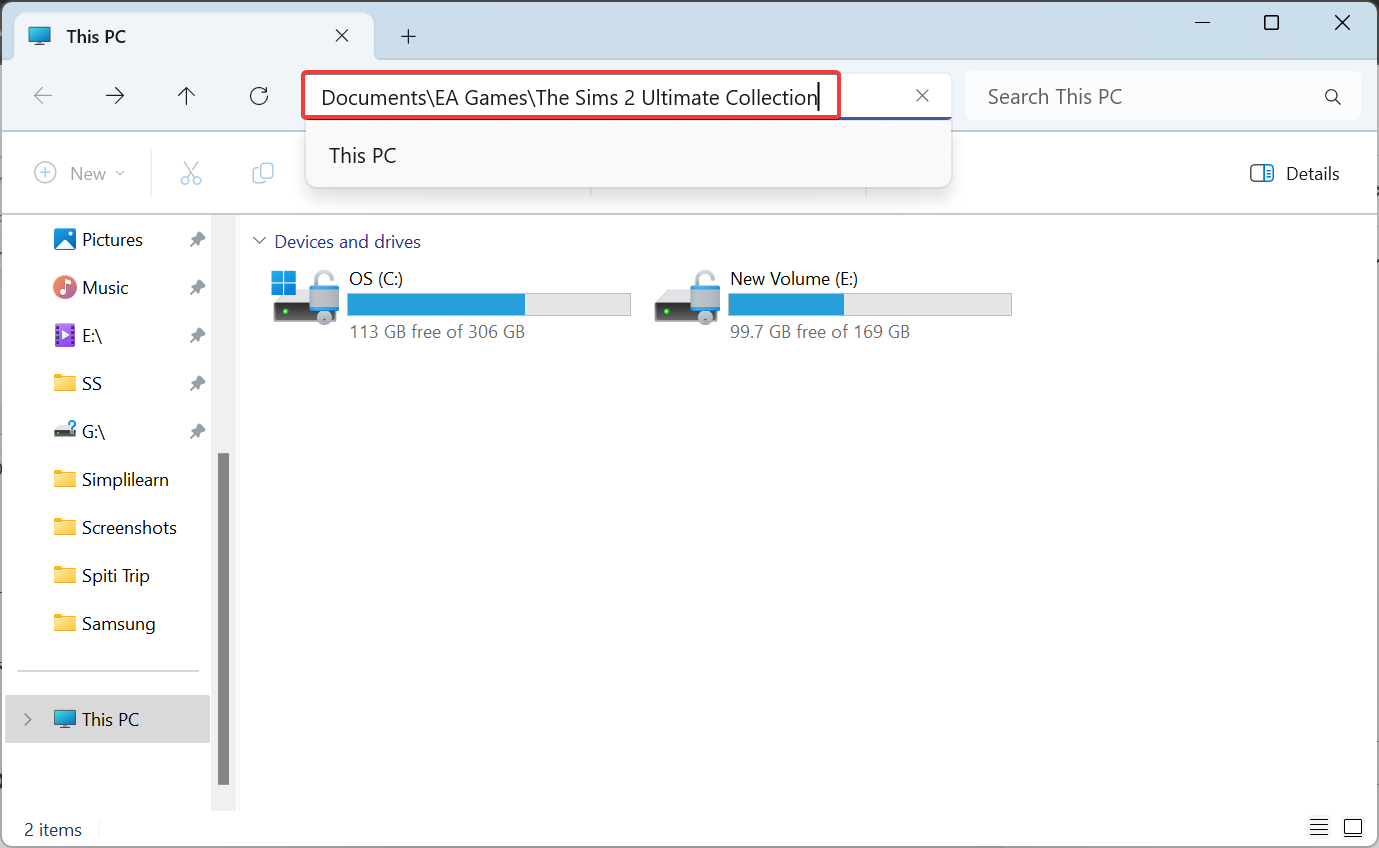
- Delete the following two files:
- Groups.cache
- Accessory.cache
- Relaunch The Sims 2 and check whether it’s now working in Windows 11.
5. Disable OneDrive and other cloud storage services
- Click the OneDrive icon in the system tray. If it’s not there, open OneDrive via the Search menu, and the icon will appear.
- Click the gear icon near the top right, and then select Settings.
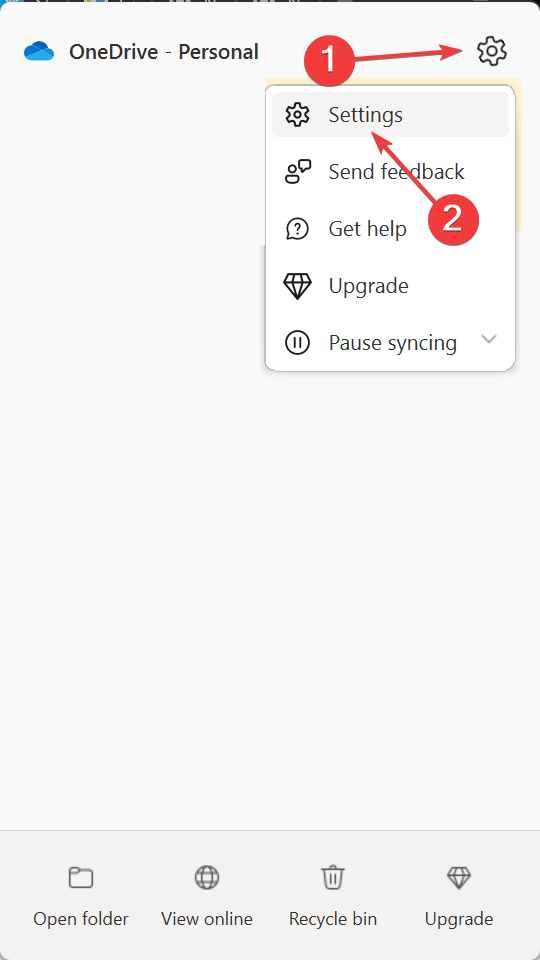
- Now, click on Unlink this PC.
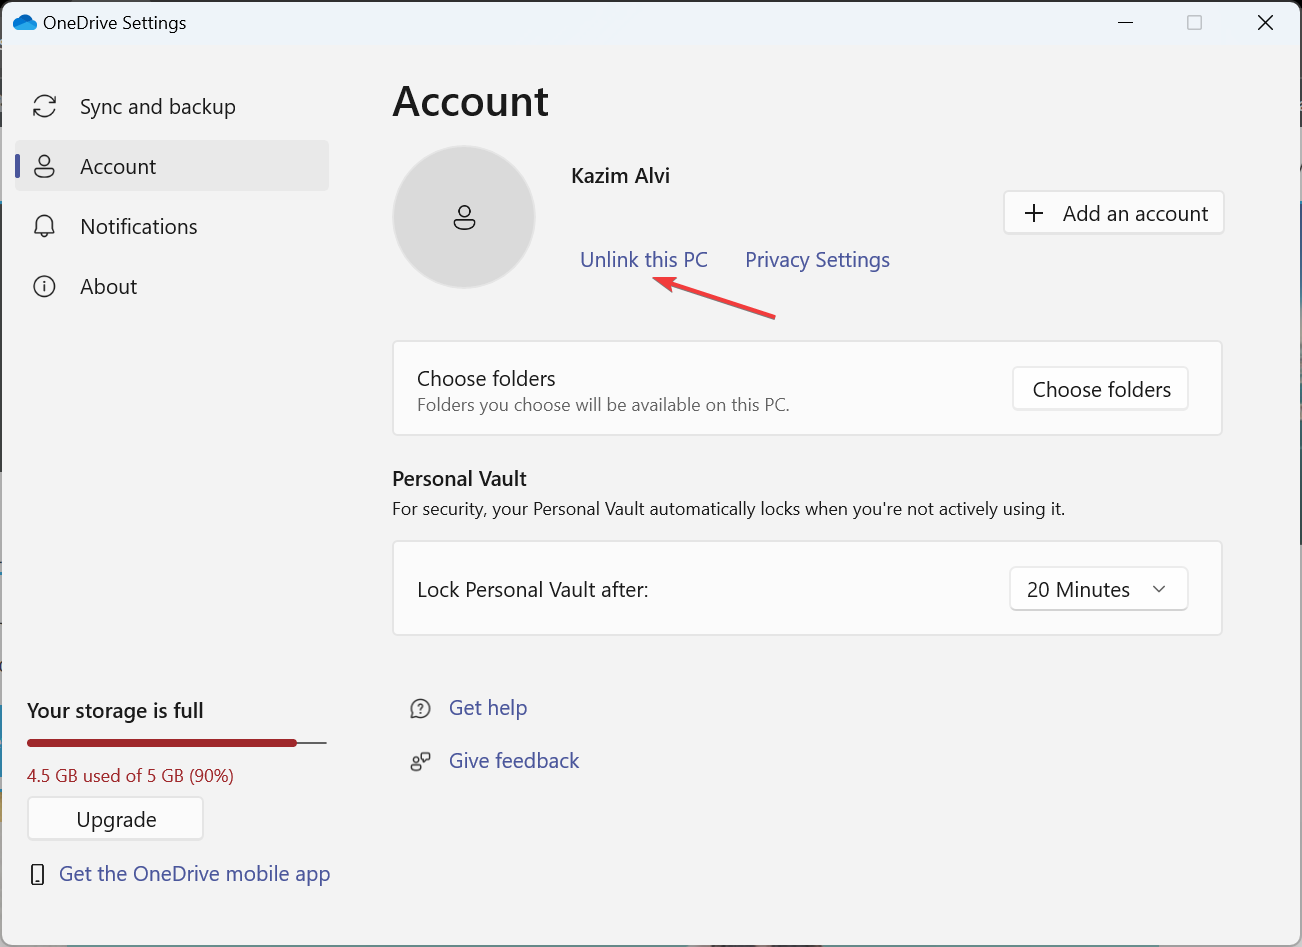
- Click Unlink account in the confirmation prompt that appears.
- Restart the computer and check for improvements.
As per our experts, OneDrive may alter the files stores in the Documents folder, which will cause The Sims 2 to crash or not work on Windows 11. So, disable or remove OneDrive!
6. Install the Visual C++ Redistributables
- Go to Microsoft’s official website, and download the latest X64 Visual C++ Redistributables.
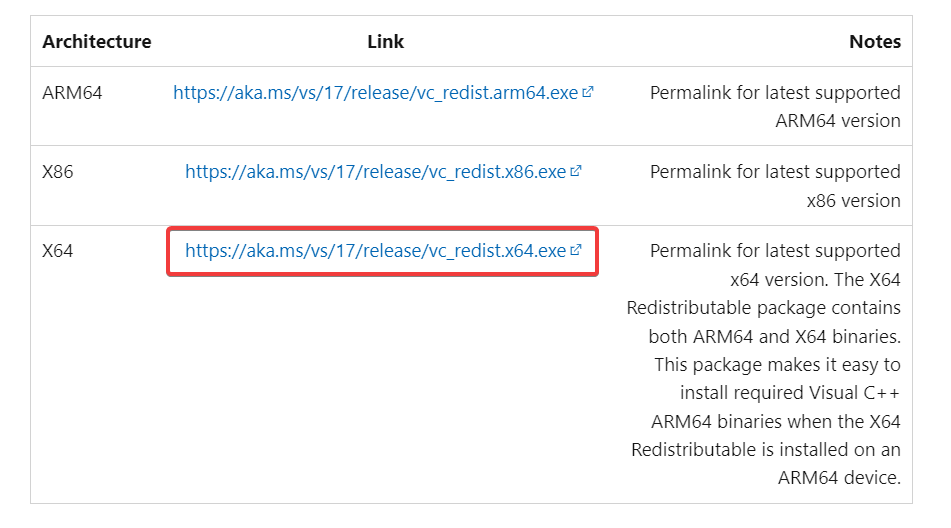
- Run the setup and follow the on-screen instructions to complete the installation.
If The Sims 2 throws an error saying that MSVCP140.dll is missing or VCRUNTIME140.dll is not found, get the latest Visual C++ Redistributable packages.
7. Reinstall The Sims 2
- Press Windows + R to open Run, type appwiz.cpl in the text field, and hit Enter.
- Select The Sims 2 from the list of applications, and click Uninstall.
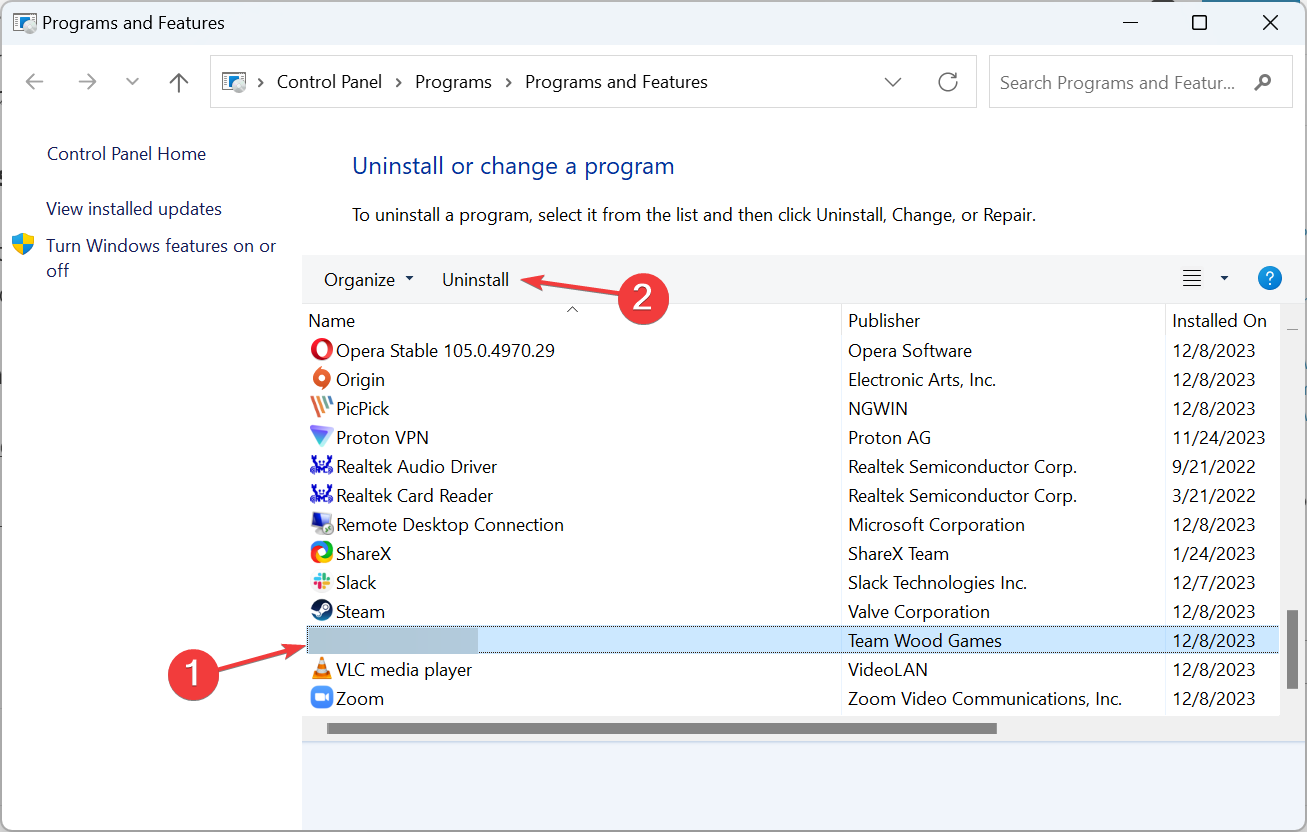
- Follow the on-screen instructions to complete the process.
- Reboot the device and then reinstall The Sims 2 from an official source or the disc.
If the problem persists, you can use a reliable software uninstaller to delete any leftover files and Registry entries. The game will work post-reinstall!
A few users could run The Sims 2 on a virtual machine when it wasn’t directly working on Windows 11. When doing so, make sure to install Windows 7 or an older iteration of the OS.
Before you leave, discover the best Windows 11 graphic settings for gaming for a finer experience!
For any queries or to share what worked for you, drop a comment below.
Read our disclosure page to find out how can you help Windows Report sustain the editorial team. Read more


Improve this guide


User forum
0 messages