Twitch Keeps Buffering: 9 Ways to Stop it
The best ways to get back to enjoying your stream
Key notes
- Twitch is a popular platform but it has its own flaws and the buffering error can appear due to browser issues or network problems.
- If Twitch keeps buffering, we suggest trying a gaming browser with Twitch integration.
- Make sure that there are no other background apps interfering with the streaming platform.

Twitch is one of the most popular live-streaming services for gamers. But despite its popularity, many users reported Twitch keeps buffering, especially on browsers like Chrome or Firefox.
On this note, users complained of VoD, playback problems, or clip buffering, which occurs due to background applications. All these issues will have a massive negative impact on user experience, affecting the overall gaming dynamics.
Why is my Twitch constantly buffering?
The Twitch keeps buffering issue can be caused by various factors from system issues to problems with your browser. Below are some of the popular causes:
- Internet connection issues – In case your Internet is slow or unstable, it can cause Twitch not to load on Chrome and Firefox or constant buffering. We suggest checking the Internet status first. In addition, you’ll get more fixes in this way later.
- Background apps, extensions, cookies, or cached files affecting the app – In this situation, we recommend temporarily disabling the extensions and clearing your browser’s data.
- Your system is infected with malware – Because cyber attacks are more and more frequent, you can easily get viruses that will cause the Twitch buffering issue even with good internet. You can use one of the best antivirus software to scan and remove the malware.
- Browser-related problems – If you’re facing this error when running the Twitch browser version, we recommend using one of the best browsers for Twitch streaming.
Now, let’s see what you can do to solve all of the issues mentioned above.
How do I fix Twitch if it keeps buffering?
Before exploring our fixes on the Twitch keep buffering issue, below are some checks to perform that might solve the problem for you:
- Check the Twitch server status.
- Ensure that your internet connection is active and stable.
If you are still facing this issue after these preliminary checks, you can now explore the fixes below.
1. Turn off/on low latency
1.1. As a broadcaster
- Log in to your Twitch account, click the Profile picture icon, and select Settings.

- Click the Channels and Videos tab at the top to open your dashboard.

- Choose Settings followed by Stream in the left pane.
- Finally, scroll down and check/uncheck the radio button next to the Low latency option under Latency mode.

Now, you can restart the stream and check if the issue persists.
1.2. As a viewer
1. Click the Settings icon on the Twitch player of the video you are streaming.
2. Choose the Advanced option.

3. Now, toggle the switch before Low latency to activate/deactivate it.

The Low latency mode is used by streamers and viewers to communicate in near real-time. However, some users have found it to be the cause of the Twitch buffering constantly issue. So, be sure to enable and disable this feature as in the example below
2. Disable hardware acceleration
2.1 Google Chrome
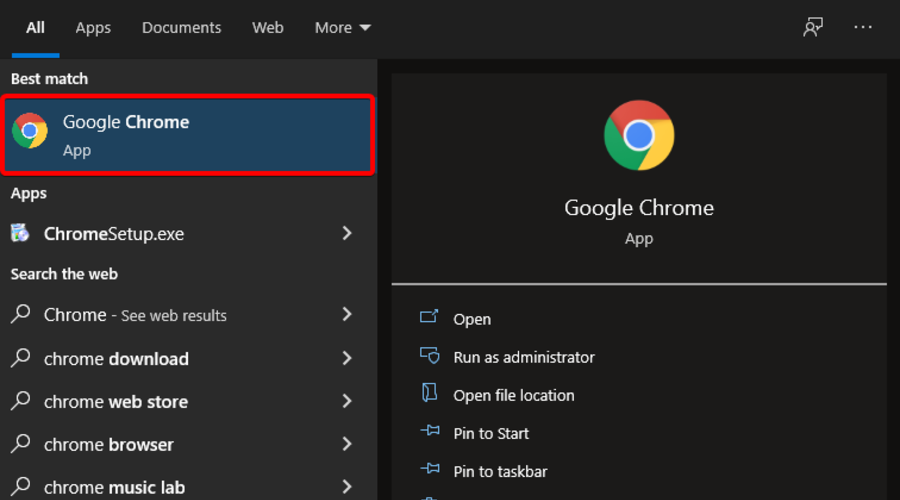
- Hit the Windows key, type Chrome, and then open the first result.
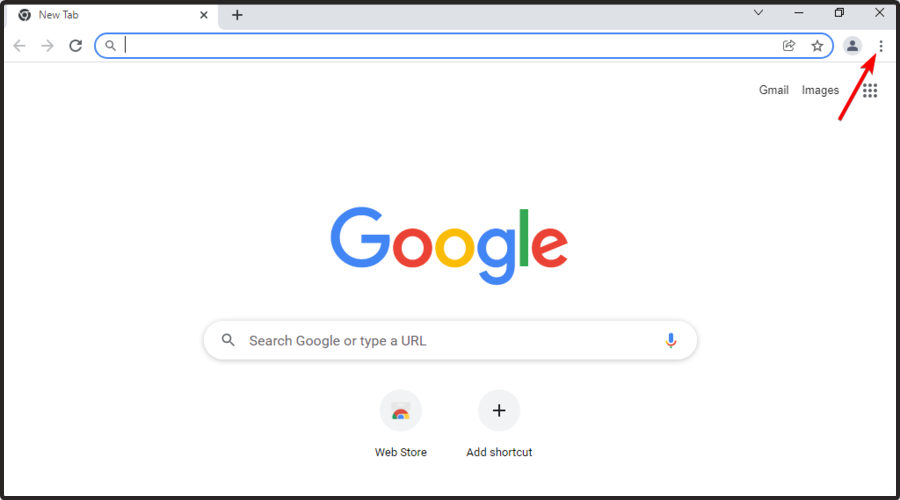
- Look at the top-right corner of the window, then click on the 3 vertical dots (the Chrome General menu).
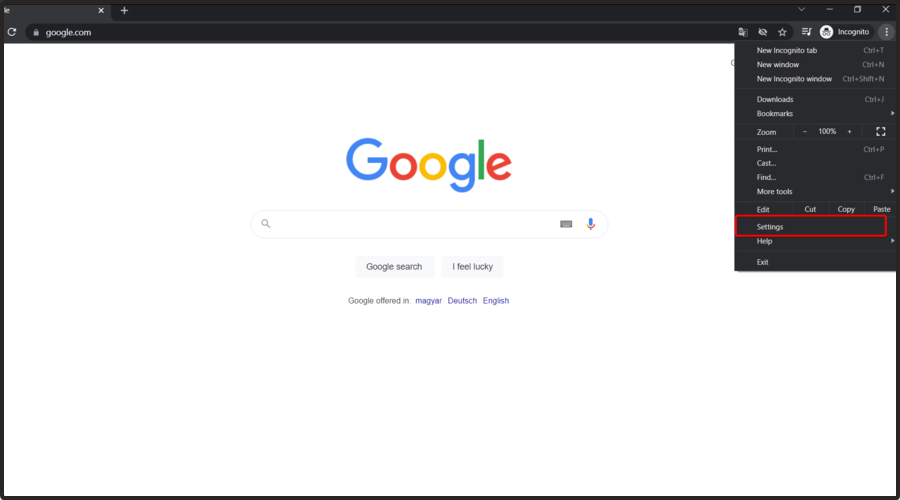
- Navigate to Settings.
- From the left window pane, expand the Advanced section, then click on System.
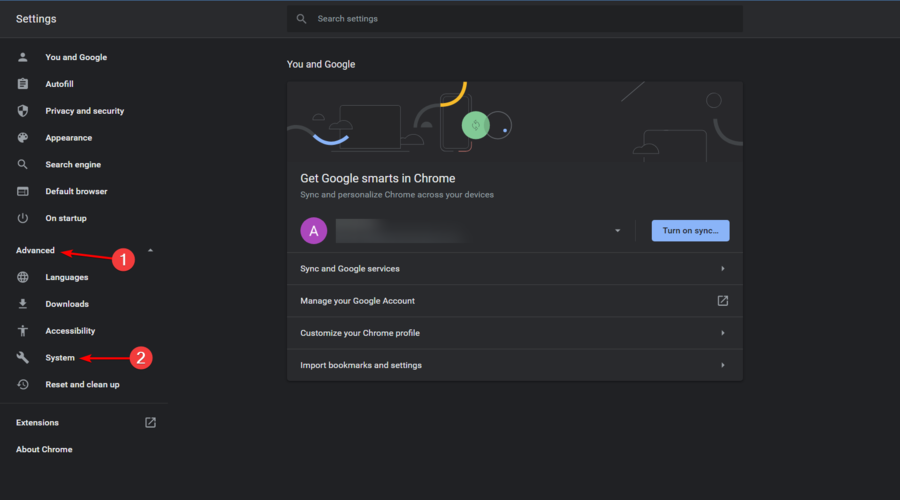
- Locate the Use hardware acceleration when available option and disable it.

- Restart your browser.
After disabling this feature, check if still Twitch keeps buffering on your PC.
2.2 Mozilla Firefox
- Press on the Windows key, type Firefox, and open it.

- Go to the Firefox General menu (marked as 3 horizontal lines in the top-right corner of the window).

- Click on Settings.

- Now, in the right side of the window, scroll down until you find the Performance section.

- There, uncheck the Use recommended preferences settings option, then the Use hardware acceleration when available one.

If Twitch keeps buffering every few seconds, it could be due to the hardware acceleration feature. The hardware acceleration feature will utilize your GPU to process data.
However, it can lead to some problems, so you should disable it. After disabling this feature the issue should be resolved. Other problems can be generated by hardware accelerations, such as the Twitch error 1000.
3. Clear the browser’s cache
3.1 Google Chrome
- Hit the Windows key, type Chrome, and then click on the first result.
- Use the following keyboard shortcut to open the Clear browsing data menu: Shift + Ctrl + Delete.
- Select All time as the time range.
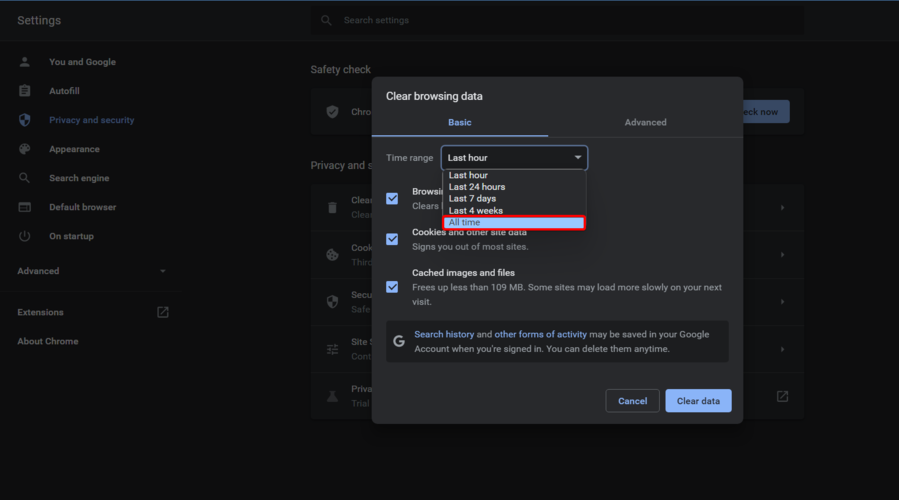
- Checkmark the Cookies other site data and Cached images and files sections.
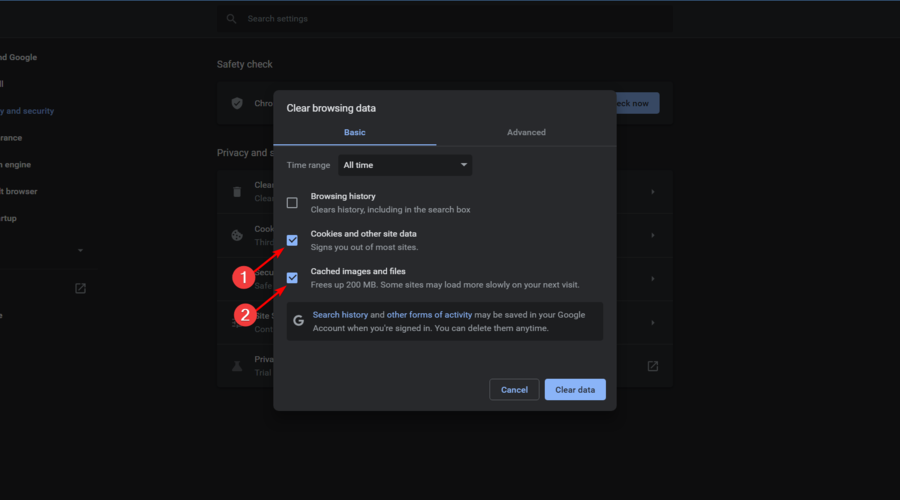
- Click on the Clear Data button.

3.2 Mozilla Firefox
- Press on the Windows key, type Firefox, and open the first result.
- Click on the 3 horizontal lines button from the top right corner.
- Navigate to History.

- Click on Clear Recent History.

- Click on the Time range dropdown menu and select Everything.
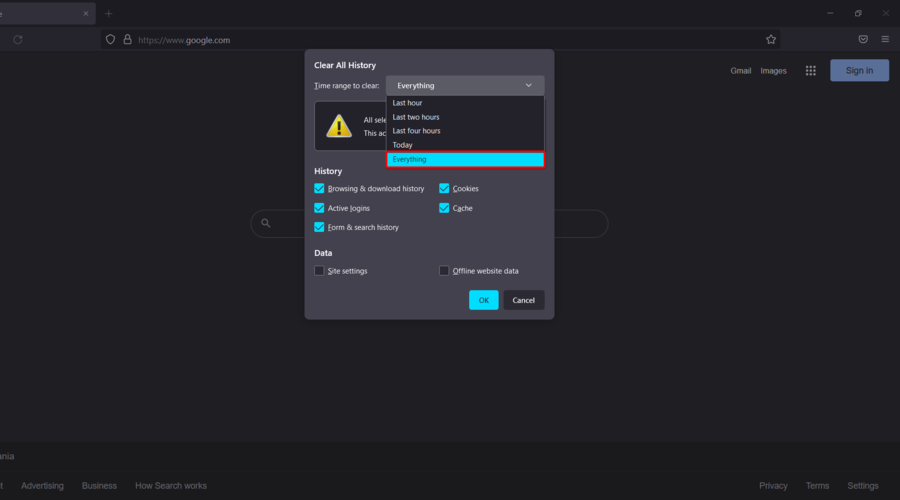
- Checkmark anything you want to clear from the History and Data sections. We recommend checking all the boxes except Active logins.

- Click on OK.
- Now, go again to the Firefox general menu.
- Navigate to Settings.
- From the left window pane, choose Privacy & Security.

- Scroll down to Cookies and site data, then click on the Clear Data… button.

You should know that there are tools that can help you perform this task automatically and according to a schedule. Check the best cookie cleaner software for your Windows 10/11 PC to discover which one is more efficient.
4. Disable browser extensions
4.1 Google Chrome
- Hit the Windows key, type Chrome, and then open the first result.
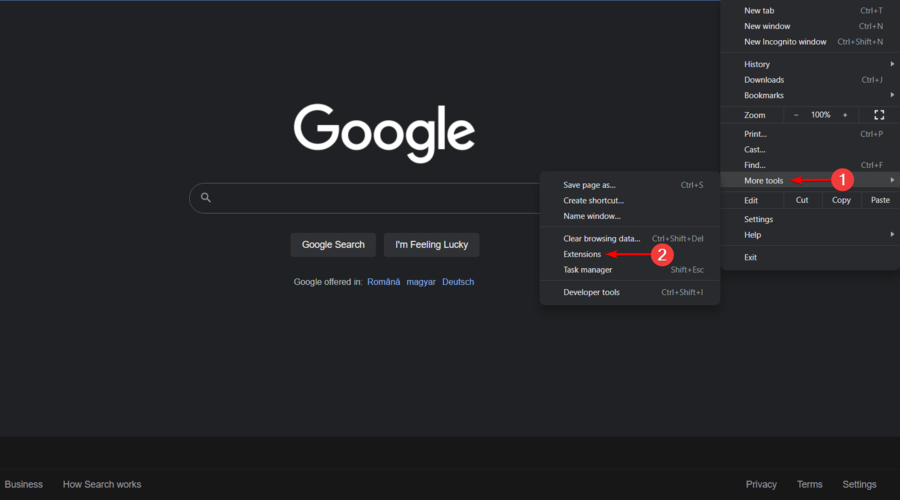
- Click on the Customize and Control Google Chrome menu button (the 3 vertical dots placed in the right-top corner of the window).
- Hover the mouse over More tools, then click on Extensions.
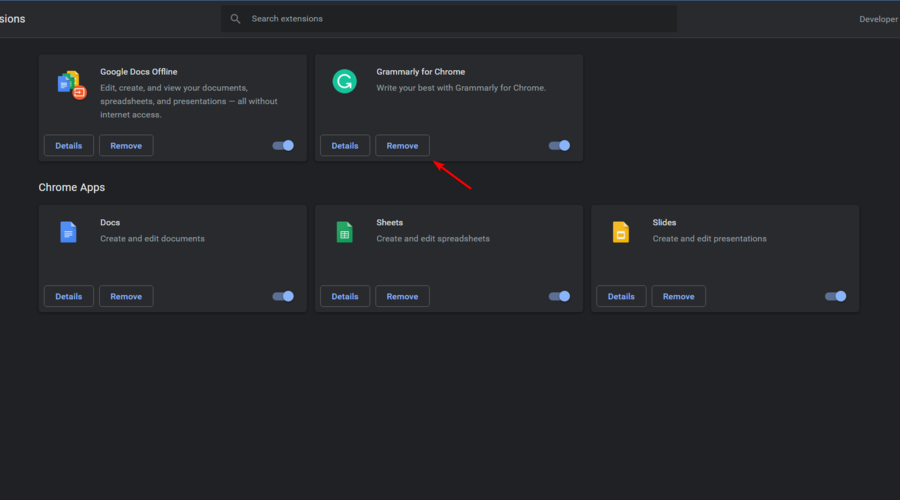
- On to the extension you want to remove, click Remove.
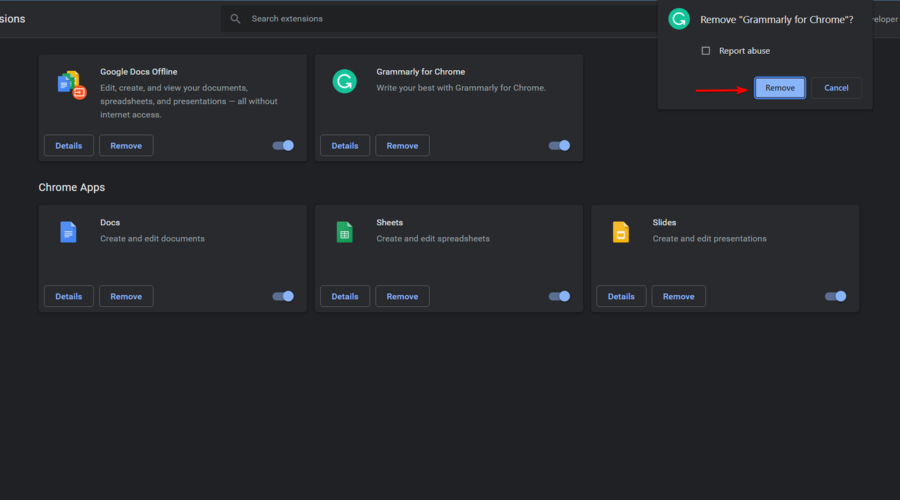
- Confirm by clicking Remove.
- Repeat the process for all your extensions.
4.2 Mozilla Firefox
- Press on the Windows key, type Firefox, and then open the first result.
- From the top-right corner of the window, navigate to the Firefox menu (marked as 3 horizontal lines).
- Navigate to Add-ons and themes.

- From the left window pane, select Extensions.

- Find the ones you want to disable, click on them then on the Disable button.
- If you want to delete an extension entirely, click Remove.
Once you disable all extensions, check if the problem is still there. If the issue doesn’t appear anymore, try enabling the disabled extensions one by one.
Be sure to repeatedly check Twitch to pinpoint the extension causing the problem. Twitch adblock and other adblockers are notorious so once you find the problematic extension, remove it, or keep it disabled.
5. Change your DNS
- Use the following keyboard shortcut to open the Settings menu: Windows + I.
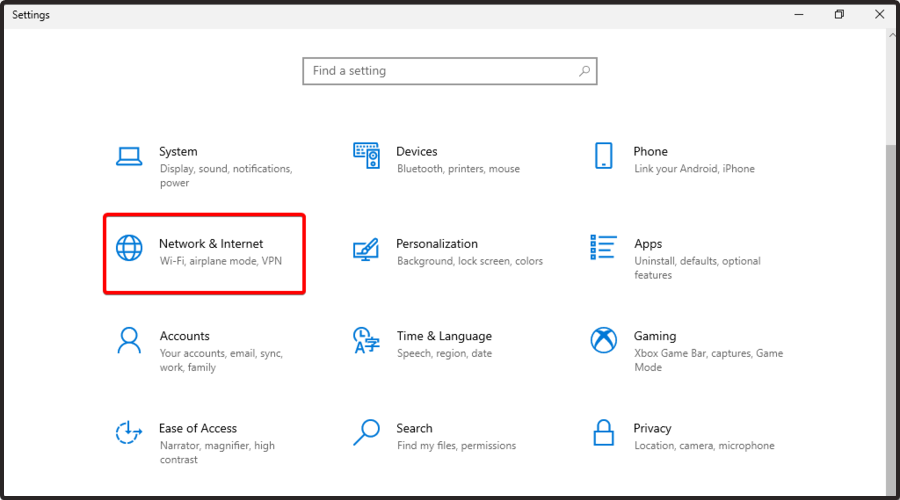
- Navigate to Network & Internet.
- From the right window pane, click on Change adapter options.

- A list of available network connections will appear. Right-click your network connection and choose Properties from the menu.

- Select Internet Protocol Version 4 (TCP/IPv4) from the list, then click on Properties.

- When the new window appears, select Use the following DNS server addresses.

- Now enter 8.8.8.8 as the Preferred and 8.8.4.4 as the Alternate DNS server.

- Click the OK button to save changes.
After making these changes, you’ll switch your DNS to Google’s DNS and the issue should be resolved. If Twitch is buffering every few seconds, it’s possible that your network connection is the problem.
6. Disable background applications
- Press the Windows key + I to open Settings and select Privacy.

- In the left window pane, scroll down to Background apps, then click on it.
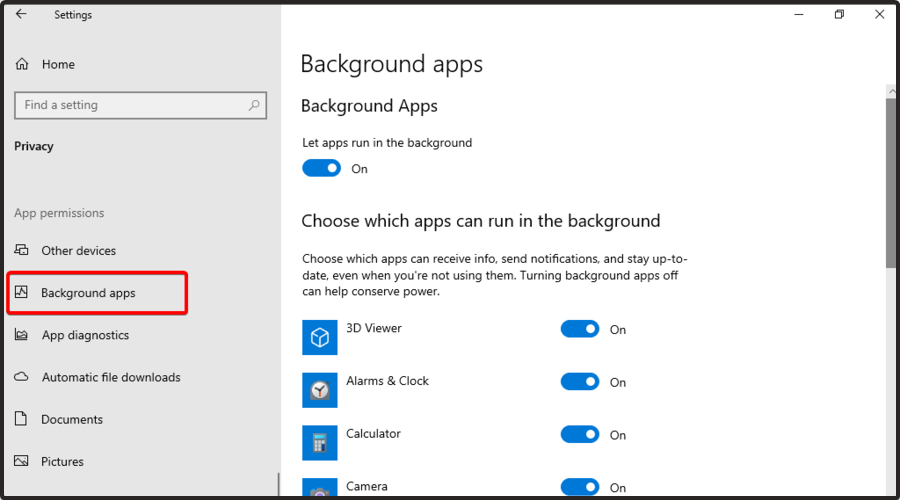
- Now, in the right window pane, make sure that Let apps run in the background is turned Off.
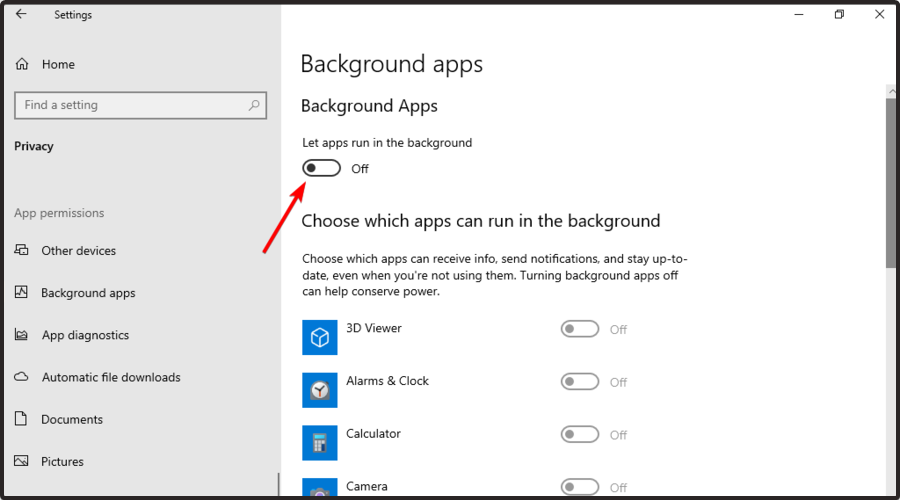
According to users, if you’re facing Twitch buffering issues, the background applications might be responsible.
A common cause for this is Steam updating certain games in the background. So be sure that Steam isn’t downloading anything or that it does not have updating issues.
If you notice that the Steam update is stuck or not downloading, you can use our comprehensive guide to resolve the problem.
In addition, check any other applications that might be using your bandwidth in the background and disable them. After you disable these applications, check if the problem is still there.
7. Check for malware
- Press the Windows key + S, type virus, and select Virus & threat protection.

- Choose Scan options.

- Finally, select your preferred scan option and click the Scan now button.

If Twitch is buffering but the Internet is fine, we recommend performing a full system scan using your antivirus
If there’s no malware on your PC, perhaps the issue is your antivirus. To check that, disable some antivirus features and see if that can be a potential Twitch buffering fix.
Alternatively, you can remove your antivirus altogether and check if that helps. However, the preferred way, in this case, would be to use one of the best antiviruses with Gaming Mode & Booster in ESET NOD32.
This lightweight software does not interfere with your system and does everything to keep your PC protected online and offline. More importantly, it detects and eliminates viruses before they can affect your computer.
8. Disable your proxy or VPN
- Press the Windows + I and select the Network & Internet option.
- Select Proxy from the left pane, then disable all options from the right pane.

Once you disable all options, the proxy will be disabled and the problem with Twitch buffering should be resolved. If you’re using a VPN, be sure to disable or uninstall it and check if that solves the issue.
What’s more, we suggest that you try a good VPN that won’t interfere with Twitch and other websites.
Besides ensuring that browsing is safe no matter what website you access, a premium VPN also cleans your traffic and unblocks media content that is geo-location restricted.
9. Block specific IP range
- Hit the Windows key, type Windows Defender Firewall with Advanced Security, and then click on the first result.

- From the left window pane, click on Inbound Rules, then look at the right side of the window, and select New Rule.

- Select Custom rule and click on Next.

- Keep clicking Next until you reach the Scope screen.

- Select These IP addresses and click Add in the Which remote IP addresses does this rule apply to section.

- Select This IP address range and enter the following addresses: 206.111.0.0 (From) and 206.111.255.255 (To).

- Click OK to proceed.
- Now repeat steps 5-7, but this time, use the following IP addresses: 173.194.55.1 (From) and 173.194.55.255 (To).

- Once you’re done, click Next.
- Select Block the connection and keep clicking Next to finish the process.

Once you configure your firewall, you just have to run the following command in Command Prompt or restart your PC: ipconfig /flushdns
Check if the problem is still there. Many users reported that this solution worked for them, so be sure to try it out.
To improve your experience with Twitch and other similar streaming platforms, you can try to use any of these best broadcasting software. Also, find out how to fix a slow Internet connection in Windows.
Do let us know which solution from our guide worked for you, or if you have any other suggestions for us, in the comments below.
Read our disclosure page to find out how can you help Windows Report sustain the editorial team. Read more


Improve this guide

User forum
1 messages