Fix: This Version of System Recovery is not Compatible
Making some modifications to your boot settings should do
5 min. read
Updated on
Read our disclosure page to find out how can you help Windows Report sustain the editorial team. Read more
Key notes
- If you are dealing with this version of system recovery is not compatible error, you can fix it by creating a fresh recovery disk.
- Another effective solution is to boot in UEFI Mode/ legacy BIOS-compatibility mode.
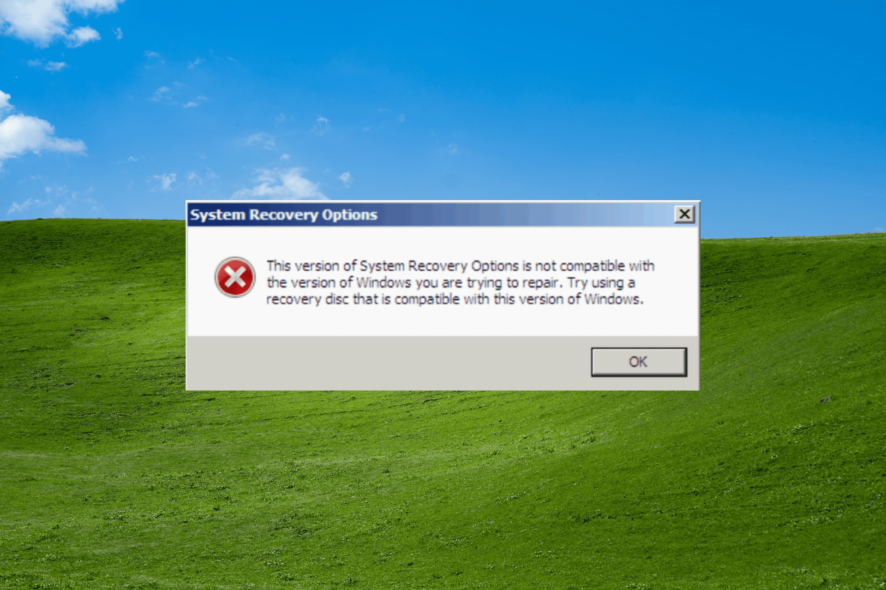
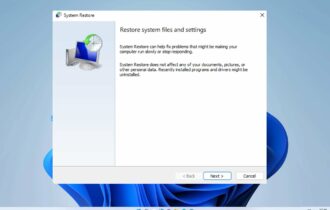
System recovery is one of the easiest remedies if your Windows 7 installation has failed. Sadly, it doesn’t always work due to seemingly random issues such as this version of system recovery options is not compatible error.
When it occurs, your PC may not be able to recover its correct boot settings and might show a black screen. While this issue can look scary, the solutions in this guide will help you fix it quickly.
Why am I getting the version of system recovery options is not compatible error?
- Compatibility issues: This hitch can occur when your installed version of Windows is incompatible with the Windows image you are using for recovery. For example, it could be an OEM while you have installed a retail edition. You could also be running a 64-bit recovery disk on a 32-bit Windows.
- Wrong Boot Settings: Adjusting the system boot settings in BIOS during repair could confuse the boot process and cause this problem.
- Disconnected Drives: You can also expect this challenge if you’re attempting a system restoration when one drive is disconnected (for PCs installed with multiple hard drives).
Long story short, the error arises due to a faulty system repair setup.
How can I fix this version of system recovery is not compatible error?
1. Modify Your Boot Settings
1.1. Disable all other disks but your Windows system disc
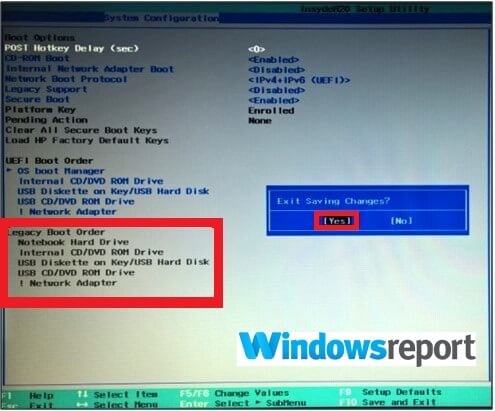
If you disable your second hard disk (and every other extra disk) in BIOS and leave the Windows system disc (primary hard drive) only when recovering, the compatibility hiccup may not occur. This should then allow the Windows 7 recovery to proceed normally.
1.2. Set the System Disk to be accessed from a lower channel
Alternatively, you may have to look into which ports the various drives – system, DVD/Blu-ray drives, and secondary disks are installed on the motherboard.
You then rewire the system drive into a lower channel/slot, for example, SATA slot #0(channel 0). Connect the rest into the other slots. For instance, the Blu-ray can go to SATA slot #1, RAID on SATA slot #2, and so on.
In addition, switch boot sequences and ensure that the system disk will be number 1 in the system boot priority list. Lastly, reboot from your recovery disk.
2. Disconnect and reconnect the drives
If your Windows repair option won’t work, try disconnecting and then reconnecting your hard drives, including any existing RAID disks.
You would need to access their ports by removing the system case. Remember to unplug the PC from the power source before opening the case.
Retry the recovery soon after reconnecting the power cables and see if this will fix this version of system recovery options is not compatible problem.
3. Disable UEFI
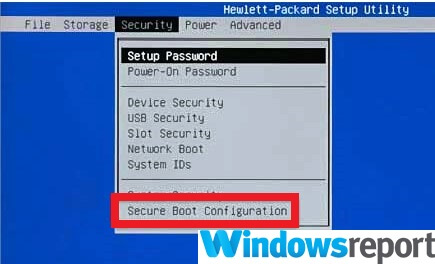
- Open your PC’s BIOS menu. You press the correct key during boot sequence, for example, Esc, F1, F2, or F12.
- Locate the Secure Boot settings, and change it to Disabled. You can find this option under either Authentication, Security, or Boot.
- Save the changes and exit.
- The PC reboots.
UEFI Secure Boot helps to ensure that your computer boots using trusted firmware only. But it occasionally triggers this version of system recovery options is not compatible issue.
Disabling Secure Boot can hence remove the unwelcome setback. If all is well, it will re-launch recovery and run the steps to completion.
4. Create a fresh recovery disk
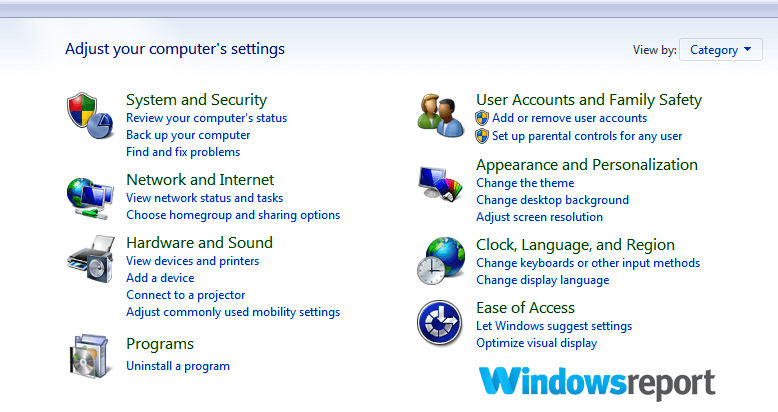
- From another EFI partitioned machine, click the Start button (insert a USB flash drive/DVD first).
- Select Control Panel from the menu.
- Select System and Maintenance.
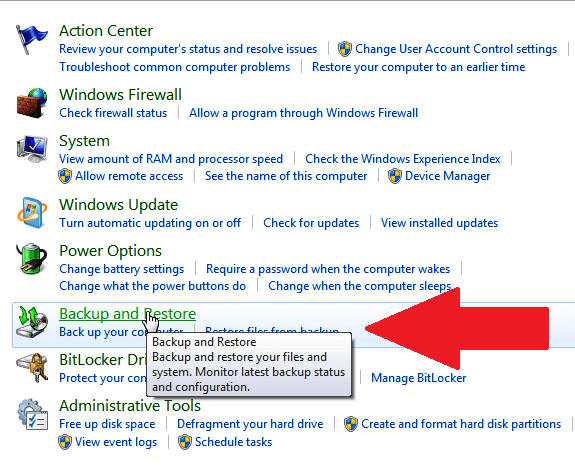
- Choose Backup and Restore.
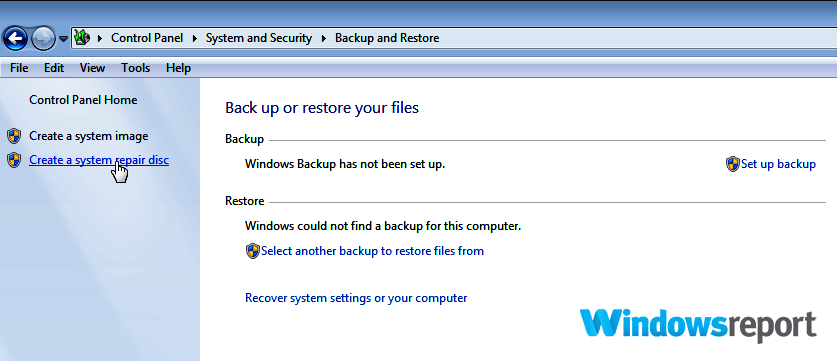
- Click Create a system repair disc from the left pane.
- Follow the steps as directed.
- Insert the new Windows 7 recovery disk, then restart your PC and run the usual steps to recover your Windows 7 image.
It can be that you’re attempting to recover your Windows installation using an outdated Windows 7 recovery DVD.
This happens especially in newer machines that come with UEFI enabled instead of the conventional BIOS firmware interface.
5. Boot in UEFI Mode/ legacy BIOS-compatibility
- Insert the Windows installation DVD/USB key.
- Boot your PC to this DVD/USB key again by clicking any key at bootup.
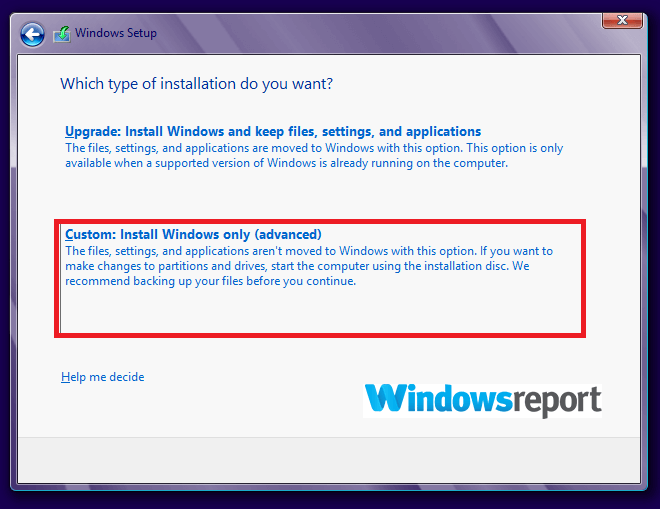
- Go through the installation wizard until you come to choose an installation type. Here you select Custom.
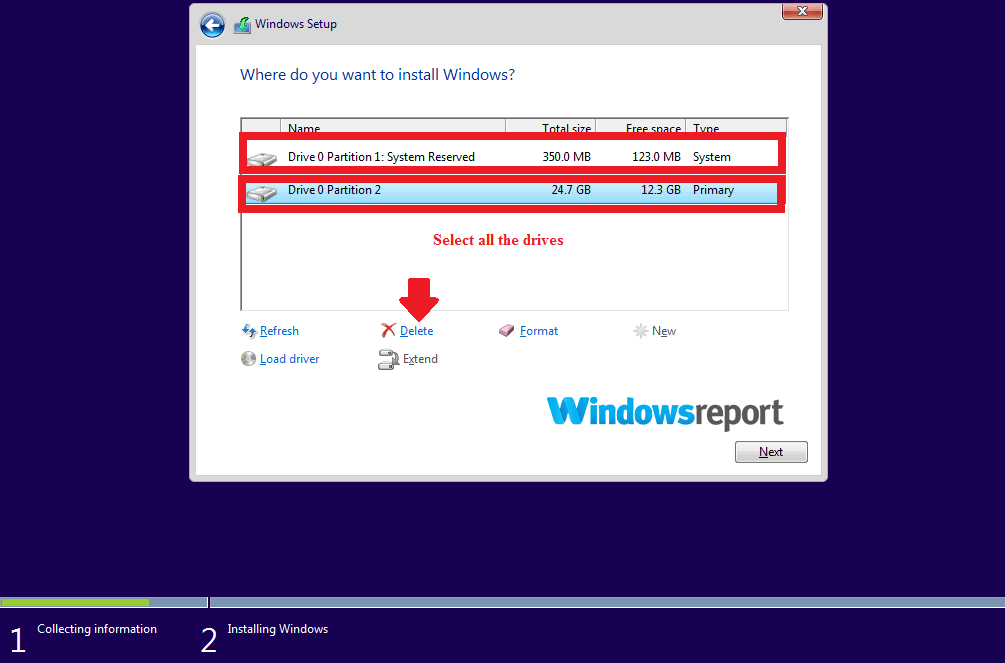
- The Where do you want to install WindowsWindow pops up. Do this: Select each partition shown on the drive, and choose Delete.
- The drive will now show one huge unallocated space/area. Select this unallocated space and press Next.
- Windows will automatically detect that the computer has booted into the UEFI mode and will reformat the drive and begin the installation.
- Don’t install. Instead, Click X to halt the process (after deleting the partition), then choose repair.
- Check if the System Recovery options are now working fine.
Another way to beat this error is by booting in UEFI mode.
That’s because booting into this mode when recovering Windows eliminates any compatibility conflicts from your USB/DVD.
With the solutions in this guide, you should now be able to fix this version of system recovery options is not compatible with the version of Windows error. Similarly, if you are dealing with a Window recovery loop error, check our detailed guide to fix it.
Feel free to let us know the solution that helped you fix this error in the comments below.
User forum
0 messages