VyprVPN Not Connecting on Windows 10 - 7 Ways To Resolve It
5 min. read
Updated on
Read our disclosure page to find out how can you help Windows Report sustain the editorial team. Read more
If you’re experiencing issues with VyprVPN not connecting on Windows 10, you’re not alone. It can stem from various reasons, including protocol mismatches, server issues, DNS conflicts, or interference from antivirus programs. Fortunately, there are several steps you can take to resolve these problems and get your VPN up and running again.
But before we begin, try out these quick fixes:
- Check if you’re connected to the internet.
- Reinstall or update the VyprVPN app.
- Reboot your PC.
- Confirm if you added the right credentials.
- Contact VyprVPN support.
If the above steps don’t help with the connectivity issues, try the solutions below.
How To Fix VyprVPN Not Connecting on Windows 10
Here’s how to deal with this problem easily:
Use a Different Protocol
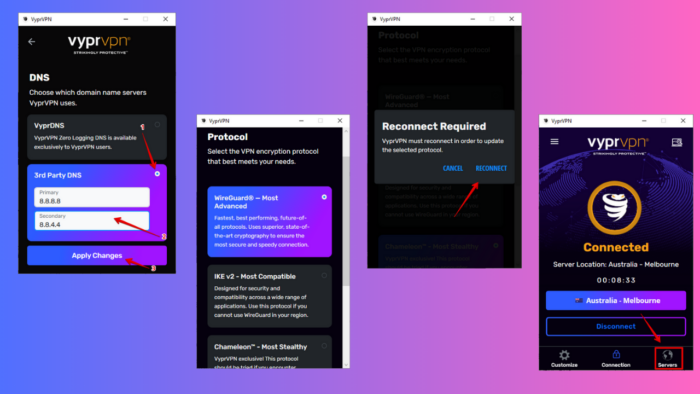
VyprVPN supports multiple protocols including WireGuard, OpenVPN, Chameleon, or IKEv2, and sometimes switching to a different one can solve connectivity issues. Here’s how to do it:
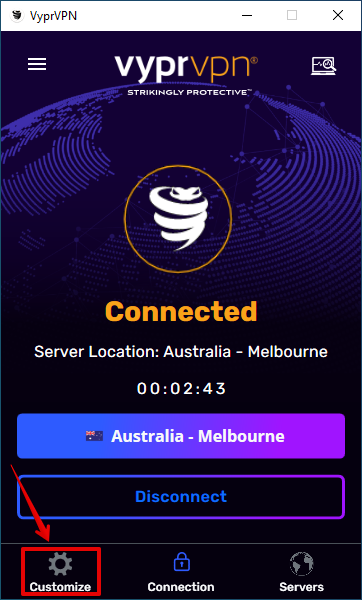
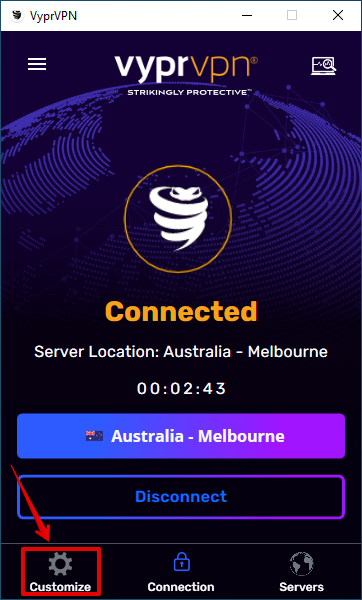
- Open VyprVPN and tap the Customize button.
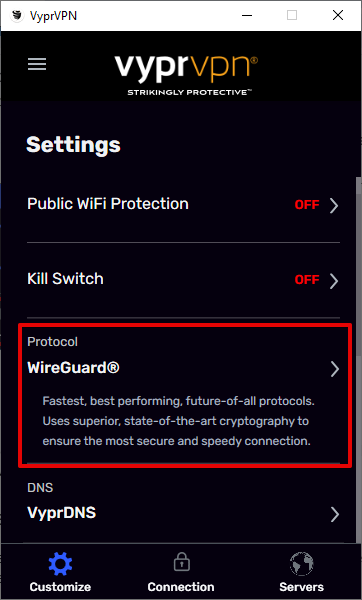
- Go to the “Protocol” section and tap the side arrow.
- Select a different protocol.
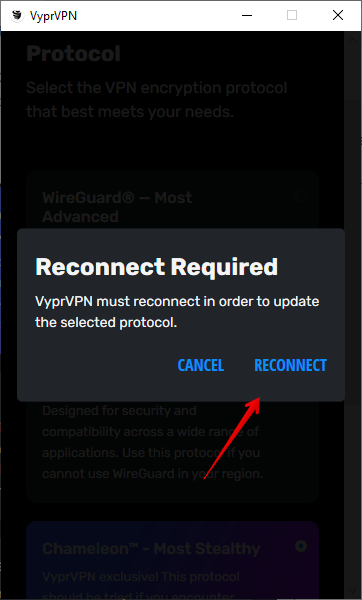
- Tap “Reconnect.”
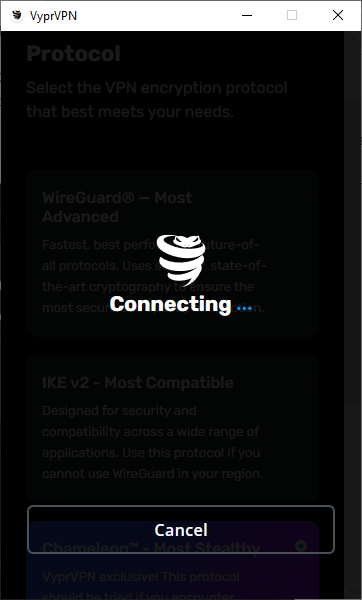
- The app will disconnect and reconnect automatically.
You should now enjoy a smooth connection.
Change Servers
Sometimes, the server you’re trying to connect to might be experiencing congestion issues or it could be banned. Switching to a different server can often solve the problem:
- Open VyprVPN and log in then tap the server button.
- Choose a different server from the list or use the search button for easy access.
- Tap on any server and it’ll connect automatically.
Change VyprVPN DNS
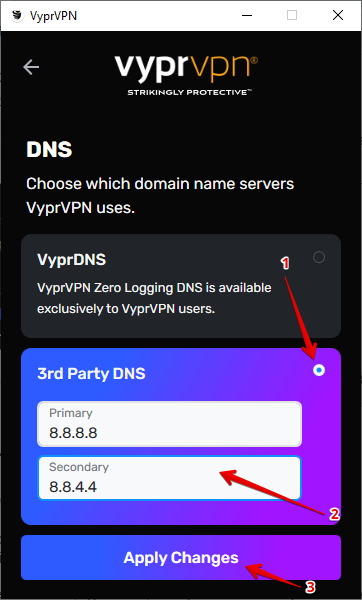
VyprVPN in the US utilizes its own DNS servers for connections. However, they can sometimes cause connectivity and performance issues. To resolve this, you can try switching to Google’s public DNS (8.8.8.8 and 8.8.4.4) instead of the default one.
Follow the below steps:
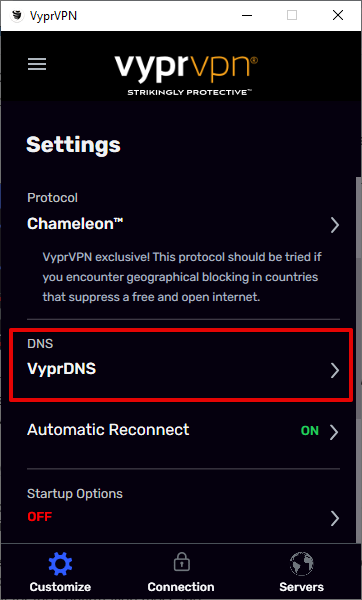
- Open VyprVPN and click Customize.
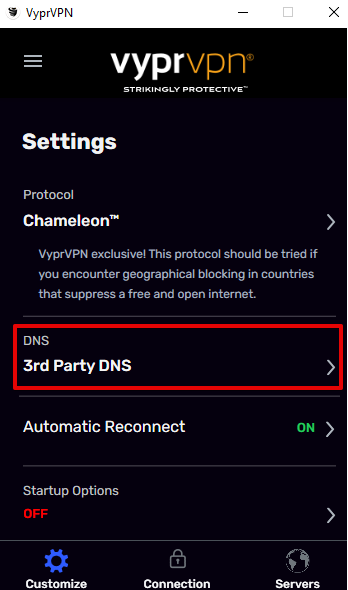
- Scroll to locate the “DNS” section then tap the expand arrow.
- Select “3rd Party DNS,” enter Google’s public DNS (8.8.8.8 and 8.8.4.4), and tap “Apply Changes.”
- Confirm if the DNS changed from VyprVPN to 3rd Party.
Flushing the DNS Cache
Flushing your DNS cache can clear any potential conflicts and improve your connection. Here’s how to do it:
- Press Window + R, type “cmd,” and press Enter to open the Command Prompt.
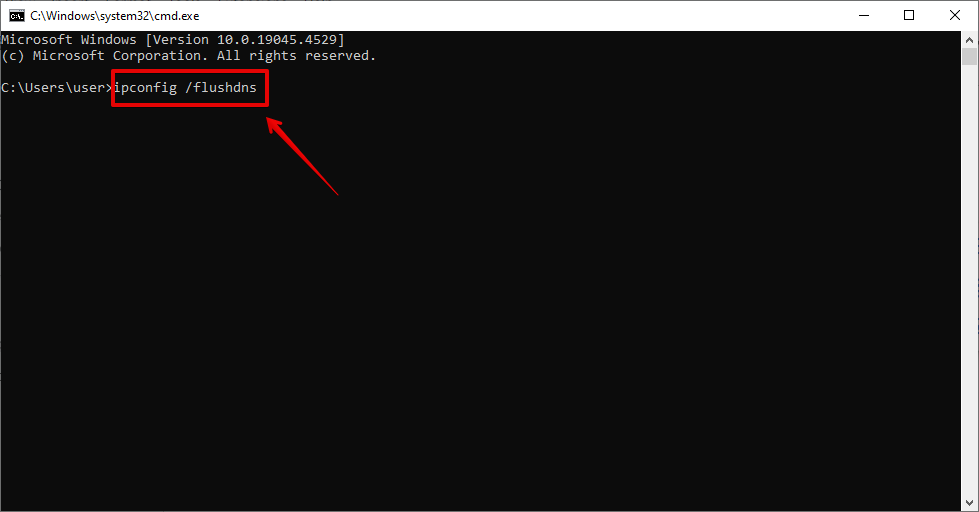
- Type “ipconfig /flushdns” and press Enter.
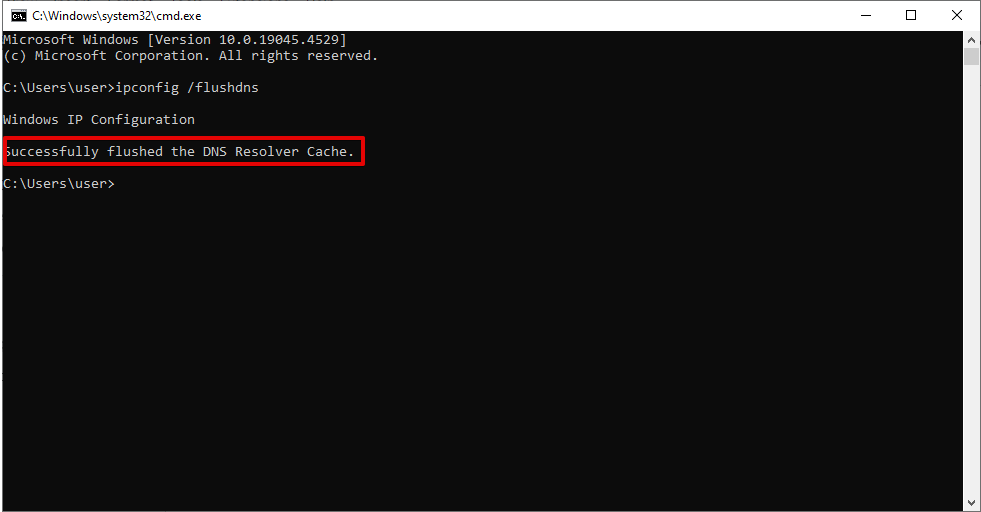
- Wait for the confirmation message.
Restart your Windows 10 and try connecting to VyprVPN again.
Add an Exception for VyprVPN to Your Antivirus and Firewall
Antivirus and firewall programs can sometimes treat VPN apps as threats and block connections. However, I don’t recommend disabling the antivirus and firewall because it’ll expose your PC to risks like malware and viruses. Instead, you can add VyprVPN as an exception.
Adding an Exception on Antivirus
Here’s how to do it:
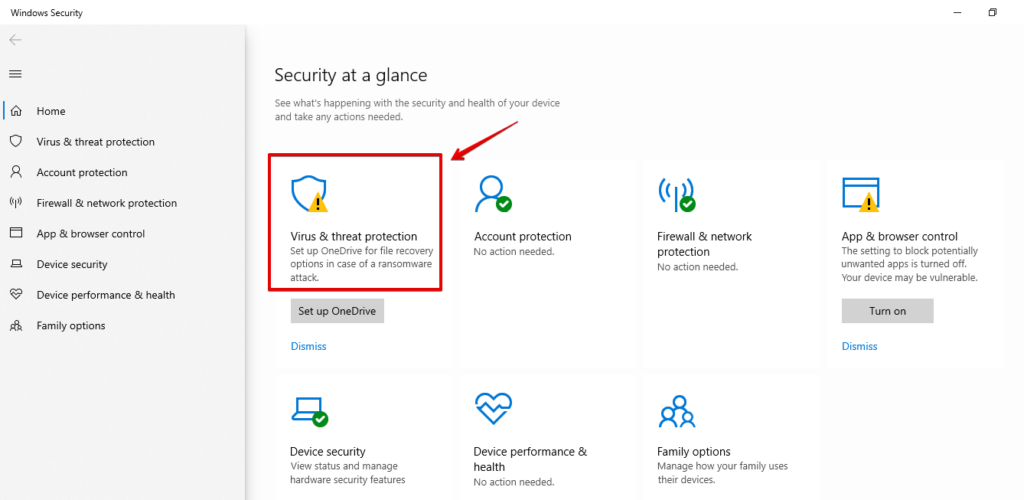
- Type “Windows Security” in the search bar beside the Windows Icon, then press Enter.
- Tap “Virus & threat protection.”
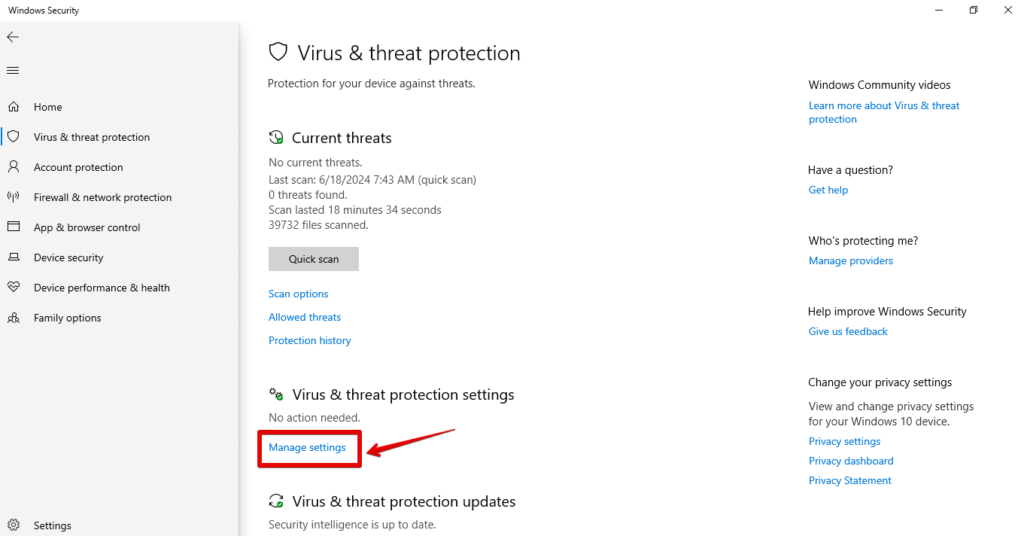
- Click “Manage settings” under the “Virus & threat protection settings” section.
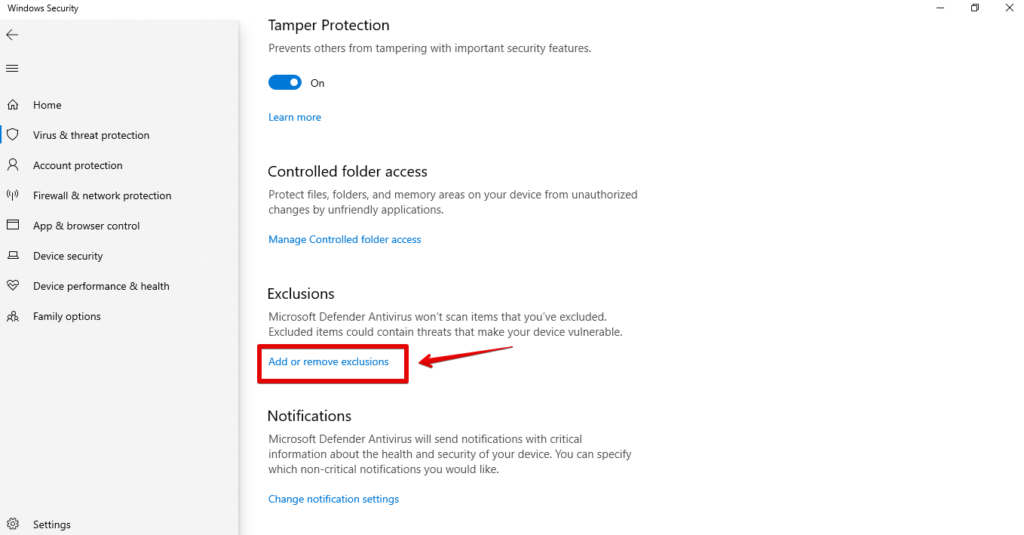
- Locate the “Exclusions” section and tap “Add or remove exclusions.” If prompted to allow your computer to make changes, hit “YES.”
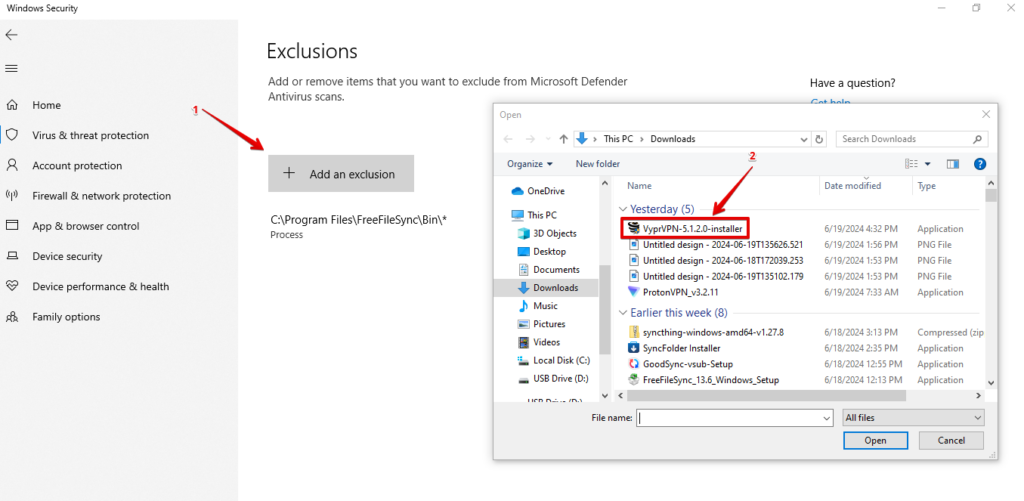
- Click “Add an exclusion,” then choose “VyprVPN” from the list.
Adding an Exception on Firewall
Follow the below steps:
- Type “Control Panel” on the search bar beside the Windows Icon and press Enter.
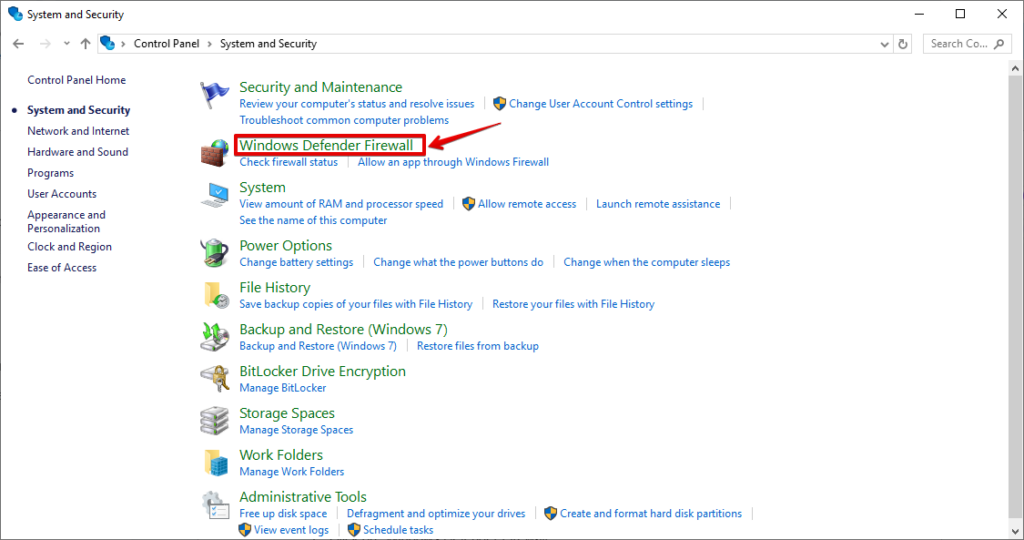
- Tap “System and Security.”
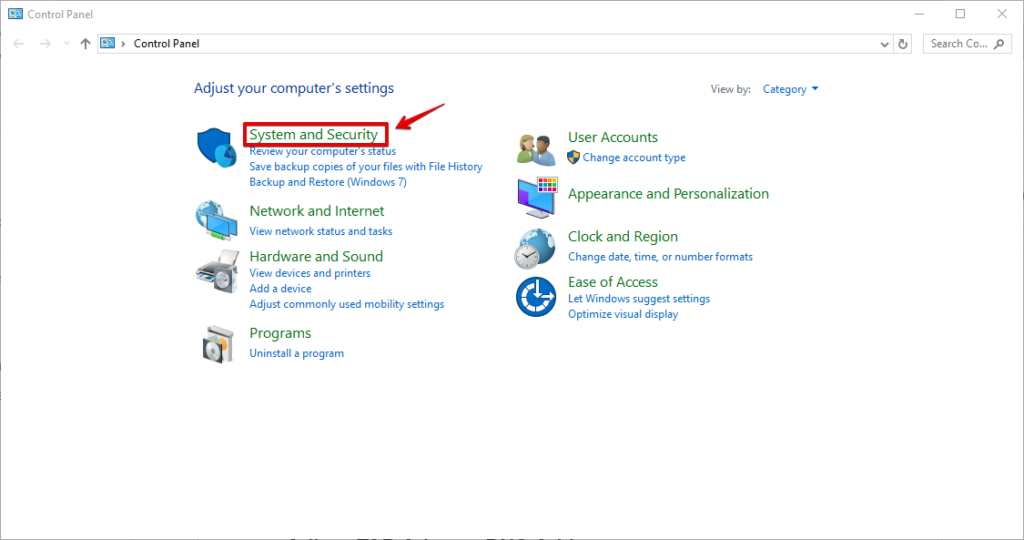
- Click “Windows Defender Firewall.”
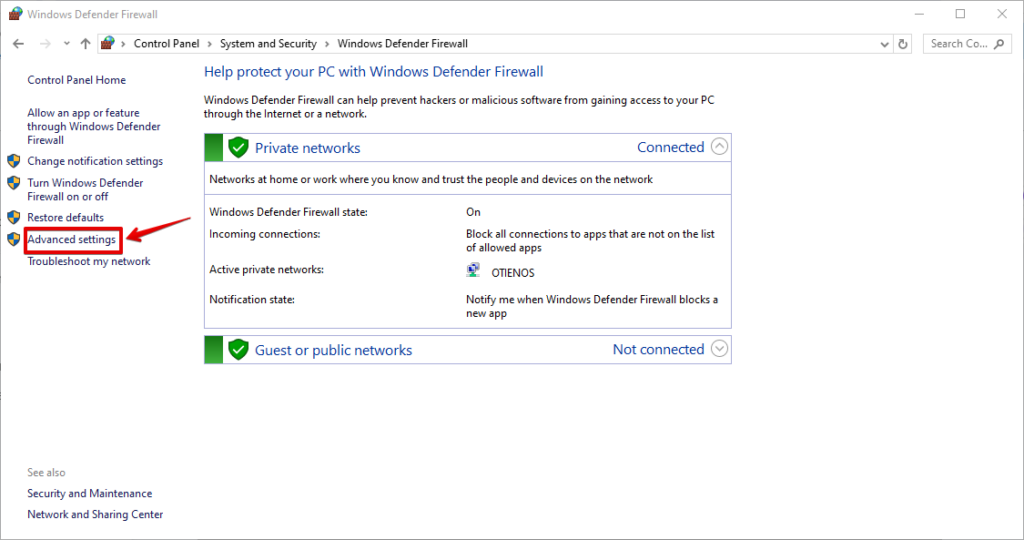
- Tap “Advanced Settings” available on the left menu.
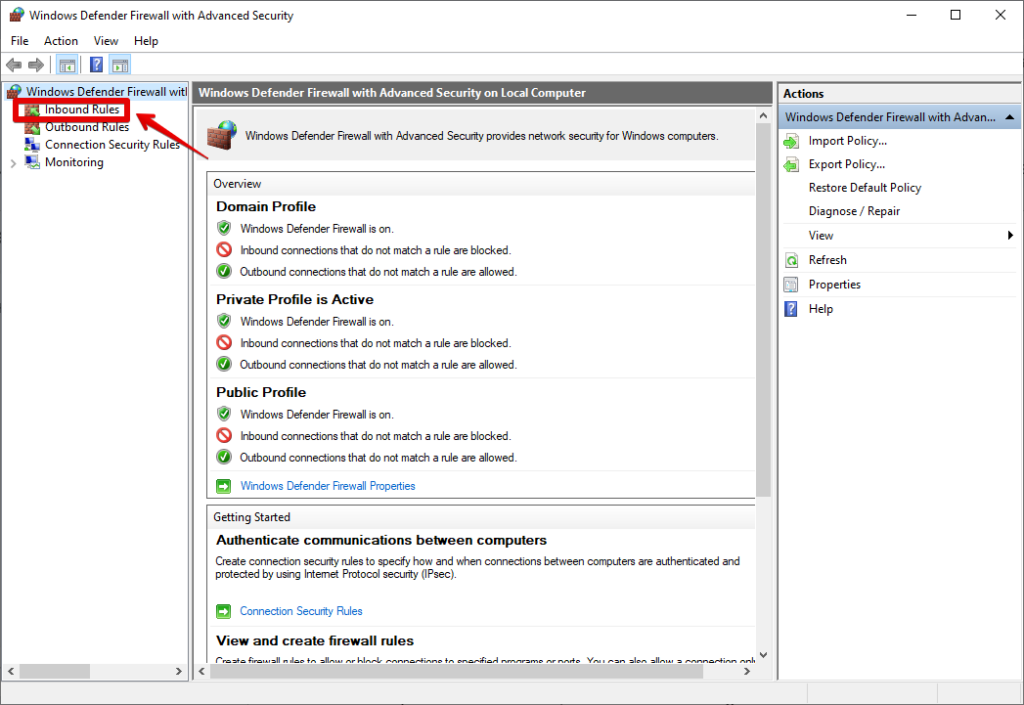
- Click “Inbound Rules.”
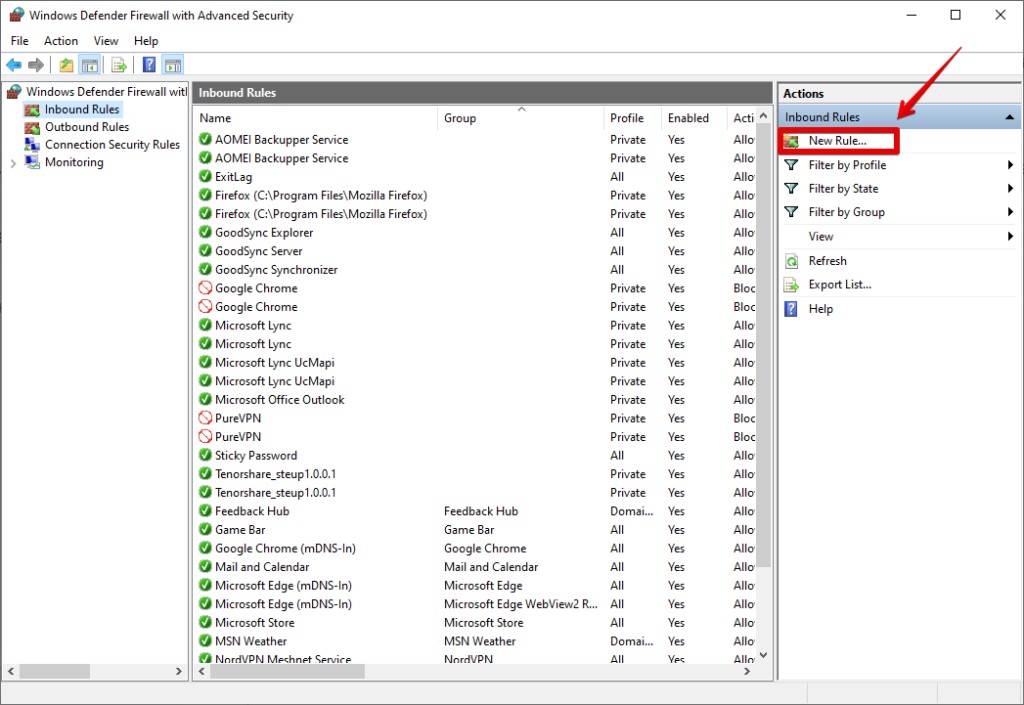
- Tap “New Rule” available on the right menu.
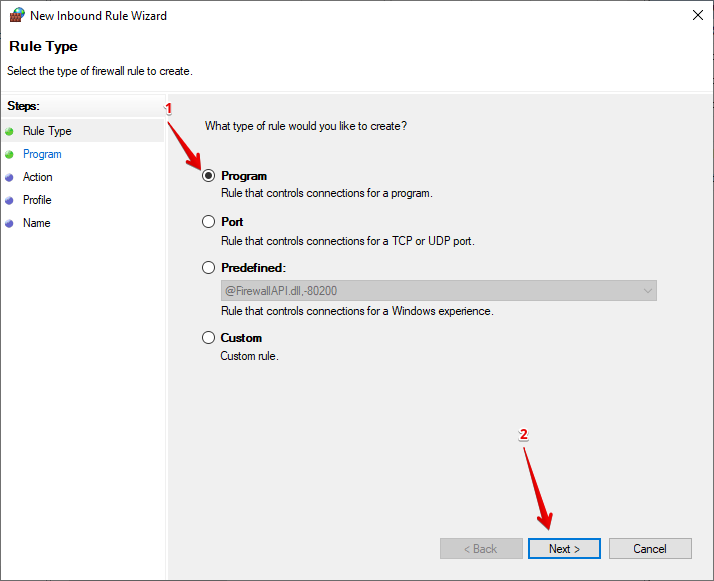
- Select “Program” and then hit “Next.”
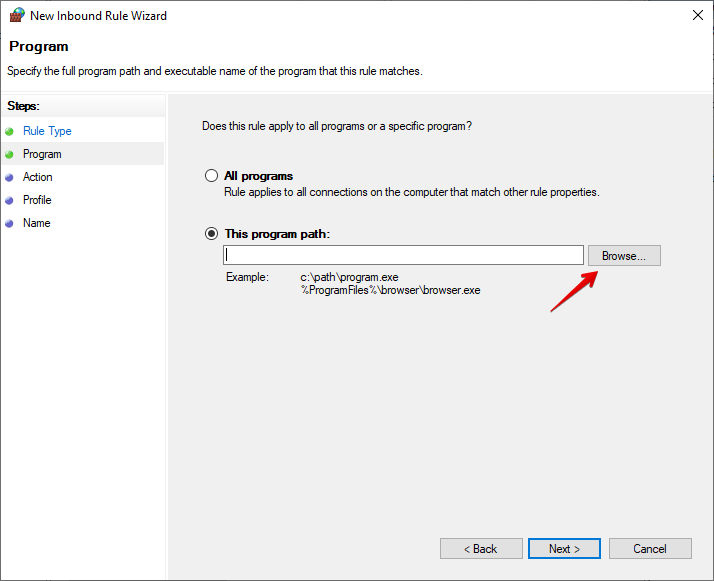
- Tap “Browse,” select the VyprVPN app, then click “Next.”
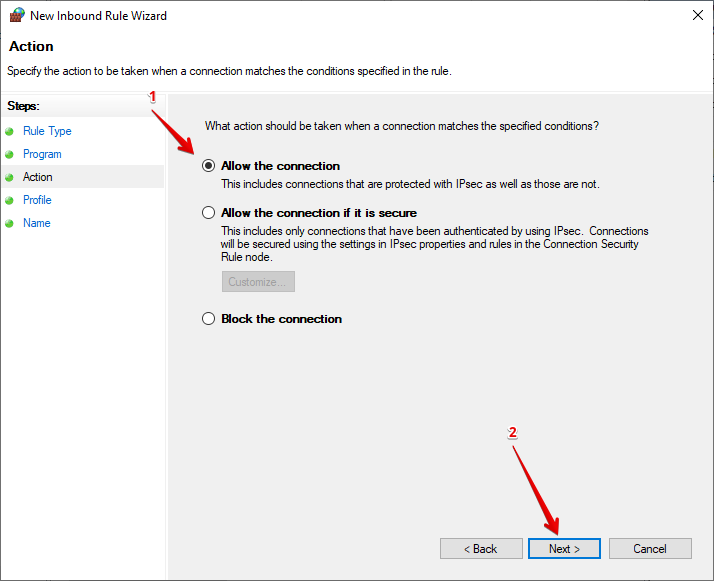
- Pick “Allow the connection” and click “Next.”
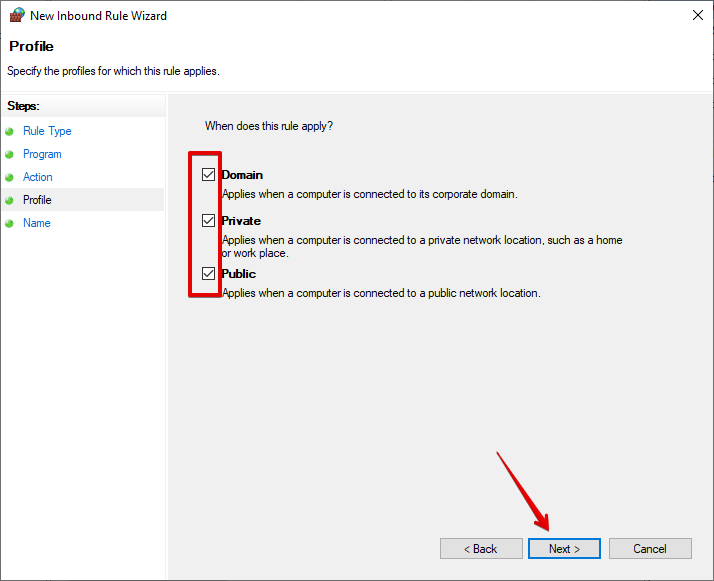
- Select when to apply the rule by ticking “Domain,” “Private,” or “Public,” or select all, then click “Next.”
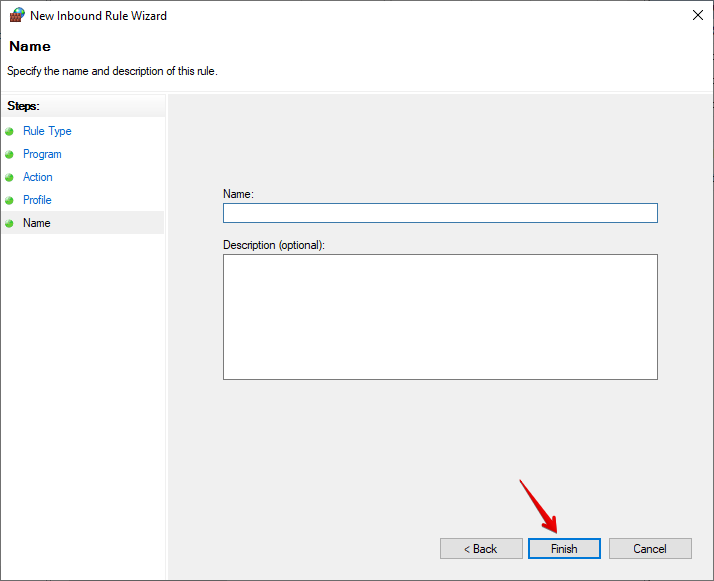
- Provide a name and description for the rule, then click “Finish.”
Change Adapter Settings
Incorrect adapter settings can also cause VyprVPN connectivity issues on Windows 10. Adjusting these settings might help:
- Press Win + X and select “Network Connections.”
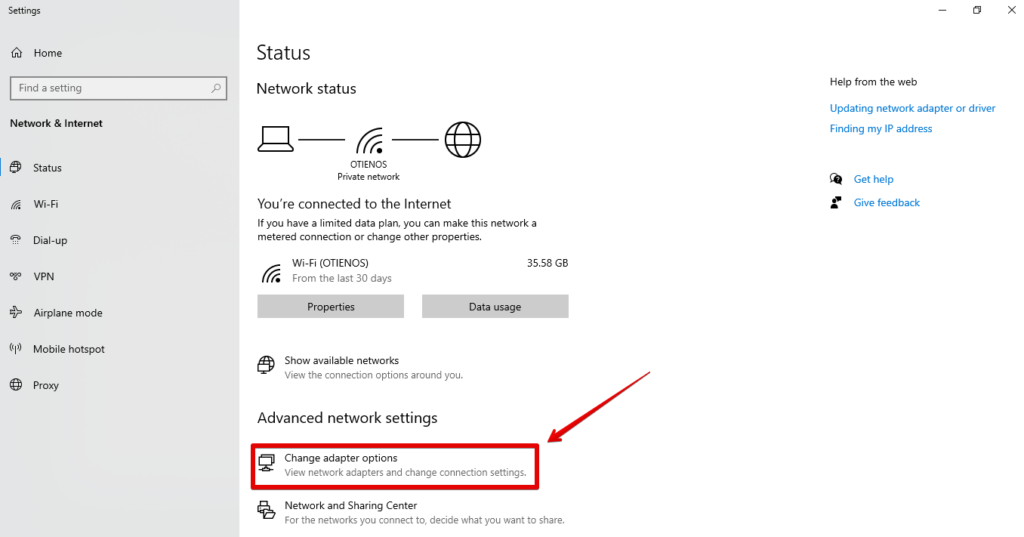
- Click “Change adapter options” under “Advanced network settings.”
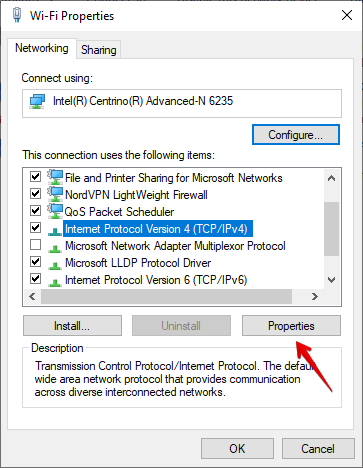
- Right-click on your active network adapter, and select “Properties.”
- Select “Internet Protocol Version 4 (TCP/IPv4)” and click “Properties.”
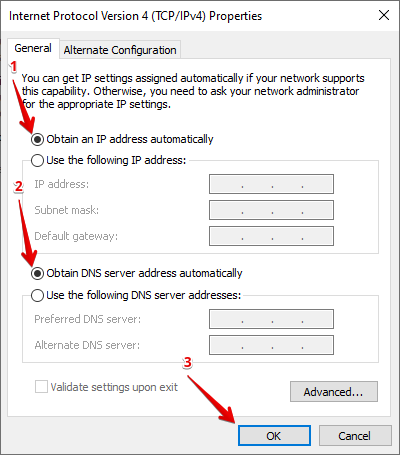
- Ensure that “Obtain an IP address automatically” and “Obtain DNS server address automatically” are selected then tap “OK.”
Restart your PC and check if VyprVPN connects now.
Try an Alternative VPN Provider
If none of the above solutions work, it’s time to switch to an alternative VPN provider. A VPN service like NordVPN is better optimized for Windows 10 and might offer more stable connections.
Here’s how to set it up on your PC:
- Visit the NordVPN website and create an account.
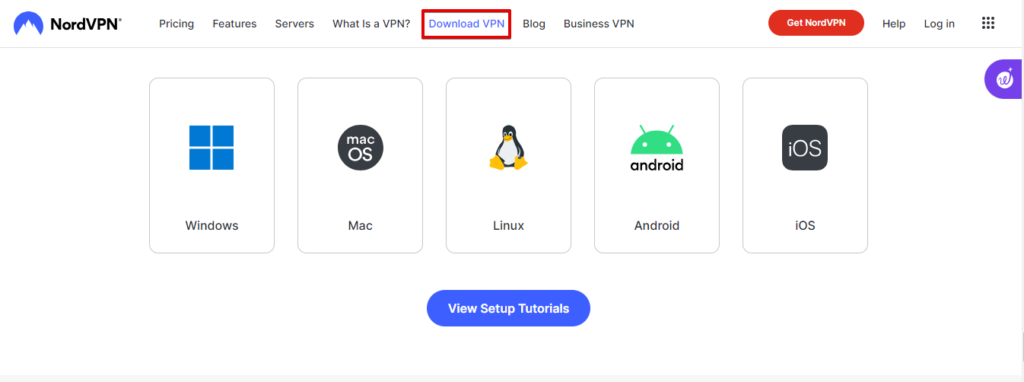
- Go to the “Download VPN” section and get the Windows version.
- After downloading it, open the file to Install the application and follow the on-screen instructions.
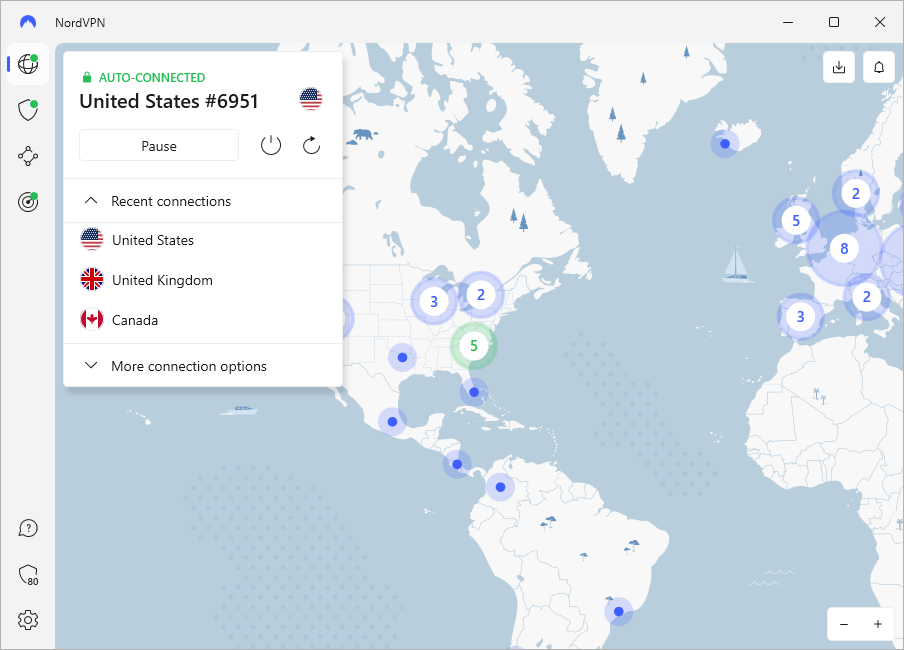
- Launch the NordVPN app and add your account details to log in.
- Tap “Quick Connect” to get the nearest and fastest server or pick any server from the list.
These fixes should be able to resolve VyprVPN not connecting on Windows 10. If you’re encountering a similar issue with Proton , Opera, or McAfee VPN we’ve got you covered.
Whether it’s changing protocols, switching servers, or tweaking settings, you can get your VPN back up and running smoothly. However, if none of these work, consider using an alternative VPN provider.









User forum
0 messages