Lock Screen Bug on Windows 11: 7 Fixes to Use When Stuck
Expert-tested solutions to fix your lock screen for good
5 min. read
Updated on
Read our disclosure page to find out how can you help Windows Report sustain the editorial team. Read more
Key notes
- If your Windows 11 lock screen is not working, you must boot in Safe Mode to access your device.
- You can fix this issue quickly by creating a new user account and disabling the Fast Startup feature.
- Don’t hesitate to make all the necessary updates or disable your lock screen.
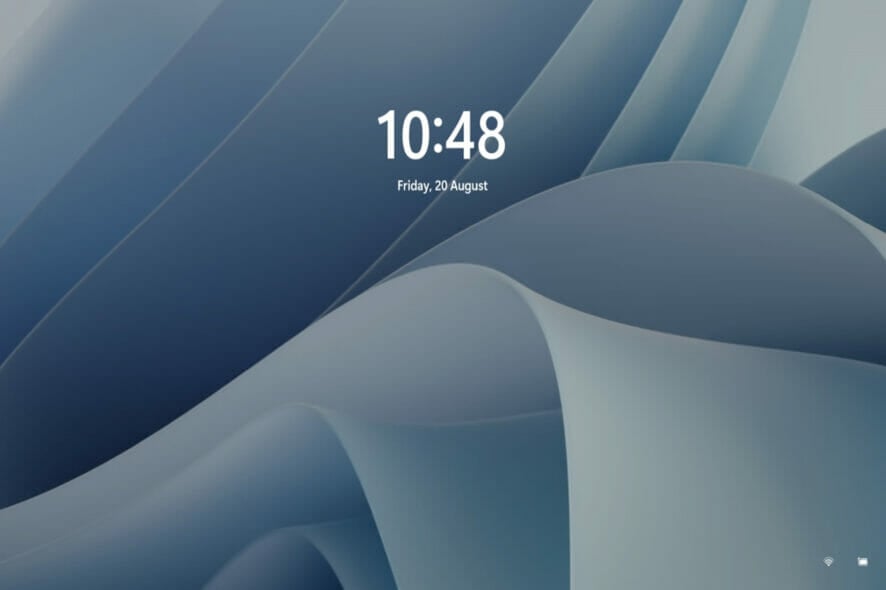
Many people are excited to finally get their hands on Windows 11 because of its unique features and updates. However, it also has its share of bugs that completely disrupt the user experience.
One of the main issues the users face is being stuck on the login screen. It can be frustrating as it deters you from working, as you cannot access your device.
In some instances, the sign-in form does not appear. However, this guide will show you the easy ways to get past the lock screen, irrespective of the form it takes.
What causes the Windows 11 lock screen bug?
Different factors can lead to the Windows 11 lock screen bug preventing you from logging in to your PC. Below are some of them:
- Faulty system files: If your Windows 11 welcome screen takes a long time, the problem might be due to broken system files. The quick solution is fixing the corrupt system files with a dedicated file repairer.
- Issues with a user account: In some cases, the problem might be with your user account. You need to create a new user account to get past the issue.
- Problems with the Fast Startup feature: Sometimes, the Fast Startup feature might be causing this problem, as it prevents your PC from shutting down completely. Disabling the feature should do the trick here.
How can I fix the lock screen bug on Windows 11?
Before exploring the fixes in this section, try the following troubleshooting steps:
- Use the power button
- Restart your PC
- Press the Ctrl + Alt + Shift key
1. Enable Safe Mode
- Switch off your device, then turn it back on. Once your device restarts, hold the Power button till the device turns off again. Repeat this process till you enter winRE.
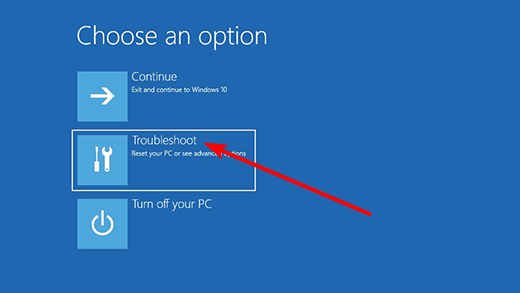
- Once the Windows Recovery Environment interface pops up, the Choose an option page will display.
- Select the Troubleshoot option.
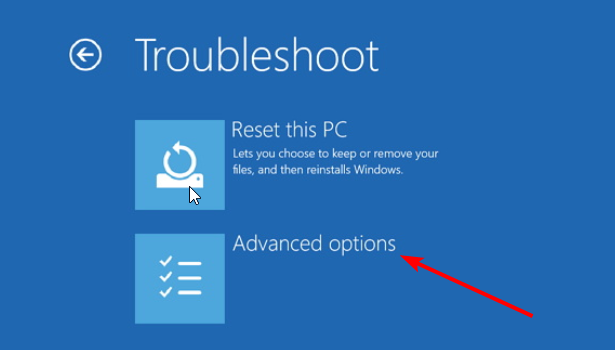
- Then, choose Advanced options.
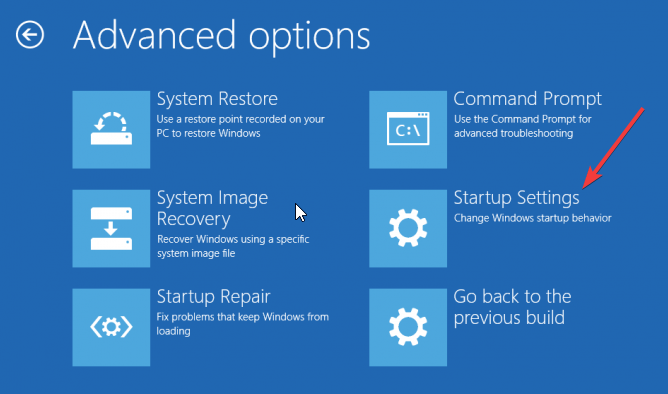
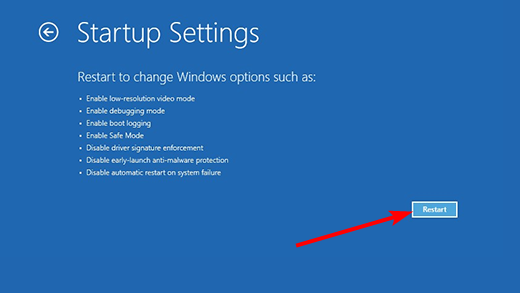
- Select Startup Settings.
- From here, click the Restart button.
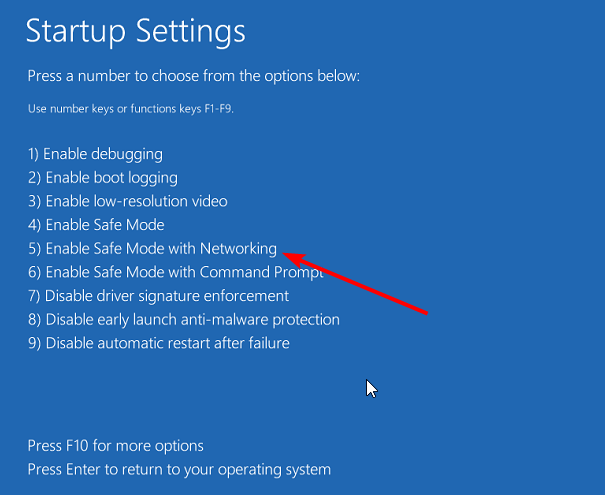
- When your PC restarts, press 5 or F5 to Enable Safe Mode with Networking.
After enabling the Safe Mode, check if the Windows 11 lock screen bug is still troubling your PC.
2. Make all the necessary updates
- Insert a Media Creation Tool and boot your PC from it.
- Press Shift + 10 to get to the Command Prompt window.
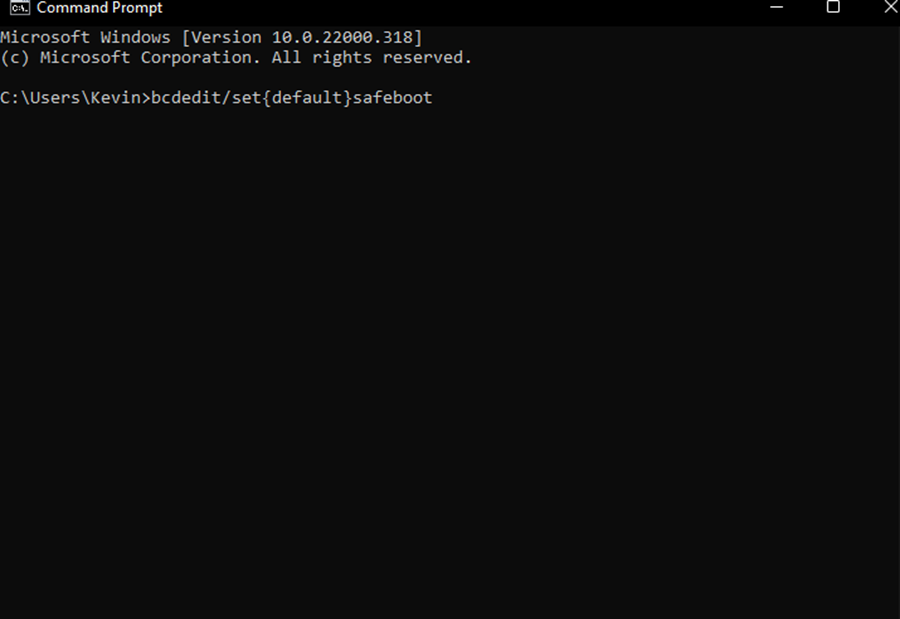
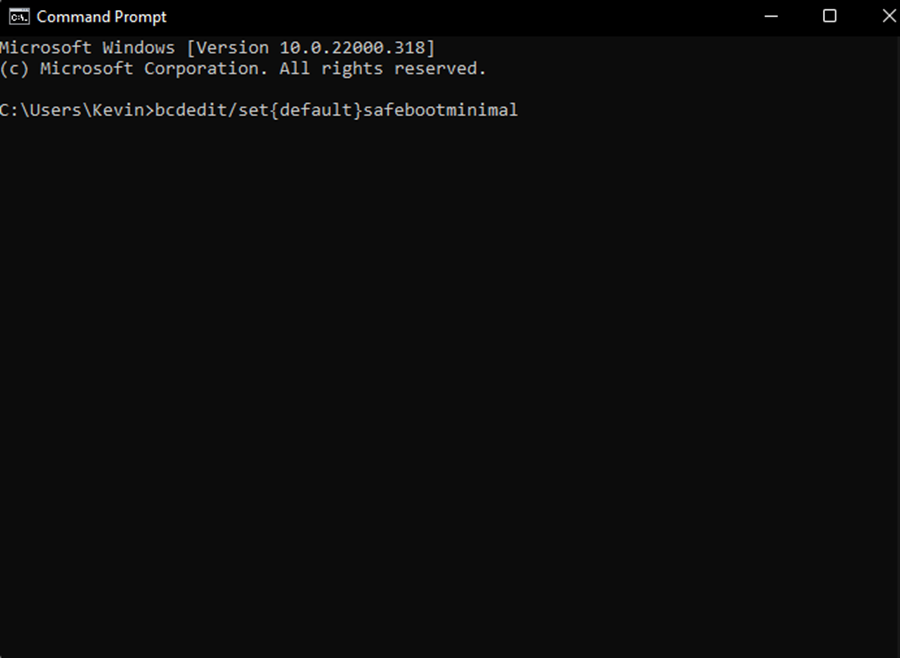
- Type the command below and hit Enter to enable Safe Mode:
bcdedit /set {default} safeboot network - Close the Command Prompt and the Windows Repair window. Then, remove the installation media allowing your device to boot in Safe Mode with Networking.
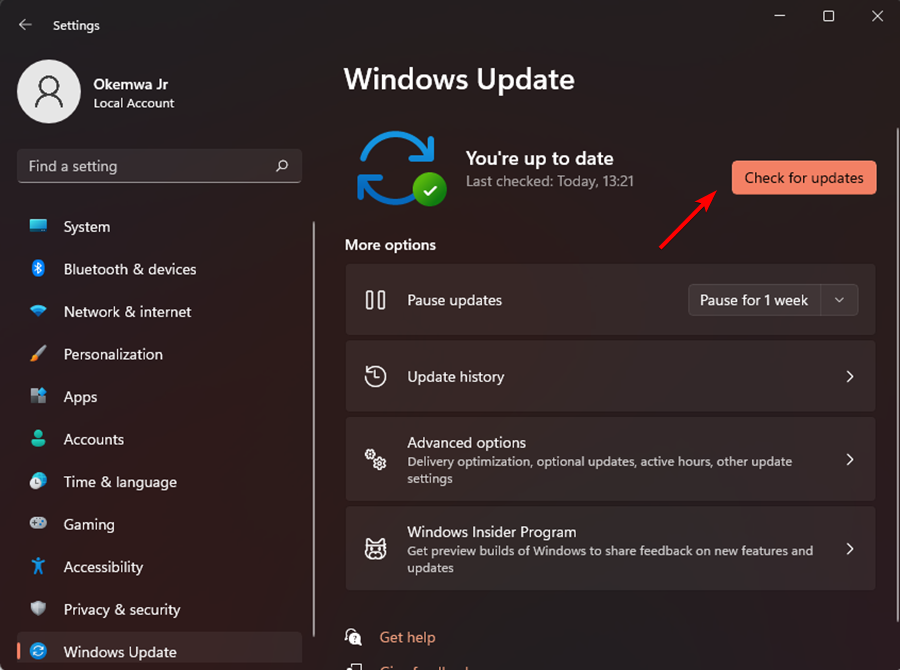
- Now, press the Windows key + I and select Windows Update in the left pane.
- Finally, click the Check for updates button.
3. Disable your lock screen
- Repeat Steps 1 to 4 in the Solution 2.
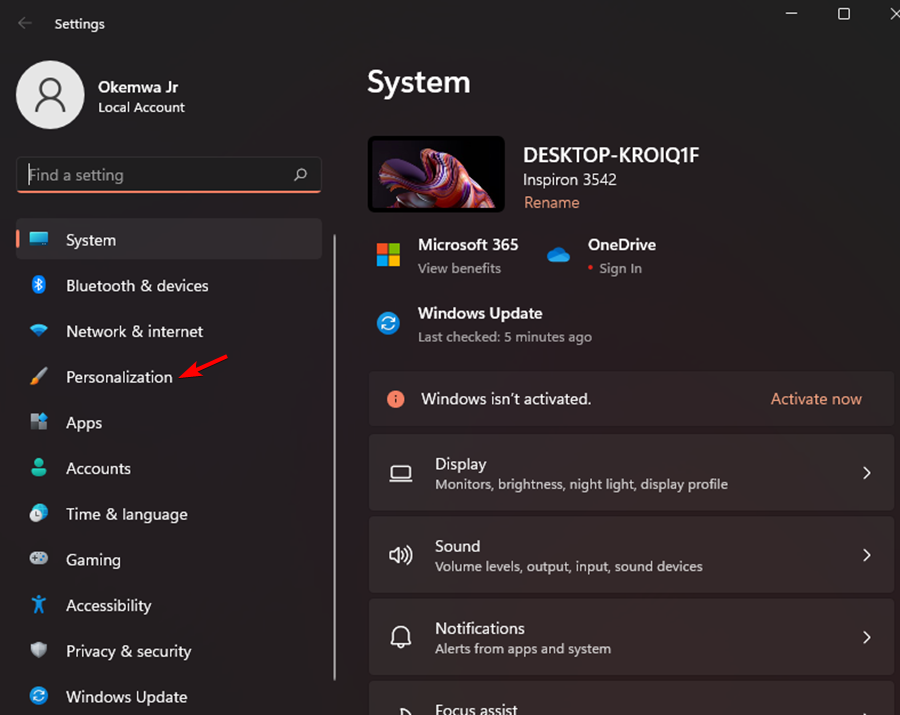
- Press the Windows key + I key to open the Settings menu and select the Personalization menu on the left.
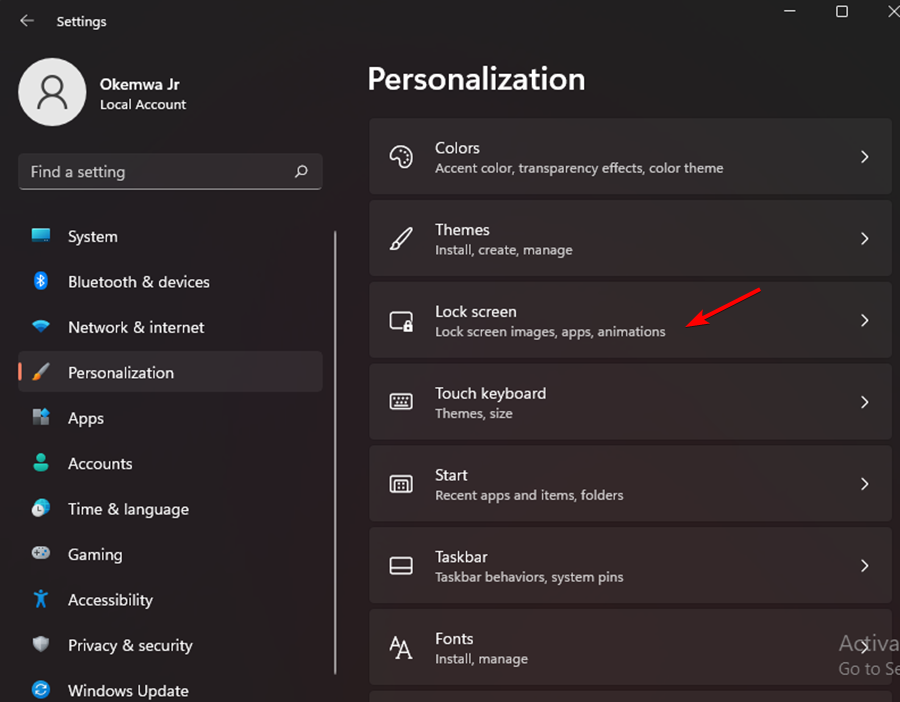
- Then click on Lock Screen on the right.
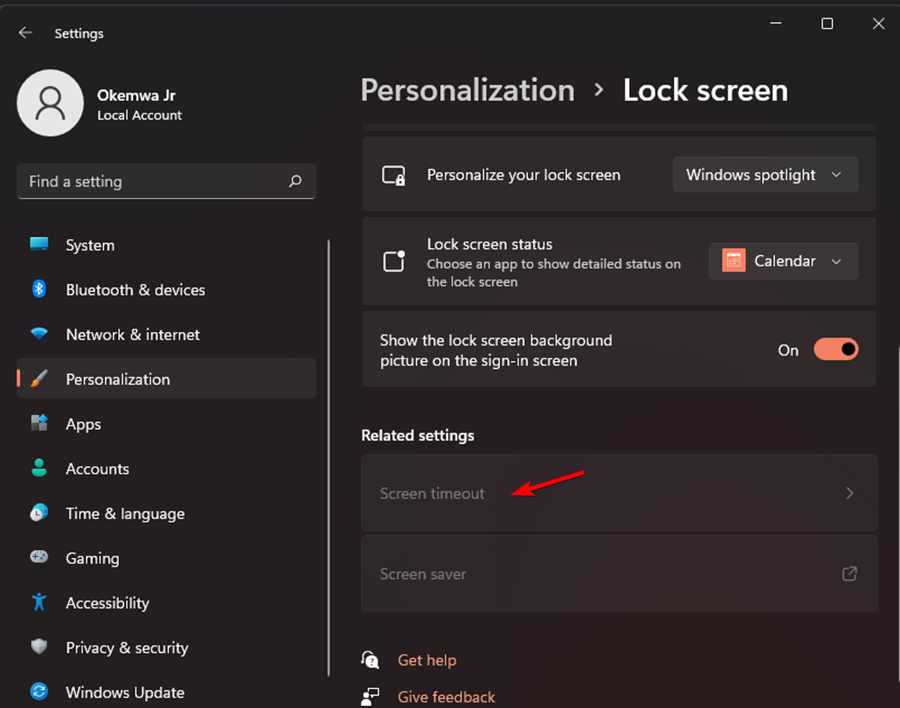
- Select the Screen timeout that is located under the Related settings option.
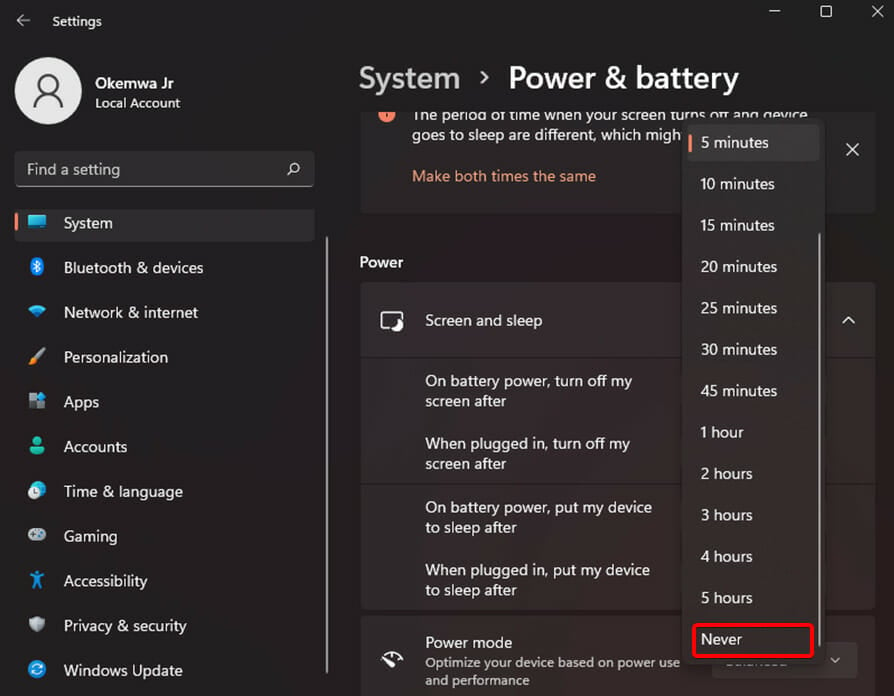
- Change the screen behavior to Never. This will prevent the login screen from appearing when your device is idle.
Disabling your lock screen is an effective way that you can use to fix the Windows 11 lock screen not showing due to a bug. You can use the Settings menu to disable your lock screen.
Removing the lock screen feature from your device will protect you from the setbacks of the bug. The lock screen will not appear even if your device is in sleep or idle mode. If you’re using a shared PC, consider disabling lock screen widgets instead of the lock screen for security purposes.
4. Prevent your screen from turning off
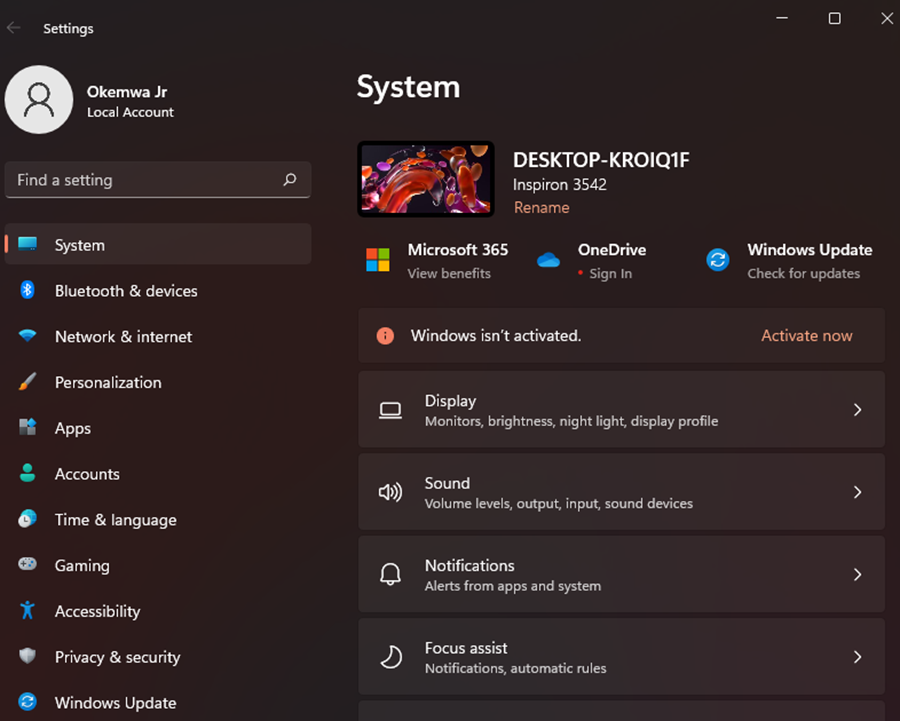
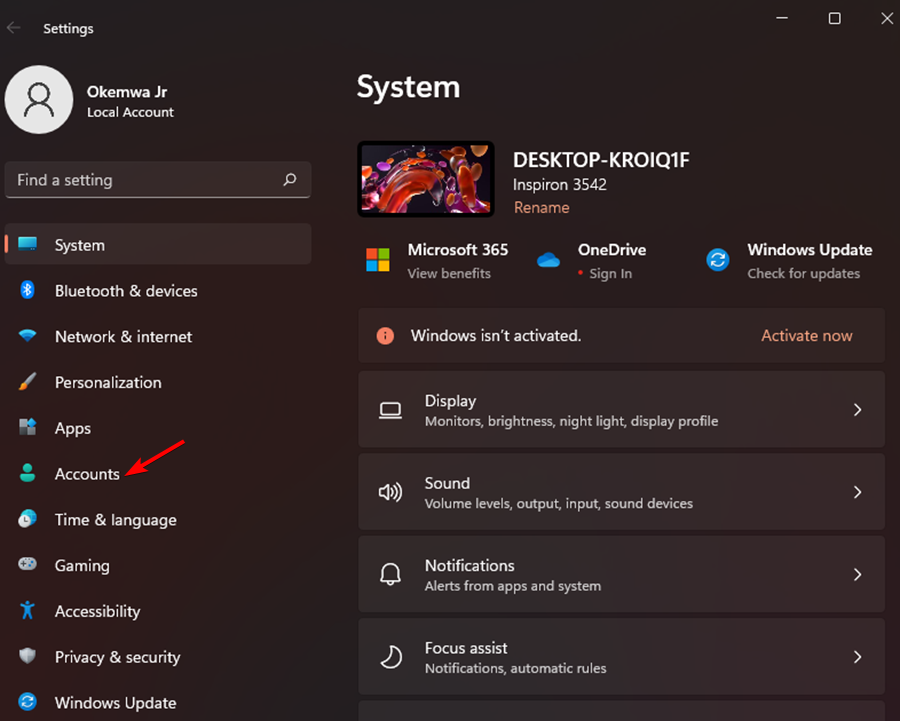
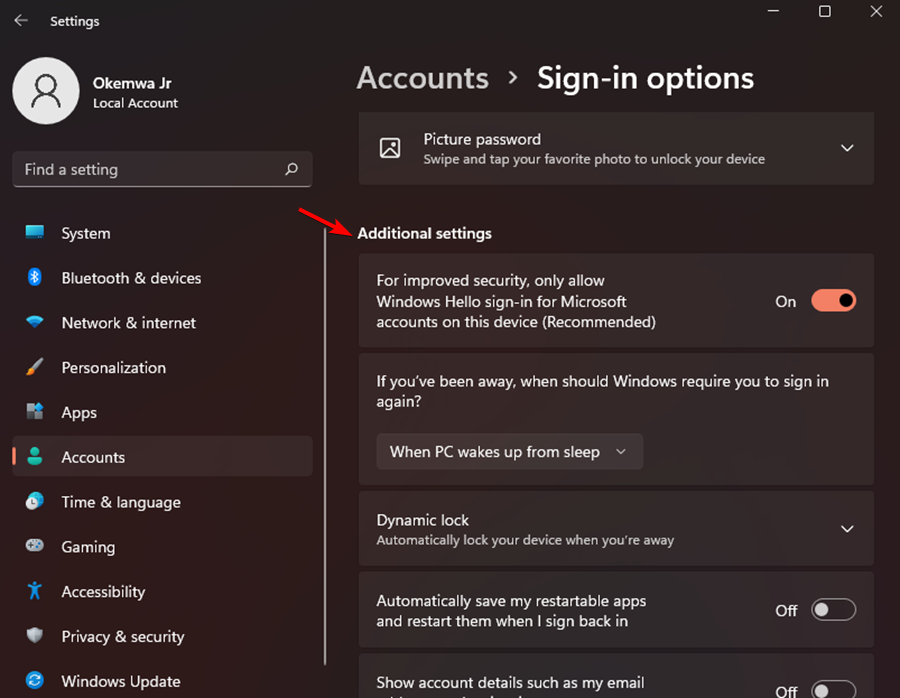
- Press the Windows key + I key to open Settings.
- Then, click on Accounts.
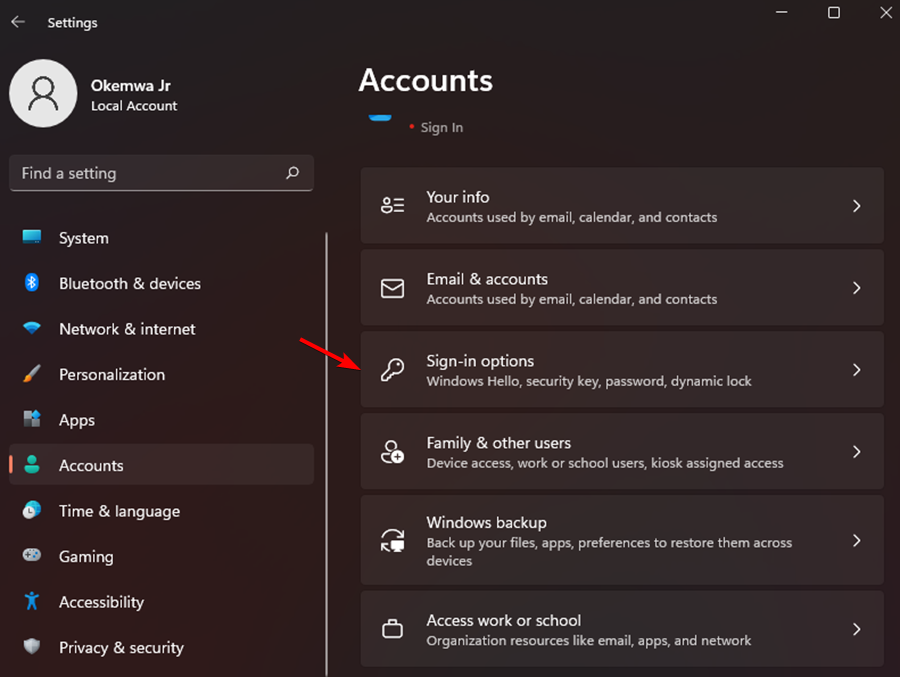
- Select the Sign in options option.
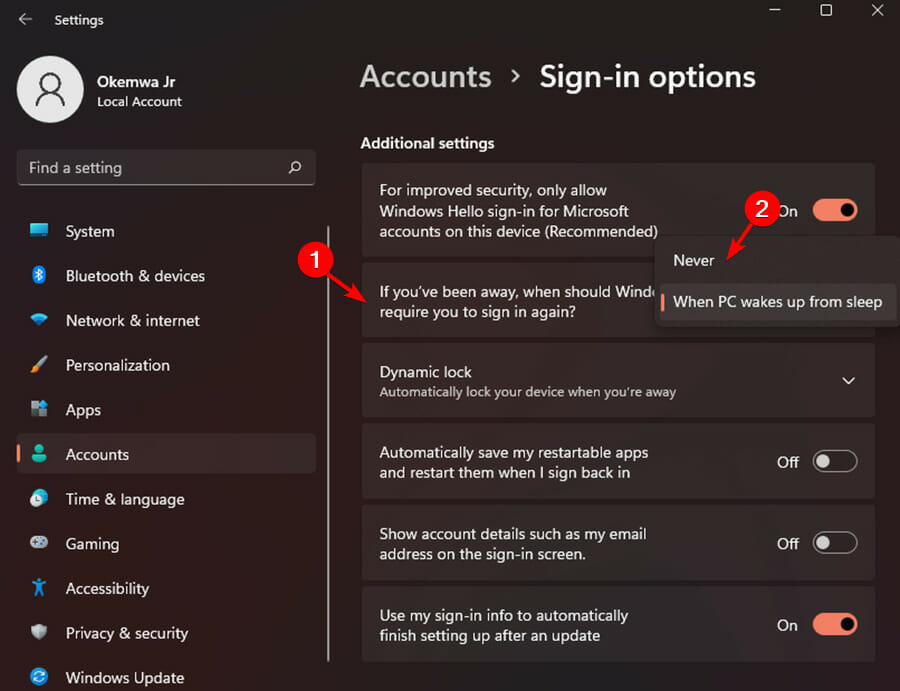
- Click on Additional Settings on the right-hand side.
- Next, change the behavior of the If you’ve been away, when should Windows require you to sign in again? Then select Never.
5. Repair system files
1. Boot your device in Safe Mode
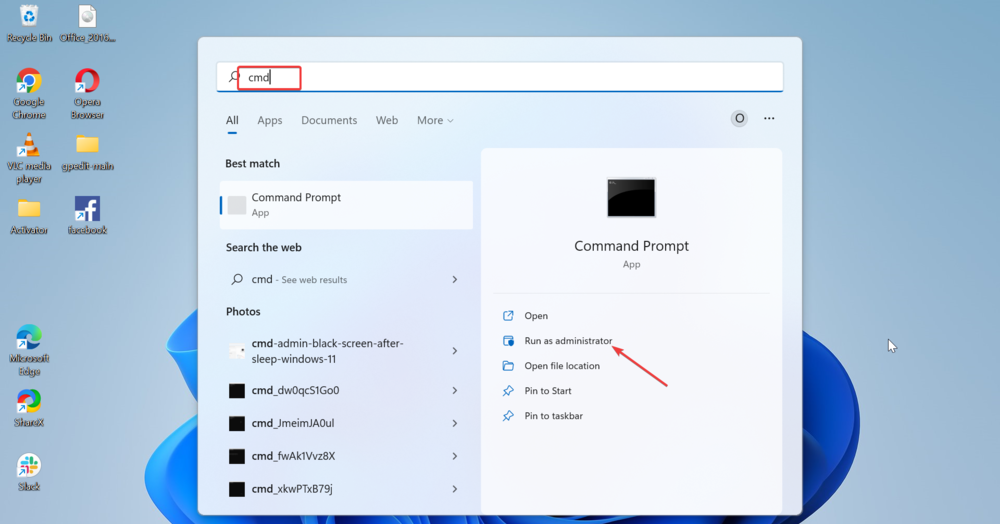
2. Then, press Windows key + S keys, type cmd, and click Run as administrator under Command Prompt.
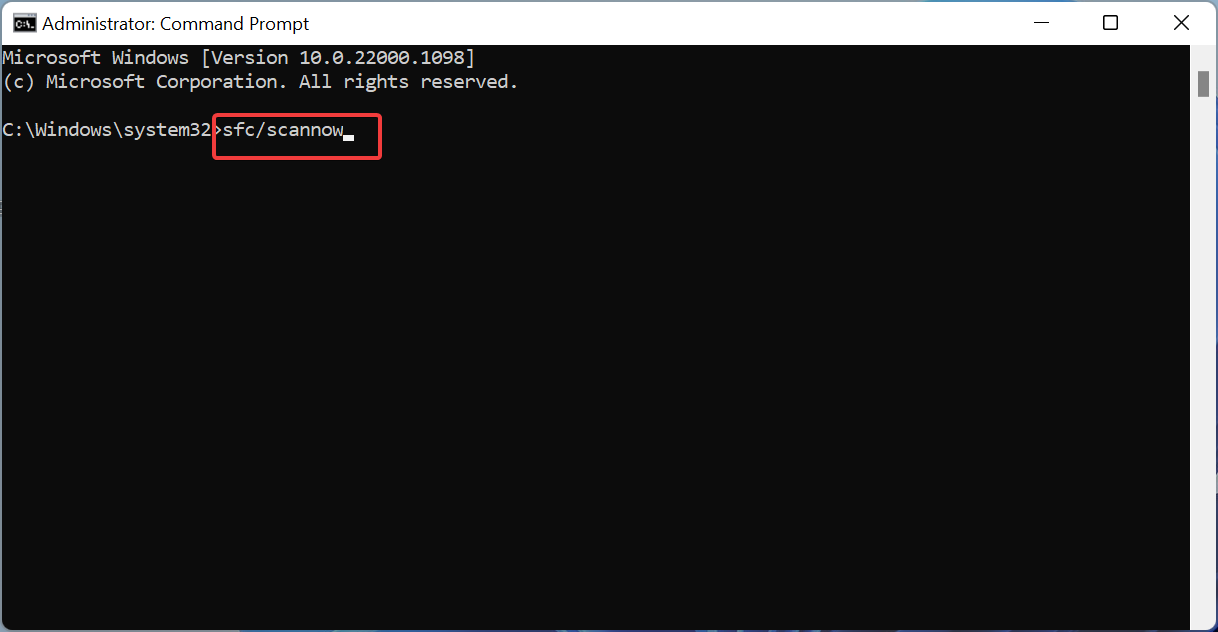
3. Type the command below and hit Enter:
sfc/scannow4. The System File Checker will then be able to identify any errors on your device. This process can take a while.
The lock screen bug could be caused by corrupted or missing system files. Therefore, performing an SFC scan is likely to solve the issue. You can easily perform it through Command Prompt.
Instead of fixing the system file manually, you can always rely on specialized repair tools. This kind of software allows you to quickly scan and fix or repair any broken system files.
6. Uncheck the Turn on fast startup option
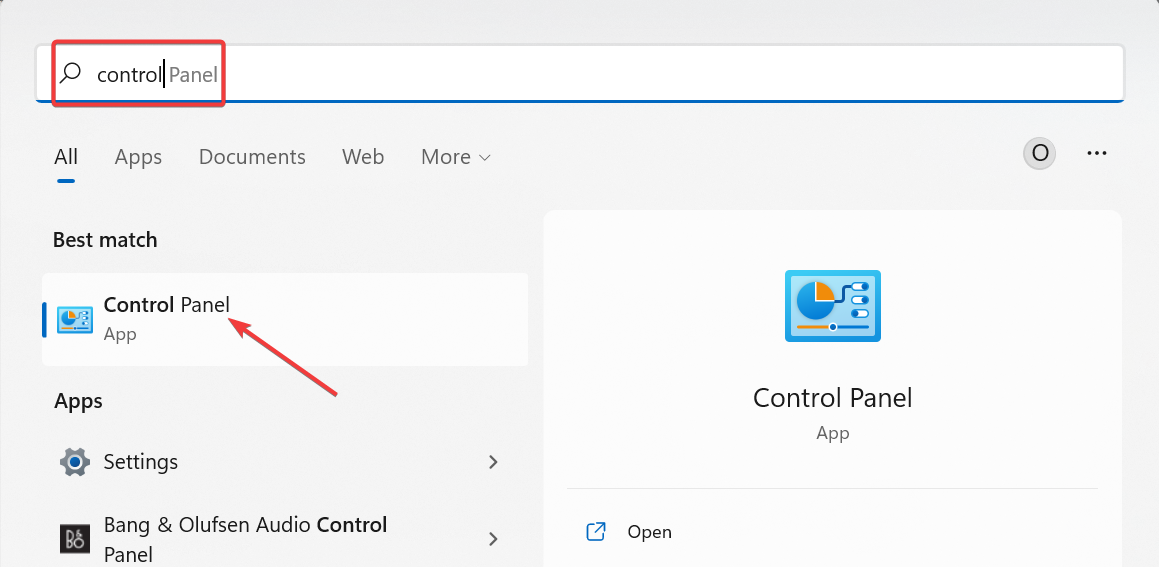
- Press Windows + S key, type control, and choose Control Panel.
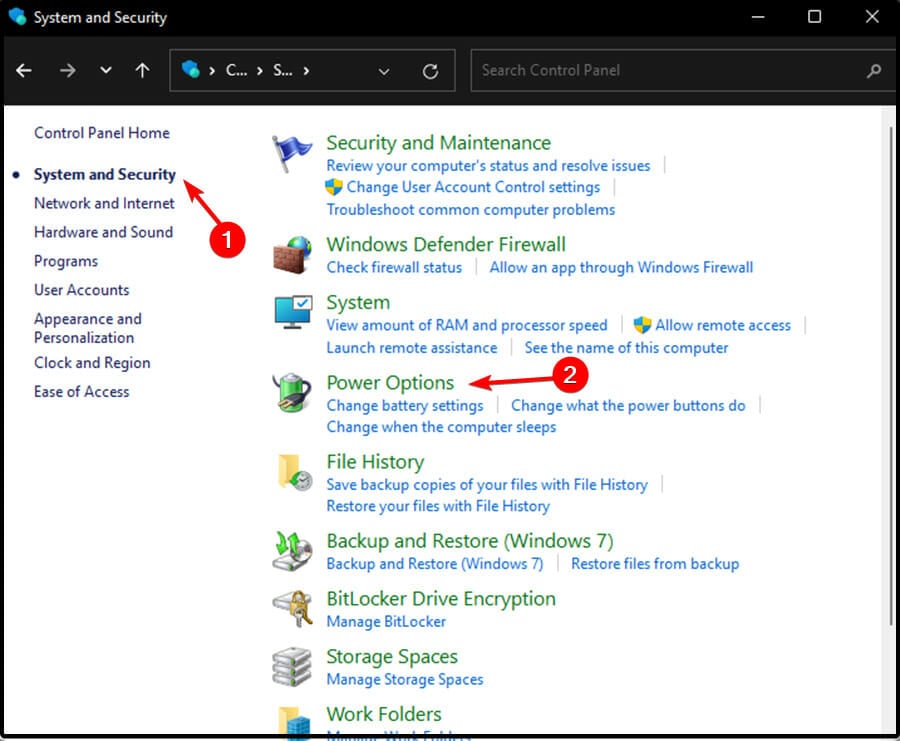
- Go to System and Security and then click on Power Options.
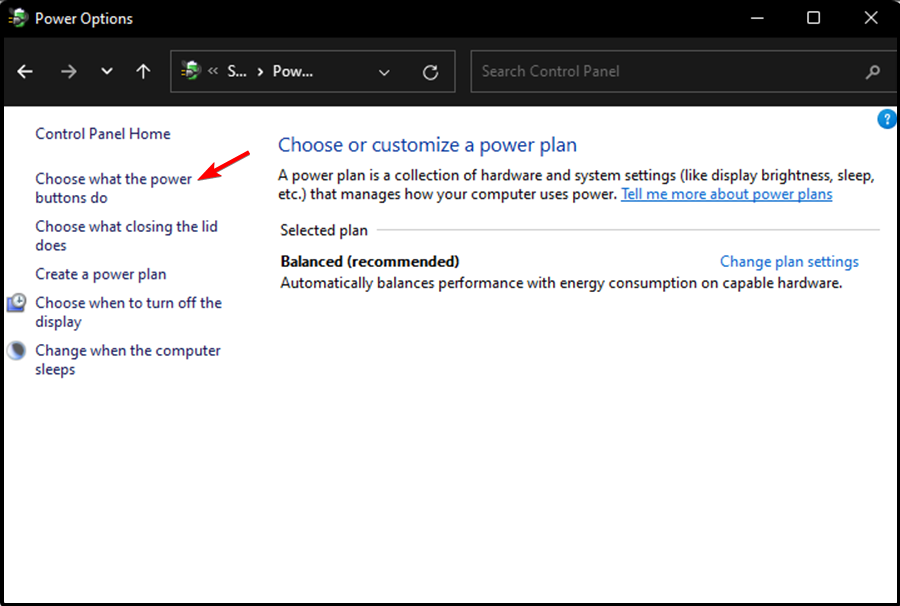
- In the left pane, click on Choose what the power buttons do.
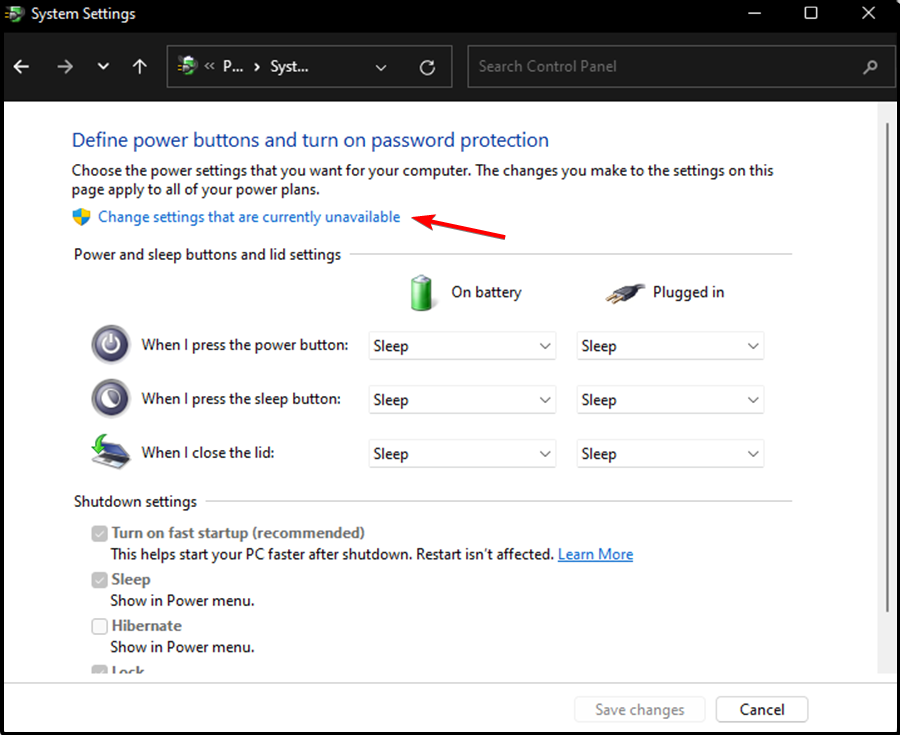
- Next, click the Change settings that are currently unavailable link.
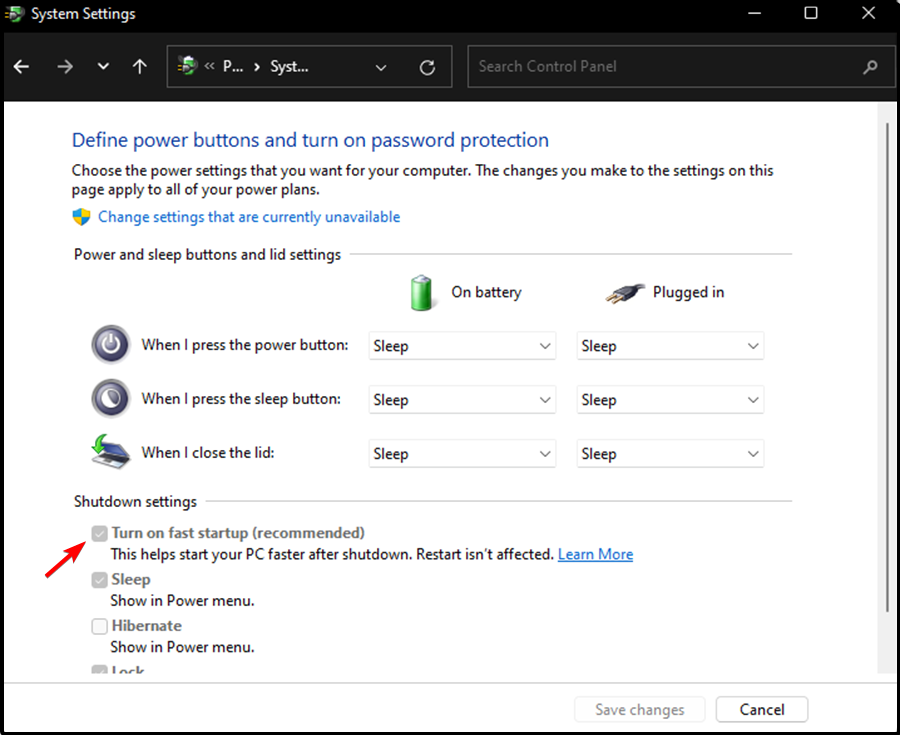
- Under the Shutdown settings section, uncheck the Turn on fast startup option to turn it off.
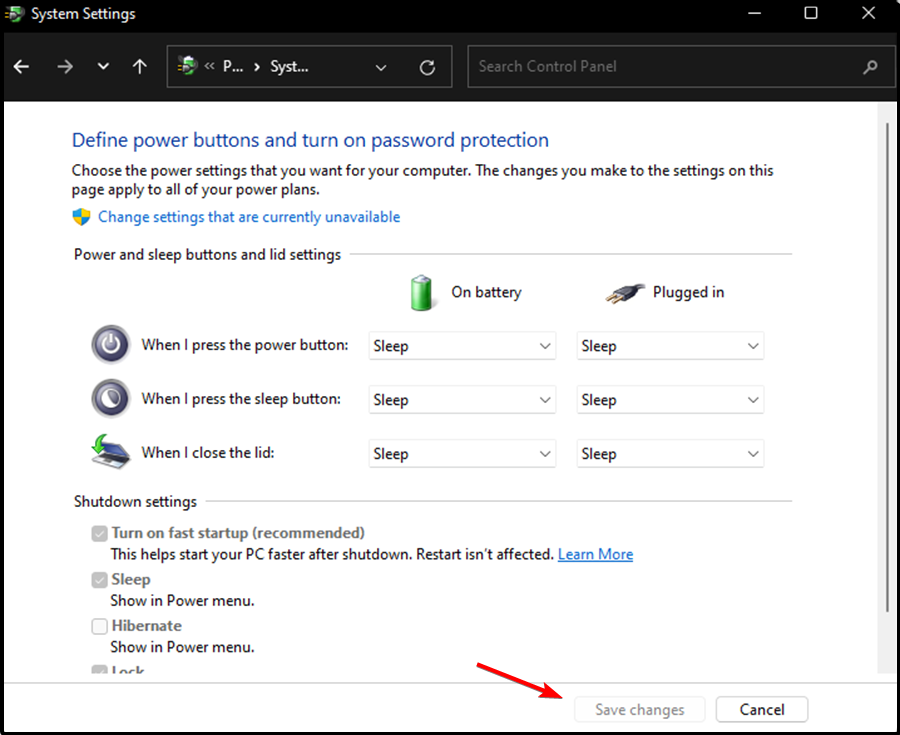
- Click Save changes to apply the changes.
If the Windows 11 lock screen is black because of a bug, you should disable the Fast Startup feature.
7. Create a new user account
- Boot your device in Safe Mode.
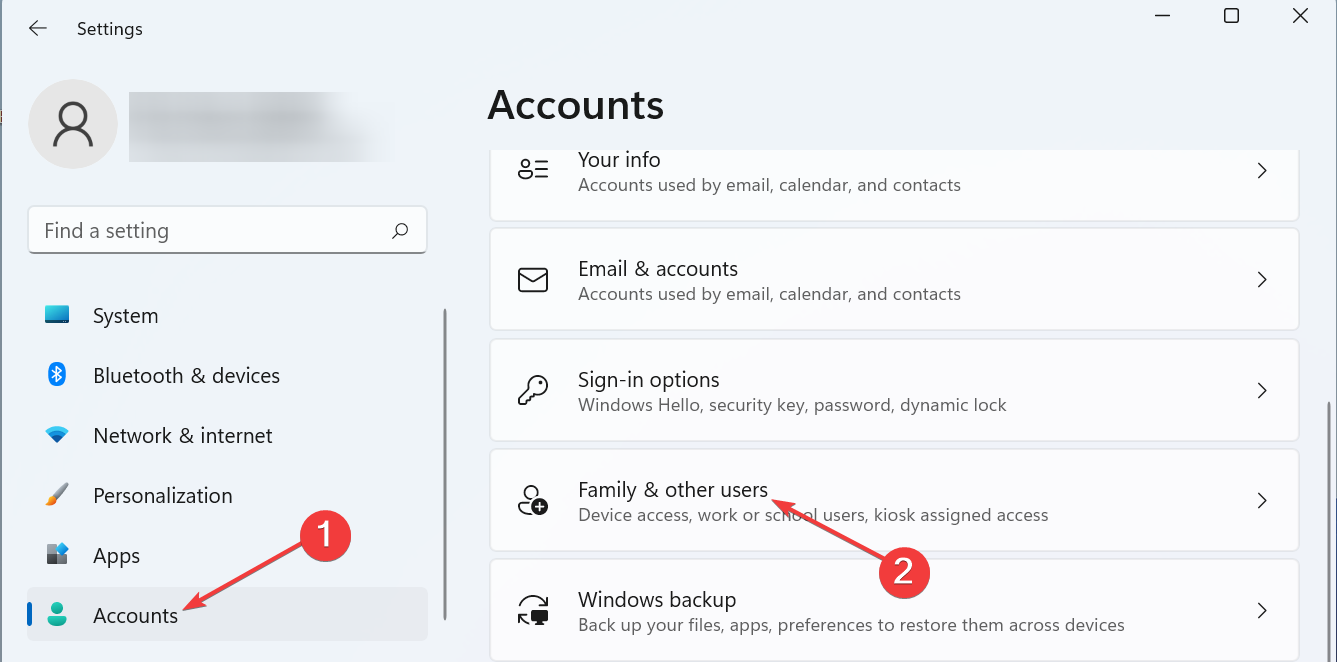
- Press the Windows key + I key to open the Settings page. Then, click on Accounts.
- On the left side, click on Family & other users.
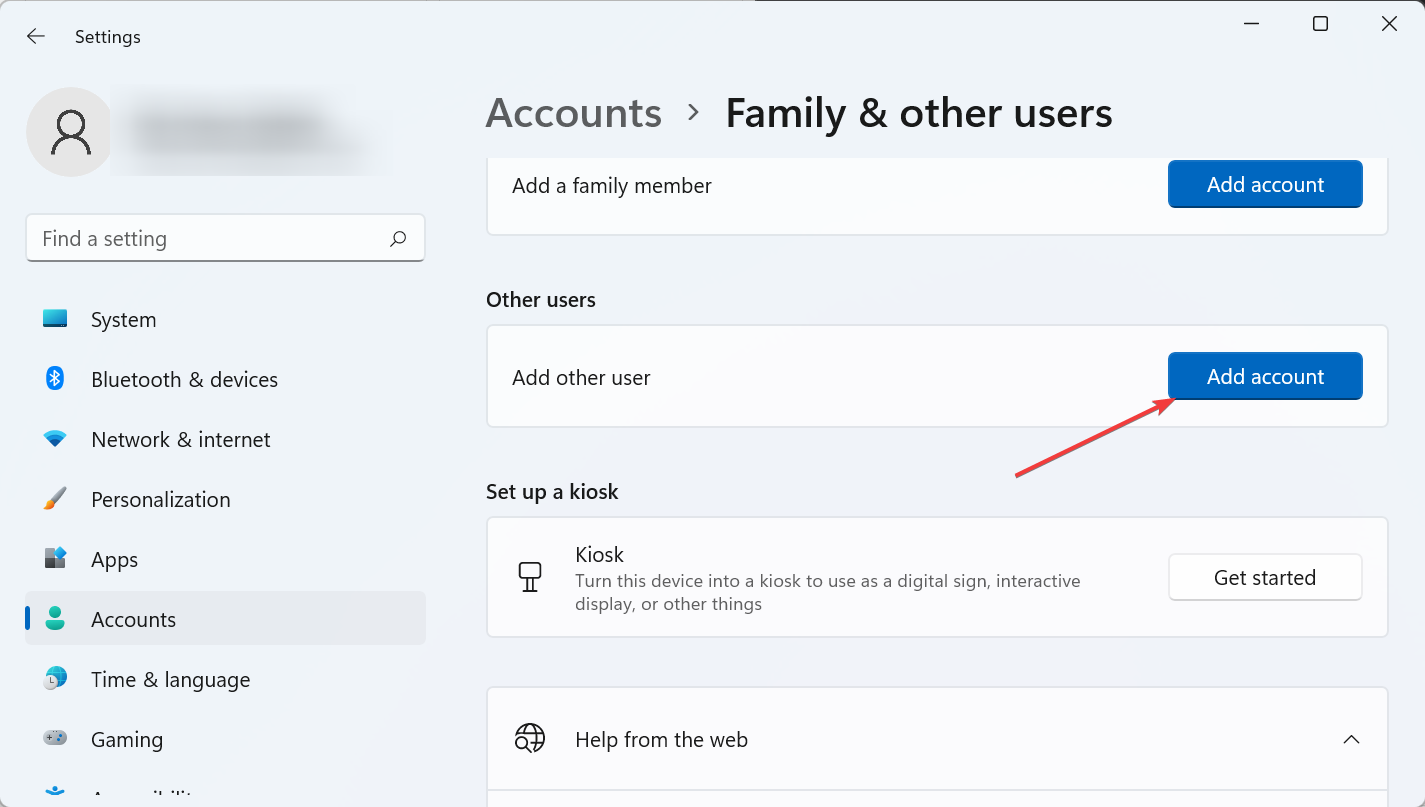
- Scroll down the page till you see Other users. Then, click the Add account button.
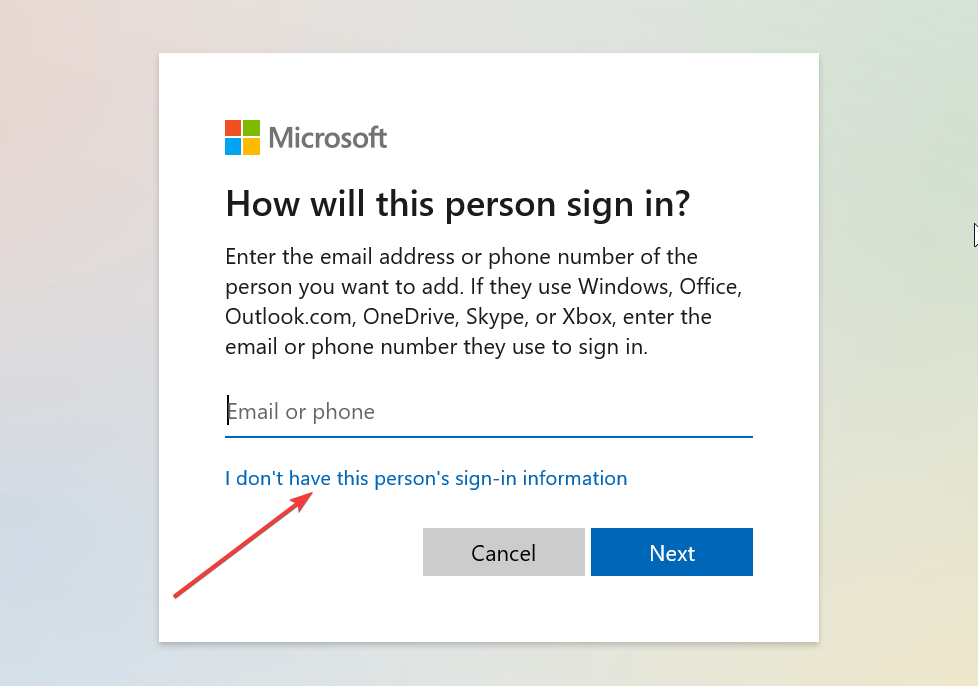
- Now, select I don’t have this person’s sign-in information.
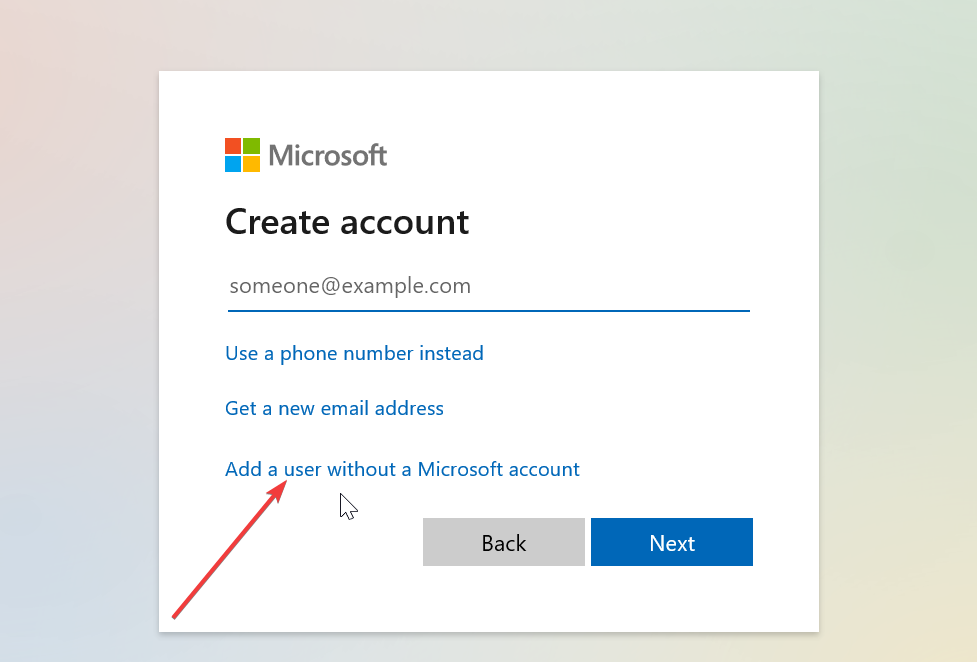
- Then, click on Add a user without a Microsoft account.
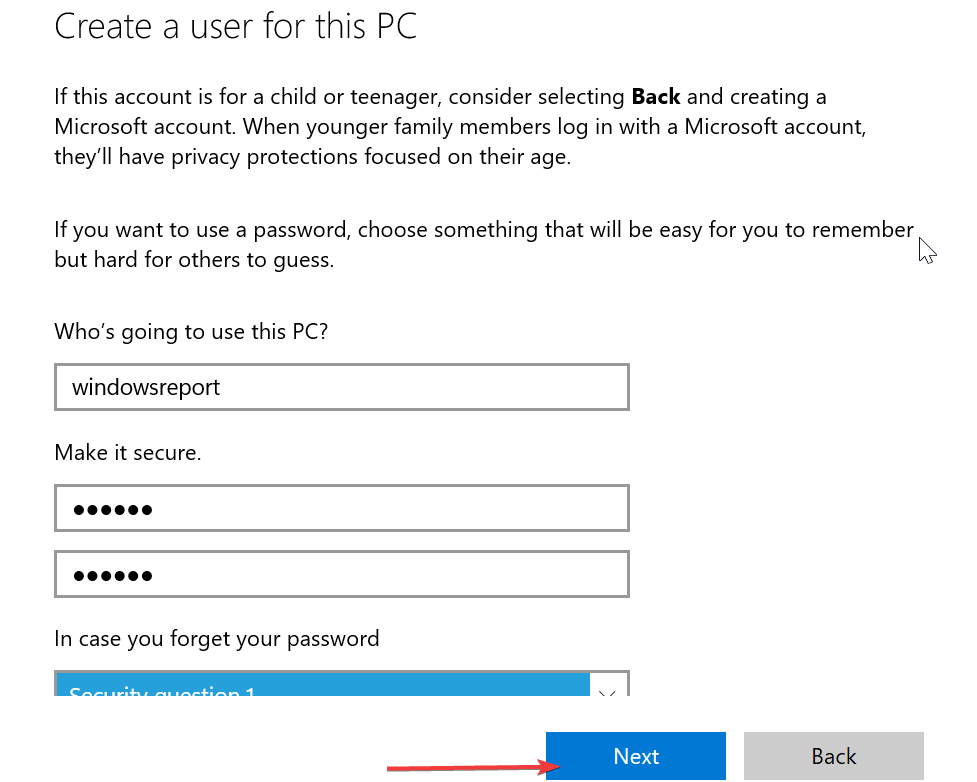
- Enter all the information required, then click on the Next button once you are done.
- Restart your device and log in to your device using the new account to check whether the problem has been resolved.
We hope that the above solutions were able to get you out of the lock screen not working in the Windows 11 issue.
If you want to know how to customize your lock screen on Windows 11, check our detailed guide to do it quickly.
We also have a guide on Lockapp.exe on Windows 11, so don’t miss it if you want to learn more about the lock screen.
Share your thoughts in the comments below, including the method that helped you resolve the lock screen issue.


User forum
0 messages